This is a fully revealed, source-derived reference map, not a player save or visited-area tracker. Choose F1–F5 or B1–B2 (All floors is an overview), filter by region, search rooms, and inspect the source map in fullscreen. The base uses the game’s extracted room geometry, terrain, line styles and map icons. Locks and events are source annotations; the Fights layer adds wiki encounter annotations and starts off to keep the native map readable. Select a feature for its recorded details, or drag and zoom to explore. The walkthrough selector draws a curated route plan over source connections; it does not claim the exact order or footsteps of the reviewed recording. Transfers and sections without native map lines are identified in the stop list instead of joined by invented corridors. Some labels remain in English where the source has no Chinese translation.
Show Locked route Event Fight Room 520 areas · 501 discoveries
Choose a room or marker Select a room, lock, event or fight on the map, or use the list.
Arrival and motel Start at the Diner and follow Jackman’s first lead to the motel. Check the ferry afterward only if its panel is blocked; repair the fuse only when the panel says it is blown.
Outskirts Diner · F1 Motel check-in · F1 Grizzly Room Suite · F2 Ferry landing (conditional repair) · F1 Floor transfers Transfer between Motel Poolside SubMap 1 and Motel Poolside SubMap 2; the map has no corridor here.
Open this route on the interactive map Ferry and Sheriff’s Office The office code is 17-15; the interview tape opens the interview route. North Wing and Armory rooms are optional side areas.
Outskirts Ferry Landing · F1 Downtown Ferry Landing · F1 Sheriff’s Department exterior · F1 Sheriff’s Office · F1 Interrogation room · B1 Floor transfers Transfer between Sheriff Basement Holding Part 2 and Sheriff Lobby Part 3; the map has no corridor here.
Open this route on the interactive map Civic plaza Use the assembly hall to follow the evacuation and Alice discussion. The vision does not identify the man.
Town Hall exterior · F1 Assembly Hall · F1 Mayor’s Office · F1 Open this route on the interactive map Union Apartments Check the diary-bearing apartments across floors. 4B and Utility gates are separate side rooms, not a proven diary order.
Union Building approach · F1 Apartment stairwell · B1 Apartment 4B · F4 Floor transfers Transfer between Apartment Stairwell SubMap 1 and Apartment Stairwell SubMap 2; the map has no corridor here. Transfer between Apartment Stairwell SubMap 2 and Apartment Stairwell SubMap 3; the map has no corridor here. Transfer between Apartment Stairwell SubMap 3 and Apartment Stairwell SubMap 4; the map has no corridor here. Transfer between Apartment Stairwell SubMap 4 and Apartment Stairwell SubMap 5; the map has no corridor here.
Open this route on the interactive map Boat repair, when needed If the workshop says parts are missing, find the Gear Box in the Diner Shed and use the Boat Engine at the dock. This repair is conditional.
Diner Shed — Gear Box · F1 Dock workshop · B1 Engine repair interaction · B1 Floor transfers Transfer between Downtown Gazette Exterior Part 1 and Downtown WestBridge SubMap 6; the map has no corridor here.
Open this route on the interactive map Church Hill Follow the cemetery, chapel and funeral-home records. The map does not establish a required key order.
Church Hill approach · F1 Cemetery · F1 Chapel confession area · F1 Funeral home · F1 Open this route on the interactive map Sewers and streets The Loomis-to-Park gate uses the Sewer Key. Valve markers do not provide a confirmed universal order.
Market Street Sewer · B1 Loomis Street Sewer · B1 Park Sewer · B1 Open this route on the interactive map Cable car and peak Install the five portable bells A/B/D/E/F; C and G are already present. Use E–G–D–C–F–A–B. The plaque clue C–F–A–B is optional.
Downtown cable station · F1 Mt. Siah Kopa cable station · F1 Peak station machine room · F2 Path to Thelend · F1 Floor transfers Transfer between Downtown Cable Station Interior SubMap 2 and Downtown Cable Station Interior SubMap 3; the map has no corridor here. Transfer between Downtown Cable Station Interior SubMap 3 and Downtown Peak Gondola; the map has no corridor here. Transfer between Peak Cable Station Back Part 1 and Peak Cable Station Machine Room Part 2; the map has no corridor here.
Open this route on the interactive map Thelend Broadcasting Use the studio map to find the final Eddie interaction. Side-room keys are only needed for their marked gates.
Studio exterior and front entrance · F1 Executive Office · F1 Stage A · F1 Open this route on the interactive map Final choice and branching routes The mapped stops show branch preparation locations. Eddie’s Leave/Kill choice and the Live furnace enter separate scenes not drawn as one walkable route.
West Road Water — Alice ring interaction · B1 Rabbit Hole curtain and ring wall · F1 Floor transfers Transfer between Downtown West Road Water and Downtown West Road Part 1; the map has no corridor here.
Off-map story steps Eddie selector and Leave car prompt Kill transitions to Nightmare Diner Exterior; confirming Leave Silver Pines? reaches the UI Leave ending. Choosing Leave at the Eddie selector spares Eddie and returns to West Road Water.
Live furnace prompt At Outskirts Shore Shack, confirming Yes to burn all Mementos reaches the UI Live ending; earlier access to the prompt is unresolved.
Open this route on the interactive map Rest route Collect the tarnished ring at West Road Water and the Locked Ring Box at the Diner WC, then gather the five marked Stars. The Motel safe uses code 6671; in Caravan Hole, complete the Shovel dig sequence to expose its container, then collect the Star. These are item-preparation stops, not a fixed pickup order.
Tarnished Gold Ring minigame · B1 Locked Ring Box · F1 Bungalow 3 safe — Star (code 6671) · F1 Mess Hall — Star · F1 Caravan Hole fall entrance — Star · F1 Studio entrance — Star · F1 Rabbit Hole bar — Star · F1 Curtain and two-ring wall · F1 Floor transfers Transfer between Downtown West Road Water and Downtown West Road Part 1; the map has no corridor here. Transfer between Downtown Cable Station Interior SubMap 2 and Downtown Cable Station Interior SubMap 3; the map has no corridor here. Transfer between Downtown Cable Station Interior SubMap 3 and Downtown Peak Gondola; the map has no corridor here.
Off-map story steps Caravan Hole dig crate Enter at the mapped fall entrance, then complete the Shovel dig sequence to expose the forced-loot container and collect its Star.
Open curtains and place two rings Confirm Yes on Pull open the curtains?; no item is required. Each wall socket accepts either Gold Ring variant and consumes it.
Nightmare boss and unlocked exit Follow the Lady/Cowboy scenes, defeat Meatball V2, then complete all three post-fight Dwarf conversations. The last unlocks the exit to standard Ending Beach, which sets Rest / 安息. The arena/ending scenes have no map geometry.
Open this route on the interactive map Rooms, paths and discoveries Downtown Mess Hall Back Part 2 Downtown · F1 Riverside Gasstation Save Riverside · F1 Outskirts Diner Kitchen Outskirts · F1 Studio Hallway Exit Part 1 Thelend Broadcasting · F1 Downtown Loomis St Sewer Part 2 Sewers · B1 4B Union Apartments · F4 Riverside Gasstation Exterior Backlot Riverside · F1 Church Funeral Home Interior SubMap 8 Church Hill · F2 Riverside Tunnel Part 2 Riverside · F1 Downtown High St Alley Part 7 Downtown · F1 Riverside Beach SubMap 2 Riverside · B1 Riverside Sewer Gas Part 1 Sewers · B1 Mayor's Office Town Square · F1 Sheriff Lobby Part 2 Sheriff's Office · F1 Riverside Repair Shop Back Part 1 Riverside · F1 Downtown Clinic Sewer Part 1 Sewers · B1 Apartment 1A Supervisor Part 2 Union Apartments · F1 Ship Downtown · F1 Sheriff Save Sheriff's Office · F1 Church Hill Lower Part 4 Church Hill · F1 Downtown Sport Store SubMap 1 Downtown · F1 Downtown Rabbit Hole Interior Bathroom Part 1 Downtown · F1 Downtown Market ST Alley SubMap 4 Downtown · F1 Studio Exterior Entrance Part 2 Thelend Broadcasting · F1 Riverside Crossroad SubMap 6 Riverside · F1 Outskirts Outskirts Shack Tunnel Part 2 Outskirts · B1 Lobby Sheriff's Office · F1 Outskirts Motel Road Part 4 Outskirts · F1 Church Cemetary Part 3 Church Hill · F1 Sheriff Backlot Part 3 Sheriff's Office · F1 Downtown West Road Part 4 Downtown · F1 Downtown Caravan Exterior SubMap 4 Downtown · F1 Downtown Movie Theatre Back Downtown · F1 Riverside Sheriff Exterior Part 2 Riverside · F1 Downtown Clinic Exterior SubMap 3 Downtown · F1 Downtown Clinic Basement Downtown · B1 Downtown Rabbit Hole Interior Bathroom Part 2 Downtown · F1 Motel Interior Changing Room Crimson Bear Motel · F1 Apartment Exterior Front SubMap 5 Union Apartments · F1 Apartment Stairwell SubMap 5 Union Apartments · F4 Motel Interior Breezeway Crimson Bear Motel · F1 Downtown Market St SubMap 1 Downtown · B1 Sheriff Lockup Part 1 Sheriff's Office · F1 Church Dock SubMap 4 Church Hill · B1 Downtown Ship Exterior Part 1 Downtown · F1 Church Woods Ruin Interior Part 1 Church Hill · B1 Downtown High St Alley Tunnel Part 3 Downtown · B1 Riverside Sheriff Exterior Part 1 Riverside · F1 Riverside Dirt Road Warehouse Riverside · F1 Church Chapel Interior Confession SubMap 2 Church Hill · F1 Church Hill Upper Part 1 Church Hill · F1 Riverside Dirt Road Part 2 Riverside · F1 Downtown Loomis ST Part 3 Downtown · F1 Downtown Rabbit Hole Interior Stage Downtown · F1 Outskirts Outskirts Shack Tunnel Part 1 Outskirts · B1 Studio Green Room Part 1 Thelend Broadcasting · F1 Church Dock SubMap 1 Church Hill · B1 Downtown Ferry Landing Part 4 Downtown · F1 Motel Poolside SubMap 1 Crimson Bear Motel · F2 Executive Office Thelend Broadcasting · F1 Outskirts Trail Tunnel SubMap 1 Outskirts · F1 Outskirts Diner Basement Outskirts · B1 Outskirts Store Pharmacy Back Part 2 Outskirts · F1 Downtown Mess Hall Downtown · F1 Outskirts Shore Hill Outskirts · F1 Apartment Stairwell SubMap 2 Union Apartments · F1 Sheriff Lockup Inner Sheriff's Office · F1 Downtown Silver Road Part 1 Downtown · F1 Downtown Market ST Alley SubMap 6 Downtown · F1 Riverside Sheriff Exterior Part 4 Riverside · F1 Downtown Sport Store SubMap 5 Downtown · F2 Gallery Town Square · B1 Downtown Market St Alley Sewer Part 2 Sewers · B1 Outskirts Store Exterior Loading Area Outskirts · F1 Downtown Ship Exterior Part 5 Downtown · F1 Downtown Market ST Alley SubMap 1 Downtown · F1 3B Union Apartments · F3 Apartment 4B Part 3 Union Apartments · F4 Church Cemetary Part 1 Church Hill · F1 Studio Exterior Tunnel Part 2 Thelend Broadcasting · F1 Studio Storage Back Sewer Part 1 Thelend Broadcasting · B2 Peak Tunnel Entrance Part 3 Mount Siah Kopa · F1 Riverside Gasstation Main Part 2 Riverside · F1 Park Sewer Part 2 Sewers · B1 Studio Exterior Tunnel Part 1 Thelend Broadcasting · F1 Parish Hall Church Hill · F1 Church Woods Beach Part 2 Church Hill · B1 Riverside Gasstation Back Riverside · F1 Studio Exterior Walkway Thelend Broadcasting · F1 Motel Interior Shop SubMap 2 Crimson Bear Motel · F1 Church Dock SubMap 2 Church Hill · B1 Church Funeral Home Interior SubMap 9 Church Hill · F2 Outskirts Downtown Ferry Outskirts · F1 Sheriff Basement West Corridor Sheriff's Office · B1 Riverside Gasstation Exterior Part 4 Riverside · F1 Church Funeral Home Interior SubMap 7 Church Hill · F2 Riverside Repair Shop Back Part 3 Riverside · F1 Riverside Woods Part 2 Riverside · F1 Downtown WestBridge SubMap 5 Downtown · B1 Outskirts Diner Exterior Road Part 3 Outskirts · F1 Motel Interior Bungalo 3 Part 1 Crimson Bear Motel · F1 Church Hill Upper Part 2 Church Hill · F1 Downtown Movie Entrance Part 2 Downtown · F1 Motel Interior Checkin Part 2 Outskirts · F1 Outskirts Diner Interior SubMap 2 Outskirts · F1 Cell B Sheriff's Office · B1 Outskirts Diner Exterior Road Part 2 Outskirts · F1 Park Townhall Stairwell East Town Square · F2 Outskirts Boat Part 2 Outskirts · B1 Ferry Office Outskirts · F1 Studio Exterior Entrance Part 3 Thelend Broadcasting · F1 Motel Interior Grizzly Room Suite Part 1 Crimson Bear Motel · F2 Downtown Cable Car Station Exterior SubMap 4 Downtown · F2 Apartment Stairwell SubMap 1 Union Apartments · B1 Downtown Dock Workshop Part 1 Downtown · B1 Downtown Silver Road Sewer Part 1 Sewers · B1 Downtown Cable Car Station Exterior SubMap 1 Downtown · F1 Downtown WestBridge SubMap 3 Downtown · F1 Park Exterior Townhall SubMap 4 Town Square · F3 Apartment 2D Union Apartments · F2 Outskirts Motel Road Part 3 Outskirts · F1 Church Funeral Home Stairwell Part 1 Church Hill · F1 Downtown Peak Gondola Downtown · F1 Downtown Dock Part 4 Downtown · F1 Sheriff Backlot Alley Sheriff's Office · B1 Riverside Dirt Road Part 1 Riverside · F1 Downtown High St Alley Tunnel Part 4 Downtown · B1 Riverside Gasstation Exterior Part 2 Riverside · F1 Downtown Rabbit Hole Interior Back Part 1 Downtown · F1 Downtown Dock Workshop Part 2 Downtown · B1 Downtown Silver Road Part 2 Downtown · F1 Motel Interior Bungalo 1 SubMap 3 Crimson Bear Motel · F2 Downtown Apartment Street SubMap 5 Downtown · F1 Downtown Liqour Store SubMap 1 Downtown · F1 Apartment 2B Union Apartments · F2 Sheriff Reception Sheriff's Office · F1 Outskirts Diner Shed Outskirts · F1 Studio Exterior Antenna Part 1 Thelend Broadcasting · F1 Outskirts Store Freezer Outskirts · F1 Park Sewer Part 3 Sewers · B1 Riverside Tunnel Part 3 Riverside · F1 Riverside Tunnel Exterior Riverside · F1 Storage Thelend Broadcasting · F1 Peak Cable Station Machine Room Part 1 Mount Siah Kopa · F2 Church Hill Church Hall Part 1 Church Hill · F1 Downtown High St Alley Part 4 Downtown · F1 Outskirts Diner Interior SubMap 4 Outskirts · B1 Downtown Cable Station Interior SubMap 1 Downtown · F1 Downtown Clinic Exterior SubMap 4 Downtown · B1 Outskirts Trail Tunnel SubMap 3 Outskirts · B1 Church Hill Lower Part 1 Church Hill · F1 Downtown Apartment Street SubMap 4 Downtown · F1 Downtown Clinic Exterior SubMap 2 Downtown · F1 Studio Green Room Part 2 Thelend Broadcasting · F1 Apartment Basement Laundry Back Part 1 Union Apartments · B1 Downtown Apartment Street SubMap 2 Downtown · F1 Office Sheriff's Office · F1 Apartment Stairwell SubMap 3 Union Apartments · F2 Motel Interior Bungalo 1 SubMap 4 Crimson Bear Motel · F1 Downtown Caravan Exterior SubMap 5 Downtown · F1 Motel Interior Bungalo 1 SubMap 2 Crimson Bear Motel · F1 Downtown Ferry Landing Part 6 Downtown · F1 Toilet Town Square · F1 Downtown WestBridge SubMap 4 Downtown · B1 Downtown Market ST Alley SubMap 7 Downtown · F1 Park Townhall Entrance Town Square · F1 Roof Union Apartments · F4 Wing Oil Gas Riverside · F1 Downtown Gazette Exterior Part 2 Downtown · F1 Ticket Booth Downtown · F1 Studio Hallway Exit Part 2 Thelend Broadcasting · F1 Downtown Waterway West Tunnel Part 1 Downtown · B1 Studio Exterior Window Thelend Broadcasting · F1 Downtown Apartment Street SubMap 3 Downtown · B1 Studio Storage Back Part 1 Thelend Broadcasting · B1 Downtown Apartment Street SubMap 1 Downtown · F1 Downtown Sport Store Stair SubMap 3 Downtown · F2 Riverside Dirt Road Part 3 Riverside · F1 Studio Hallway Part 3 Thelend Broadcasting · F1 Church Funeral Home Interior SubMap 12 Church Hill · B1 Weather Station Mount Siah Kopa · F1 Riverside Sheriff Exterior Part 3 Riverside · F1 Studio Exterior Front SubMap 1 Thelend Broadcasting · F1 Outskirts Ferry Landing Part 2 Outskirts · F1 Storage A Sheriff's Office · B1 Downtown Clinic Sewer Part 3 Sewers · B1 Outskirts Shore Beach Outskirts · F1 Studio Hallway Part 5 Thelend Broadcasting · F1 1B Union Apartments · F1 Downtown Ferry Landing Part 3 Downtown · F1 Downtown Ferry Landing Parking Downtown · F1 Church Woods Lighthouse Part 3 Church Hill · B1 Downtown Sewer Save Sewers · B1 Sheriff Briefing Sheriff's Office · F1 Utility Union Apartments · F1 Downtown Movie Projector Part 2 Downtown · F2 Tunnel Mount Siah Kopa · F1 Sheriff Range Sheriff's Office · B1 Outskirts Ferry Landing Part 3 Outskirts · F1 Downtown WestBridge SubMap 6 Downtown · B1 Downtown Loomis ST Part 4 Downtown · F1 Park Exterior Statue Town Square · F1 Park Exterior Garden Town Square · F1 Balcony Town Square · F2 Roof Union Apartments · F5 Sheriff Backlot Part 1 Sheriff's Office · F1 Peak Tunnel Exit Mount Siah Kopa · F1 Outskirts Motel Road Part 1 Outskirts · F1 Apartment Save Union Apartments · F1 Downtown Movie Entrance Part 1 Downtown · F1 Downtown Ship Interior Part 2 Downtown · B1 Apartment 2C Union Apartments · F2 Church Chapel Interior Part 1 Church Hill · F1 Downtown Ship Interior Part 1 Downtown · B1 Outskirts Trail Stairs Outskirts · F1 Church Chapel Tower SubMap 1 Church Hill · F1 Apartment Exterior Front SubMap 3 Union Apartments · F3 Outskirts Diner Interior SubMap 1 Outskirts · F1 Downtown High St Alley Tunnel Part 2 Downtown · B1 Church Hill Bus Save Part 2 Church Hill · F1 Church Chapel Exterior Church Hill · F1 Downtown Market St Sewer Part 2 Sewers · B1 Church Hill Upper Part 4 Church Hill · F1 Studio Storage Front SubMap 4 Thelend Broadcasting · B2 Downtown High St Alley Tunnel Part 1 Downtown · B1 Outskirts Trail Tunnel SubMap 2 Outskirts · F1 Entrance Union Apartments · F1 Park Townhall Assembly Hall SubMap 1 Town Square · F1 Sheriff Basement Hallway Part 1 Sheriff's Office · B1 Church Woods Beach Part 3 Church Hill · B1 Studio Editing Bay Part 1 Thelend Broadcasting · F1 Riverside Sheriff Exterior Part 6 Riverside · F1 Studio Bleachers Part 1 Thelend Broadcasting · F1 Outskirts Boat Part 3 Outskirts · B1 Studio Exterior Side Stairs Thelend Broadcasting · F1 Apartment Basement Laundry Back Part 2 Union Apartments · B1 Riverside Repair Shop Part 1 Riverside · F1 Riverside Woods House Part 1 Riverside · F1 Outskirts Motel Road Part 2 Outskirts · F1 Studio Hallway Part 1 Thelend Broadcasting · F1 Studio Recording Booth Part 1 Thelend Broadcasting · F1 Apartment Level 3 Hallway Part 1 Union Apartments · F3 Downtown Caravan Interior Downtown · F1 Church Woods Beach Part 4 Church Hill · B1 Parking Sheriff's Office · F1 Church Woods Boat Part 1 Church Hill · B1 Motel Courtyard Crimson Bear Motel · F1 Outskirts Store Exterior Part 4 Outskirts · F1 Riverside Woods Part 3 Riverside · F1 Apartment Exterior Shed Union Apartments · F1 Downtown Market St Alley Sewer Part 1 Sewers · B1 Downtown West Road Part 1 Downtown · F1 Church Funeral Home Interior SubMap 11 Church Hill · F3 Studio Storage Front SubMap 3 Thelend Broadcasting · B1 Sheriff Corridor North Part 2 Sheriff's Office · F1 Downtown Silver Road Sewer Part 3 Sewers · B1 Downtown Market St SubMap 2 Downtown · F1 Studio Bleachers Part 2 Thelend Broadcasting · F1 Recording Booth Thelend Broadcasting · F1 Downtown Clinic Exterior SubMap 1 Downtown · F1 Church Florist Part 1 Church Hill · F1 Downtown Caravan Exterior SubMap 2 Downtown · B1 Riverside Sewer Gas Part 2 Sewers · B1 Downtown WestBridge SubMap 1 Downtown · F1 Peak Tunnel Entrance Part 2 Mount Siah Kopa · F1 Church Woods Boat Part 2 Church Hill · B1 Evidence Sheriff's Office · F1 Outskirts Tunnel Outskirts · F1 Downtown Ferry Landing Part 2 Downtown · F1 Church Woods Boat Part 3 Church Hill · B1 Park Townhall Level3 Corridor Part 1 Town Square · F3 Riverside Woods Part 1 Riverside · F1 Riverside Repair Shop Back Part 2 Riverside · F1 Elevator Union Apartments · F1 Riverside Dirt Road Part 4 Riverside · F1 Peak Cable Station Bridges SubMap 2 Mount Siah Kopa · F1 Sheriff Lobby Part 3 Sheriff's Office · F1 Bus Depot Church Hill · F1 Riverside Crossroad SubMap 1 Riverside · B1 Studio WC Thelend Broadcasting · F1 Church Funeral Home Appartment Bedrooms Part 2 Church Hill · F2 Church Woods Beach Part 1 Church Hill · B1 Apartment Stairwell SubMap 4 Union Apartments · F3 Apartment Exterior Front SubMap 4 Union Apartments · F1 Lighthouse Outskirts · F1 Motel Poolside SubMap 3 Crimson Bear Motel · F1 Downtown Silver Road Part 5 Downtown · F1 Church Funeral Home Interior SubMap 1 Church Hill · F1 Church Hill Upper Part 5 Church Hill · F1 Motel Interior Bungalo 1 SubMap 1 Crimson Bear Motel · F2 Sheriff Armory Part 1 Sheriff's Office · B1 Downtown Market ST Alley SubMap 5 Downtown · F1 Downtown Mess Hall Back Part 1 Downtown · F1 Church Funeral Home Appartment Bedrooms Part 1 Church Hill · F2 Riverside Gasstation Shed Riverside · F1 Apartment Basement Storage Part 1 Union Apartments · B1 Shack Church Hill · F1 Downtown Movie Projector Part 1 Downtown · F2 Studio Hallway Part 4 Thelend Broadcasting · F1 Park Sewer Part 1 Sewers · B1 Downtown Movie Theatre Front Downtown · F1 Riverside Crossroad SubMap 3 Riverside · B1 Riverside Sewer Tunnel Sewers · B1 Downtown High St Alley Part 2 Downtown · F1 Outskirts Store Exterior Part 1 Outskirts · F1 Church Chapel Tower SubMap 3 Church Hill · F3 Downtown WestBridge SubMap 2 Downtown · F1 Downtown West Road Part 3 Downtown · F1 Church Funeral Home Interior SubMap 4 Church Hill · F1 Peak Cable Station Machine Room Part 2 Mount Siah Kopa · F2 Downtown Sport Store Stair SubMap 2 Downtown · F2 Outskirts Ferry Landing Office Part 1 Outskirts · F1 Motel Interior Game Main Part 1 Crimson Bear Motel · F1 Downtown High St Alley Part 5 Downtown · F1 Outskirts Store Exterior Part 2 Outskirts · F1 Clinic Downtown · F1 Sheriff Armory Part 2 Sheriff's Office · B1 Class Room Town Square · F2 Motel Interior Shop Basement SubMap 1 Crimson Bear Motel · B1 1A Supervisor Union Apartments · F1 Park Exterior Townhall SubMap 3 Town Square · F1 Downtown High St Alley Part 6 Downtown · F1 Riverside Beach SubMap 1 Riverside · F1 Downtown Market ST Alley SubMap 2 Downtown · F3 Peak Cable Station Main SubMap 2 Mount Siah Kopa · F2 Downtown Cable Station Interior SubMap 2 Downtown · F1 Outskirts Store Exterior Part 3 Outskirts · F1 Motel Interior Grizzly Room Suite Part 3 Crimson Bear Motel · F2 Church Dock Fishing Shack Part 2 Church Hill · F1 Outskirts Diner Exterior Road Part 1 Outskirts · F1 Peak Cable Station Back Part 1 Mount Siah Kopa · F1 Cell A Sheriff's Office · B1 Downtown apartment Street Sewer Part 2 Sewers · B1 Downtown Riverside Bridge Part 2 Downtown · F1 Peak Cable Station Side Mount Siah Kopa · F1 Peak Cable Station Bridges SubMap 3 Mount Siah Kopa · F1 Downtown Ferry Landing Part 5 Downtown · F1 Basement Crimson Bear Motel · B1 Downtown Clinic Sewer Part 2 Sewers · B1 Peak Path To Studio Mount Siah Kopa · F1 Church Funeral Home Stairwell Part 2 Church Hill · F1 Motel Poolside SubMap 2 Crimson Bear Motel · F1 Downtown Dock Part 1 Downtown · F1 Church Woods Ruin Interior Part 2 Church Hill · B1 Downtown Caravan Exterior SubMap 3 Downtown · F1 Peak Cable Station Bridges SubMap 6 Mount Siah Kopa · B1 Motel Interior Grizzly Room Suite Part 2 Crimson Bear Motel · F2 Downtown Market ST Backlot Part 2 Downtown · F1 Riverside Crossroad SubMap 5 Riverside · F1 Riverside Gasstation Exterior Part 3 Riverside · F1 Riverside Sheriff Exterior Part 5 Riverside · F1 Apartment Level 2 Hallway Part 2 Union Apartments · F2 Church Hill Bus Interior Church Hill · F1 Downtown Cable Car Station Exterior SubMap 2 Downtown · F1 Church Dock Shed Church Hill · B1 Apartment Level 1 Hallway Part 2 Union Apartments · F1 Downtown Liqour Store SubMap 2 Downtown · B1 Studio Exterior Entrance Part 1 Thelend Broadcasting · F1 Park Townhall Level2 Corridor Part 2 Town Square · F2 Storage Units Union Apartments · B1 Riverside Beach SubMap 3 Riverside · B1 Outskirts Boat Part 1 Outskirts · B1 Studio Exterior Stage 2 Thelend Broadcasting · F1 Downtown Ship Exterior Part 4 Downtown · F1 Outskirts Ferry Landing Part 5 Outskirts · F1 Downtown Dock Part 3 Downtown · F1 Downtown Loomis St Sewer Part 1 Sewers · B1 Florist Church Hill · F1 Pantry Sheriff's Office · F1 Motel Interior Bungalo 3 Part 2 Crimson Bear Motel · F1 Downtown Silver Road Part 3 Downtown · F1 Church Cemetary Part 2 Church Hill · F1 Downtown Loomis ST Part 1 Downtown · F1 Lobby Thelend Broadcasting · F1 Studio Storage Back Part 2 Thelend Broadcasting · B1 Outskirts Motel Road Part 5 Outskirts · F1 Park Townhall Level2 Corridor Part 1 Town Square · F2 Downtown Liqour Store Sewer Sewers · B1 Downtown Rabbit Hole Interior Back Part 2 Downtown · F1 Stage A Thelend Broadcasting · F1 Peak Tunnel Collapsed Mount Siah Kopa · F1 Roof Access Union Apartments · F4 Downtown apartment Street Sewer Part 1 Sewers · B1 Apartment 1C Painter Union Apartments · F1 Motel Interior Checkin Part 1 Outskirts · F1 Downtown Market ST Alley SubMap 3 Downtown · B1 Church Dock SubMap 3 Church Hill · B1 Church Dock SubMap 5 Church Hill · F1 Downtown Market ST Backlot Part 1 Downtown · F1 Rabbit Hole Downtown · F1 Downtown High St Alley Part 1 Downtown · F1 Park Townhall Basement Corridor Town Square · B1 Downtown Gazette Exterior Part 1 Downtown · F1 Church Hill Lower Part 3 Church Hill · F1 2A Union Apartments · F2 Downtown Caravan Exterior SubMap 6 Downtown · F1 Underpass Outskirts · F1 Cable Car Station Mount Siah Kopa · F1 Downtown Market St SubMap 3 Downtown · F1 Downtown Silver Road Sewer Part 2 Sewers · B1 Park Townhall WC Part 1 Town Square · F1 Garden Sheriff's Office · F1 Peak Forest Crossroad Mount Siah Kopa · F1 Outskirts Diner Exterior Outskirts · F1 Church Funeral Home Interior SubMap 14 Church Hill · B1 Cabin Mount Siah Kopa · F1 Peak Tunnel Entrance Part 1 Mount Siah Kopa · F1 Downtown West Road Part 2 Downtown · F1 Downtown Silver Road Part 4 Downtown · F1 Church Hill Upper Part 3 Church Hill · F1 Church Chapel Interior Part 2 Church Hill · F1 Silver Gazette Downtown · F1 Peak Cable Station Bridges SubMap 4 Mount Siah Kopa · F1 Studio Exterior Fire Escape Part 1 Thelend Broadcasting · F1 Downtown Sport Store Stair SubMap 1 Downtown · F1 Apartment 3B Part 1 Union Apartments · F3 Outskirts Trail Tunnel SubMap 4 Outskirts · F1 Storage B Sheriff's Office · B1 Apartment 3C Union Apartments · F3 Church Woods Lighthouse Part 2 Church Hill · B1 Peak Cabin Exterior Part 1 Mount Siah Kopa · F1 Church Hill Lower Part 2 Church Hill · F1 Park Upper Sewer Sewers · B1 Locker Room Sheriff's Office · F1 Peak Forest Connection Mount Siah Kopa · B1 Toilet Riverside · F1 Motel Interior Shop SubMap 1 Crimson Bear Motel · F1 Downtown Riverside Bridge Part 1 Downtown · F1 Outskirts Outskirts Shack Tunnel Part 3 Outskirts · B1 Studio Editing Bay Part 2 Thelend Broadcasting · F1 Downtown Caravan Exterior SubMap 1 Downtown · B1 Apartment Level 4 Hallway Union Apartments · F4 Riverside Crossroad SubMap 7 Riverside · F1 Riverside Crossroad SubMap 4 Riverside · F1 Sheriff Basement Archive Sheriff's Office · B1 Riverside Crossroad SubMap 2 Riverside · B1 4A Union Apartments · F4 Apartment Level 2 Hallway Part 1 Union Apartments · F2 Outskirts Store Pharmacy Back Part 1 Outskirts · F1 Downtown Gazette Interior Part 2 Downtown · F1 Apartment 3A Union Apartments · F3 Outskirts Store Pharmacy Outskirts · F1 Outskirts Diner WC Outskirts · F1 Apartment Basement Union Apartments · B1 Peak Cabin Exterior Part 2 Mount Siah Kopa · F1 Park Exterior Townhall SubMap 1 Town Square · F1 Downtown Sport Store SubMap 3 Downtown · F1 Church Chapel Tower SubMap 2 Church Hill · F2 Apartment Exterior Front SubMap 7 Union Apartments · F1 Pantry Thelend Broadcasting · F1 Antenna Thelend Broadcasting · F1 Outskirts Store Interior Main Part 1 Outskirts · F1 Studio Storage Front SubMap 1 Thelend Broadcasting · B1 Operations Office Town Square · F3 Outskirts Ferry Landing Part 4 Outskirts · F1 Outskirts Trail Part 1 Outskirts · F1 Downtown Market St SubMap 5 Downtown · F1 Apartment Level 1 Hallway Part 1 Union Apartments · F1 Riverside Gasstation Exterior Part 1 Riverside · F1 Downtown Ferry Landing Parking Tickets Part 2 Downtown · F1 Downtown Market St Sewer Part 4 Sewers · B1 Apartment 4B Part 2 Union Apartments · F4 Riverside Woods House Part 2 Riverside · F1 Studio Storage Back Sewer Part 2 Thelend Broadcasting · B2 Downtown Ship Exterior Part 3 Downtown · F1 Downtown Sport Store SubMap 4 Downtown · F2 Sheriff Basement Hallway Part 2 Sheriff's Office · B1 Apartment Basement Storage Part 2 Union Apartments · B1 Downtown Waterway West Tunnel Part 2 Downtown · B1 Park Townhall Level3 Corridor Part 2 Town Square · F3 Laundry Union Apartments · B1 Apartment Level 3 Hallway Part 2 Union Apartments · F3 Downtown Market St Sewer Part 3 Sewers · B1 Studio Exterior Fire Escape Part 2 Thelend Broadcasting · F1 Peak Cable Station Back Part 2 Mount Siah Kopa · F1 Church Woods Lighthouse Part 1 Church Hill · B1 Studio Exterior Front SubMap 3 Thelend Broadcasting · B1 Motel Pool Crimson Bear Motel · B1 Shack Outskirts · F1 Downtown Cable Station Interior SubMap 3 Downtown · F2 Church Chapel Interior Confession SubMap 1 Church Hill · F1 Church Funeral Home Interior SubMap 3 Church Hill · F1 Downtown Market St SubMap 4 Downtown · F1 Motel Interior Game Main Part 2 Crimson Bear Motel · F1 Downtown Clinic Interior Part 2 Downtown · F1 Studio Hallway Part 2 Thelend Broadcasting · F1 Sheriff Cold Storage Sheriff's Office · B1 Park Exterior Townhall SubMap 2 Town Square · F1 Downtown Cable Car Station Exterior SubMap 3 Downtown · F1 Church Funeral Home Interior SubMap 2 Church Hill · F1 Dana's Repair Shop Riverside · F1 Downtown Ferry Landing Part 1 Downtown · F1 Outskirts Diner Interior SubMap 3 Outskirts · F1 Downtown High St Alley Part 3 Downtown · F1 Downtown Sport Store SubMap 2 Downtown · F1 Sheriff Interrogation Sheriff's Office · B1 Downtown Loomis ST Part 2 Downtown · F1 Docks Downtown · F1 Bleachers Thelend Broadcasting · F1 Riverside Woods Part 4 Riverside · F1 Downtown Gazette Back Downtown · F1 Sheriff Basement Holding Part 2 Sheriff's Office · B1 Outskirts Ferry Landing Part 1 Outskirts · F1 Apartment Exterior Front SubMap 6 Union Apartments · F1 Sheriff Basement Holding Part 1 Sheriff's Office · B1 Outskirts Store Interior Main Part 2 Outskirts · F1 Studio Exterior Front SubMap 2 Thelend Broadcasting · F1 Downtown Market St Sewer Part 1 Sewers · B1 Church Funeral Home Interior SubMap 13 Church Hill · B1 Church Funeral Home Interior SubMap 10 Church Hill · F3 Riverside Beach SubMap 4 Riverside · B1 Tunnel Riverside · F1 Studio Lobby Part 2 Thelend Broadcasting · F1 Prop Storage Thelend Broadcasting · B1 Peak Cable Station Bridges SubMap 5 Mount Siah Kopa · B1 Church Funeral Home Interior SubMap 6 Church Hill · F2 Peak Cable Station Bridges SubMap 1 Mount Siah Kopa · F1 Community Room Town Square · B1 Downtown West Road Water Downtown · B1 Church Funeral Home Interior SubMap 5 Church Hill · F1 Motel Poolside SubMap 1 ↔ Motel Interior Grizzly Room Suite Part 1 A source-recorded gate between these areas. Downtown Clinic Exterior SubMap 1 ↔ Downtown Clinic Exterior SubMap 2 A source-recorded gate between these areas. Apartment Basement Storage Part 1 ↔ Apartment Basement Storage Part 2 A source-recorded gate between these areas. Church Chapel Interior Part 1 ↔ Church Chapel Interior Confession SubMap 1 A source-recorded gate between these areas. Outskirts Store Exterior Part 2 ↔ Outskirts Store Exterior Part 3 A source-recorded gate between these areas. Riverside Sheriff Exterior Part 1 ↔ Riverside Sheriff Exterior Part 2 A source-recorded gate between these areas. Riverside Dirt Road Part 2 ↔ Riverside Sheriff Exterior Part 6 A source-recorded gate between these areas. Motel Interior Game Main Part 1 ↔ Motel Interior Game Main Part 2 A source-recorded gate between these areas. Studio Hallway Exit Part 2 ↔ Studio Exterior Side Stairs A source-recorded gate between these areas. Sheriff Lockup Part 1 ↔ Evidence A source-recorded gate between these areas. Outskirts Trail Part 1 ↔ Underpass A source-recorded gate between these areas. Apartment Level 4 Hallway ↔ 4B A source-recorded gate between these areas. Sheriff Basement Hallway Part 1 ↔ Sheriff Basement Hallway Part 2 A source-recorded gate between these areas. Apartment Basement Laundry Back Part 1 ↔ Apartment Basement Laundry Back Part 2 A source-recorded gate between these areas. Church Funeral Home Appartment Bedrooms Part 1 ↔ Church Funeral Home Appartment Bedrooms Part 2 A source-recorded gate between these areas. Downtown Market St SubMap 4 ↔ Downtown Market St SubMap 5 A source-recorded gate between these areas. Motel Courtyard ↔ Motel Poolside SubMap 2 A source-recorded gate between these areas. Apartment 3B Part 1 ↔ 3B A source-recorded gate between these areas. Sheriff Backlot Alley ↔ Sheriff Range A source-recorded gate between these areas. Utility ↔ Apartment Exterior Front SubMap 7 A source-recorded gate between these areas. Riverside Gasstation Exterior Backlot ↔ Toilet A source-recorded gate between these areas. Sheriff Armory Part 1 ↔ Sheriff Armory Part 2 A source-recorded gate between these areas. Studio Exterior Fire Escape Part 1 ↔ Studio Exterior Fire Escape Part 2 A source-recorded gate between these areas. Riverside Woods House Part 1 ↔ Riverside Woods House Part 2 A source-recorded gate between these areas. Outskirts Diner Interior SubMap 1 ↔ Outskirts Diner Interior SubMap 2 A source-recorded gate between these areas. Church Cemetary Part 1 ↔ Church Cemetary Part 2 A source-recorded gate between these areas. Church Woods Ruin Interior Part 1 ↔ Church Woods Ruin Interior Part 2 A source-recorded gate between these areas. Outskirts Diner Exterior ↔ Outskirts Diner Interior SubMap 3 A source-recorded gate between these areas. Outskirts Trail Tunnel SubMap 1 ↔ Outskirts Trail Tunnel SubMap 4 A source-recorded gate between these areas. Outskirts Motel Road Part 1 ↔ Outskirts Motel Road Part 2 A source-recorded gate between these areas. Downtown Ship Exterior Part 1 ↔ Ship A source-recorded gate between these areas. Downtown High St Alley Tunnel Part 2 ↔ Downtown High St Alley Tunnel Part 3 A source-recorded gate between these areas. Sheriff Basement Holding Part 1 ↔ Sheriff Basement Holding Part 2 A source-recorded gate between these areas. Studio Exterior Antenna Part 1 ↔ Antenna A source-recorded gate between these areas. Church Florist Part 1 ↔ Florist A source-recorded gate between these areas. Riverside Repair Shop Back Part 2 ↔ Riverside Repair Shop Back Part 3 A source-recorded gate between these areas. Motel Poolside SubMap 2 ↔ Motel Interior Bungalo 3 Part 1 A source-recorded gate between these areas. Church Dock SubMap 3 ↔ Church Dock Shed A source-recorded gate between these areas. Bus Depot ↔ Church Hill Bus Save Part 2 A source-recorded gate between these areas. Church Funeral Home Interior SubMap 12 ↔ Church Funeral Home Interior SubMap 13 A source-recorded gate between these areas. Peak Cabin Exterior Part 1 ↔ Peak Cabin Exterior Part 2 A source-recorded gate between these areas. Outskirts Ferry Landing Office Part 1 ↔ Ferry Office A source-recorded gate between these areas. Church Hill Upper Part 1 ↔ Church Cemetary Part 1 A source-recorded gate between these areas. Downtown apartment Street Sewer Part 1 ↔ Downtown apartment Street Sewer Part 2 A source-recorded gate between these areas. Downtown Apartment Street SubMap 1 ↔ Downtown Apartment Street SubMap 2 A source-recorded gate between these areas. Studio Hallway Part 4 ↔ Studio Hallway Part 5 A source-recorded gate between these areas. Pantry ↔ Studio Bleachers Part 2 A source-recorded gate between these areas. Ticket Booth ↔ Downtown Ferry Landing Parking Tickets Part 2 A source-recorded gate between these areas. Studio Hallway Part 3 ↔ Studio Hallway Part 4 A source-recorded gate between these areas. Park Sewer Part 3 ↔ Downtown Loomis St Sewer Part 1 A source-recorded gate between these areas. Clinic ↔ Downtown Clinic Interior Part 2 A source-recorded gate between these areas. Riverside Crossroad SubMap 4 ↔ Riverside Crossroad SubMap 5 A source-recorded gate between these areas. Church Hill Upper Part 2 ↔ Florist A source-recorded gate between these areas. Outskirts Store Pharmacy Back Part 1 ↔ Outskirts Store Pharmacy Back Part 2 A source-recorded gate between these areas. Downtown Movie Entrance Part 1 ↔ Downtown Movie Entrance Part 2 A source-recorded gate between these areas. Church Funeral Home Interior SubMap 10 ↔ Church Funeral Home Interior SubMap 11 A source-recorded gate between these areas. Apartment Level 3 Hallway Part 2 ↔ Apartment Stairwell SubMap 4 A source-recorded gate between these areas. Church Hill Church Hall Part 1 ↔ Parish Hall A source-recorded gate between these areas. Downtown Gazette Exterior Part 1 ↔ Downtown Gazette Exterior Part 2 A source-recorded gate between these areas. Outskirts Outskirts Shack Tunnel Part 2 ↔ Outskirts Outskirts Shack Tunnel Part 3 A source-recorded gate between these areas. Outskirts Diner Exterior Road Part 1 ↔ Outskirts Diner Shed A source-recorded gate between these areas. Outskirts Trail Tunnel SubMap 1 ↔ Outskirts Trail Tunnel SubMap 2 A source-recorded gate between these areas. Downtown High St Alley Part 1 ↔ Downtown High St Alley Part 2 A source-recorded gate between these areas. Downtown Riverside Bridge Part 2 ↔ Riverside Woods Part 1 A source-recorded gate between these areas. Downtown High St Alley Part 5 ↔ Downtown High St Alley Part 6 A source-recorded gate between these areas. Pantry ↔ Sheriff Corridor North Part 2 A source-recorded gate between these areas. Riverside Repair Shop Back Part 1 ↔ Riverside Repair Shop Back Part 2 A source-recorded gate between these areas. Apartment Exterior Front SubMap 4 ↔ Apartment Exterior Shed A source-recorded gate between these areas. Park Sewer Part 1 ↔ Park Sewer Part 2 A source-recorded gate between these areas. Church Funeral Home Stairwell Part 1 ↔ Church Funeral Home Stairwell Part 2 A source-recorded gate between these areas. Community Room ↔ Gallery A source-recorded gate between these areas. Sheriff Lockup Inner ↔ Evidence A source-recorded gate between these areas. Motel Interior Checkin Part 1 ↔ Motel Interior Checkin Part 2 A source-recorded gate between these areas. Downtown Cable Station Interior SubMap 1 ↔ Downtown Cable Station Interior SubMap 2 A source-recorded gate between these areas. Outskirts Diner Exterior Road Part 3 ↔ Lighthouse A source-recorded gate between these areas. Torso Configured starting health: 45 HP. Maximum health cap: 45 HP. Faceless Configured starting health: 35 HP. Maximum health cap: 35 HP. Talk to Boots Dialogue excerpt: This is a restricted area. Talk to Boots Dialogue excerpt: This is a restricted area. Wormbird Bug Configured starting health: 5 HP. Maximum health cap: 10 HP. Torso Configured starting health: 45 HP. Maximum health cap: 45 HP. Torso Configured starting health: 45 HP. Maximum health cap: 45 HP. Wormperson Configured starting health: 100 HP. Maximum health cap: 100 HP. Wormbird Bug Configured starting health: 5 HP. Maximum health cap: 10 HP. Wormbird Bug Configured starting health: 5 HP. Maximum health cap: 10 HP. Tumor Configured starting health: 70 HP. Maximum health cap: 70 HP. Faceless Configured starting health: 35 HP. Maximum health cap: 35 HP. Faceless Configured starting health: 35 HP. Maximum health cap: 35 HP. Faceless Configured starting health: 35 HP. Maximum health cap: 35 HP. Faceless Configured starting health: 35 HP. Maximum health cap: 35 HP. Faceless Configured starting health: 35 HP. Maximum health cap: 35 HP. Faceless Configured starting health: 35 HP. Maximum health cap: 35 HP. Faceless Configured starting health: 35 HP. Maximum health cap: 35 HP. Torso Configured starting health: 45 HP. Maximum health cap: 45 HP. Torso Configured starting health: 45 HP. Maximum health cap: 45 HP. Faceless Configured starting health: 35 HP. Maximum health cap: 35 HP. Torso Configured starting health: 45 HP. Maximum health cap: 45 HP. Torso Configured starting health: 45 HP. Maximum health cap: 45 HP. Bird Configured starting health: 1 HP. Maximum health cap: 1 HP. Bird Configured starting health: 1 HP. Maximum health cap: 1 HP. Faceless Configured starting health: 35 HP. Maximum health cap: 35 HP. Torso Configured starting health: 45 HP. Maximum health cap: 45 HP. Faceless Configured starting health: 35 HP. Maximum health cap: 35 HP. Tumor Configured starting health: 70 HP. Maximum health cap: 70 HP. Voice cue — Apartment Level 1 Hallway Part 1 A voiced line here begins: The air is thick with mold and rot, and… Wormbird Bug Configured starting health: 5 HP. Maximum health cap: 10 HP. Wormbird Bug Configured starting health: 5 HP. Maximum health cap: 10 HP. Wormbird Bug Configured starting health: 5 HP. Maximum health cap: 10 HP. Wormbird Bug Configured starting health: 5 HP. Maximum health cap: 10 HP. Wormbird Bug Configured starting health: 5 HP. Maximum health cap: 10 HP. Tumor Configured starting health: 70 HP. Maximum health cap: 70 HP. Torso Configured starting health: 45 HP. Maximum health cap: 45 HP. Tumor Configured starting health: 70 HP. Maximum health cap: 70 HP. Faceless Configured starting health: 35 HP. Maximum health cap: 35 HP. Torso Configured starting health: 45 HP. Maximum health cap: 45 HP. Faceless Configured starting health: 35 HP. Maximum health cap: 35 HP. Tumor Configured starting health: 70 HP. Maximum health cap: 70 HP. Faceless Configured starting health: 35 HP. Maximum health cap: 35 HP. Tumor Configured starting health: 70 HP. Maximum health cap: 70 HP. Faceless Configured starting health: 35 HP. Maximum health cap: 35 HP. Faceless Configured starting health: 35 HP. Maximum health cap: 35 HP. Torso Configured starting health: 45 HP. Maximum health cap: 45 HP. Tumor Configured starting health: 70 HP. Maximum health cap: 70 HP. Voice cue — Church Chapel Interior Part 1 A voiced line here begins: I haven’t seen the inside of a church in… Talk to Boots Dialogue excerpt: "In your anger do not sin: Do not let… Wormperson Configured starting health: 100 HP. Maximum health cap: 100 HP. Faceless Configured starting health: 35 HP. Maximum health cap: 35 HP. Faceless Configured starting health: 35 HP. Maximum health cap: 35 HP. Bird Configured starting health: 1 HP. Maximum health cap: 1 HP. Bird Configured starting health: 1 HP. Maximum health cap: 1 HP. Bird Configured starting health: 1 HP. Maximum health cap: 1 HP. Bird Configured starting health: 1 HP. Maximum health cap: 1 HP. Bird Configured starting health: 1 HP. Maximum health cap: 1 HP. Wormperson Configured starting health: 100 HP. Maximum health cap: 100 HP. Faceless Configured starting health: 35 HP. Maximum health cap: 35 HP. Shroud Configured starting health: 20 HP. Maximum health cap: 20 HP. Tumor Configured starting health: 70 HP. Maximum health cap: 70 HP. Shroud Configured starting health: 20 HP. Maximum health cap: 20 HP. Wormbird Bug Configured starting health: 5 HP. Maximum health cap: 10 HP. Wormbird Bug Configured starting health: 5 HP. Maximum health cap: 10 HP. Faceless Configured starting health: 35 HP. Maximum health cap: 35 HP. Faceless Configured starting health: 35 HP. Maximum health cap: 35 HP. Shroud Configured starting health: 20 HP. Maximum health cap: 20 HP. Faceless Configured starting health: 35 HP. Maximum health cap: 35 HP. Shroud Configured starting health: 20 HP. Maximum health cap: 20 HP. Shroud Configured starting health: 20 HP. Maximum health cap: 20 HP. Faceless Configured starting health: 35 HP. Maximum health cap: 35 HP. Shroud Configured starting health: 20 HP. Maximum health cap: 20 HP. Shroud Configured starting health: 20 HP. Maximum health cap: 20 HP. Torso Configured starting health: 45 HP. Maximum health cap: 45 HP. Talk to Gallery Man Dialogue excerpt: Got what you came here for? Shadow Configured starting health: 60 HP. Maximum health cap: 60 HP. Shadow Configured starting health: 60 HP. Maximum health cap: 60 HP. Bird Configured starting health: 1 HP. Maximum health cap: 1 HP. Bird Configured starting health: 1 HP. Maximum health cap: 1 HP. Bird Configured starting health: 1 HP. Maximum health cap: 1 HP. Bird Configured starting health: 1 HP. Maximum health cap: 1 HP. Bird Configured starting health: 1 HP. Maximum health cap: 1 HP. Tumor Configured starting health: 70 HP. Maximum health cap: 70 HP. Bird Configured starting health: 1 HP. Maximum health cap: 1 HP. Bird Configured starting health: 1 HP. Maximum health cap: 1 HP. Bird Configured starting health: 1 HP. Maximum health cap: 1 HP. Bird Configured starting health: 1 HP. Maximum health cap: 1 HP. Bird Configured starting health: 1 HP. Maximum health cap: 1 HP. Wormperson Configured starting health: 100 HP. Maximum health cap: 100 HP. Wormbird Bug Configured starting health: 5 HP. Maximum health cap: 10 HP. Faceless Configured starting health: 35 HP. Maximum health cap: 35 HP. Wormperson Configured starting health: 100 HP. Maximum health cap: 100 HP. Talk to Gallery Man Dialogue excerpt: I hear the storm's getting worse. Water is rising,… Talk to Dwarf Dialogue excerpt: The cable car won't run without the bells. Dog Configured starting health: 35 HP. Maximum health cap: 35 HP. Floater Configured starting health: 15 HP. Maximum health cap: 15 HP. Floater Configured starting health: 15 HP. Maximum health cap: 15 HP. Faceless Configured starting health: 35 HP. Maximum health cap: 35 HP. Talk to Jane Doe Dialogue excerpt: He bit me in the neck. Shroud Configured starting health: 20 HP. Maximum health cap: 20 HP. Talk to Boots Dialogue excerpt: I figured you'd wind up down here. Is it… Shadow Configured starting health: 60 HP. Maximum health cap: 60 HP. Wormbird Bug Configured starting health: 5 HP. Maximum health cap: 10 HP. Tumor Configured starting health: 70 HP. Maximum health cap: 70 HP. Torso Configured starting health: 45 HP. Maximum health cap: 45 HP. Wormbird Bug Configured starting health: 5 HP. Maximum health cap: 10 HP. Wormbird Bug Configured starting health: 5 HP. Maximum health cap: 10 HP. Shadow Configured starting health: 60 HP. Maximum health cap: 60 HP. Voice cue — Downtown Loomis ST Part 2 A voiced line here begins: Gusts of icy rain push me further into the… Talk to Gallery Man Dialogue excerpt: Surprised to see anyone still outside. Most people are… Faceless Configured starting health: 35 HP. Maximum health cap: 35 HP. Faceless Configured starting health: 35 HP. Maximum health cap: 35 HP. Faceless Configured starting health: 35 HP. Maximum health cap: 35 HP. Faceless Configured starting health: 35 HP. Maximum health cap: 35 HP. Faceless Configured starting health: 35 HP. Maximum health cap: 35 HP. Faceless Configured starting health: 35 HP. Maximum health cap: 35 HP. Faceless Configured starting health: 35 HP. Maximum health cap: 35 HP. Tumor Configured starting health: 70 HP. Maximum health cap: 70 HP. Faceless Configured starting health: 35 HP. Maximum health cap: 35 HP. Faceless Configured starting health: 35 HP. Maximum health cap: 35 HP. Faceless Configured starting health: 35 HP. Maximum health cap: 35 HP. Faceless Configured starting health: 35 HP. Maximum health cap: 35 HP. Bird Configured starting health: 1 HP. Maximum health cap: 1 HP. Bird Configured starting health: 1 HP. Maximum health cap: 1 HP. Bird Configured starting health: 1 HP. Maximum health cap: 1 HP. Bird Configured starting health: 1 HP. Maximum health cap: 1 HP. Bird Configured starting health: 1 HP. Maximum health cap: 1 HP. Bird Configured starting health: 1 HP. Maximum health cap: 1 HP. Bird Configured starting health: 1 HP. Maximum health cap: 1 HP. Bird Configured starting health: 1 HP. Maximum health cap: 1 HP. Bird Configured starting health: 1 HP. Maximum health cap: 1 HP. Bird Configured starting health: 1 HP. Maximum health cap: 1 HP. Faceless Configured starting health: 35 HP. Maximum health cap: 35 HP. Dog Configured starting health: 35 HP. Maximum health cap: 35 HP. Shadow Configured starting health: 60 HP. Maximum health cap: 60 HP. Wormbird Bug Configured starting health: 5 HP. Maximum health cap: 10 HP. Wormbird Bug Configured starting health: 5 HP. Maximum health cap: 10 HP. Shadow Configured starting health: 60 HP. Maximum health cap: 60 HP. Faceless Configured starting health: 35 HP. Maximum health cap: 35 HP. Fog Shambler Configured starting health: 380 HP. Maximum health cap: 380 HP. Torso Configured starting health: 45 HP. Maximum health cap: 45 HP. Talk to Boots Dialogue excerpt: You got me, son. You got me good. Talk to Cat Dialogue excerpt: Didn’t mean to let you down, partner. Talk to Cat Dialogue excerpt: Good to see you again, partner. Torso Configured starting health: 45 HP. Maximum health cap: 45 HP. Voice cue — Rabbit Hole A voiced line here begins: The bar looks deserted. But it's real. I half… Talk to Gallery Man Dialogue excerpt: Did you find the man you were looking for? Floater Configured starting health: 15 HP. Maximum health cap: 15 HP. Bird Configured starting health: 1 HP. Maximum health cap: 1 HP. Bird Configured starting health: 1 HP. Maximum health cap: 1 HP. Bird Configured starting health: 1 HP. Maximum health cap: 1 HP. Bird Configured starting health: 1 HP. Maximum health cap: 1 HP. Bird Configured starting health: 1 HP. Maximum health cap: 1 HP. Armored WP Configured starting health: 220 HP. Maximum health cap: 220 HP. Shadow Configured starting health: 60 HP. Maximum health cap: 60 HP. Faceless Configured starting health: 35 HP. Maximum health cap: 35 HP. Torso Configured starting health: 45 HP. Maximum health cap: 45 HP. Faceless Configured starting health: 35 HP. Maximum health cap: 35 HP. Torso Configured starting health: 45 HP. Maximum health cap: 45 HP. Faceless Configured starting health: 35 HP. Maximum health cap: 35 HP. Faceless Configured starting health: 35 HP. Maximum health cap: 35 HP. Floater Configured starting health: 15 HP. Maximum health cap: 15 HP. Floater Configured starting health: 15 HP. Maximum health cap: 15 HP. Faceless Configured starting health: 35 HP. Maximum health cap: 35 HP. Wormbird Bug Configured starting health: 5 HP. Maximum health cap: 10 HP. Wormbird Bug Configured starting health: 5 HP. Maximum health cap: 10 HP. Wormbird Bug Configured starting health: 5 HP. Maximum health cap: 10 HP. Bird Configured starting health: 1 HP. Maximum health cap: 1 HP. Bird Configured starting health: 1 HP. Maximum health cap: 1 HP. Bird Configured starting health: 1 HP. Maximum health cap: 1 HP. Bird Configured starting health: 1 HP. Maximum health cap: 1 HP. Bird Configured starting health: 1 HP. Maximum health cap: 1 HP. Bird Configured starting health: 1 HP. Maximum health cap: 1 HP. Bird Configured starting health: 1 HP. Maximum health cap: 1 HP. Bird Configured starting health: 1 HP. Maximum health cap: 1 HP. Bird Configured starting health: 1 HP. Maximum health cap: 1 HP. Bird Configured starting health: 1 HP. Maximum health cap: 1 HP. Wormbird Bug Configured starting health: 5 HP. Maximum health cap: 10 HP. Wormbird Bug Configured starting health: 5 HP. Maximum health cap: 10 HP. Faceless Configured starting health: 35 HP. Maximum health cap: 35 HP. Faceless Configured starting health: 35 HP. Maximum health cap: 35 HP. Wormbird Bug Configured starting health: 5 HP. Maximum health cap: 10 HP. Faceless Configured starting health: 35 HP. Maximum health cap: 35 HP. Torso Configured starting health: 45 HP. Maximum health cap: 45 HP. Faceless Configured starting health: 35 HP. Maximum health cap: 35 HP. Faceless Configured starting health: 35 HP. Maximum health cap: 35 HP. Faceless Configured starting health: 35 HP. Maximum health cap: 35 HP. Torso Configured starting health: 45 HP. Maximum health cap: 45 HP. Wormbird Bug Configured starting health: 5 HP. Maximum health cap: 10 HP. Wormbird Bug Configured starting health: 5 HP. Maximum health cap: 10 HP. Faceless Configured starting health: 35 HP. Maximum health cap: 35 HP. Faceless Configured starting health: 35 HP. Maximum health cap: 35 HP. Faceless Configured starting health: 35 HP. Maximum health cap: 35 HP. Talk to Cat Dialogue excerpt: Where am I? Talk to Dwarf Dialogue excerpt: Here for the show? Voice cue — Motel Courtyard A voiced line here begins: Everything about this place feels wrong. Faceless Configured starting health: 35 HP. Maximum health cap: 35 HP. Wormbird Bug Configured starting health: 5 HP. Maximum health cap: 10 HP. Faceless Configured starting health: 35 HP. Maximum health cap: 35 HP. Faceless Configured starting health: 35 HP. Maximum health cap: 35 HP. Floater Configured starting health: 15 HP. Maximum health cap: 15 HP. Faceless Configured starting health: 35 HP. Maximum health cap: 35 HP. Wormperson Configured starting health: 100 HP. Maximum health cap: 100 HP. Floater Configured starting health: 15 HP. Maximum health cap: 15 HP. Floater Configured starting health: 15 HP. Maximum health cap: 15 HP. Floater Configured starting health: 15 HP. Maximum health cap: 15 HP. Talk to Deputy Roberts Dialogue excerpt: Any luck out there? Talk to Deputy Roberts Dialogue excerpt: Getting ready to take off? Faceless Configured starting health: 35 HP. Maximum health cap: 35 HP. Dog Configured starting health: 35 HP. Maximum health cap: 35 HP. Faceless Configured starting health: 35 HP. Maximum health cap: 35 HP. Torso Configured starting health: 45 HP. Maximum health cap: 45 HP. Voice cue — Outskirts Store Interior Main Part 1 A voiced line here begins: What the hell is going on? Faceless Configured starting health: 35 HP. Maximum health cap: 35 HP. Wormbird Bug Configured starting health: 5 HP. Maximum health cap: 10 HP. Faceless Configured starting health: 35 HP. Maximum health cap: 35 HP. Faceless Configured starting health: 35 HP. Maximum health cap: 35 HP. Faceless Configured starting health: 35 HP. Maximum health cap: 35 HP. Faceless Configured starting health: 35 HP. Maximum health cap: 35 HP. Wormbird Bug Configured starting health: 5 HP. Maximum health cap: 10 HP. Wormbird Bug Configured starting health: 5 HP. Maximum health cap: 10 HP. Wormperson Configured starting health: 100 HP. Maximum health cap: 100 HP. Shadow Configured starting health: 60 HP. Maximum health cap: 60 HP. Torso Configured starting health: 45 HP. Maximum health cap: 45 HP. Bird Configured starting health: 1 HP. Maximum health cap: 1 HP. Bird Configured starting health: 1 HP. Maximum health cap: 1 HP. Bird Configured starting health: 1 HP. Maximum health cap: 1 HP. Bird Configured starting health: 1 HP. Maximum health cap: 1 HP. Bird Configured starting health: 1 HP. Maximum health cap: 1 HP. Bird Configured starting health: 1 HP. Maximum health cap: 1 HP. Bird Configured starting health: 1 HP. Maximum health cap: 1 HP. Bird Configured starting health: 1 HP. Maximum health cap: 1 HP. Bird Configured starting health: 1 HP. Maximum health cap: 1 HP. Bird Configured starting health: 1 HP. Maximum health cap: 1 HP. Faceless Configured starting health: 35 HP. Maximum health cap: 35 HP. Voice cue — Park Exterior Statue A voiced line here begins: Town hall seems deserted. Tumor Configured starting health: 70 HP. Maximum health cap: 70 HP. Pursuer Configured starting health: 325 HP. Maximum health cap: 325 HP. Voice cue — Park Townhall Assembly Hall SubMap 1 A voiced line here begins: The expected rainfall... Faceless Configured starting health: 35 HP. Maximum health cap: 35 HP. Tumor Configured starting health: 70 HP. Maximum health cap: 70 HP. Wormperson Configured starting health: 100 HP. Maximum health cap: 100 HP. Torso Configured starting health: 45 HP. Maximum health cap: 45 HP. Faceless Configured starting health: 35 HP. Maximum health cap: 35 HP. Torso Configured starting health: 45 HP. Maximum health cap: 45 HP. Torso Configured starting health: 45 HP. Maximum health cap: 45 HP. Faceless Configured starting health: 35 HP. Maximum health cap: 35 HP. Faceless Configured starting health: 35 HP. Maximum health cap: 35 HP. Bird Configured starting health: 1 HP. Maximum health cap: 1 HP. Talk to Jane Doe Dialogue excerpt: Do you think they'll ever find her? Wormperson Configured starting health: 100 HP. Maximum health cap: 100 HP. Torso Configured starting health: 45 HP. Maximum health cap: 45 HP. Faceless Configured starting health: 35 HP. Maximum health cap: 35 HP. Wormbird Bug Configured starting health: 5 HP. Maximum health cap: 10 HP. Wormbird Bug Configured starting health: 5 HP. Maximum health cap: 10 HP. Faceless Configured starting health: 35 HP. Maximum health cap: 35 HP. Torso Configured starting health: 45 HP. Maximum health cap: 45 HP. Faceless Configured starting health: 35 HP. Maximum health cap: 35 HP. Talk to Dwarf Dialogue excerpt: They killed him so he'd forget. Tumor Configured starting health: 70 HP. Maximum health cap: 70 HP. Shadow Configured starting health: 60 HP. Maximum health cap: 60 HP. Head Crawler Configured starting health: 100 HP. Maximum health cap: 100 HP. Floater Configured starting health: 15 HP. Maximum health cap: 15 HP. Floater Configured starting health: 15 HP. Maximum health cap: 15 HP. Floater Configured starting health: 15 HP. Maximum health cap: 15 HP. Floater Configured starting health: 15 HP. Maximum health cap: 15 HP. Dog Configured starting health: 35 HP. Maximum health cap: 35 HP. Faceless Configured starting health: 35 HP. Maximum health cap: 35 HP. Faceless Configured starting health: 35 HP. Maximum health cap: 35 HP. Faceless Configured starting health: 35 HP. Maximum health cap: 35 HP. Faceless Configured starting health: 35 HP. Maximum health cap: 35 HP. Torso Configured starting health: 45 HP. Maximum health cap: 45 HP. Wormbird Bug Configured starting health: 5 HP. Maximum health cap: 10 HP. Wormbird Bug Configured starting health: 5 HP. Maximum health cap: 10 HP. Fog Shambler Configured starting health: 380 HP. Maximum health cap: 380 HP. Floater Configured starting health: 15 HP. Maximum health cap: 15 HP. Floater Configured starting health: 15 HP. Maximum health cap: 15 HP. Bird Configured starting health: 1 HP. Maximum health cap: 1 HP. Bird Configured starting health: 1 HP. Maximum health cap: 1 HP. Bird Configured starting health: 1 HP. Maximum health cap: 1 HP. Bird Configured starting health: 1 HP. Maximum health cap: 1 HP. Bird Configured starting health: 1 HP. Maximum health cap: 1 HP. Wormperson Configured starting health: 100 HP. Maximum health cap: 100 HP. Voice cue — Peak Path To Studio A voiced line here begins: The air feels so much colder up here, like… Wormbird Bug Configured starting health: 5 HP. Maximum health cap: 10 HP. Wormbird Bug Configured starting health: 5 HP. Maximum health cap: 10 HP. Torso Configured starting health: 45 HP. Maximum health cap: 45 HP. Wormperson Configured starting health: 100 HP. Maximum health cap: 100 HP. Faceless Configured starting health: 35 HP. Maximum health cap: 35 HP. Faceless Configured starting health: 35 HP. Maximum health cap: 35 HP. Faceless Configured starting health: 35 HP. Maximum health cap: 35 HP. Head Crawler Configured starting health: 100 HP. Maximum health cap: 100 HP. Faceless Configured starting health: 35 HP. Maximum health cap: 35 HP. Wormbird Bug Configured starting health: 5 HP. Maximum health cap: 10 HP. Shadow Configured starting health: 60 HP. Maximum health cap: 60 HP. Faceless Configured starting health: 35 HP. Maximum health cap: 35 HP. Faceless Configured starting health: 35 HP. Maximum health cap: 35 HP. Torso Configured starting health: 45 HP. Maximum health cap: 45 HP. Faceless Configured starting health: 35 HP. Maximum health cap: 35 HP. Torso Configured starting health: 45 HP. Maximum health cap: 45 HP. Talk to Boots Dialogue excerpt: <i>O Lord, I want to be among the number… Torso Configured starting health: 45 HP. Maximum health cap: 45 HP. Wormbird Bug Configured starting health: 5 HP. Maximum health cap: 10 HP. Torso Configured starting health: 45 HP. Maximum health cap: 45 HP. Torso Configured starting health: 45 HP. Maximum health cap: 45 HP. Faceless Configured starting health: 35 HP. Maximum health cap: 35 HP. Faceless Configured starting health: 35 HP. Maximum health cap: 35 HP. Faceless Configured starting health: 35 HP. Maximum health cap: 35 HP. Wormperson Configured starting health: 100 HP. Maximum health cap: 100 HP. Faceless Configured starting health: 35 HP. Maximum health cap: 35 HP. Faceless Configured starting health: 35 HP. Maximum health cap: 35 HP. Shroud Configured starting health: 20 HP. Maximum health cap: 20 HP. Shroud Configured starting health: 20 HP. Maximum health cap: 20 HP. Shroud Configured starting health: 20 HP. Maximum health cap: 20 HP. Faceless Configured starting health: 35 HP. Maximum health cap: 35 HP. Faceless Configured starting health: 35 HP. Maximum health cap: 35 HP. Shroud Configured starting health: 20 HP. Maximum health cap: 20 HP. Floater Configured starting health: 15 HP. Maximum health cap: 15 HP. Torso Configured starting health: 45 HP. Maximum health cap: 45 HP. Floater Configured starting health: 15 HP. Maximum health cap: 15 HP. Faceless Configured starting health: 35 HP. Maximum health cap: 35 HP. Faceless Configured starting health: 35 HP. Maximum health cap: 35 HP. Torso Configured starting health: 45 HP. Maximum health cap: 45 HP. Faceless Configured starting health: 35 HP. Maximum health cap: 35 HP. Faceless Configured starting health: 35 HP. Maximum health cap: 35 HP. Faceless Configured starting health: 35 HP. Maximum health cap: 35 HP. Shroud Configured starting health: 20 HP. Maximum health cap: 20 HP. Torso Configured starting health: 45 HP. Maximum health cap: 45 HP. Shroud Configured starting health: 20 HP. Maximum health cap: 20 HP. Torso Configured starting health: 45 HP. Maximum health cap: 45 HP. Torso Configured starting health: 45 HP. Maximum health cap: 45 HP. Dog Configured starting health: 35 HP. Maximum health cap: 35 HP. Faceless Configured starting health: 35 HP. Maximum health cap: 35 HP. Dog Configured starting health: 35 HP. Maximum health cap: 35 HP. Dog Configured starting health: 35 HP. Maximum health cap: 35 HP. Dog Configured starting health: 35 HP. Maximum health cap: 35 HP. Dog Configured starting health: 35 HP. Maximum health cap: 35 HP. Wormbird Bug Configured starting health: 5 HP. Maximum health cap: 10 HP. Dog Configured starting health: 35 HP. Maximum health cap: 35 HP. Faceless Configured starting health: 35 HP. Maximum health cap: 35 HP. Torso Configured starting health: 45 HP. Maximum health cap: 45 HP. Talk to Deputy Roberts Dialogue excerpt: Detective. Wormbird Bug Configured starting health: 5 HP. Maximum health cap: 10 HP. Wormbird Bug Configured starting health: 5 HP. Maximum health cap: 10 HP. Wormbird Bug Configured starting health: 5 HP. Maximum health cap: 10 HP. Wormbird Bug Configured starting health: 5 HP. Maximum health cap: 10 HP. Faceless Configured starting health: 35 HP. Maximum health cap: 35 HP. Torso Configured starting health: 45 HP. Maximum health cap: 45 HP. Torso Configured starting health: 45 HP. Maximum health cap: 45 HP. Faceless Configured starting health: 35 HP. Maximum health cap: 35 HP. Faceless Configured starting health: 35 HP. Maximum health cap: 35 HP. Faceless Configured starting health: 35 HP. Maximum health cap: 35 HP. Wormbird Bug Configured starting health: 5 HP. Maximum health cap: 10 HP. Wormbird Bug Configured starting health: 5 HP. Maximum health cap: 10 HP. Talk to Deputy Roberts Dialogue excerpt: You really have it in for this Eddie guy,… Wormperson Configured starting health: 200 HP. Maximum health cap: 200 HP. Dog Configured starting health: 35 HP. Maximum health cap: 35 HP. Dog Configured starting health: 35 HP. Maximum health cap: 35 HP. Torso Configured starting health: 45 HP. Maximum health cap: 45 HP. Voice cue — Lobby A voiced line here begins: The air smells of moldy pastries and stale coffee. Talk to Boots Dialogue excerpt: You’re not an officer. What are you up to,… Talk to Boots Dialogue excerpt: You’re not an officer. What are you up to,… Torso Configured starting health: 45 HP. Maximum health cap: 45 HP. Faceless Configured starting health: 35 HP. Maximum health cap: 35 HP. Dog Configured starting health: 35 HP. Maximum health cap: 35 HP. Dog Configured starting health: 35 HP. Maximum health cap: 35 HP. Faceless Configured starting health: 35 HP. Maximum health cap: 35 HP. Faceless Configured starting health: 35 HP. Maximum health cap: 35 HP. Wormbird Bug Configured starting health: 5 HP. Maximum health cap: 10 HP. Wormbird Bug Configured starting health: 5 HP. Maximum health cap: 10 HP. Shadow Configured starting health: 60 HP. Maximum health cap: 60 HP. Head Crawler Configured starting health: 100 HP. Maximum health cap: 100 HP. Torso Configured starting health: 45 HP. Maximum health cap: 45 HP. Bird Configured starting health: 1 HP. Maximum health cap: 1 HP. Bird Configured starting health: 1 HP. Maximum health cap: 1 HP. Bird Configured starting health: 1 HP. Maximum health cap: 1 HP. Bird Configured starting health: 1 HP. Maximum health cap: 1 HP. Bird Configured starting health: 1 HP. Maximum health cap: 1 HP. Talk to Jane Doe Dialogue excerpt: How did you get up here? Floater Configured starting health: 15 HP. Maximum health cap: 15 HP. Faceless Configured starting health: 35 HP. Maximum health cap: 35 HP. Bird Configured starting health: 1 HP. Maximum health cap: 1 HP. Bird Configured starting health: 1 HP. Maximum health cap: 1 HP. Bird Configured starting health: 1 HP. Maximum health cap: 1 HP. Bird Configured starting health: 1 HP. Maximum health cap: 1 HP. Bird Configured starting health: 1 HP. Maximum health cap: 1 HP. Faceless Configured starting health: 35 HP. Maximum health cap: 35 HP. Torso Configured starting health: 45 HP. Maximum health cap: 45 HP. Torso Configured starting health: 45 HP. Maximum health cap: 45 HP. Torso Configured starting health: 45 HP. Maximum health cap: 45 HP. Torso Configured starting health: 45 HP. Maximum health cap: 45 HP. Torso Configured starting health: 45 HP. Maximum health cap: 45 HP. Wormbird Bug Configured starting health: 5 HP. Maximum health cap: 10 HP. Wormbird Bug Configured starting health: 5 HP. Maximum health cap: 10 HP. Wormbird Bug Configured starting health: 5 HP. Maximum health cap: 10 HP. Wormbird Bug Configured starting health: 5 HP. Maximum health cap: 10 HP. Wormbird Bug Configured starting health: 5 HP. Maximum health cap: 10 HP. Tumor Configured starting health: 70 HP. Maximum health cap: 70 HP. Wormperson Configured starting health: 100 HP. Maximum health cap: 100 HP. Torso Configured starting health: 45 HP. Maximum health cap: 45 HP. Wormperson Configured starting health: 100 HP. Maximum health cap: 100 HP. Head Crawler Configured starting health: 100 HP. Maximum health cap: 100 HP. Wormperson Configured starting health: 100 HP. Maximum health cap: 100 HP. Faceless Configured starting health: 35 HP. Maximum health cap: 35 HP. Torso Configured starting health: 45 HP. Maximum health cap: 45 HP. Voice cue — Lobby A voiced line here begins: I don't know what I can possibly expect to… Head Crawler Configured starting health: 100 HP. Maximum health cap: 100 HP. Torso Configured starting health: 45 HP. Maximum health cap: 45 HP. Voice cue — Recording Booth A voiced line here begins: *Whispers*: All lies... Pursuer Configured starting health: 450 HP. Maximum health cap: 450 HP. Head Crawler Configured starting health: 100 HP. Maximum health cap: 100 HP. Wormperson Configured starting health: 100 HP. Maximum health cap: 100 HP. Faceless Configured starting health: 35 HP. Maximum health cap: 35 HP. Faceless Configured starting health: 35 HP. Maximum health cap: 35 HP. Head Crawler Configured starting health: 100 HP. Maximum health cap: 100 HP. Faceless Configured starting health: 35 HP. Maximum health cap: 35 HP. Faceless Configured starting health: 35 HP. Maximum health cap: 35 HP. Faceless Configured starting health: 35 HP. Maximum health cap: 35 HP. Torso Configured starting health: 45 HP. Maximum health cap: 45 HP. Two-ring wall sockets Open the stage curtains to expose two ring sockets. Each accepts either Alice’s Ring or Eddie’s Gold Ring and consumes the item; completing both opens the transition to the Nightmare Rabbit Hole. Star — Mess Hall Pick up one Star here. Star — Rabbit Hole bar Pick up one Star here. Star — Studio exterior entrance Pick up one Star here. Star — Bungalow 3 safe In Bungalow 3, enter 6671 on the safe keypad and collect the Star. Star — Caravan hole The pin marks the pit entrance. Go down and dig with the Shovel until the loot crate is exposed, then collect the Star. Fights without a precise map position These source records could not be placed confidently on the map. Some listed levels have map areas, but the individual fight position could not be matched.
Choose a source-only fightSelect a fight Bird — Apartment Exterior Front Bird — Apartment Exterior Front Bird — Apartment Exterior Front Wormbird Bug — Church Hill Crematorium Interior Wormbird Bug — Church Hill Crematorium Interior Faceless — Church Hill Crematorium Interior Faceless — Church Hill Crematorium Interior Shroud — Church Hill Crematorium Interior Faceless — Church Hill Crematorium Interior Shroud — Church Hill Crematorium Interior Shroud — Church Hill Crematorium Interior Faceless — Church Hill Crematorium Interior Shroud — Church Hill Crematorium Interior Shroud — Church Hill Crematorium Interior Torso — Church Hill Crematorium Interior Wormperson — Church Hill Crematorium Interior Appartment Shroud — Church Hill Crematorium Interior Appartment Bedrooms Tumor — Church Hill Crematorium Interior Appartment Bedrooms Shroud — Church Hill Crematorium Interior Appartment Bedrooms Dog — Linus Fight Club Wormperson — Motel Sewer Despair_Dying — Nightmare Apartment Woods Beach Wormperson — Nightmare Church Chapel Interior Faceless — Nightmare Church Chapel Interior Faceless — Nightmare Church Chapel Interior Faceless — Nightmare Church Chapel Interior Faceless — Nightmare Church Chapel Interior Faceless — Nightmare Church Chapel Interior Faceless — Nightmare Church Chapel Interior Torso — Nightmare Church Chapel Interior Torso — Nightmare Church Chapel Interior Faceless — Nightmare Church Chapel Interior Torso — Nightmare Church Chapel Interior Faceless — Nightmare Church Chapel Interior Faceless — Nightmare Church Chapel Interior Faceless — Nightmare Church Chapel Interior Faceless — Nightmare Church Chapel Interior Torso — Nightmare Church Chapel Interior Shroud — Nightmare Studio Antechamber Shroud — Nightmare Studio Antechamber Floater — Nightmare Studio Bridge Torso — Nightmare Studio Descent Wormperson — Nightmare Studio Gun Room Faceless — Nightmare Studio Gun Room Floater — Nightmare Studio Hallway Sewer Floater — Nightmare Studio Hallway Sewer Floater — Nightmare Studio Morgue Floater — Nightmare Studio Morgue Head Crawler — Nightmare Studio Morgue Shadow — Nightmare Studio Phone Room Shroud — Nightmare Studio Tape Room Madam — Nightmare Trailer Tree Mantis — Outskirts Tunnel Floater — Park Exterior Statue Nightmare Floater — Park Exterior Statue Nightmare Floater — Park Exterior Statue Nightmare Floater — Park Exterior Statue Nightmare Floater — Park Exterior Statue Nightmare Floater — Park Exterior Statue Nightmare Bird — Park Exterior Statue Nightmare Bird — Park Exterior Statue Nightmare Bird — Park Exterior Statue Nightmare Bird — Park Exterior Statue Nightmare Bird — Park Exterior Statue Nightmare Wormbird Bug — Riverside Lumberyard Shadow — Riverside Lumberyard Faceless — Riverside Lumberyard Bird — Studio Exterior Antenna Bird — Studio Exterior Antenna Bird — Studio Exterior Antenna Bird — Studio Exterior Antenna Bird — Studio Exterior Antenna Floater — Downtown Nightmare Boss Meatball Floater — Downtown Nightmare Boss Meatball Faceless — Downtown Nightmare Boss Meatball Torso — Downtown Nightmare Boss Meatball HealthBox — Downtown Nightmare Boss Meatball Despair — Apartment Boss Madam — Nightmare Studio Logic Meatball V2 — Downtown Nightmare Boss Meatball Review pending · Inspected Windows file snapshot, 2026-10-11; Steam build ID unverified
Source
Room meshes, floor terrain, map line styling and native icons come from the map-presentation extraction ; room connections, unlock conditions, discoveries and encounter records come from the supplied Windows world-data extraction . Curated route stops combine story and trigger data with selected-frame review ; compact copies of the map appear beside the matching walkthrough chapters. These are route plans, not a frame-by-frame path transcript. The map is static and does not reflect a player’s progress. The supplied files do not establish the Steam build or verify behavior in play; artwork reuse permission is unreviewed.
The three pictured NPCs are full-body sprites linked to their speaker settings in the character-art evidence ; other dialogue speakers have no verified match here.
Topic art: editorial composition made from native map terrain, title decal and UI icons; it is not a screenshot or a new map route, credited to Wych Elm / Team17. Source records and asset hashes ; reuse permission for the underlying artwork has not been established.
Click the picture or scroll to zoom, drag to move. Click outside it or press Esc to close.
Unofficial fan wiki, not affiliated with Wych Elm / Team17. Game content belongs to its owners.
 GameWikiStation
 Silver Pines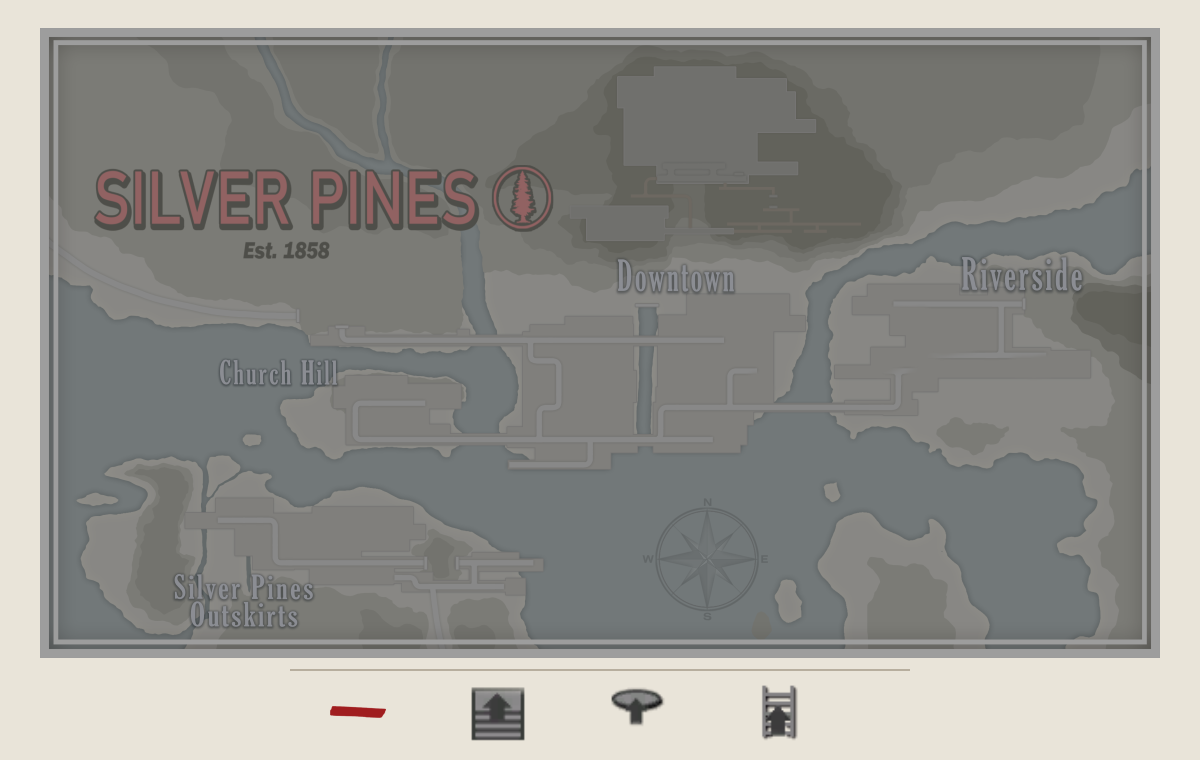
Comments & feedback
Share a tip or suggest a correction. Comments appear publicly right away; display names are unverified. All language pages share this discussion. Please keep personal information private.