
 Order of the Sinking Star
Bard gate challenges

These two rooms combine 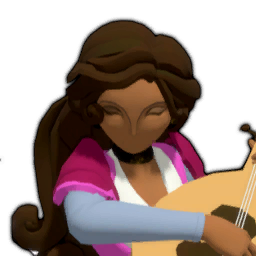 Bard’s charm route with gate and exit layouts. In the first, four heroes begin around the A–D pad cluster and Crystal 1 sits in the lower passage. E is the purple target; G1 is the lower yellow gate, G2 the upper pink gate, and the four exits are E1–E4. For other Bard routes, see Bard puzzles.
Four pads: leave crystal weights
Section titled “Four pads: leave crystal weights”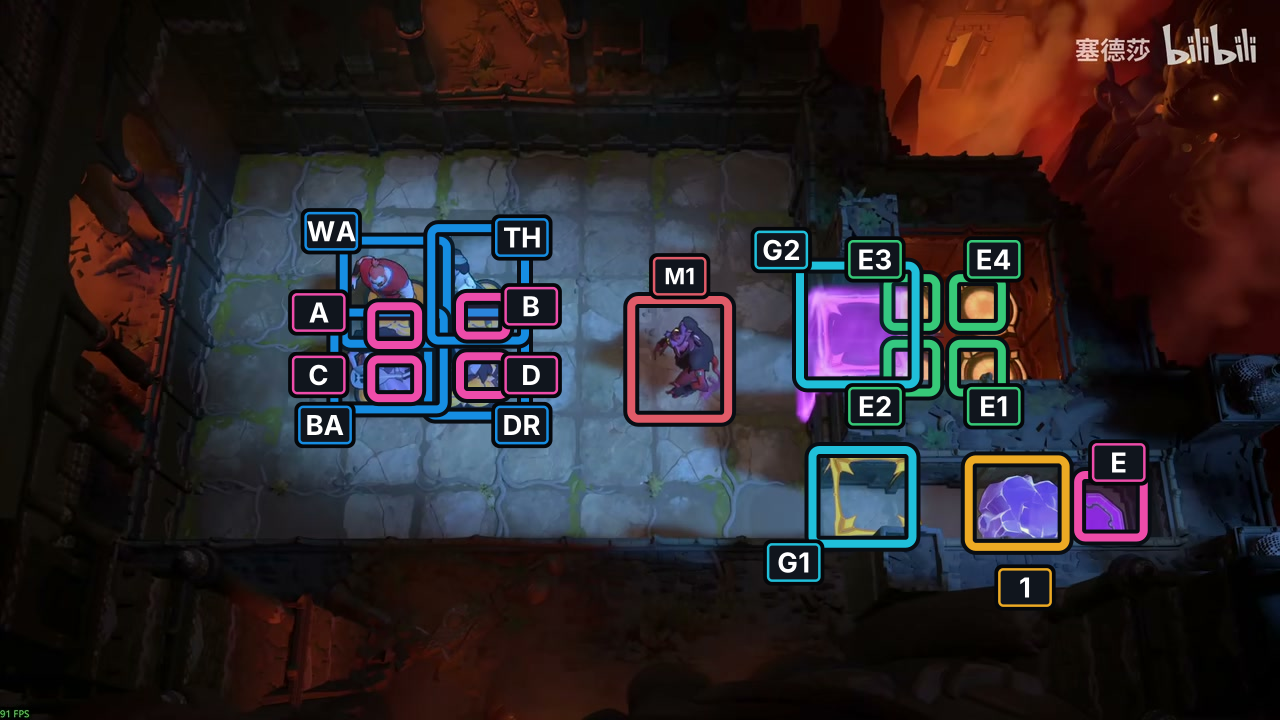
- Crystal 1
- Switches A–E
- Gates G1–G2
- Exits E1–E4
- DR Druid
- WA Warrior
- BA Bard
- TH Thief
- Goblin M1
Hint
Use Bard to charm Goblin M1 onto B, then leave Bard inactive so M1 stays there. The plan uses the 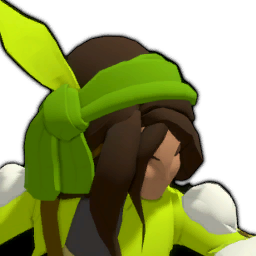 Thief’s crystal form on A and the Bard’s crystal form on D, with
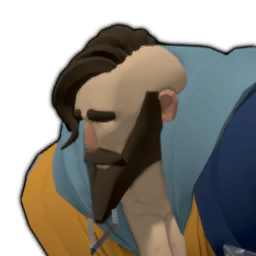 Druid on C. Keep all four pads covered before
 Warrior leaves the cluster: they open the lower G1 gate. Warrior then pushes Crystal 1 onto E to open the upper G2 gate. Keep Crystal 1 on E while the heroes make their exits.
Solution
- Put M1 on B. Use Bard’s charm route to bring the Goblin from the right side to B. Once M1 is there, switch to Warrior; walking Bard away or charming again pulls M1 off B.
- Set the four-pad cluster. Warrior pushes the inactive Bard downward, then rightward across the lower side of the cluster. Druid turns Bard and Thief into crystal forms; Warrior pushes the Thief’s crystal form onto A and the Bard’s onto D, while M1 stays on B and Druid takes C. At step 63, A–D are all occupied and the lower yellow G1 gate opens.
- Open the upper crossing. Warrior passes through the lower yellow G1 gate and pushes Crystal 1 from the lower passage onto purple E. At step 71, this opens the upper pink G2 gate. Leave Crystal 1 on E to keep G2 open.
- Bring the pad holders back into the route. Warrior returns through the lower side and pushes the Bard/Goblin train up; M1 leaves B by step 80, and G1 closes at step 81. Warrior then shifts the Thief/Bard train right. G2 stays open because Crystal 1 remains on E. Druid restores Bard at step 89, leaving Thief faceted on B.
- Clear the right-hand approach before Bard’s final charm sequence. Move Druid and Warrior to the right of G2 first. Then Bard charms right across the row and down once, carrying Thief and M1 along the lower route. M1 stops at the wall, clear of the exit approach.
- Fill the exits and restore Thief last. Warrior reaches E4, top-right. Bard moves right to E1, bottom-right; Thief lands on E2, bottom-left. Druid’s last downward transmute restores Thief on E2; Druid remains on E3, top-left. Crystal 1 stays on E so the upper G2 passage remains open.
If M1 leaves B before Warrior begins the pad crossing, return to the Bard lure and reset the four-pad arrangement. If Crystal 1 misses E, undo to the push from the lower passage. Before Bard’s final charm sequence, put both Druid and Warrior beyond G2 so M1 cannot block their approach.
Images show selected video checkpoints; the first frame is the starting position.
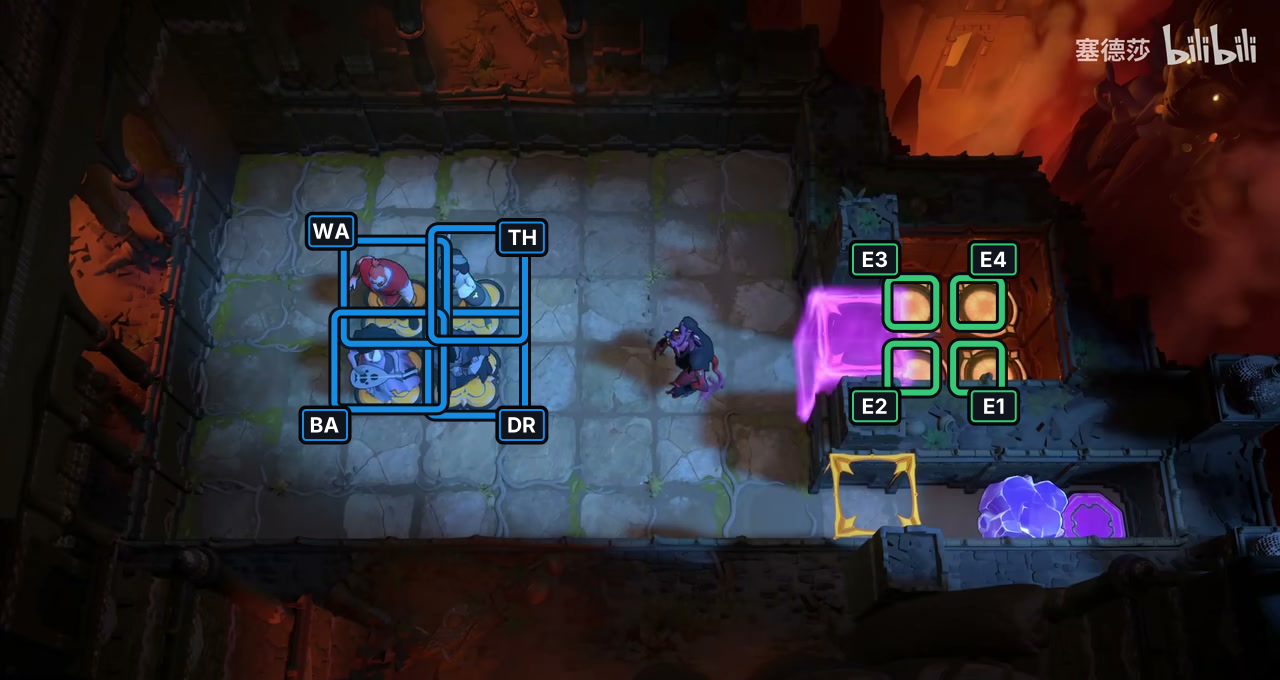
At 30:05.033, the selected frame shows Druid, Warrior, Bard and Thief in the room’s starting layout.
Check: The markers identify the visible heroes and exits; no input sequence or later state is inferred.
Open full-size image in a new tabFull direction sequence
- DR Druid
↓ ↓ ← ← ← - TH Thief
↑ ↑ ← ↓ - WA Warrior
→ ↓ ↓ ↓ - BA Bard
→ → ← ← ← ↑ - WA Warrior
← ↑ ← ↑ ↑ → ↓ ↓ ← ↓ → → - TH Thief
→ ↓ - DR Druid
→ → → ↑ ← ← ↑ ↑ ↑ ↑ → ↓ ↓ - WA Warrior
↑ ← ↑ ↑ ↑ → ↓ ← ↓ ↓ → ↓ ↓ → ↑ - DR Druid
→ → - WA Warrior
↓ → → → → → → → ← ← ← ← ← ← ← ↑ ↑ ↓ ← ← ↑ ↑ → - DR Druid
→ → ↑ → → → → → ↑ - WA Warrior
↓ ↓ → → → → → ↑ → → - BA Bard
→ → → ↓ - WA Warrior
→ ↑ - BA Bard
→ → → - DR Druid
↓
Two Dragons: clear the lower passage
Section titled “Two Dragons: clear the lower passage”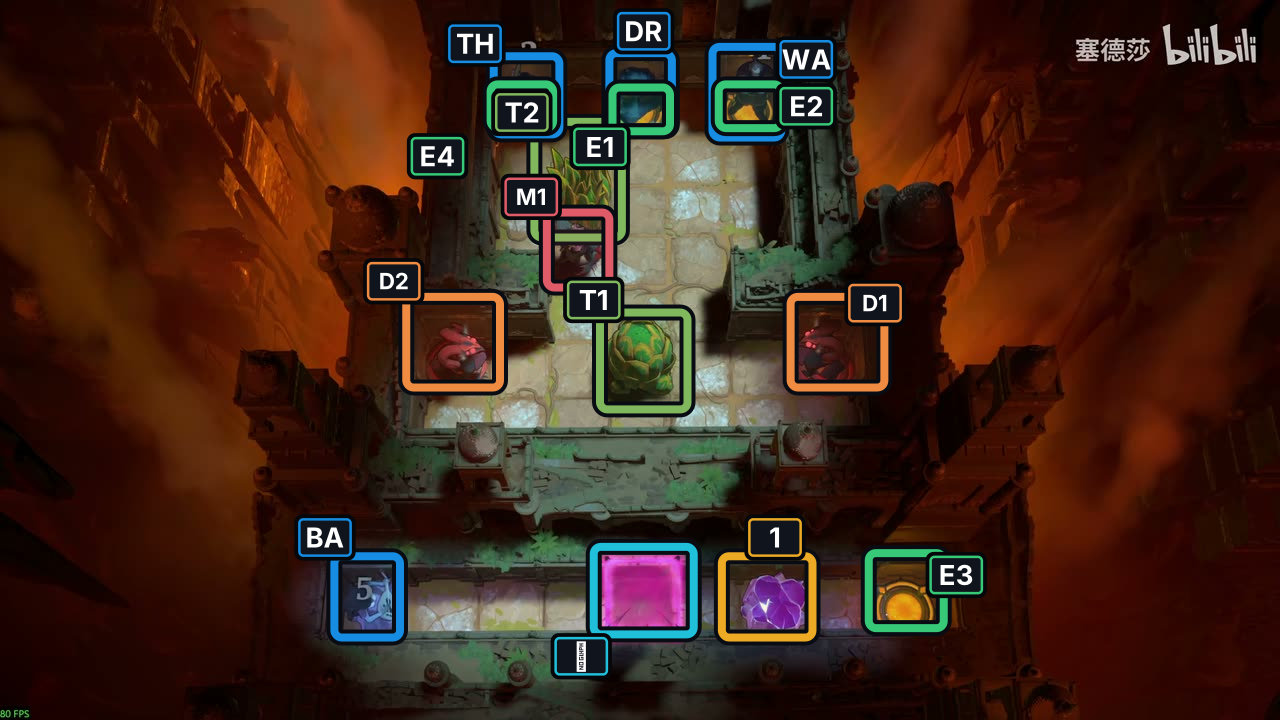
- Crystal 1
- Plants T1–T2
- Gate
- Exits E1–E4
- TH Thief
- WA Warrior
- BA Bard
- DR Druid
- Goblin M1
- Dragons D1–D2
Hint
Turn upper plant T2 into a crystal and push it down the Goblin lane; it reaches the row between the Dragons as M1 is cleared. Turn lower plant T1 into a crystal, pull the T1 crystal up one step, then have Warrior push it right and down. Leave exactly one empty tile between the T1 and T2 crystals on the Dragon row. Druid uses that gap to reach both Dragon lanes. Bard moves the original Crystal 1 to the gate only after both Dragons are frozen.
Solution
- At step 3, Druid changes T2 into a crystal. Warrior pushes it down through M1; by step 13, M1 is cleared and the T2 crystal is on the row between the Dragons. At step 17, Druid changes lower plant T1 into a crystal. Thief pulls the T1 crystal up once at step 27. Warrior pushes it right and then down, leaving it at step 33 beside the T2 crystal with one empty tile between them.
- Druid circles below the crystals and casts upward from below the left Dragon to freeze it at step 42, then does the same below the right Dragon at step 49. The gate is open after this sequence. Keep both Dragons frozen.
- Bard moves the original Crystal 1 right along the lower lane, then back left onto the gate: it reaches the gate at step 57. At step 58, Druid casts upward while staying below the right Dragon, thawing it. Wait for the gate to close and for the original Crystal 1’s debris effect to finish. At step 59, Druid casts upward again from the same tile to refreeze the Dragon; the gate reopens. Continue Bard’s route only after it is open again.
- Bard follows the open lower lane to E3 at step 65. Thief reaches E4 at step 70 and Warrior E2 at step 75. Druid reaches E1 at step 84. Both Dragons remain frozen at the finish.
If the T1 and T2 crystals are not on the same Dragon row with exactly one empty tile between them, undo before Druid freezes the Dragons. If the gate closes during the Bard sequence, wait for Druid’s second upward action to refreeze the Dragon and reopen the gate before Bard continues. Keep Bard on the lower lane to E3; send Thief, Warrior and Druid to E4, E2 and E1 respectively.
Images show selected video checkpoints; the first frame is the starting position.
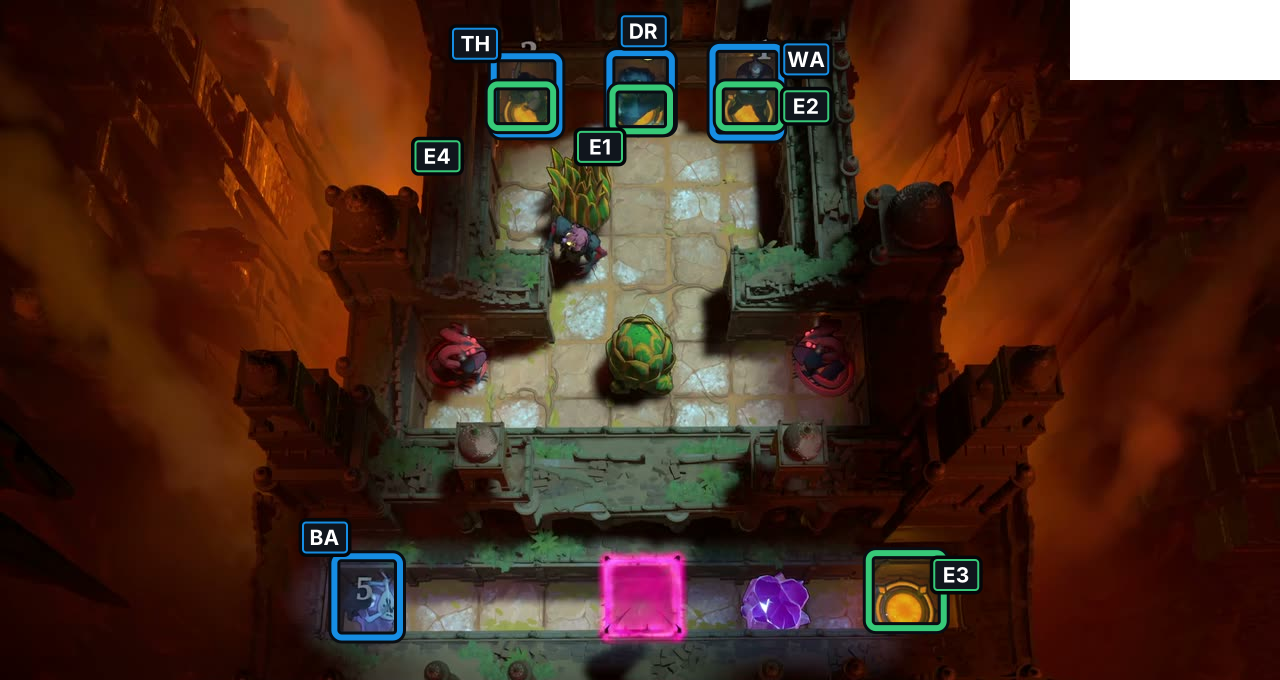
At 32:48.000, the selected frame shows Thief, Warrior, Bard and Druid in the room’s starting layout.
Check: The markers identify the visible heroes and exits; no input sequence or later state is inferred.
Open full-size image in a new tabFull direction sequence
- DR Druid
← ↓ ↓ ↑ → ↓ - WA Warrior
← ← ← ↓ ↓ ↓ ↓ - DR Druid
↓ ↓ ↓ ↓ ↑ → → - TH Thief
→ → ↓ ↓ ↓ ↓ ↑ → ↑ - WA Warrior
→ ↑ → ↓ - DR Druid
← ← ↓ ↓ ↓ ← ← ← ↑ → → → → → → ↑ - BA Bard
→ → → → → ← ← ← - DR Druid
↑ ↑ - BA Bard
→ → → → → → - TH Thief
↑ ↑ ← ← ← - WA Warrior
↑ ↑ ↑ ↑ → - DR Druid
← ← ← ↑ ↑ ↑ ↑ ↑ ↑
Sources and credits
Room layout, pad labels and exit positions: PC r67121 game files. The directions follow a replay in a scoped rules model; the video corroborates selected visual states, not a recorded input sequence. Video: 塞德莎, Heroes 3, part 4. Board artwork: Thekla, Inc.
- Four additional source-only Heroes 3 room layouts (PC r67121) — Extracted data
- Supplemental Heroes 3 route checks (bounded model) — Documentation · bounded-heroes3-challenges-2026-10-17
- Joric's PuzzleScript movement-rule port — Documentation · commit-4e6e0784727d95c7337d50f6d5b3ef912aa0e8ae
- Heroes 3 compactor and gatekeeping visual samples, part 4 / 英雄3第4部分:压缩房与门控房画面观察 — Observed in-game
- Character portraits and selected puzzle-board images (PC r67121) — Extracted data
- Heroes 3 compactor_v2 selected P4 starting-layout screenshot — Observed in-game · screenshots-reviewed-2026-10-21
- Heroes 3 gatekeeping_v3 selected P4 starting-layout screenshot — Observed in-game · screenshots-reviewed-2026-10-21
Unofficial fan wiki, not affiliated with Thekla, Inc. / Arc Games / Gamirror Games. Game content belongs to its owners.
Comments & feedback
Share a tip or suggest a correction. Comments are public. Guest names are unverified; verified accounts show their account username. All language pages share this discussion. Please keep personal information private.