
 Order of the Sinking Star
Heroes and Light

This page covers 38 main-area layouts that match local r67121 native textures. The article identifies its game version as the October 2026 launch; the local package’s exact Steam depot mapping is unverified.
Article puzzle numbers follow the author’s solution-video order and are recorded separately from internal set positions. Compare your board with these selected views, then use the hint below each image. Video cues are not exact frame PTS; cards show selected layouts and make no finish claim.
Colored number rings identify layout landmarks, not action order. Unmatched article numbers remain unassigned, and 24 other candidates remain unresolved.
Puzzle 5 — smash_grid_kill (set position 61)
Section titled “Puzzle 5 — smash_grid_kill (set position 61)”Article puzzle 5; narration cue P15 7:31. Internal set position: 61.
Selected layout only; colored rings mark landmarks, not input steps.
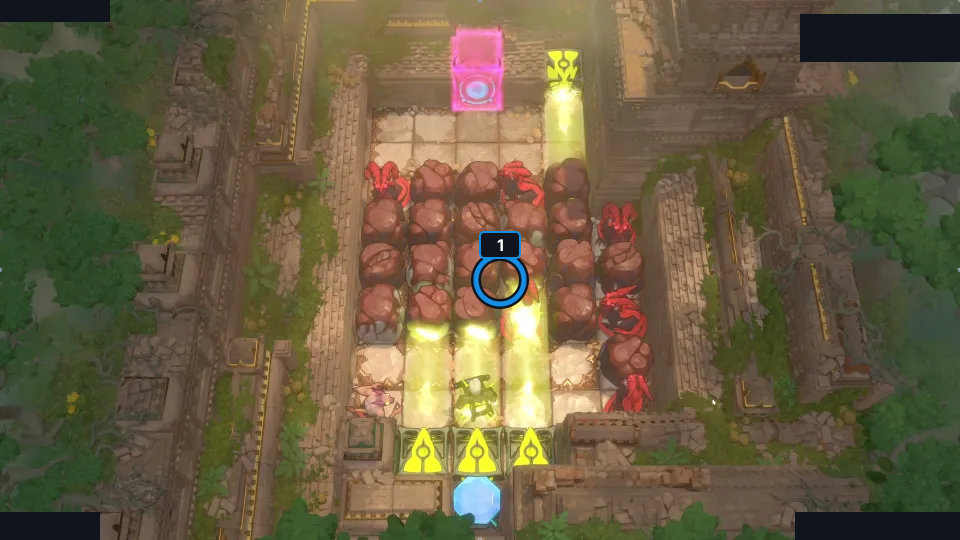
Trigger the dragon chain.
Check: The article still matches smash_grid_kill; its P15 7:31 cue is not exact PTS. Notes are source-reported; no route replay or finish is claimed.
Open full-size image in a new tabPuzzle 6 — smash_grid_4 (set position 62)
Section titled “Puzzle 6 — smash_grid_4 (set position 62)”Article puzzle 6; narration cue P15 9:55. Internal set position: 62.
Selected layout only; colored rings mark landmarks, not input steps.
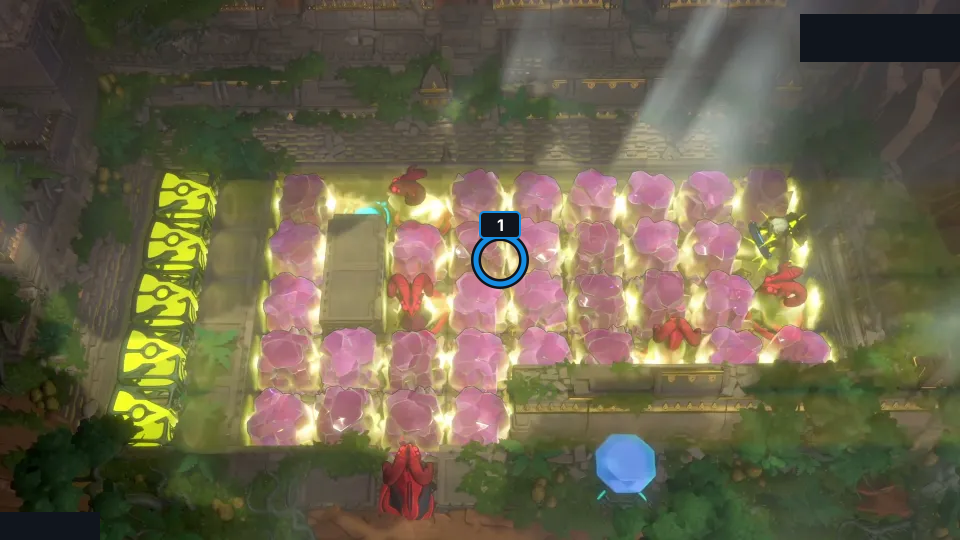
Open the wall without crossing fire.
Check: The article still matches smash_grid_4; its P15 9:55 cue is not exact PTS. Notes are source-reported; no route replay or finish is claimed.
Open full-size image in a new tabPuzzle 7 — red_handed (set position 27)
Section titled “Puzzle 7 — red_handed (set position 27)”Article puzzle 7; narration cue P16 0:22. Internal set position: 27.
Selected layout only; colored rings mark landmarks, not input steps.
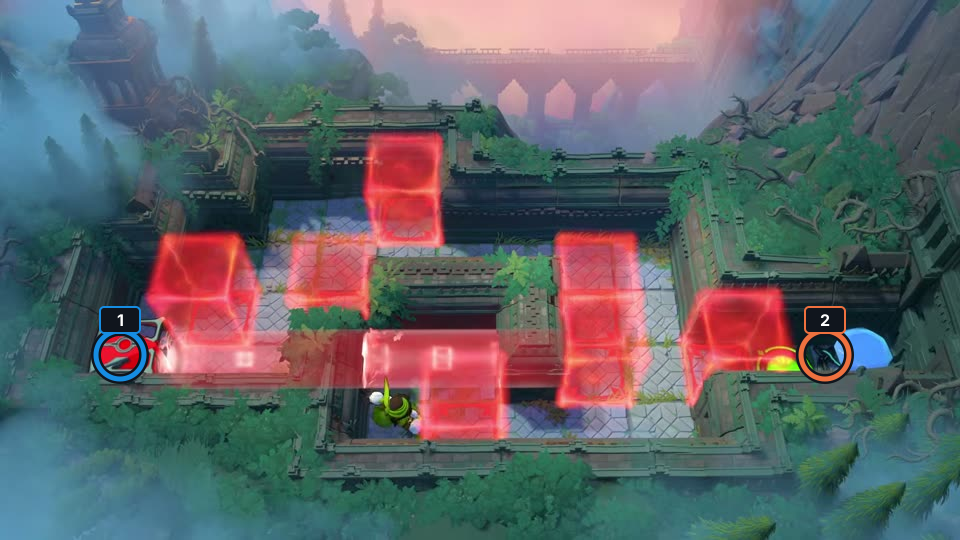
Keep the red emitter left.
Check: The article still matches red_handed; its P16 0:22 cue is not exact PTS. Notes are source-reported; no route replay or finish is claimed.
Open full-size image in a new tabPuzzle 8 — lock_picky (set position 28)
Section titled “Puzzle 8 — lock_picky (set position 28)”Article puzzle 8; narration cue P16 2:16. Internal set position: 28.
Selected layout only; colored rings mark landmarks, not input steps.
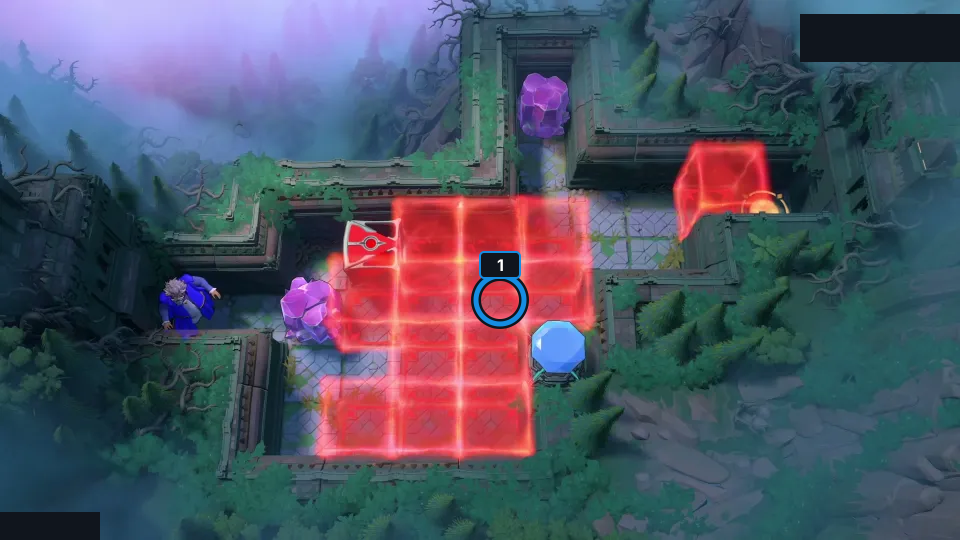
Leave one red block.
Check: The article still matches lock_picky; its P16 2:16 cue is not exact PTS. Notes are source-reported; no route replay or finish is claimed.
Open full-size image in a new tabPuzzle 9 — through_intro (set position 2)
Section titled “Puzzle 9 — through_intro (set position 2)”Article puzzle 9; narration cue P16 5:17. Internal set position: 2.
Selected layout only; colored rings mark landmarks, not input steps.
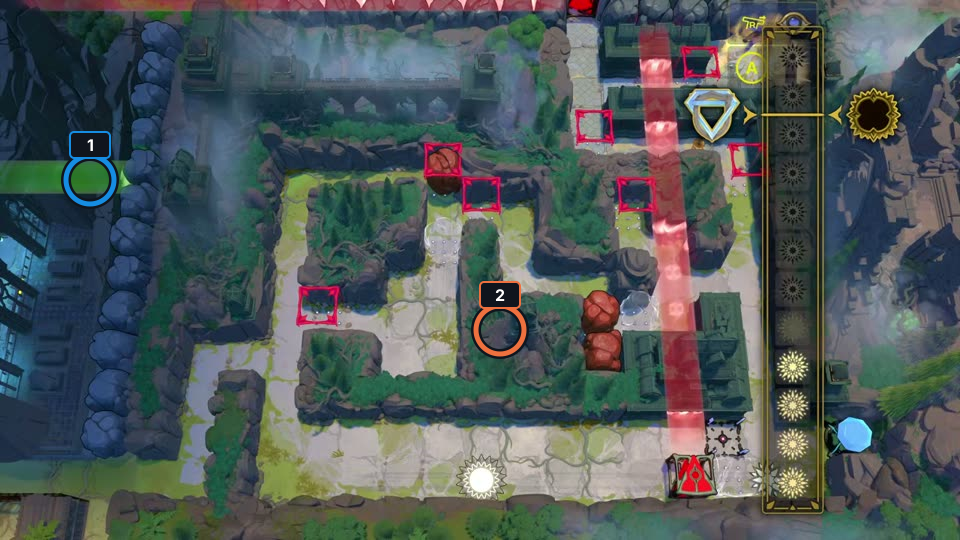
Walk through green-lit walls.
Check: The article still matches through_intro; its P16 5:17 cue is not exact PTS. Notes are source-reported; no route replay or finish is claimed.
Open full-size image in a new tabPuzzle 10 — through_push (set position 3)
Section titled “Puzzle 10 — through_push (set position 3)”Article puzzle 10; narration cue P16 5:57. Internal set position: 3.
Selected layout only; colored rings mark landmarks, not input steps.
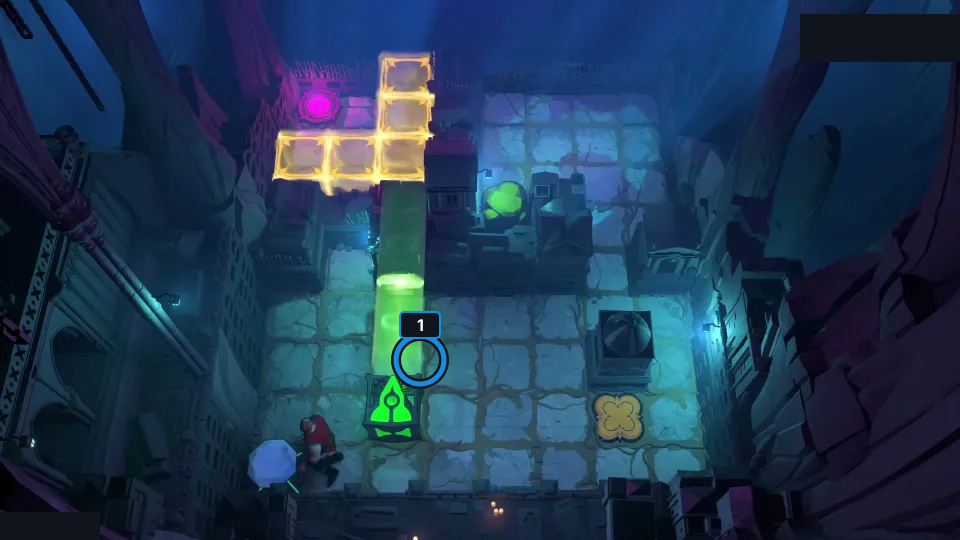
Hold the button; use green wall-walking.
Check: The article still matches through_push; its P16 5:57 cue is not exact PTS. Notes are source-reported; no route replay or finish is claimed.
Open full-size image in a new tabPuzzle 11 — binary_maze (set position 4)
Section titled “Puzzle 11 — binary_maze (set position 4)”Article puzzle 11; narration cue P16 6:41. Internal set position: 4.
Selected layout only; colored rings mark landmarks, not input steps.
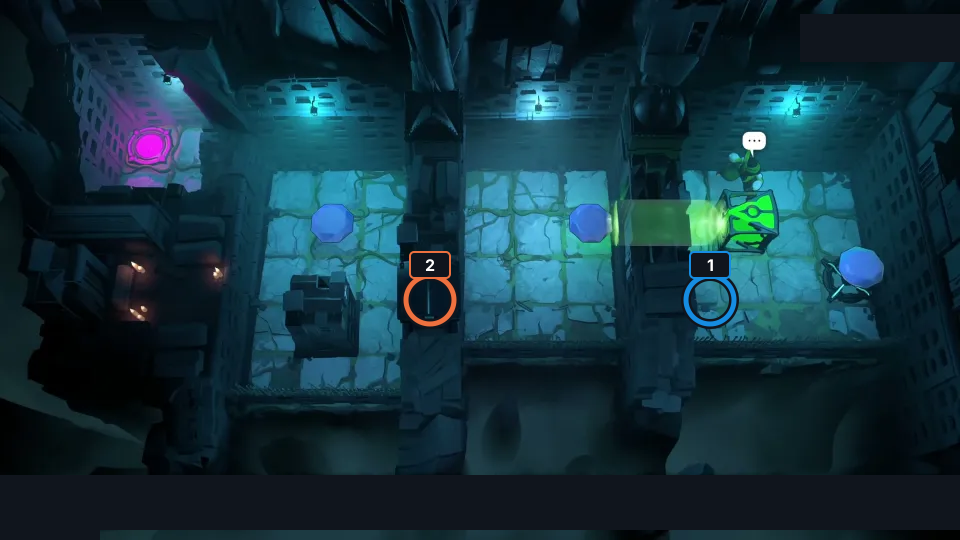
Shift gems through green-lit walls.
Check: The article still matches binary_maze; its P16 6:41 cue is not exact PTS. Notes are source-reported; no route replay or finish is claimed.
Open full-size image in a new tabPuzzle 12 — thief_through (set position 5)
Section titled “Puzzle 12 — thief_through (set position 5)”Article puzzle 12; narration cue P16 8:30. Internal set position: 5.
Selected layout only; colored rings mark landmarks, not input steps.
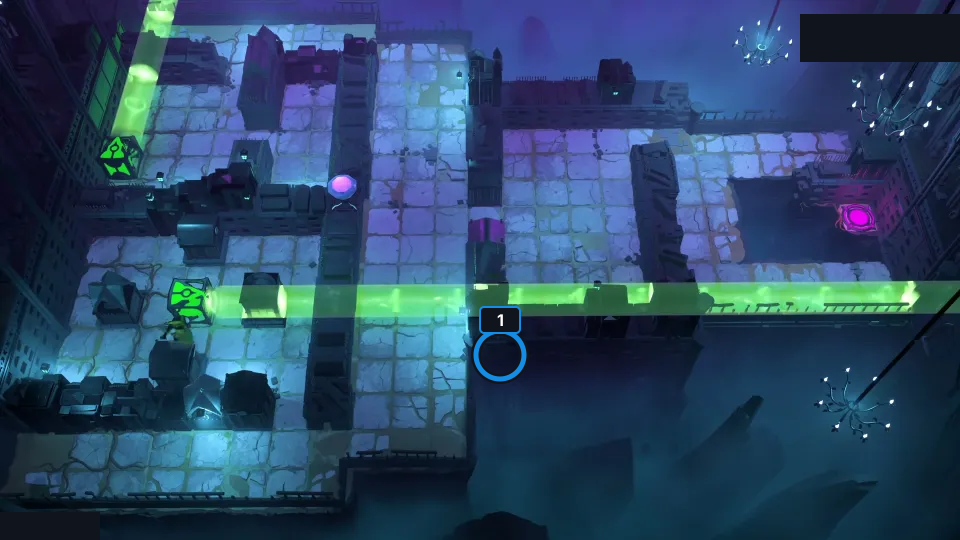
Pull the emitter through walls.
Check: The article still matches thief_through; its P16 8:30 cue is not exact PTS. Notes are source-reported; no route replay or finish is claimed.
Open full-size image in a new tabPuzzle 13 — wall_sneak (set position 6)
Section titled “Puzzle 13 — wall_sneak (set position 6)”Article puzzle 13; narration cue P16 10:25. Internal set position: 6.
Selected layout only; colored rings mark landmarks, not input steps.
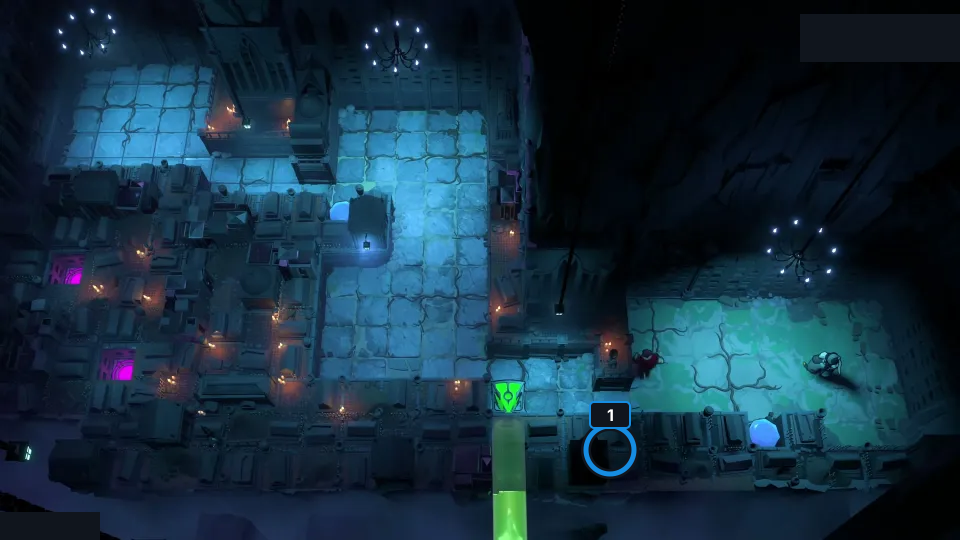
Cross wall sections in green light.
Check: The article still matches wall_sneak; its P16 10:25 cue is not exact PTS. Notes are source-reported; no route replay or finish is claimed.
Open full-size image in a new tabPuzzle 14 — corner_loop (set position 8)
Section titled “Puzzle 14 — corner_loop (set position 8)”Article puzzle 14; narration cue P16 12:33. Internal set position: 8.
Selected layout only; colored rings mark landmarks, not input steps.
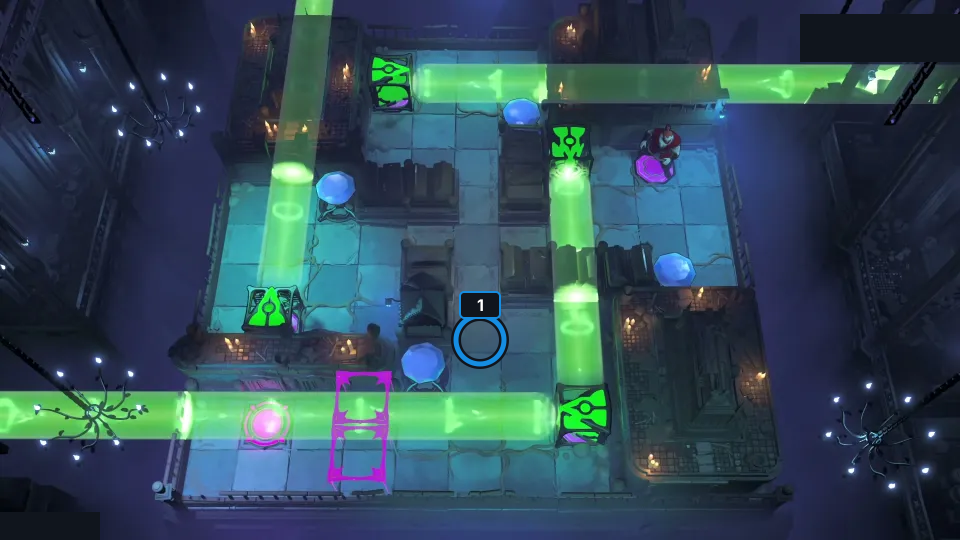
Loop around to realign beams.
Check: The article still matches corner_loop; its P16 12:33 cue is not exact PTS. Notes are source-reported; no route replay or finish is claimed.
Open full-size image in a new tabPuzzle 15 — double_team (set position 10)
Section titled “Puzzle 15 — double_team (set position 10)”Article puzzle 15; narration cue P16 20:08. Internal set position: 10.
Selected layout only; colored rings mark landmarks, not input steps.
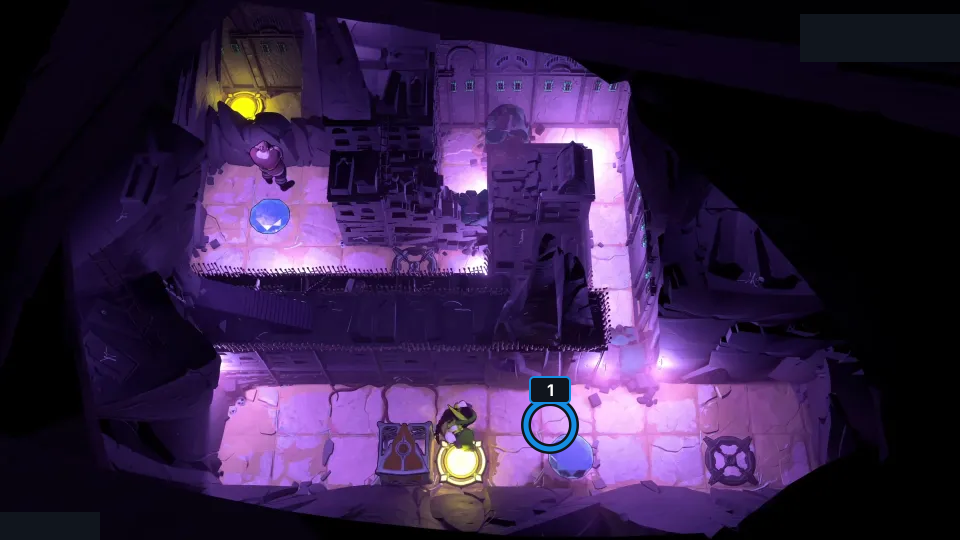
Warrior first; Thief follows.
Check: The article still matches double_team; its P16 20:08 cue is not exact PTS. Notes are source-reported; no route replay or finish is claimed.
Open full-size image in a new tabPuzzle 16 — orange_beam_deal (set position 15)
Section titled “Puzzle 16 — orange_beam_deal (set position 15)”Article puzzle 16; narration cue P16 21:43. Internal set position: 15.
Selected layout only; colored rings mark landmarks, not input steps.
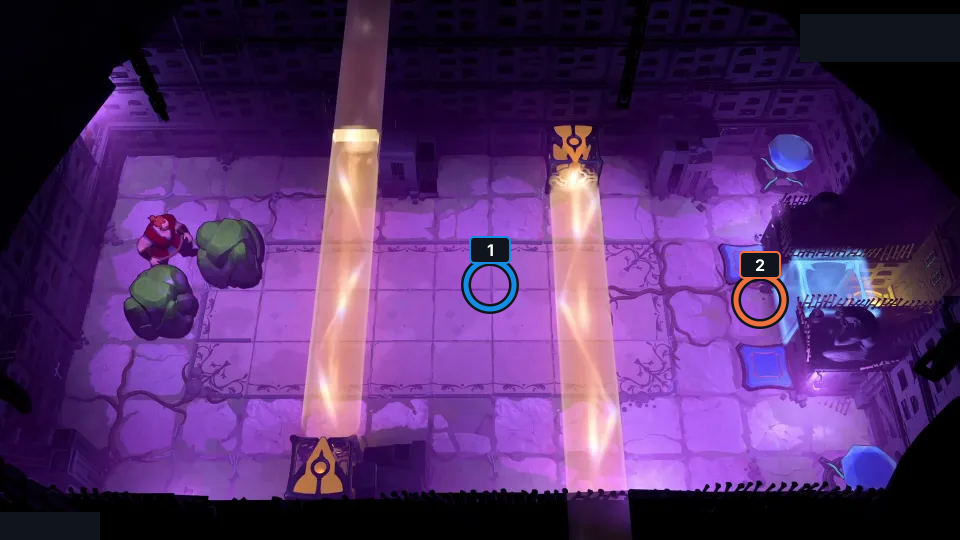
Adjust orange-beam spacing.
Check: The article still matches orange_beam_deal; its P16 21:43 cue is not exact PTS. Notes are source-reported; no route replay or finish is claimed.
Open full-size image in a new tabPuzzle 17 — pushing_near_orange (set position 11)
Section titled “Puzzle 17 — pushing_near_orange (set position 11)”Article puzzle 17; narration cue P16 23:25. Internal set position: 11.
Selected layout only; colored rings mark landmarks, not input steps.
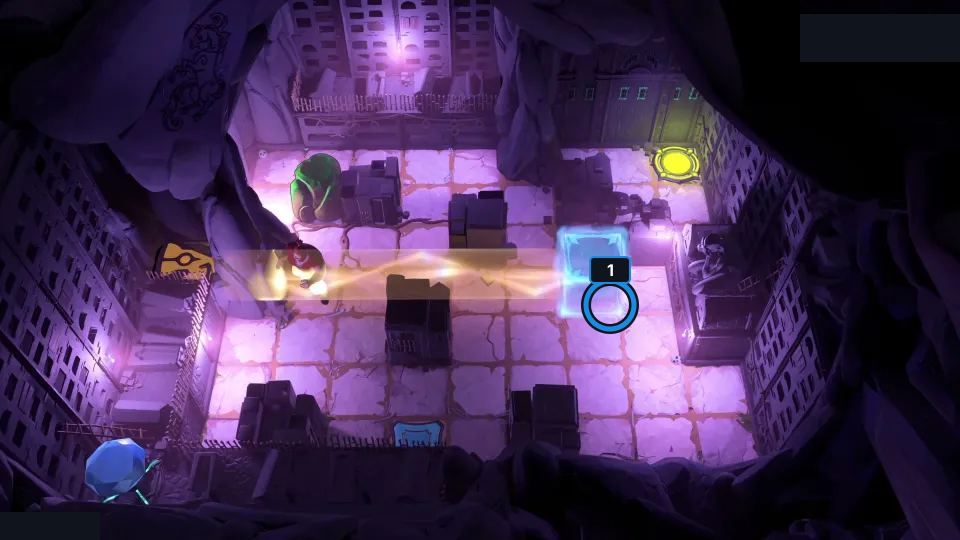
Detour to change jump parity.
Check: The article still matches pushing_near_orange; its P16 23:25 cue is not exact PTS. Notes are source-reported; no route replay or finish is claimed.
Open full-size image in a new tabPuzzle 18 — pulling_near_orange_v2 (set position 12)
Section titled “Puzzle 18 — pulling_near_orange_v2 (set position 12)”Article puzzle 18; narration cue P16 24:18. Internal set position: 12.
Selected layout only; colored rings mark landmarks, not input steps.
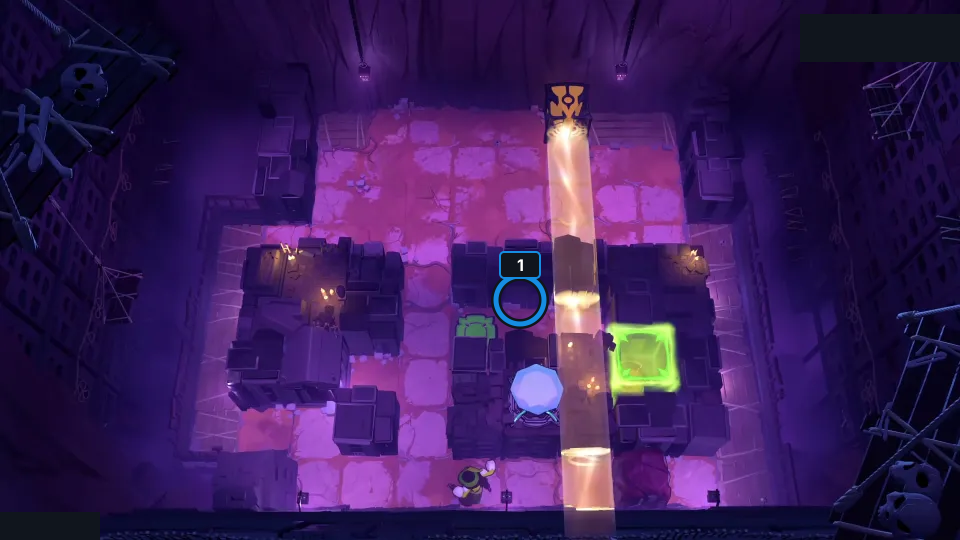
Jump in orange light to release.
Check: The article still matches pulling_near_orange_v2; its P16 24:18 cue is not exact PTS. Notes are source-reported; no route replay or finish is claimed.
Open full-size image in a new tabPuzzle 19 — jump_the_fence_v2 (set position 14)
Section titled “Puzzle 19 — jump_the_fence_v2 (set position 14)”Article puzzle 19; narration cue P16 26:13. Internal set position: 14.
Selected layout only; colored rings mark landmarks, not input steps.
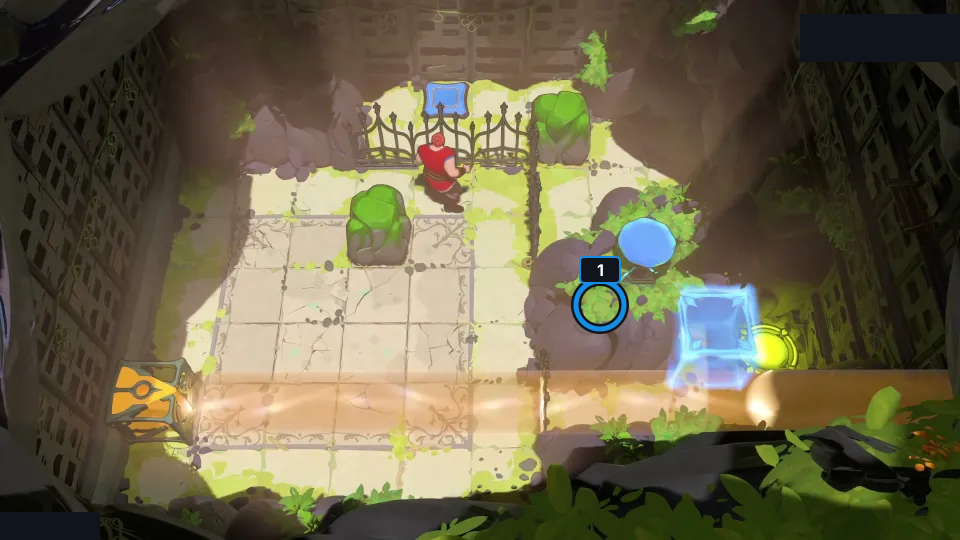
Land beyond the orange beam.
Check: The article still matches jump_the_fence_v2; its P16 26:13 cue is not exact PTS. Notes are source-reported; no route replay or finish is claimed.
Open full-size image in a new tabPuzzle 20 — pushing_orange (set position 13)
Section titled “Puzzle 20 — pushing_orange (set position 13)”Article puzzle 20; narration cue P16 27:22. Internal set position: 13.
Selected layout only; colored rings mark landmarks, not input steps.
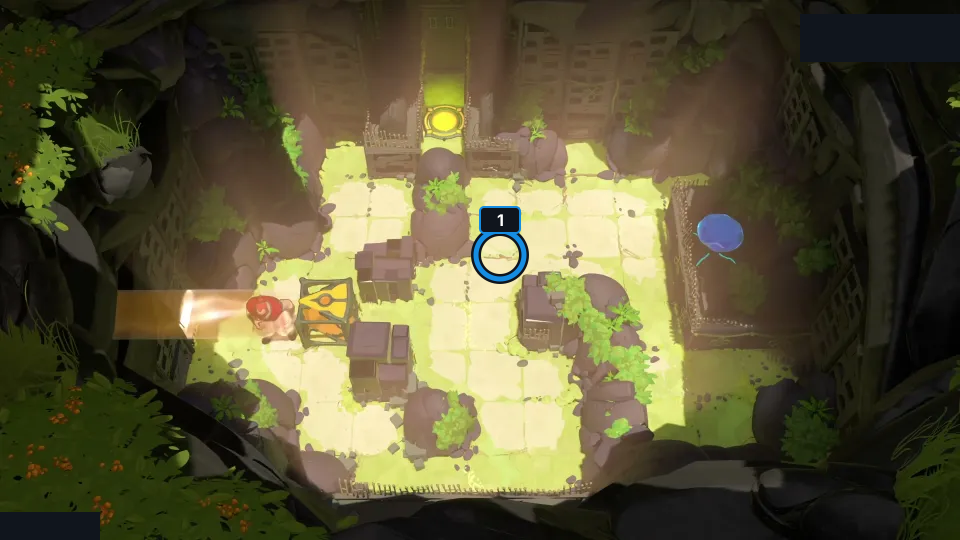
Loop to reposition the emitter.
Check: The article still matches pushing_orange; its P16 27:22 cue is not exact PTS. Notes are source-reported; no route replay or finish is claimed.
Open full-size image in a new tabPuzzle 21 — beam_shatter (set position 16)
Section titled “Puzzle 21 — beam_shatter (set position 16)”Article puzzle 21; narration cue P16 28:40. Internal set position: 16.
Selected layout only; colored rings mark landmarks, not input steps.
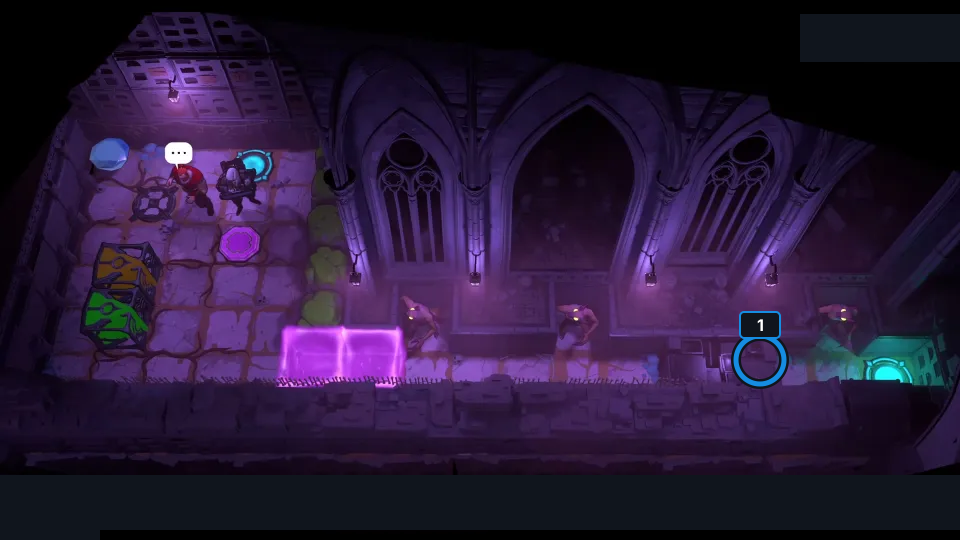
Close a gate on the emitter.
Check: The article still matches beam_shatter; its P16 28:40 cue is not exact PTS. Notes are source-reported; no route replay or finish is claimed.
Open full-size image in a new tabPuzzle 22 — simple_trap (set position 17)
Section titled “Puzzle 22 — simple_trap (set position 17)”Article puzzle 22; narration cue P16 30:10. Internal set position: 17.
Selected layout only; colored rings mark landmarks, not input steps.
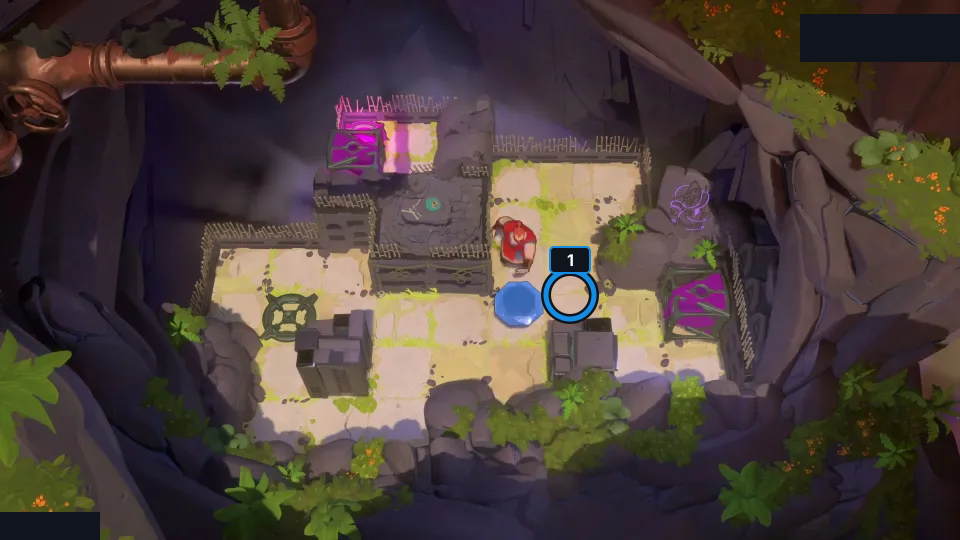
Place the gem; do not step right.
Check: The article still matches simple_trap; its P16 30:10 cue is not exact PTS. Notes are source-reported; no route replay or finish is claimed.
Open full-size image in a new tabPuzzle 23 — untrap (set position 18)
Section titled “Puzzle 23 — untrap (set position 18)”Article puzzle 23; narration cue P16 30:42. Internal set position: 18.
Selected layout only; colored rings mark landmarks, not input steps.
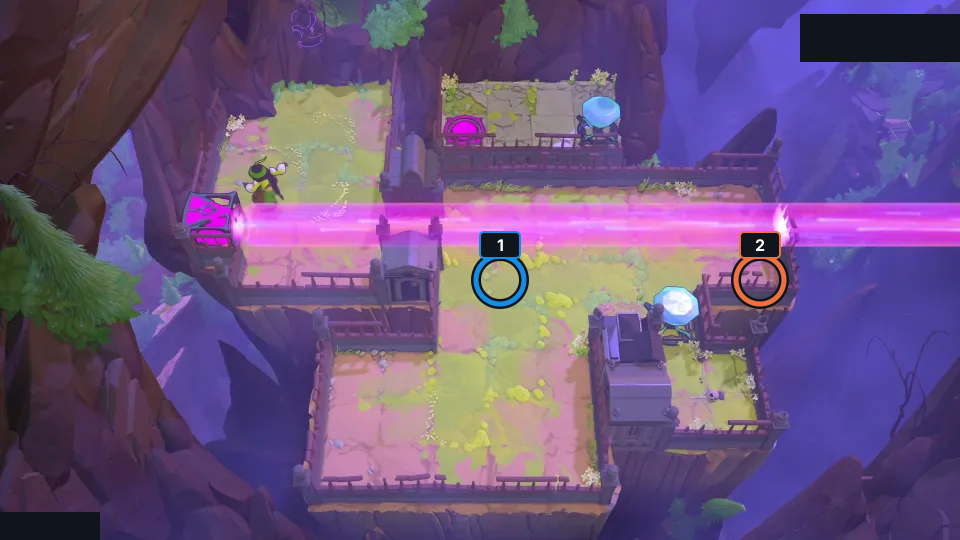
Move the gem before steering purple.
Check: The article still matches untrap; its P16 30:42 cue is not exact PTS. Notes are source-reported; no route replay or finish is claimed.
Open full-size image in a new tabPuzzle 24 — pushback (set position 19)
Section titled “Puzzle 24 — pushback (set position 19)”Article puzzle 24; narration cue P16 31:29. Internal set position: 19.
Selected layout only; colored rings mark landmarks, not input steps.
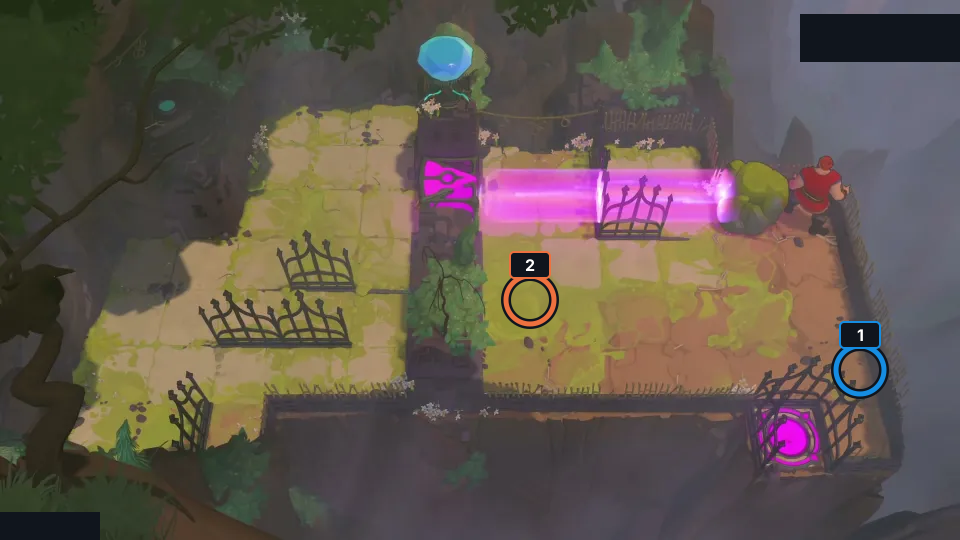
Use a stone to block purple.
Check: The article still matches pushback; its P16 31:29 cue is not exact PTS. Notes are source-reported; no route replay or finish is claimed.
Open full-size image in a new tabPuzzle 25 — endpoint_team (set position 20)
Section titled “Puzzle 25 — endpoint_team (set position 20)”Article puzzle 25; narration cue P16 32:32. Internal set position: 20.
Selected layout only; colored rings mark landmarks, not input steps.
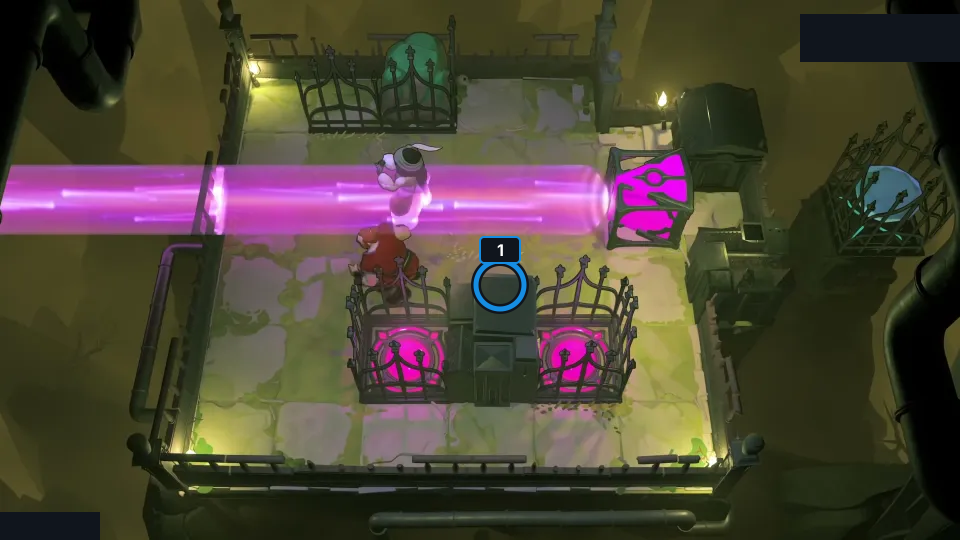
Free the stone before splitting exits.
Check: The article still matches endpoint_team; its P16 32:32 cue is not exact PTS. Notes are source-reported; no route replay or finish is claimed.
Open full-size image in a new tabPuzzle 26 — purple_haze (set position 21)
Section titled “Puzzle 26 — purple_haze (set position 21)”Article puzzle 26; narration cue P16 34:32. Internal set position: 21.
Selected layout only; colored rings mark landmarks, not input steps.
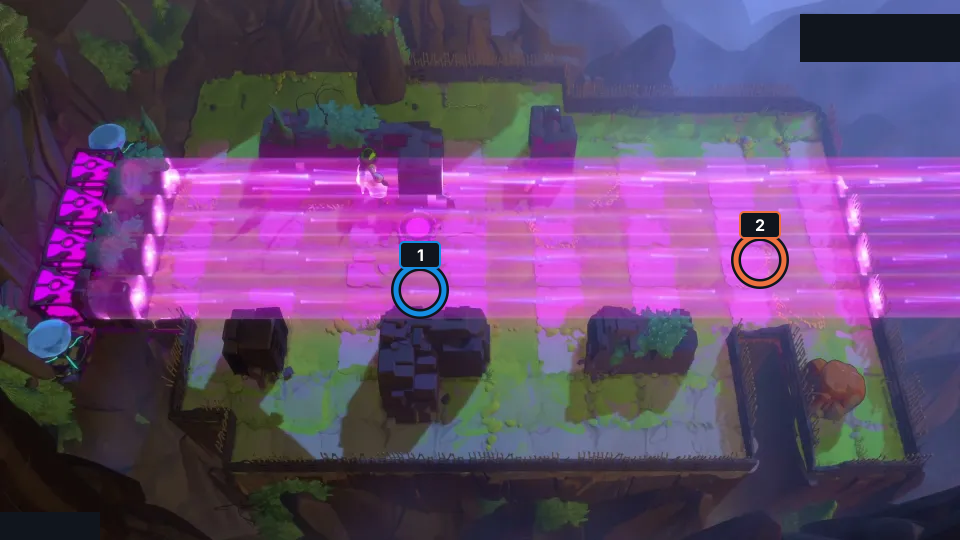
Block a lower beam; take the gap.
Check: The article still matches purple_haze; its P16 34:32 cue is not exact PTS. Notes are source-reported; no route replay or finish is claimed.
Open full-size image in a new tabPuzzle 27 — endpoint_gates (set position 23)
Section titled “Puzzle 27 — endpoint_gates (set position 23)”Article puzzle 27; narration cue P16 35:58. Internal set position: 23.
Selected layout only; colored rings mark landmarks, not input steps.
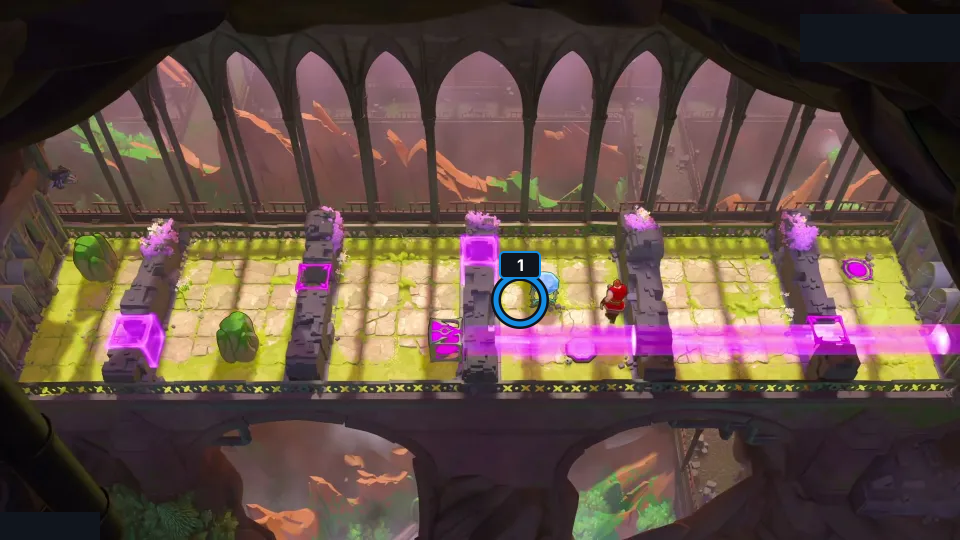
Use a gate as the purple stopper.
Check: The article still matches endpoint_gates; its P16 35:58 cue is not exact PTS. Notes are source-reported; no route replay or finish is claimed.
Open full-size image in a new tabPuzzle 28 — purple_perpendicular (set position 22)
Section titled “Puzzle 28 — purple_perpendicular (set position 22)”Article puzzle 28; narration cue P16 40:44. Internal set position: 22.
Selected layout only; colored rings mark landmarks, not input steps.
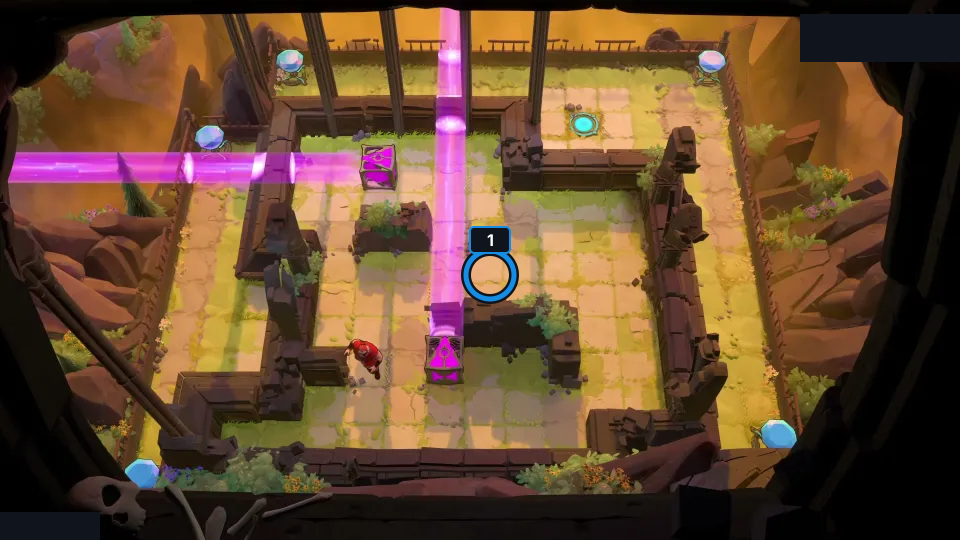
Crossed beams move both emitters.
Check: The article still matches purple_perpendicular; its P16 40:44 cue is not exact PTS. Notes are source-reported; no route replay or finish is claimed.
Open full-size image in a new tabPuzzle 29 — pull_together (set position 25)
Section titled “Puzzle 29 — pull_together (set position 25)”Article puzzle 29; narration cue P16 42:18. Internal set position: 25.
Selected layout only; colored rings mark landmarks, not input steps.
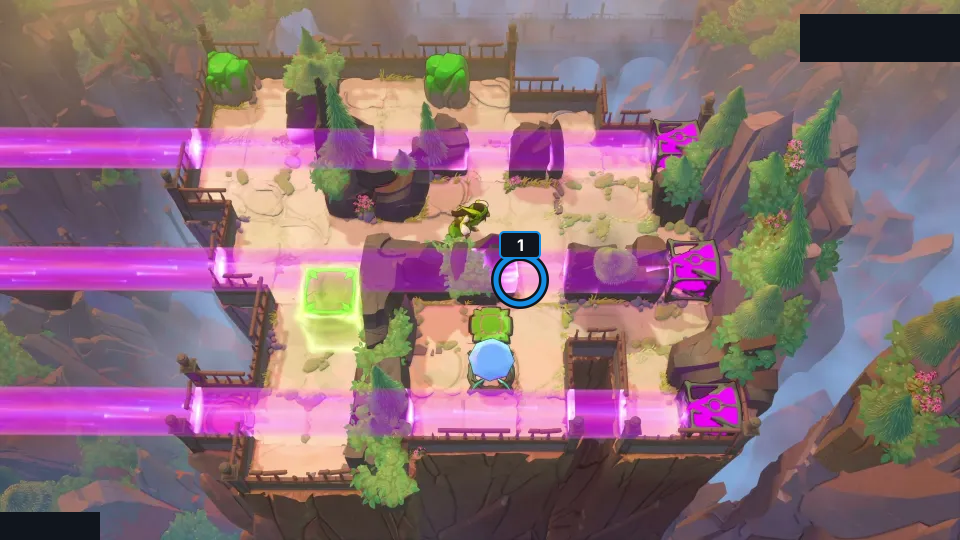
Use stones to block purple beams.
Check: The article still matches pull_together; its P16 42:18 cue is not exact PTS. Notes are source-reported; no route replay or finish is claimed.
Open full-size image in a new tabPuzzle 30 — purple_push_pal (set position 26)
Section titled “Puzzle 30 — purple_push_pal (set position 26)”Article puzzle 30; narration cue P16 45:48. Internal set position: 26.
Selected layout only; colored rings mark landmarks, not input steps.
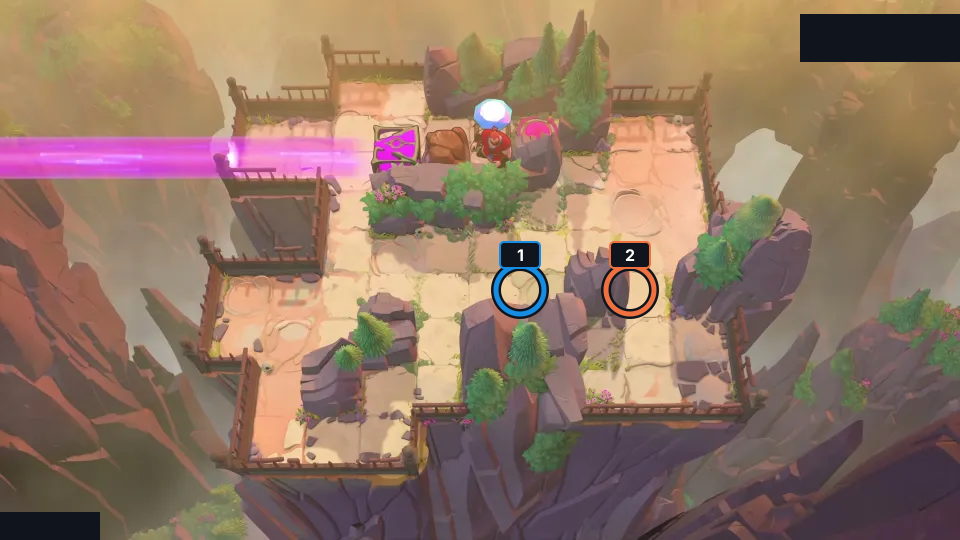
Move the emitter early.
Check: The article still matches purple_push_pal; its P16 45:48 cue is not exact PTS. Notes are source-reported; no route replay or finish is claimed.
Open full-size image in a new tabPuzzle 31 — slide_rows (set position 24)
Section titled “Puzzle 31 — slide_rows (set position 24)”Article puzzle 31; narration cue P16 47:32. Internal set position: 24.
Selected layout only; colored rings mark landmarks, not input steps.
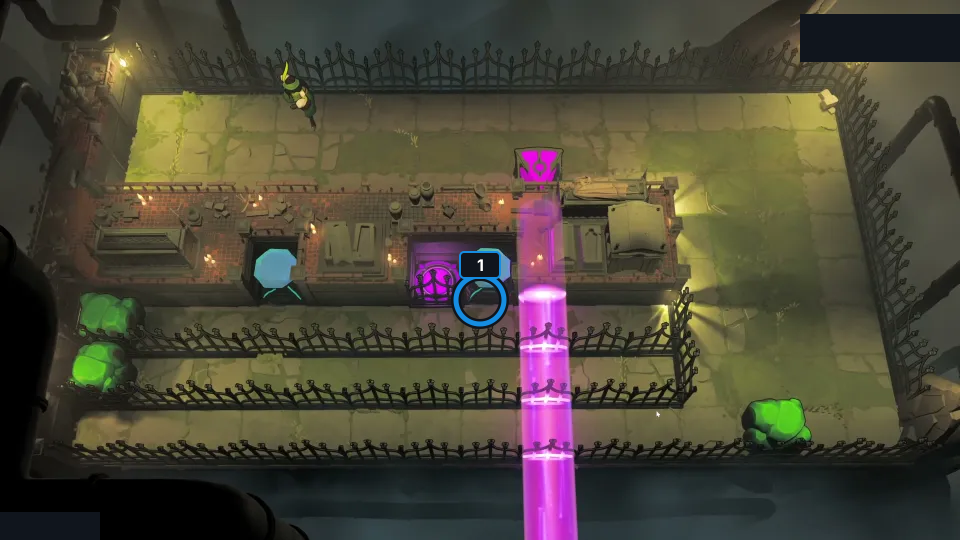
Build stone steps, then teleport.
Check: The article still matches slide_rows; its P16 47:32 cue is not exact PTS. Notes are source-reported; no route replay or finish is claimed.
Open full-size image in a new tabPuzzle 32 — bypass_gates (set position 7)
Section titled “Puzzle 32 — bypass_gates (set position 7)”Article puzzle 32; narration cue P16 14:45. Internal set position: 7.
Selected layout only; colored rings mark landmarks, not input steps.
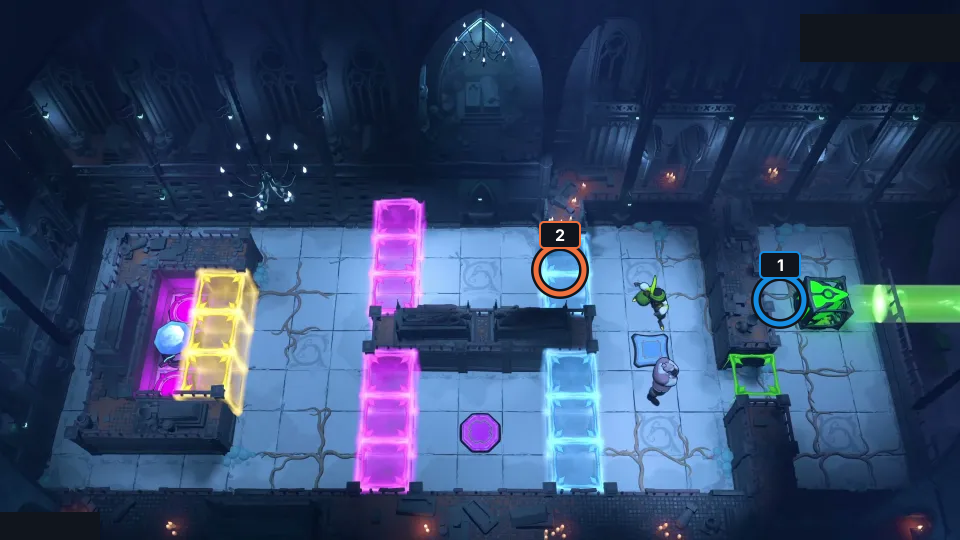
Wall-walk the green emitter.
Check: The article still matches bypass_gates; its P16 14:45 cue is not exact PTS. Notes are source-reported; no route replay or finish is claimed.
Open full-size image in a new tabPuzzle 33 — through_sokoban (set position 9)
Section titled “Puzzle 33 — through_sokoban (set position 9)”Article puzzle 33; narration cue P16 17:12. Internal set position: 9.
Selected layout only; colored rings mark landmarks, not input steps.
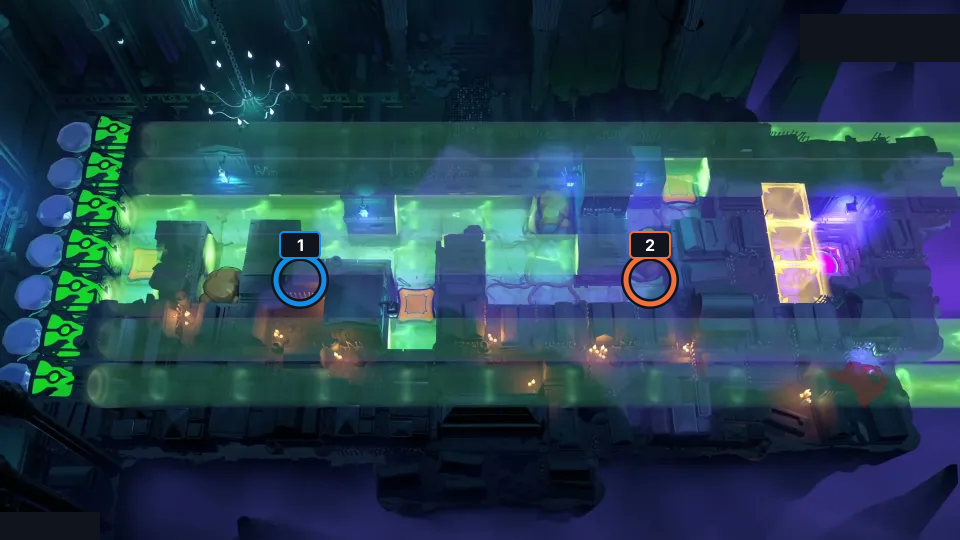
Move the left stone first.
Check: The article still matches through_sokoban; its P16 17:12 cue is not exact PTS. Notes are source-reported; no route replay or finish is claimed.
Open full-size image in a new tabPuzzle 34 — boxes_vs_crystals
Section titled “Puzzle 34 — boxes_vs_crystals”Article section: Puzzle 34; internal set position: 1.
The ring marks a visible landmark, not an action step.
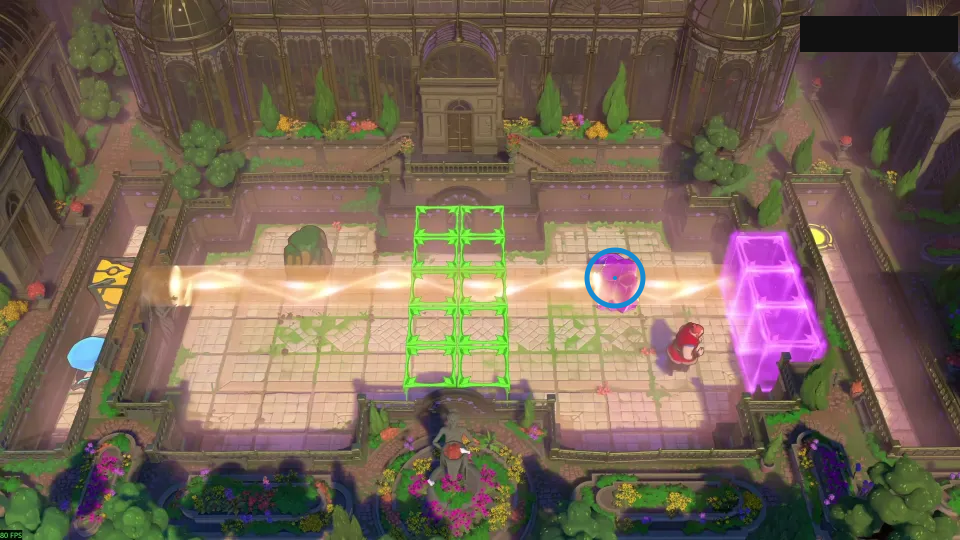
Put a stone in the orange beam before pushing the crystal.
Check: Ring marks purple crystal in the yellow beam.
Open full-size image in a new tabPuzzle 35 — pushing_crystal_near_orange_v2
Section titled “Puzzle 35 — pushing_crystal_near_orange_v2”Article section: Puzzle 35; internal set position: 2.
The ring marks a visible landmark, not an action step.
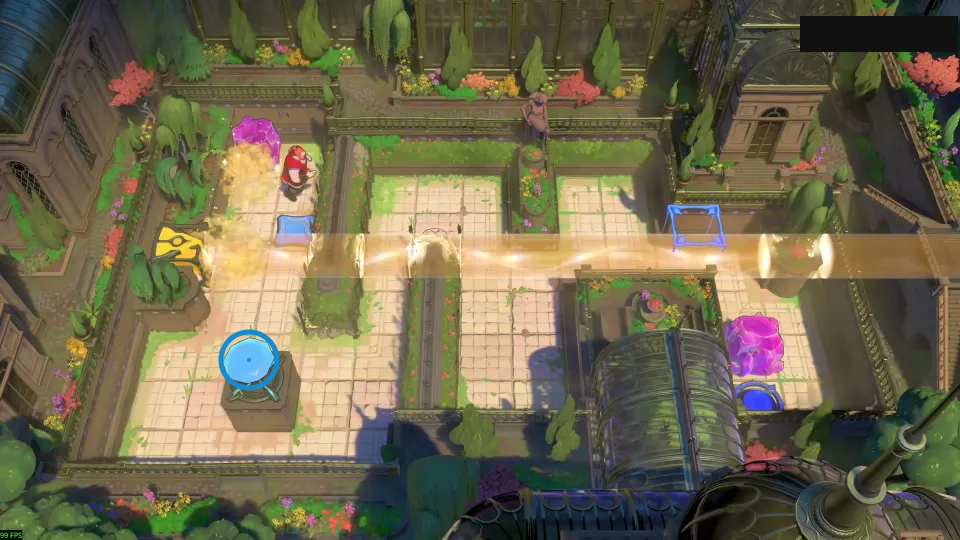
Use orange jumps, then stop before the wall.
Check: Ring marks blue gem on the lower-left plinth.
Open full-size image in a new tabPuzzle 36 — safety_gloves
Section titled “Puzzle 36 — safety_gloves”Article section: Puzzle 36; internal set position: 3.
The ring marks a visible landmark, not an action step.
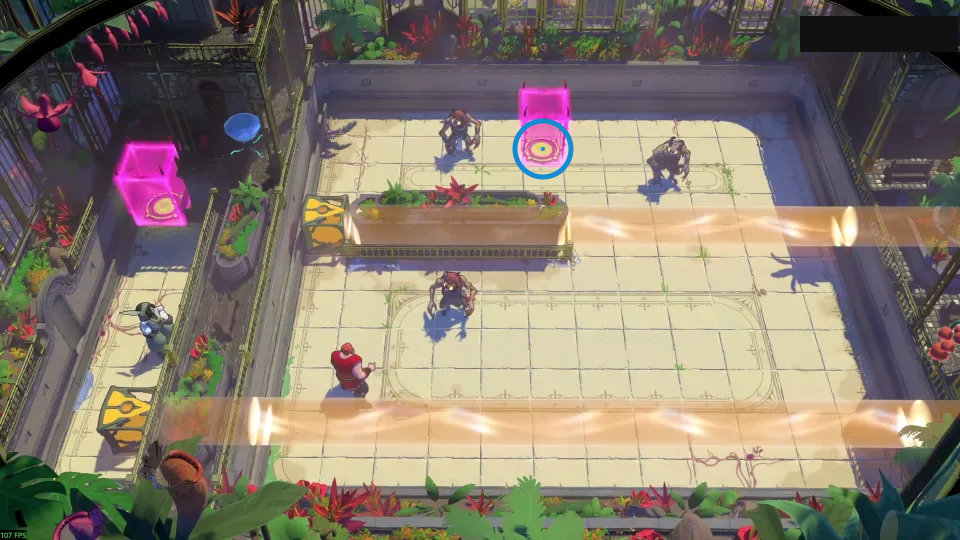
Use parity to line up all three goblins.
Check: Ring marks yellow circular pad inside the upper pink block.
Open full-size image in a new tabPuzzle 37 — accidentally_unlock_v2
Section titled “Puzzle 37 — accidentally_unlock_v2”Article section: Puzzle 37; internal set position: 7.
The ring marks a visible landmark, not an action step.
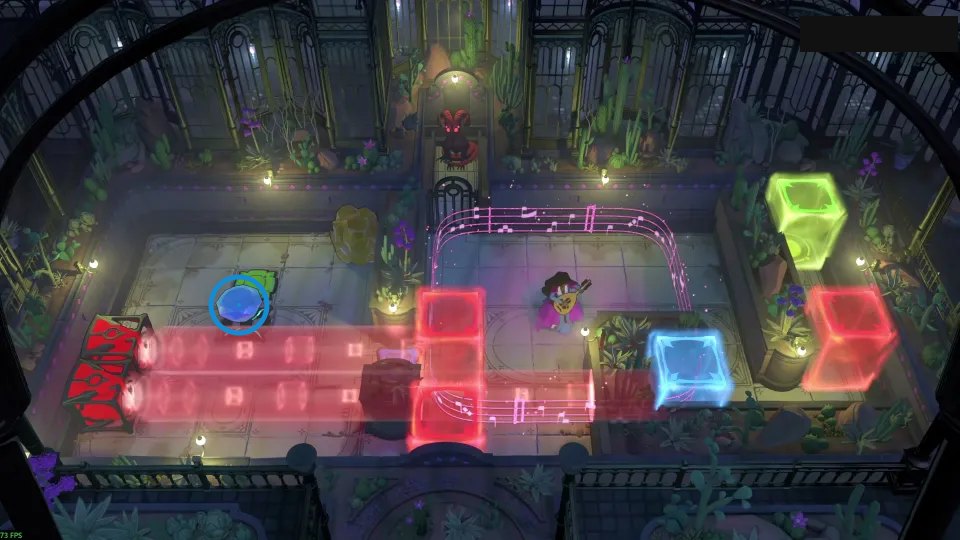
Keep the crystal out of the middle red beam.
Check: Ring marks blue gem on the left platform.
Open full-size image in a new tabPuzzle 38 — through_maze_v2
Section titled “Puzzle 38 — through_maze_v2”Article section: Puzzle 38; internal set position: 5.
The ring marks a visible landmark, not an action step.
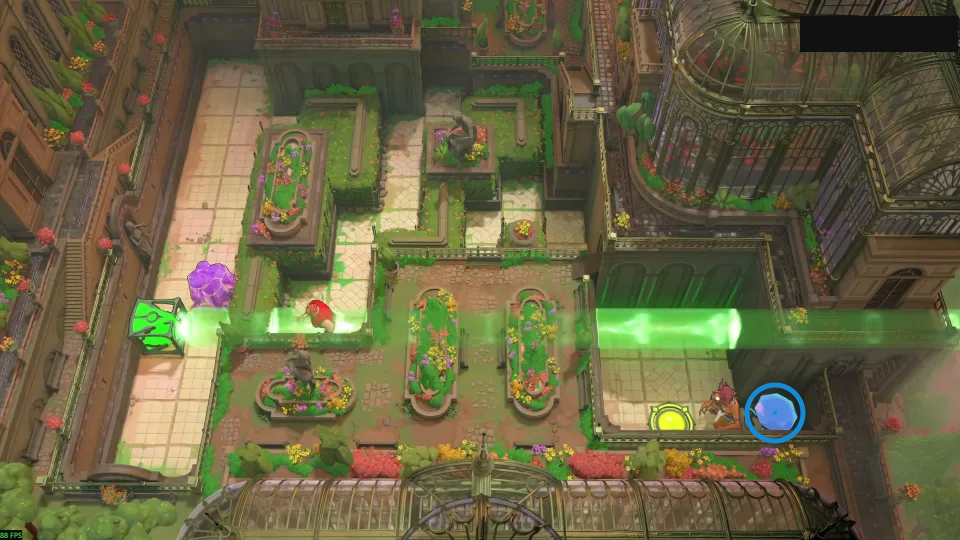
Use green light to move the goblin through walls.
Check: Ring marks blue gem on the lower-right walkway.
Open full-size image in a new tabPuzzle 39 — middle_smash
Section titled “Puzzle 39 — middle_smash”Article section: Puzzle 39; internal set position: 6.
The ring marks a visible landmark, not an action step.
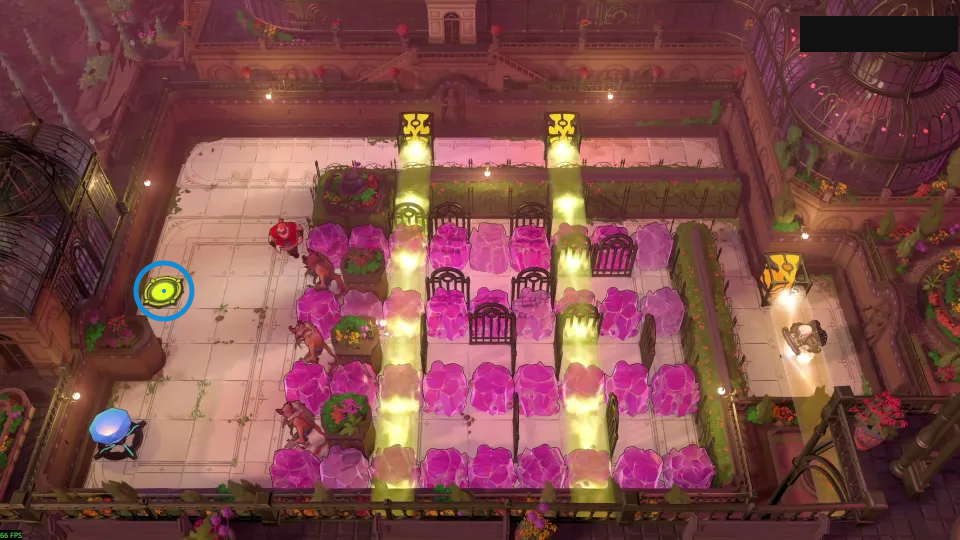
Use yellow beams to clear the crystal path.
Check: Ring marks green circular pad on the left floor.
Open full-size image in a new tabPuzzle 40 — matching_purple (set position 52)
Section titled “Puzzle 40 — matching_purple (set position 52)”Article puzzle 40; narration cue P17 13:59. Internal set position: 52.
Selected layout only; colored rings mark landmarks, not input steps.
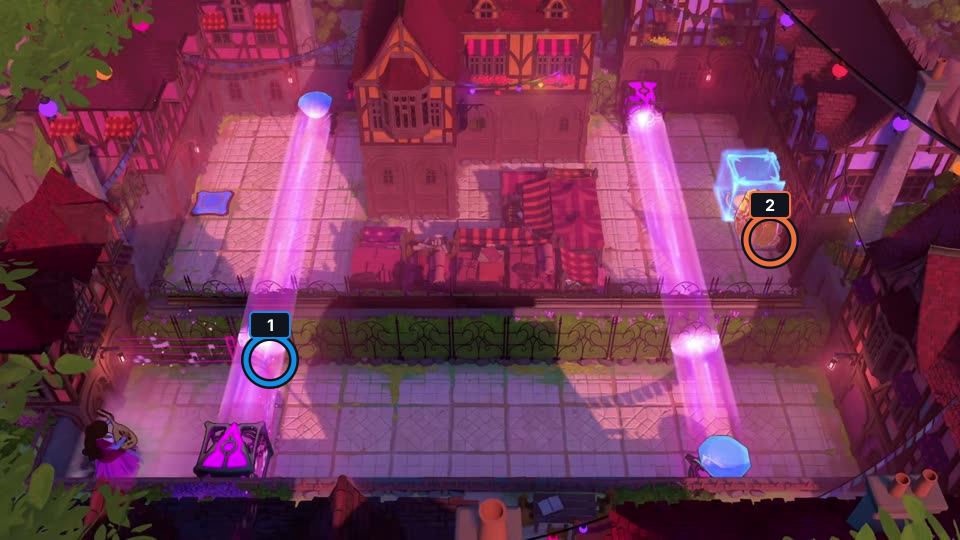
Carry the crystal along purple.
Check: The article still matches matching_purple; its P17 13:59 cue is not exact PTS. Notes are source-reported; no route replay or finish is claimed.
Open full-size image in a new tabPuzzle 41 — double_tempo (set position 50)
Section titled “Puzzle 41 — double_tempo (set position 50)”Article puzzle 41; narration cue P17 16:04. Internal set position: 50.
Selected layout only; colored rings mark landmarks, not input steps.
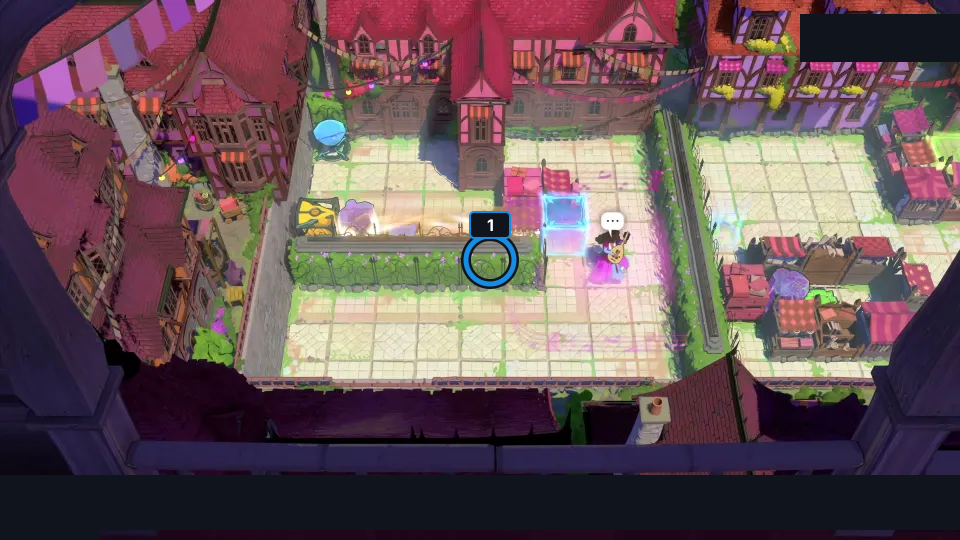
Orange jumps release the Bard’s hold.
Check: The article still matches double_tempo; its P17 16:04 cue is not exact PTS. Notes are source-reported; no route replay or finish is claimed.
Open full-size image in a new tabPuzzle 42 — button_playground (set position 51)
Section titled “Puzzle 42 — button_playground (set position 51)”Article puzzle 42; narration cue P17 17:17. Internal set position: 51.
Selected layout only; colored rings mark landmarks, not input steps.
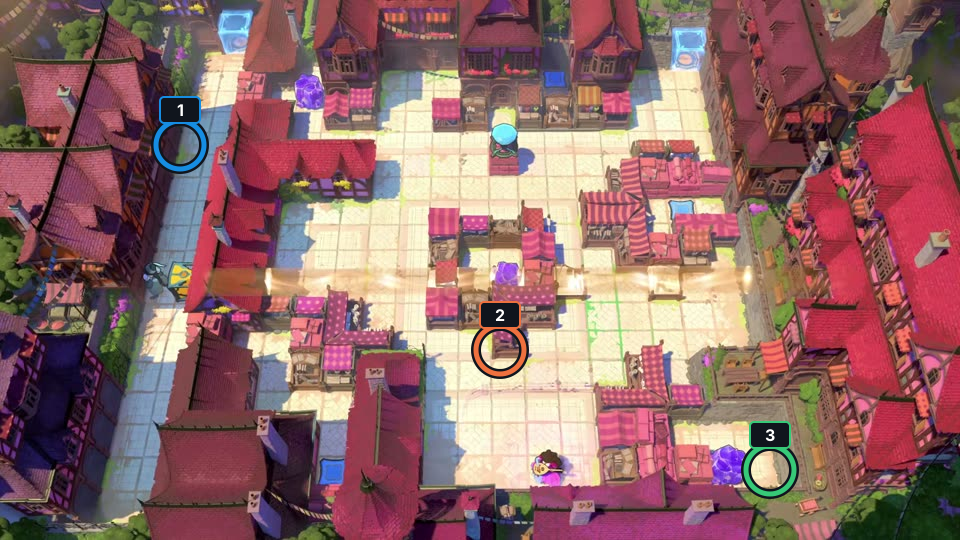
Carry three crystals to their goals.
Check: The article still matches button_playground; its P17 17:17 cue is not exact PTS. Notes are source-reported; no route replay or finish is claimed.
Open full-size image in a new tabPuzzle 43 — endpoint_weapon (set position 54)
Section titled “Puzzle 43 — endpoint_weapon (set position 54)”Article puzzle 43; narration cue P17 23:24. Internal set position: 54.
Selected layout only; colored rings mark landmarks, not input steps.
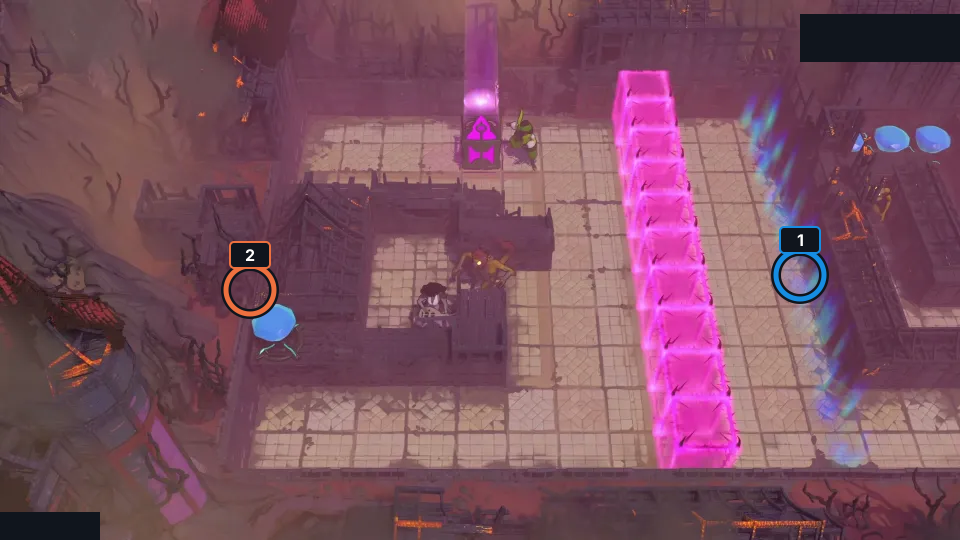
Send goblins off purple-beam ends.
Check: The article still matches endpoint_weapon; its P17 23:24 cue is not exact PTS. Notes are source-reported; no route replay or finish is claimed.
Open full-size image in a new tabPuzzle 44 — immobilize (set position 53)
Section titled “Puzzle 44 — immobilize (set position 53)”Article puzzle 44; narration cue P17 29:42. Internal set position: 53.
Selected layout only; colored rings mark landmarks, not input steps.
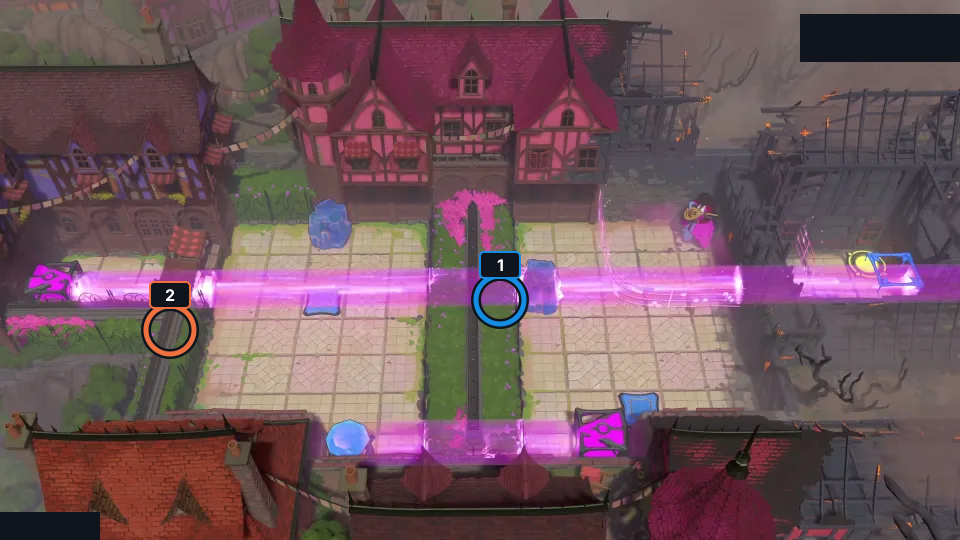
Use a crystal to block the beam.
Check: The article still matches immobilize; its P17 29:42 cue is not exact PTS. Notes are source-reported; no route replay or finish is claimed.
Open full-size image in a new tabPuzzle 45 — endpoint_object
Section titled “Puzzle 45 — endpoint_object”Article section: Puzzle 45; internal set position: 4.
The ring marks a visible landmark, not an action step.
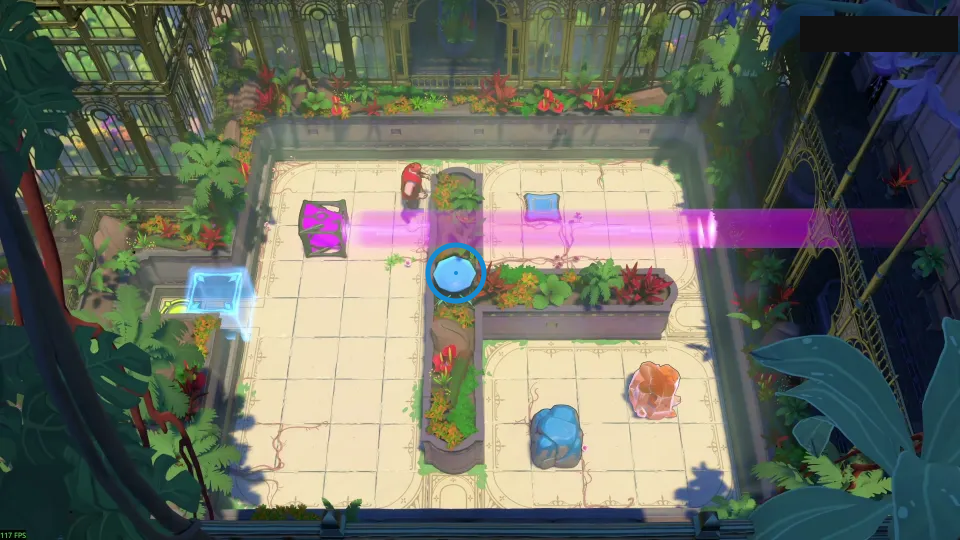
Place a stone behind the crystal as beam endpoint.
Check: Ring marks blue gem in the central planted strip.
Open full-size image in a new tabPuzzle 46 — torc_blocked_easier
Section titled “Puzzle 46 — torc_blocked_easier”Article section: Puzzle 46; internal set position: 8.
The ring marks a visible landmark, not an action step.
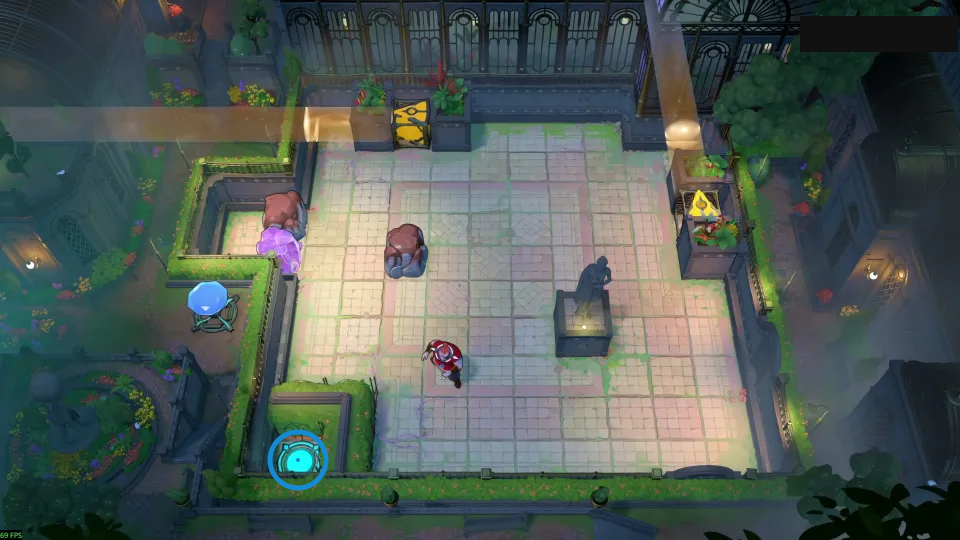
Block your next step to turn the orange beam.
Check: Ring marks cyan circular pad in the lower-left recess.
Open full-size image in a new tabPuzzle 47 — torc_blocked
Section titled “Puzzle 47 — torc_blocked”Article section: Puzzle 47; internal set position: 9.
The ring marks a visible landmark, not an action step.
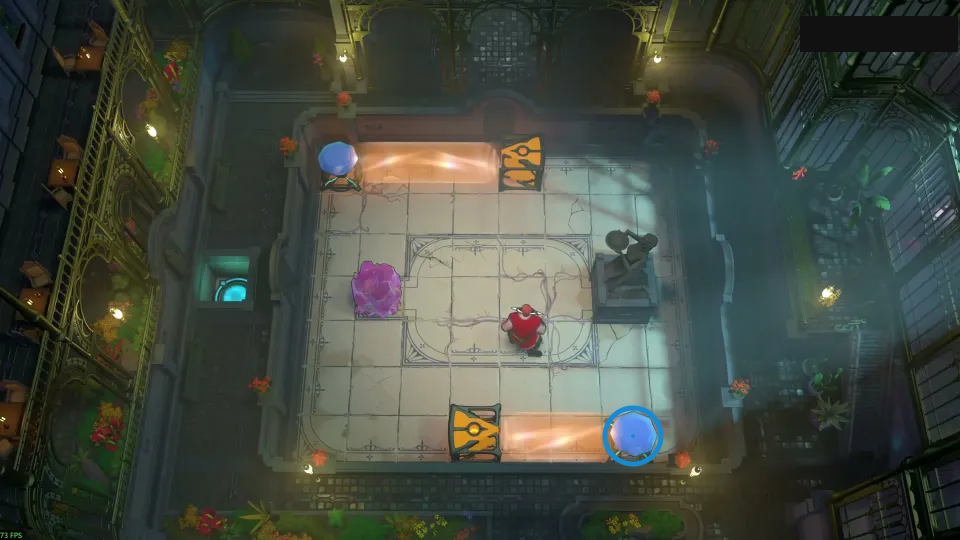
Cross orange beams to build the missing block.
Check: Ring marks blue gem at the lower-right corner.
Open full-size image in a new tabPuzzle 48 — be_aggro_alt_2 (set position 41)
Section titled “Puzzle 48 — be_aggro_alt_2 (set position 41)”Article puzzle 48; narration cue P17 50:28. Internal set position: 41.
Selected layout only; colored rings mark landmarks, not input steps.
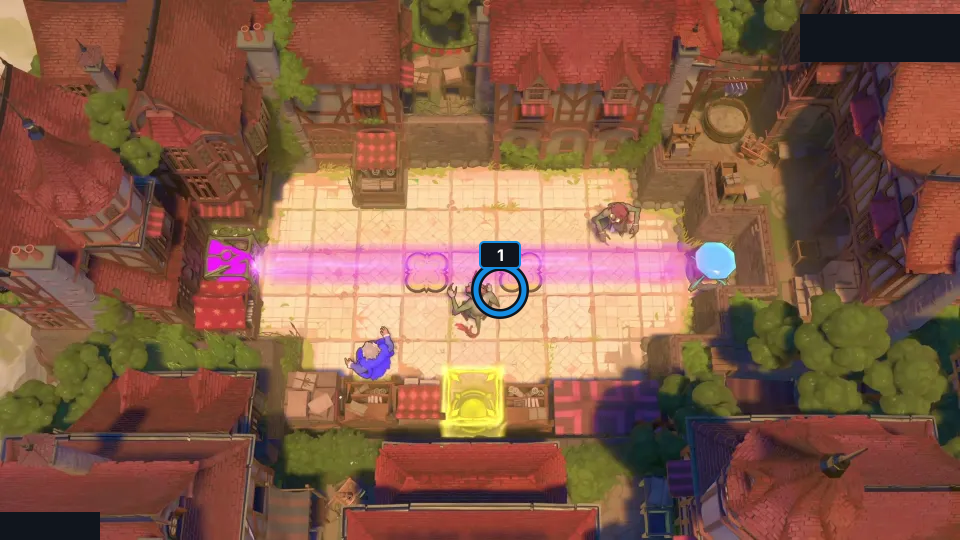
Swap goblins onto the buttons.
Check: The article still matches be_aggro_alt_2; its P17 50:28 cue is not exact PTS. Notes are source-reported; no route replay or finish is claimed.
Open full-size image in a new tabPuzzle 49 — invisible_hand (set position 55)
Section titled “Puzzle 49 — invisible_hand (set position 55)”Article puzzle 49; narration cue P17 45:50. Internal set position: 55.
Selected layout only; colored rings mark landmarks, not input steps.
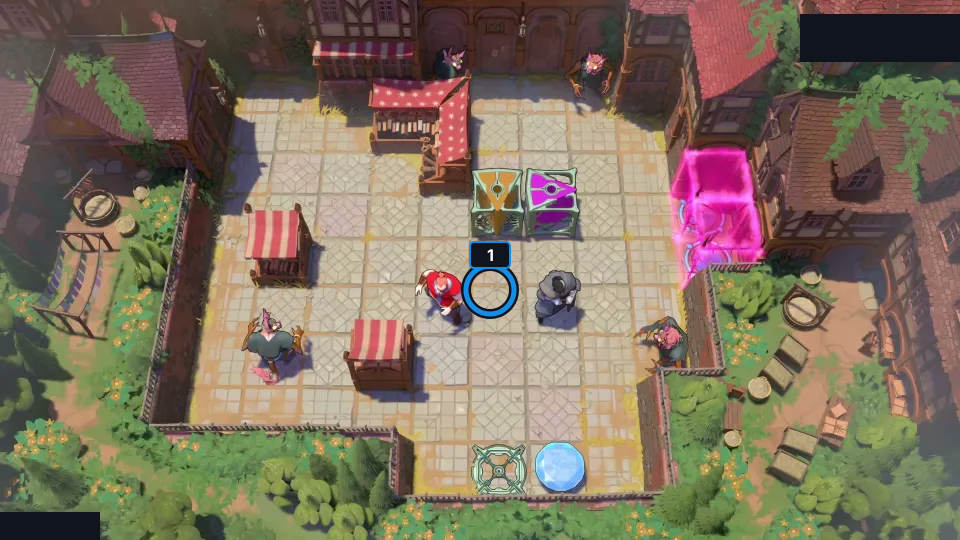
Transform goblins from afar.
Check: The article still matches invisible_hand; its P17 45:50 cue is not exact PTS. Notes are source-reported; no route replay or finish is claimed.
Open full-size image in a new tabPuzzle 50 — oneway_beam (set position 1)
Section titled “Puzzle 50 — oneway_beam (set position 1)”Article puzzle 50; narration cue P15 4:58. Internal set position: 1.
Selected layout only; colored rings mark landmarks, not input steps.
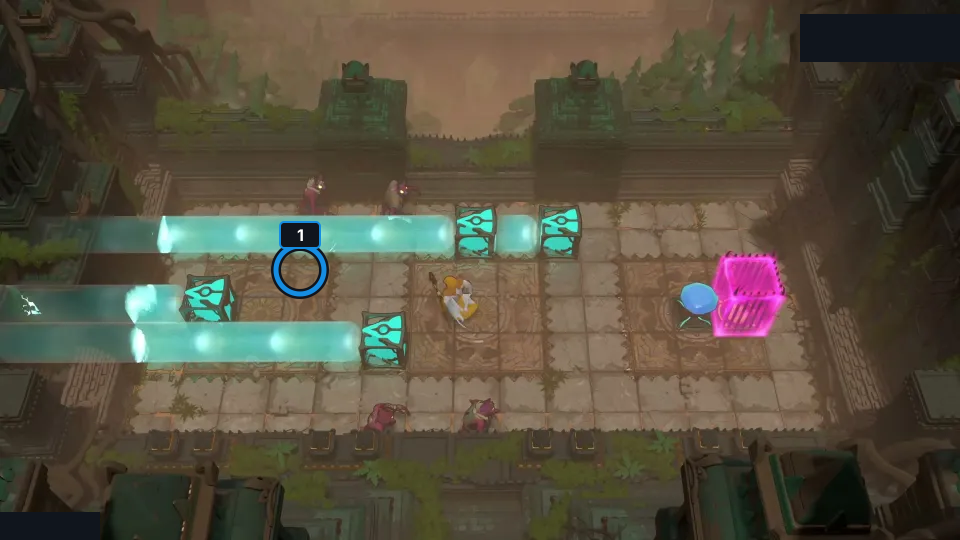
Push cyan emitters to pair goblins.
Check: The article still matches oneway_beam; its P15 4:58 cue is not exact PTS. Notes are source-reported; no route replay or finish is claimed.
Open full-size image in a new tabPuzzle 54 — druid_multismash_v3 (set position 59)
Section titled “Puzzle 54 — druid_multismash_v3 (set position 59)”Article puzzle 54; narration cue P39 5:59. Internal set position: 59.
Selected layout only; colored rings mark landmarks, not input steps.
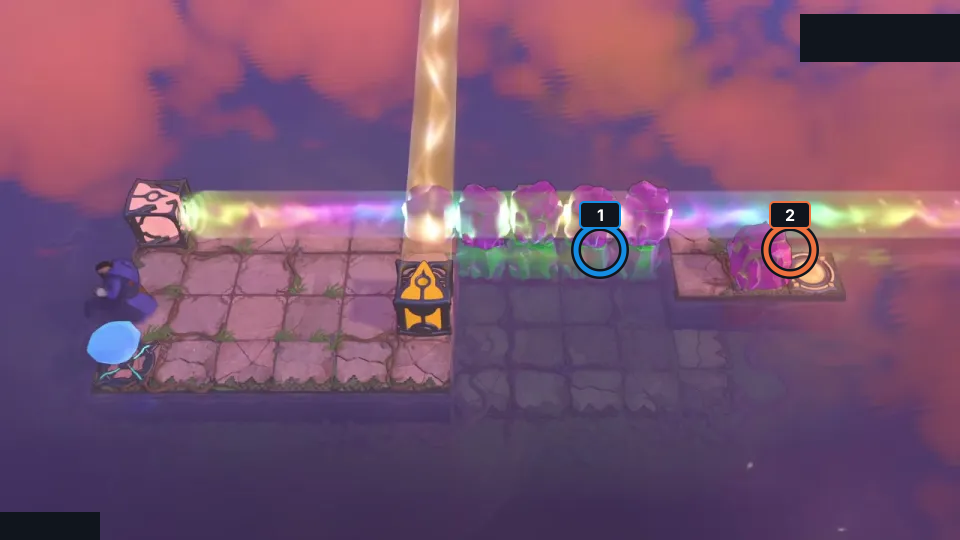
Turn crystals into plants before blasts.
Check: The article still matches druid_multismash_v3; its P39 5:59 cue is not exact PTS. Notes are source-reported; no route replay or finish is claimed.
Open full-size image in a new tabSelected room views
Section titled “Selected room views”Blue button in the purple pattern
Section titled “Blue button in the purple pattern”Compare the crystal group with the purple buttons and blue button.
The blue ring marks a visible landmark in this selected view.
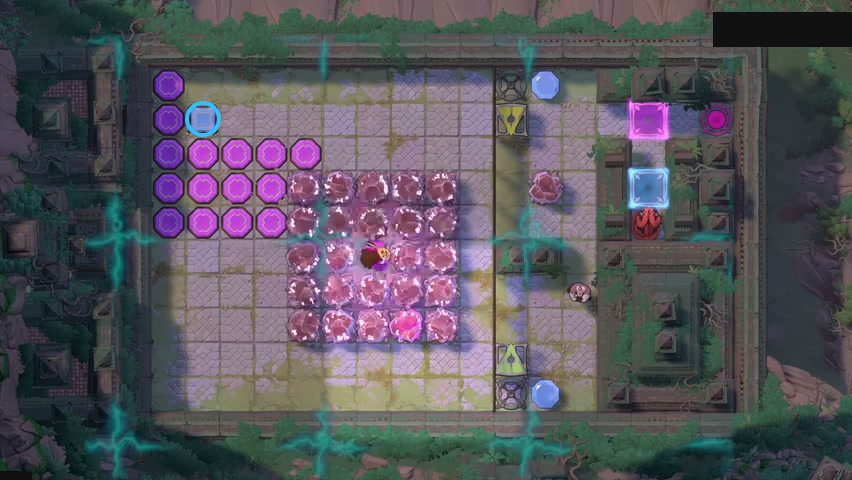
Find blue button in the purple pattern.
Check: The blue ring marks blue button in the purple pattern.
Open full-size image in a new tabUpper-right button in the orange C-shaped array
Section titled “Upper-right button in the orange C-shaped array”Compare both button patterns before moving the crystal group.
The blue ring marks a visible landmark in this selected view.
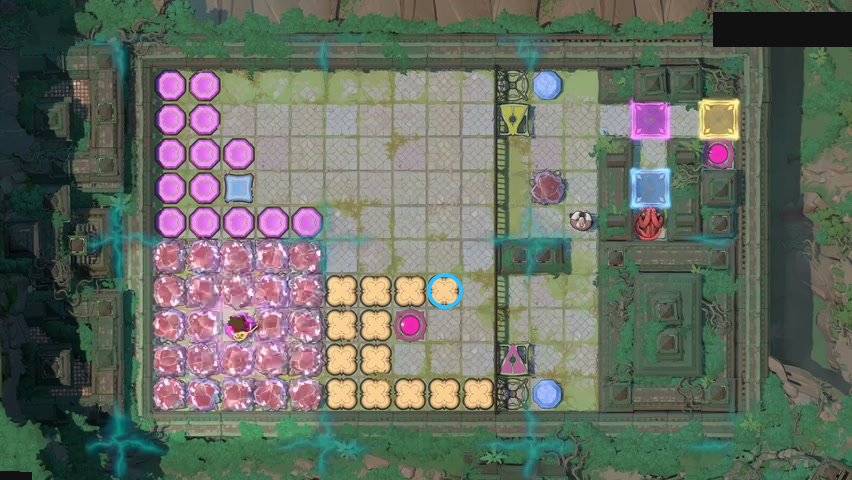
Find upper-right button in the orange C-shaped array.
Check: The blue ring marks upper-right button in the orange C-shaped array.
Open full-size image in a new tabIsolated orange button beside the purple staircase
Section titled “Isolated orange button beside the purple staircase”Locate the lone orange button in the purple staircase.
The blue ring marks a visible landmark in this selected view.
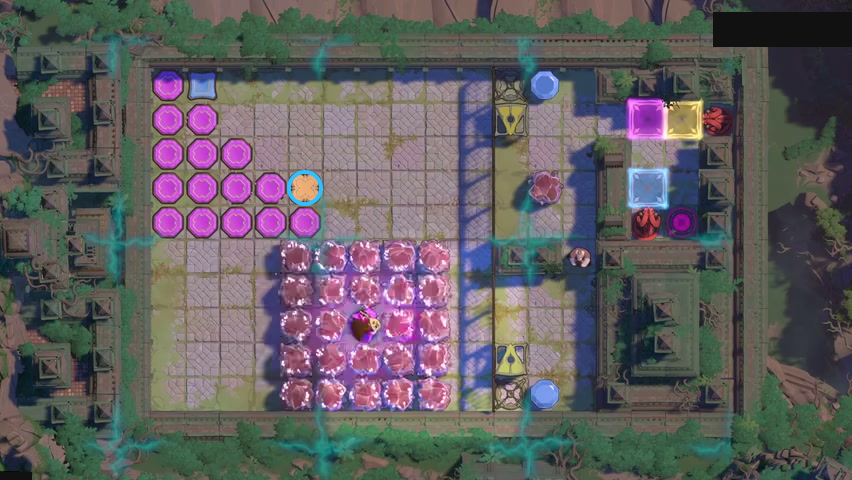
Find isolated orange button beside the purple staircase.
Check: The blue ring marks isolated orange button beside the purple staircase.
Open full-size image in a new tabSources and limits
Stills and short notes follow Sinking Star Walkthrough’s Heroes and Light main-area guide. One untimed video source: Sedesha’s series walkthrough. Four subtitle-overlapped article images use clean selected frames from the accompanying no-commentary videos.
These cards establish a local r67121 source/layout match only. Steam depot mapping is unverified; video cues are not exact PTS; notes are source-reported, with no independent route replay or finish claim.
- Full puzzle candidate inventory (PC r67121) — Extracted data
- Official Order of the Sinking Star Steam update notes — Documentation · official-updates-reviewed-2026-10-21
- Heroes and Light candidate shipping classification — Documentation · heroes-and-light-candidate-review-2026-10-22+approved-cross-source-candidates-2026-10-24+verified-backlog23-2026-10-25
- Heroes and Light main-area walkthrough and still index — Documentation · walkthrough-updated-2026-10-15
- Heroes and Light bilingual selected-layout cards — Extracted data · heroes-and-light-selected-layouts-2026-10-22
- The Flying Chungus Heroes and Light no-commentary solutions, part 1 — Observed in-game · selected-frame-review-2026-10-22
- The Flying Chungus Heroes and Light no-commentary solutions, part 2 — Observed in-game · selected-frame-review-2026-10-22
- 塞德莎 Order of the Sinking Star full video series — Observed in-game · heroes-and-light-cue-review-2026-10-22
- 塞德莎 Heroes and Light narration, part 15 — Observed in-game · article-cue-review-2026-10-22
- 塞德莎 Heroes and Light narration, part 16 — Observed in-game · article-cue-review-2026-10-22
- 塞德莎 Heroes and Light narration, part 17 — Observed in-game · article-cue-review-2026-10-22
- 塞德莎 Heroes and Light bonus-room narration, part 39 — Observed in-game · article-cue-review-2026-10-22
- Remaining approved source/native candidate crosswalk — Extracted data · remaining-source-candidates-2026-10-25-29-video-display-upgrades
- Heroes And Light bilingual selected-layout evidence — Extracted data · remaining-source-layouts-heroes-and-light-2026-10-24
- Sinking Star Walkthrough article: heroes and light solutions — Documentation · walkthrough-heroes-and-light-solutions
- Root-approved selected video frame and native layout observations — Observed in-game · verified-backlog-video-frame-observations-2026-10-25
- Verified backlog bilingual selected-layout cards — Extracted data · verified-backlog-selected-layouts-2026-10-25
- Verified backlog current display coverage delta — Extracted data · verified-backlog-display-coverage-delta-2026-10-25
Unofficial fan wiki, not affiliated with Thekla, Inc. / Arc Games / Gamirror Games. Game content belongs to its owners.
Comments & feedback
Share a tip or suggest a correction. Comments are public. Guest names are unverified; verified accounts show their account username. All language pages share this discussion. Please keep personal information private.