
 Order of the Sinking Star
Heroes and Stones East

The fourteen numbered rooms and the separate Extra room still are matched to local layouts by comparing their native textures. Numbered rings point to the source-reported summary, not an input replay. The Extra room is unnumbered and appears after Puzzle 2 in the article. Article numbers and video cues are not exact frame PTS; a still may show a later state rather than the room start.
The colored numbers are visual references, not an action sequence.
Puzzle 1 — pull_it_v4 (Heroes and Stones position 29)
Section titled “Puzzle 1 — pull_it_v4 (Heroes and Stones position 29)”Article puzzle 1; video cue 0:00. Internal set position: 29.
Carry one stone, then pull the next
Section titled “Carry one stone, then pull the next”Selected article still; it may show a later state, not the room start. Numbered rings identify details in the source-reported summary.
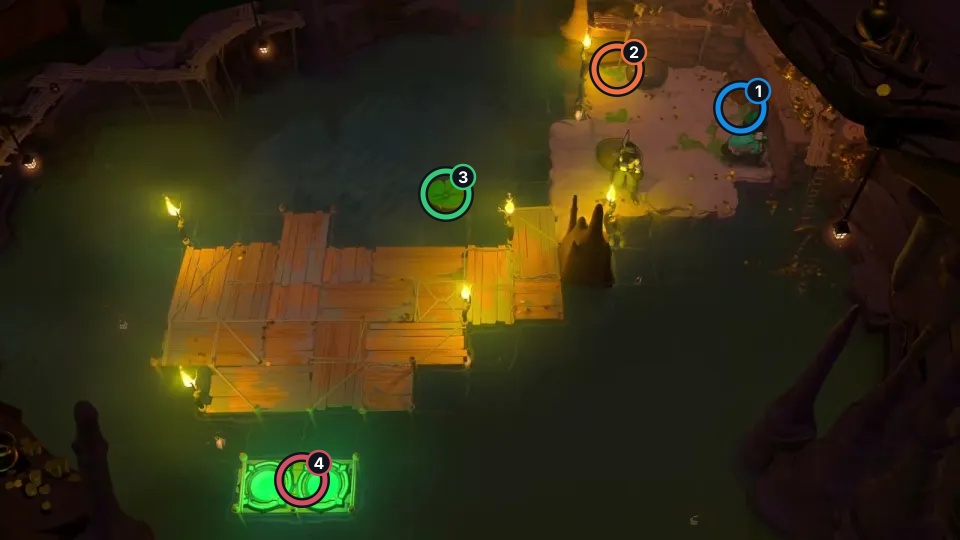
Carry the Stone at marker 2 on the Lily Pad at 3. Let the Thief at 1 pull the second Stone during its skip, then cross to exit 4.
Check: Article still matches the local pull_it_v4 texture. Cue 0:00 is not exact PTS; route notes are source-reported, not replayed.
Open full-size image in a new tabPuzzle 2 — pull_teamwork_alt (Heroes and Stones position 30)
Section titled “Puzzle 2 — pull_teamwork_alt (Heroes and Stones position 30)”Article puzzle 2; video cue 0:46. Internal set position: 30.
Pull stones through the winding route
Section titled “Pull stones through the winding route”Selected article still; it may show a later state, not the room start. Numbered rings identify details in the source-reported summary.
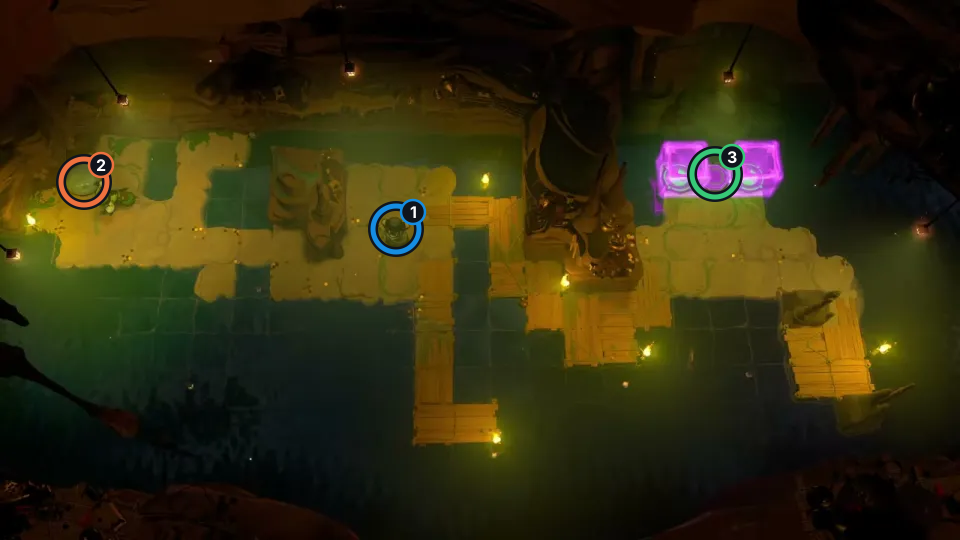
Pause the Thief at marker 1 at each bend and alternate pushes and pulls. Marker 2 is the near Stone; 3 shows the far route end.
Check: Article still matches the local pull_teamwork_alt texture. Cue 0:46 is not exact PTS; route notes are source-reported, not replayed.
Open full-size image in a new tabExtra room:  Druid and Sailor — druids_stone_0_v2 (Heroes and Stones position 9)
Section titled “Extra room: Druid and Sailor — druids_stone_0_v2 (Heroes and Stones position 9)”Article label: Extra room (unnumbered); internal set position: 9.
Root a moving Crystal to stop it
Section titled “Root a moving Crystal to stop it”Unnumbered article Extra room still; it may show a later state, not the room start. Numbered rings identify objects in the source-reported summary.
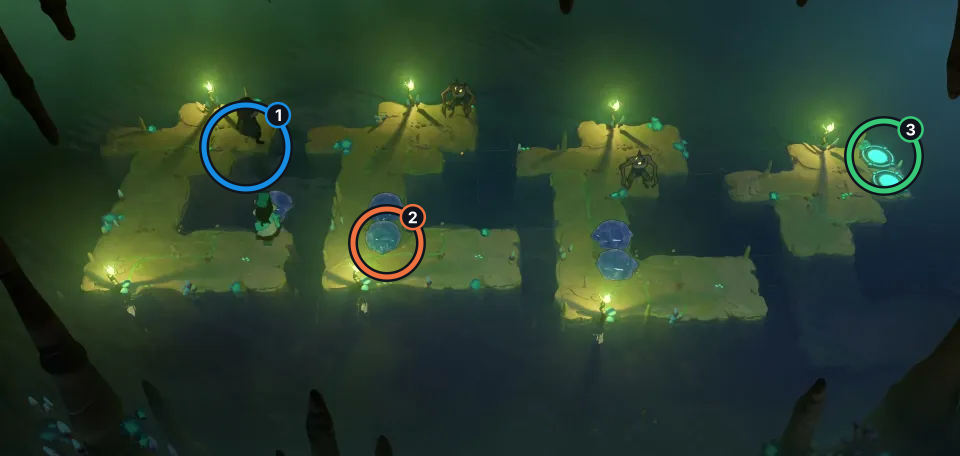
When the moving Crystal stone reaches the Druid in group 1, turn it into a plant to root it, then back into a Crystal so it sinks and extends the path. Stage 2 uses two stones; the moved Goblin changes the stopping spots before the final push to exit 3.
Check: The unnumbered Extra room still matches the local druids_stone_0_v2 texture. The article links Bilibili cue 4:02, not the still's exact PTS; the route note is source-reported, not replayed, and no finish is claimed.
Open full-size image in a new tabPuzzle 3 — druid_stone_p (Heroes and Stones position 10)
Section titled “Puzzle 3 — druid_stone_p (Heroes and Stones position 10)”Article puzzle 3; video cue 2:35. Internal set position: 10.
Block the Dragon’s fire
Section titled “Block the Dragon’s fire”Selected article still; it may show a later state, not the room start. Numbered rings identify details in the source-reported summary.
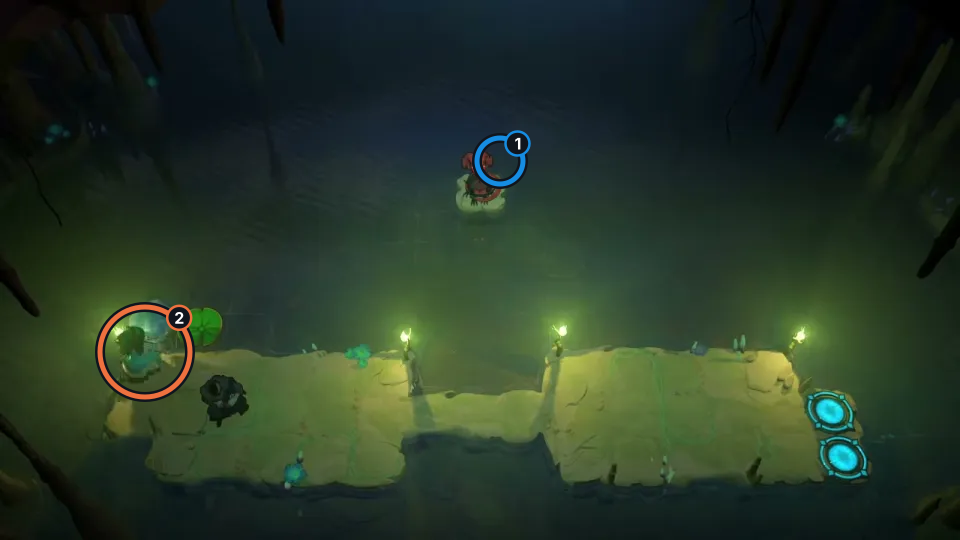
Use the Sailor in the marked left-bank group (#2) as a blocker against the Dragon (#1); restore it beyond the lane.
Check: Article still matches the local druid_stone_p texture. Cue 2:35 is not exact PTS; route notes are source-reported, not replayed.
Open full-size image in a new tabPuzzle 4 — druids_stone_alt (Heroes and Stones position 11)
Section titled “Puzzle 4 — druids_stone_alt (Heroes and Stones position 11)”Article puzzle 4; video cue 2:59. Internal set position: 11.
Split and reunite the Lily Pads
Section titled “Split and reunite the Lily Pads”Selected article still; it may show a later state, not the room start. Numbered rings identify details in the source-reported summary.
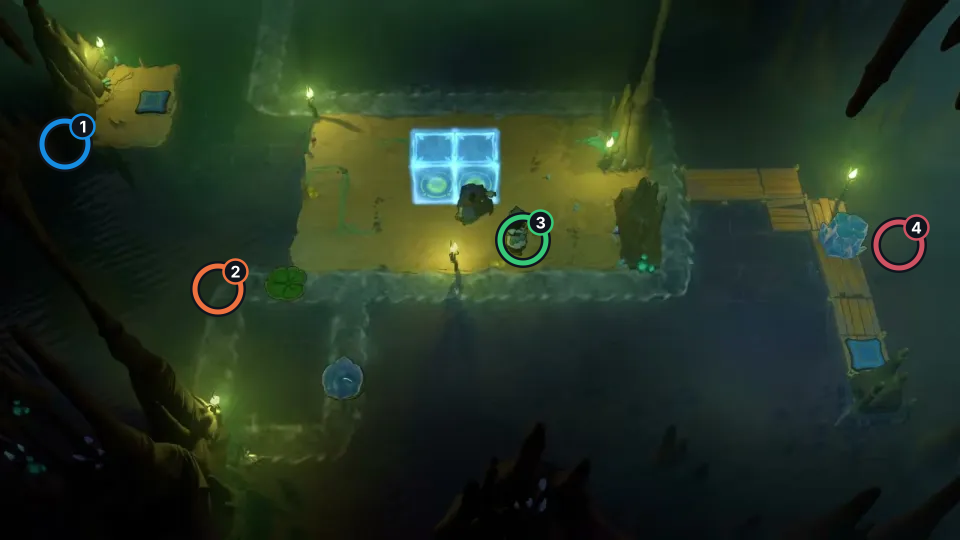
Keep Lily Pads 2 and 4 apart for the lower-right button at 1, then reunite them for the upper-left route. The Druid at 3 roots a Crystal on a pad.
Check: Article still matches the local druids_stone_alt texture. Cue 2:59 is not exact PTS; route notes are source-reported, not replayed.
Open full-size image in a new tabPuzzle 5 — druids_stone_2_v4 (Heroes and Stones position 12)
Section titled “Puzzle 5 — druids_stone_2_v4 (Heroes and Stones position 12)”Article puzzle 5; video cue 4:22. Internal set position: 12.
Carry the Crystal across the fire line
Section titled “Carry the Crystal across the fire line”Selected article still; it may show a later state, not the room start. Numbered rings identify details in the source-reported summary.
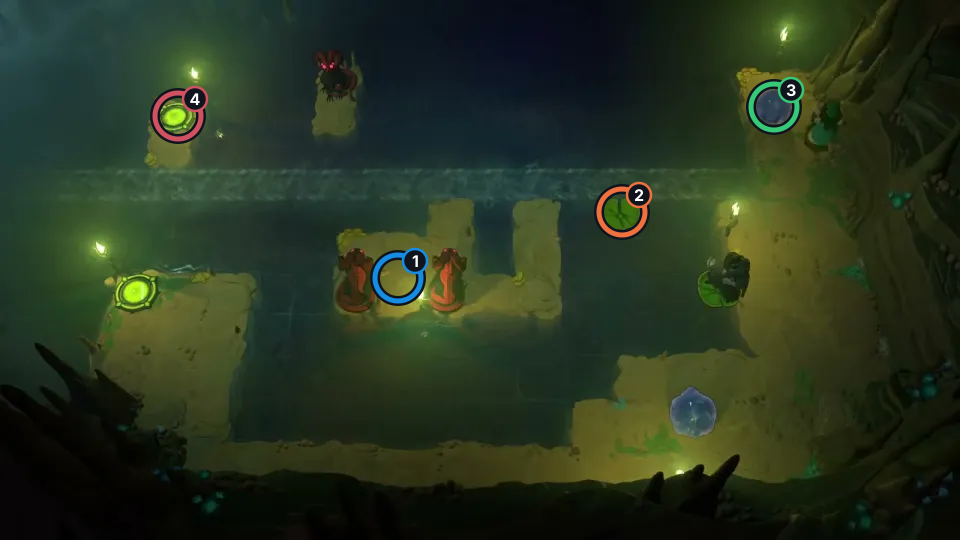
Move the Crystal at 3 in front of the paired Lily Pads, with the Druid behind. Pause at each landing and use a Crystal to stop the fire near 1.
Check: Article still matches the local druids_stone_2_v4 texture. Cue 4:22 is not exact PTS; route notes are source-reported, not replayed.
Open full-size image in a new tabPuzzle 6 — stone_stopper_intro (Heroes and Stones position 33)
Section titled “Puzzle 6 — stone_stopper_intro (Heroes and Stones position 33)”Article puzzle 6; video cue 5:28. Internal set position: 33.
Use the Cleric’s fire lane
Section titled “Use the Cleric’s fire lane”Selected article still; it may show a later state, not the room start. Numbered rings identify details in the source-reported summary.
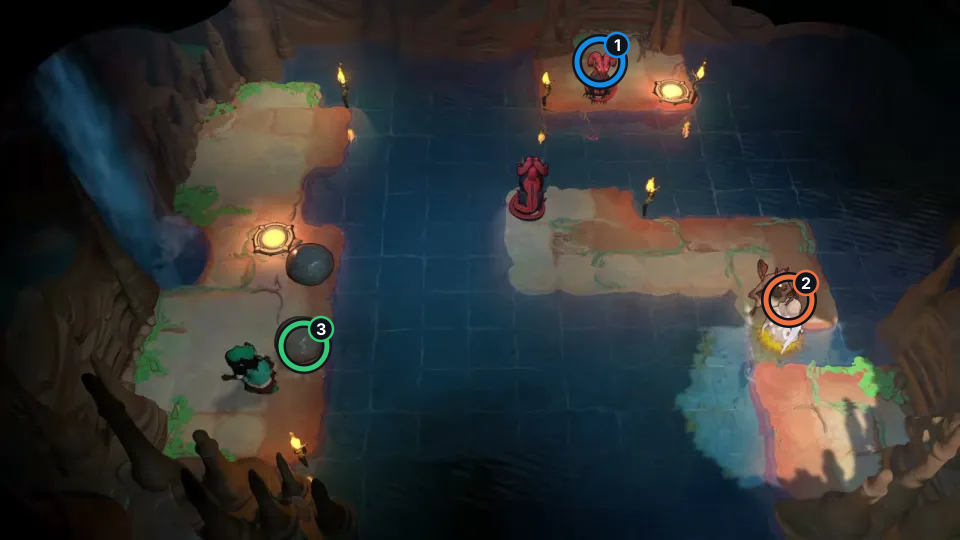
Cleric 2 floats only in Dragon 1's fire lane. Use Stone 3 as the step-off between the two banks.
Check: Article still matches the local stone_stopper_intro texture. Cue 5:28 is not exact PTS; route notes are source-reported, not replayed.
Open full-size image in a new tabPuzzle 7 — another_stone_stopper (Heroes and Stones position 34)
Section titled “Puzzle 7 — another_stone_stopper (Heroes and Stones position 34)”Article puzzle 7; video cue 5:47. Internal set position: 34.
Ride the Lily Pad past the Dragon
Section titled “Ride the Lily Pad past the Dragon”Selected article still; it may show a later state, not the room start. Numbered rings identify details in the source-reported summary.
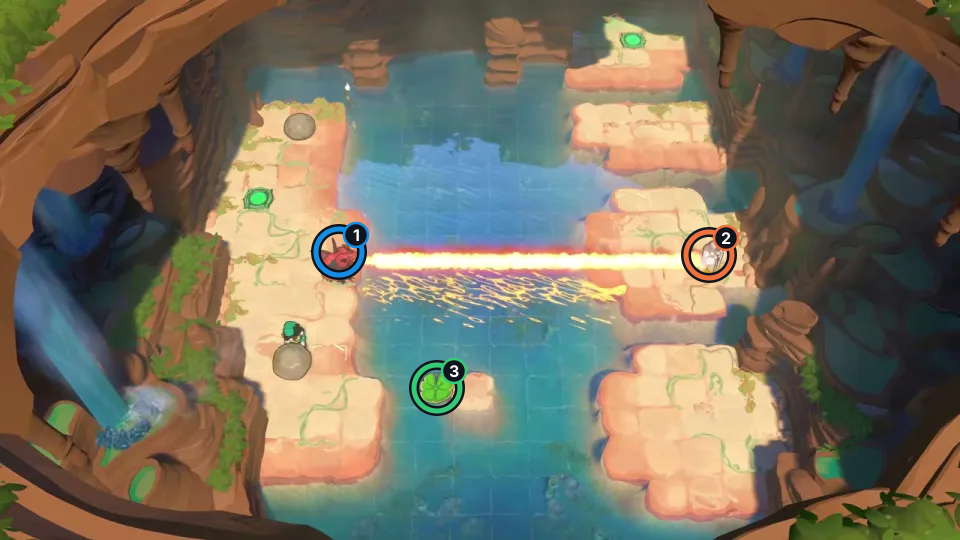
Ride Dragon 1 upward on Lily Pad 3. Cleric 2 crosses when the fire lane lifts over the water.
Check: Article still matches the local another_stone_stopper texture. Cue 5:47 is not exact PTS; route notes are source-reported, not replayed.
Open full-size image in a new tabPuzzle 8 — stone_stopper3_v2 (Heroes and Stones position 35)
Section titled “Puzzle 8 — stone_stopper3_v2 (Heroes and Stones position 35)”Article puzzle 8; video cue 6:34. Internal set position: 35.
Turn the skipping stone upward
Section titled “Turn the skipping stone upward”Selected article still; it may show a later state, not the room start. Numbered rings identify details in the source-reported summary.
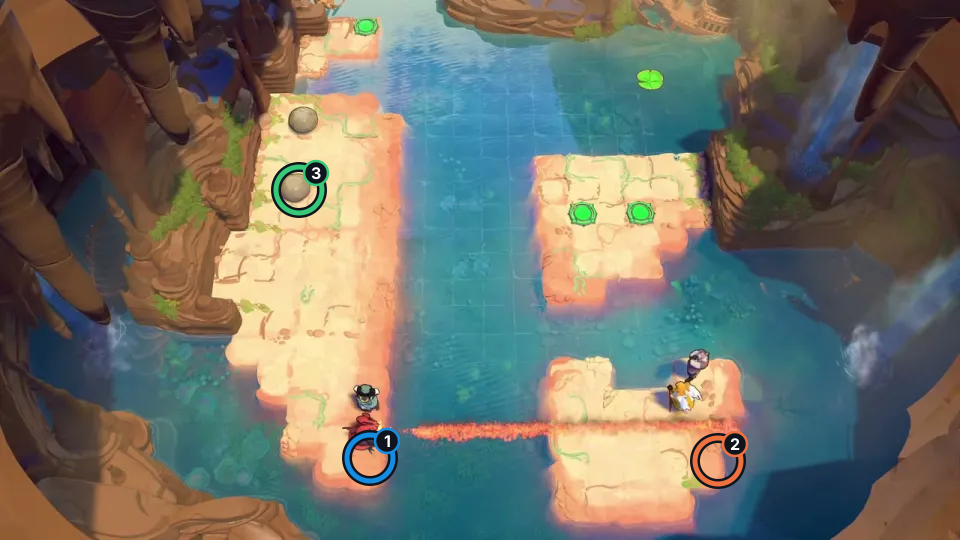
Warrior 1 pushes Cleric 2 into the skipping-stone lane to turn Stone 3 upward. The source route does not use the far-right-column Stone.
Check: Article still matches the local stone_stopper3_v2 texture. Cue 6:34 is not exact PTS; route notes are source-reported, not replayed.
Open full-size image in a new tabPuzzle 9 — stone_stopper5 (Heroes and Stones position 36)
Section titled “Puzzle 9 — stone_stopper5 (Heroes and Stones position 36)”Article puzzle 9; video cue 7:45. Internal set position: 36.
Protect the Cleric with the Goblin
Section titled “Protect the Cleric with the Goblin”Selected article still; it may show a later state, not the room start. Numbered rings identify details in the source-reported summary.
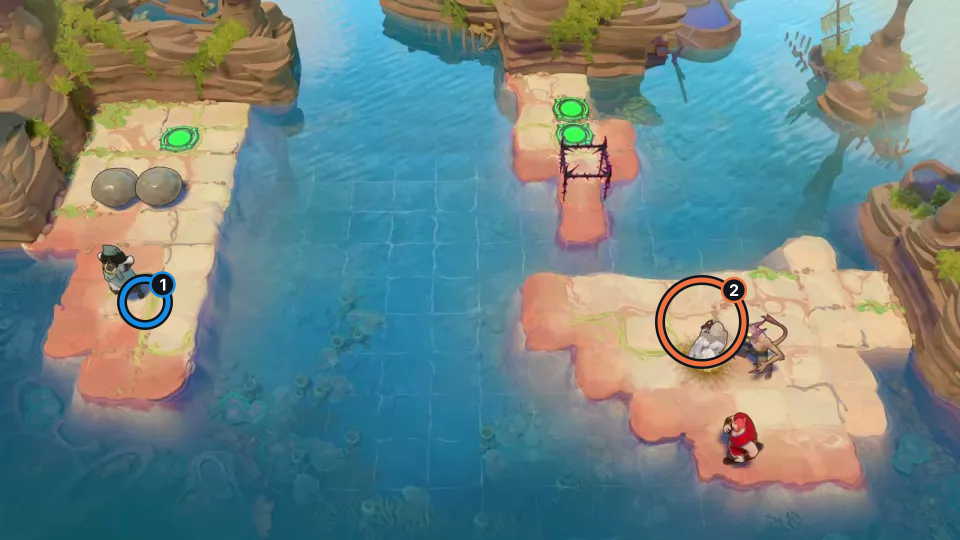
Keep Goblin (#1) alive to protect the Cleric (#2). The Sailor pushes the pair through the water route.
Check: Article still matches the local stone_stopper5 texture. Cue 7:45 is not exact PTS; route notes are source-reported, not replayed.
Open full-size image in a new tabPuzzle 10 — hot_swap (Heroes and Stones position 39)
Section titled “Puzzle 10 — hot_swap (Heroes and Stones position 39)”Article puzzle 10; video cue 8:34. Internal set position: 39.
Swap objects across the island
Section titled “Swap objects across the island”Selected article still; it may show a later state, not the room start. Numbered rings identify details in the source-reported summary.
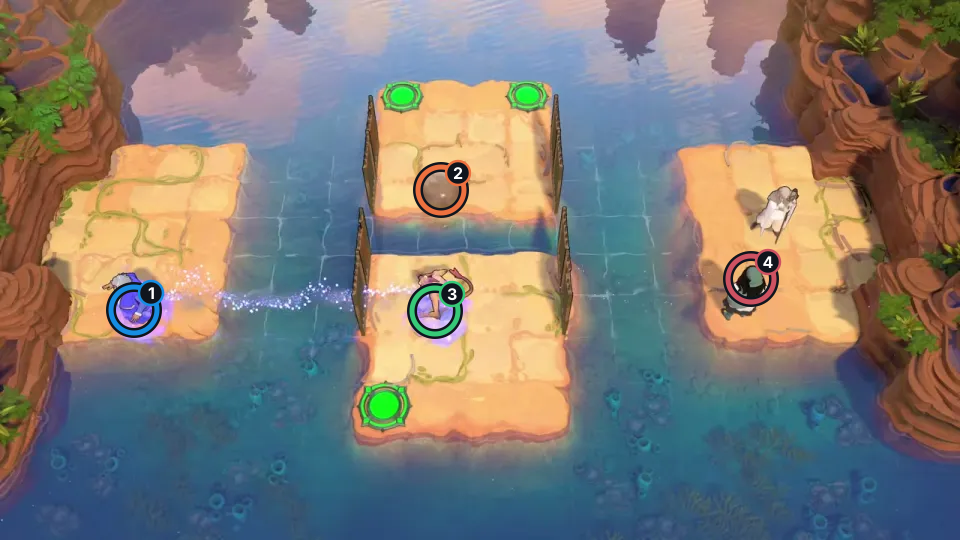
Use Wizard 1 for one-for-one swaps to bring Crystal 2 to the middle. Follow the safe Cleric 3 and Goblin 4 float setup.
Check: Article still matches the local hot_swap texture. Cue 8:34 is not exact PTS; route notes are source-reported, not replayed.
Open full-size image in a new tabPuzzle 11 — skipping_with_dragon (Heroes and Stones position 37)
Section titled “Puzzle 11 — skipping_with_dragon (Heroes and Stones position 37)”Article puzzle 11; video cue 9:22. Internal set position: 37.
Guide the Cleric and save a final tile
Section titled “Guide the Cleric and save a final tile”Selected article still; it may show a later state, not the room start. Numbered rings identify details in the source-reported summary.
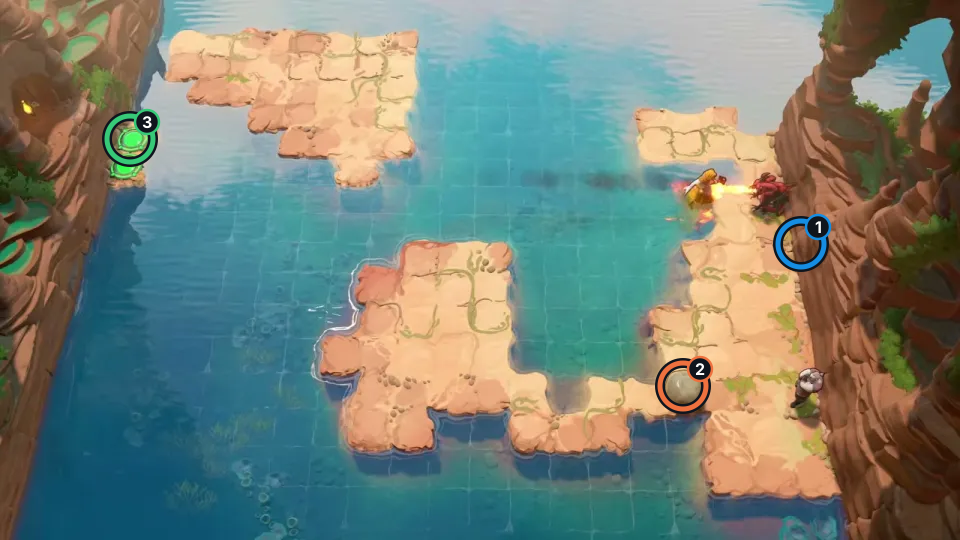
Warrior 1 pushes the Cleric toward exit 3; save one tile for the last step. Move Stone 2 to the upper-left with the Cleric's safe float spots.
Check: Article still matches the local skipping_with_dragon texture. Cue 9:22 is not exact PTS; route notes are source-reported, not replayed.
Open full-size image in a new tabPuzzle 12 — walk_into_fire (Heroes and Stones position 38)
Section titled “Puzzle 12 — walk_into_fire (Heroes and Stones position 38)”Article puzzle 12; video cue 10:47. Internal set position: 38.
Turn the skipping stone downward
Section titled “Turn the skipping stone downward”Selected article still; it may show a later state, not the room start. Numbered rings identify details in the source-reported summary.
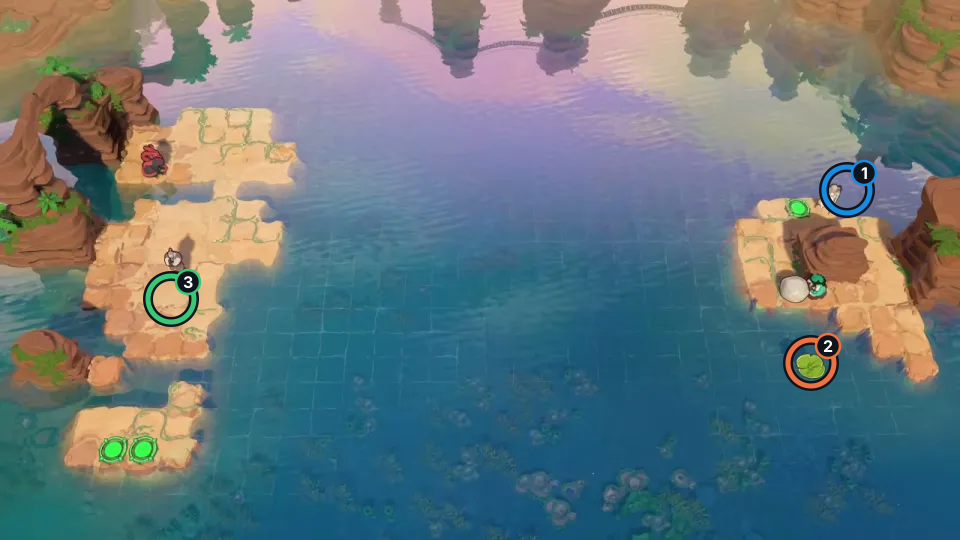
Knock Lily Pad 1 left, then turn the skipping Stone downward in flight. Use the left-bank setup at 3 with the Cleric in the fire lane.
Check: Article still matches the local walk_into_fire texture. Cue 10:47 is not exact PTS; route notes are source-reported, not replayed.
Open full-size image in a new tabPuzzle 13 — monster_gate_in_water (Heroes and Stones position 40)
Section titled “Puzzle 13 — monster_gate_in_water (Heroes and Stones position 40)”Article puzzle 13; video cue 12:44. Internal set position: 40.
Fill both pits around the Monster Gate
Section titled “Fill both pits around the Monster Gate”Selected article still; it may show a later state, not the room start. Numbered rings identify details in the source-reported summary.
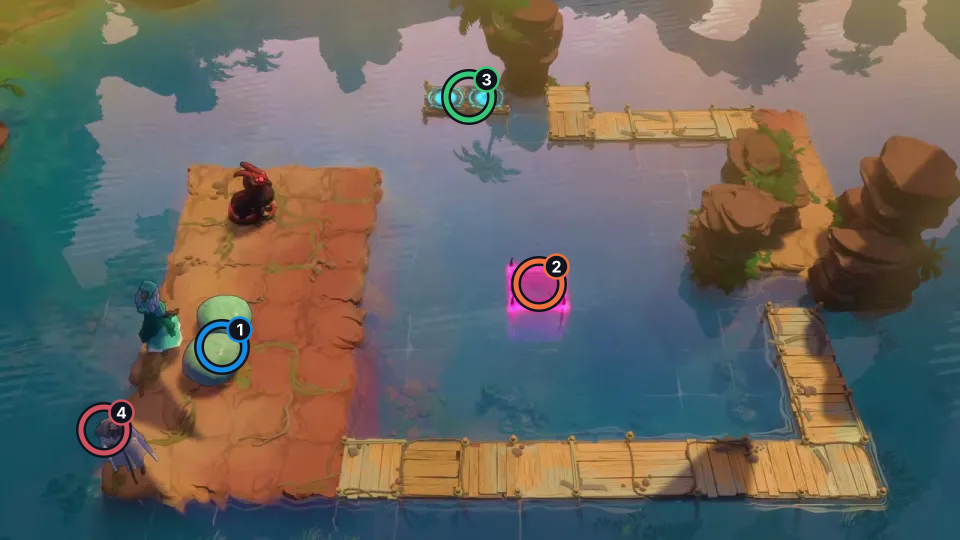
Put a Stone from pair 1 at Monster Gate 2. Stand Cleric 4 below it to push into upper pit 3; repeat for the other pit.
Check: Article still matches the local monster_gate_in_water texture. Cue 12:44 is not exact PTS; route notes are source-reported, not replayed.
Open full-size image in a new tabPuzzle 14 — pull_skip_twins_v3 (Heroes and Stones position 41)
Section titled “Puzzle 14 — pull_skip_twins_v3 (Heroes and Stones position 41)”Article puzzle 14; video cue 13:25. Internal set position: 41.
Pull the stone through the flame lane
Section titled “Pull the stone through the flame lane”Selected article still; it may show a later state, not the room start. Numbered rings identify details in the source-reported summary.
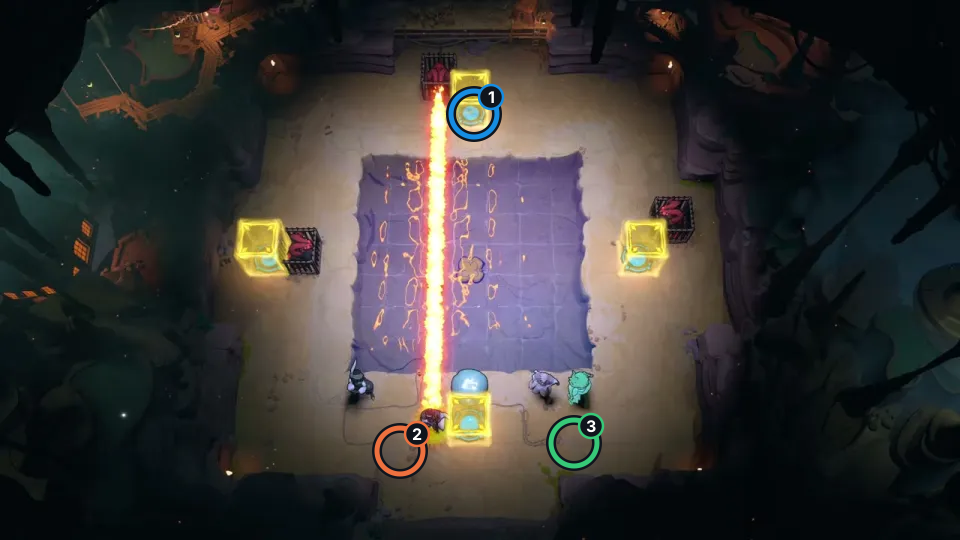
Push Stone 1 up through the center pool and pull sideways as it passes. Clerics 3 protect Thief 2 across the water.
Check: Article still matches the local pull_skip_twins_v3 texture. Cue 13:25 is not exact PTS; route notes are source-reported, not replayed.
Open full-size image in a new tabSources and limits
The numbered stills, Extra room image and cue links are from Sinking Star Walkthrough. The article links the Extra room to the Bilibili narration at 4:02. The numbered-room gameplay video is The Flying Chungus, Heroes and Stones East. Captions summarize the published walkthrough; no raw-video decode, exact still PTS, independent route replay or finish is claimed. The matched local package is labeled PC r67121, but its official Steam depot mapping is unverified.
- Full puzzle candidate inventory (PC r67121) — Extracted data
- Heroes and Stones uncovered candidate shipping review — Documentation · heroes-and-stones-candidate-classification-2026-10-22;remaining-source-candidates-2026-10-24
- Heroes and Stones, East walkthrough and source-frame index — Documentation · walkthrough-updated-2026-10-14
- The Flying Chungus Heroes and Stones East gameplay video — Observed in-game · article-cues-reviewed-2026-10-22
- 塞德莎 Heroes and Stones East Extra room narration — Observed in-game · article-extra-cue-reviewed-2026-10-22
Unofficial fan wiki, not affiliated with Thekla, Inc. / Arc Games / Gamirror Games. Game content belongs to its owners.
Comments & feedback
Share a tip or suggest a correction. Comments are public. Guest names are unverified; verified accounts show their account username. All language pages share this discussion. Please keep personal information private.