
 Order of the Sinking Star
High Beamcasters: selected room layouts

High Beamcasters is part of Antipode High. Fifty-three of 58 numbered article rooms have distinct source/native identities; five article stills remain unassigned. The separate Overworld puzzle 10 still also has a cross-family match; the other ten Overworld targets remain unassigned. Four selected video layouts below are separate and carry no article puzzle numbers.
Article numbers follow the narrated source order and are separate from level-set positions. The added selected video layouts have no article number. Rings mark visible features in the selected states; the article-room summaries remain source-reported, and no starting state, full route, finish or exact Steam depot is established.
Puzzle 2 — sokobridge_v4
Section titled “Puzzle 2 — sokobridge_v4”Article still from P36; internal elevators set position: 1.
Put two stones beside the elevator, ride up, and walk right.
Selected article still only; the colored ring marks a visible layout landmark, not an input step.
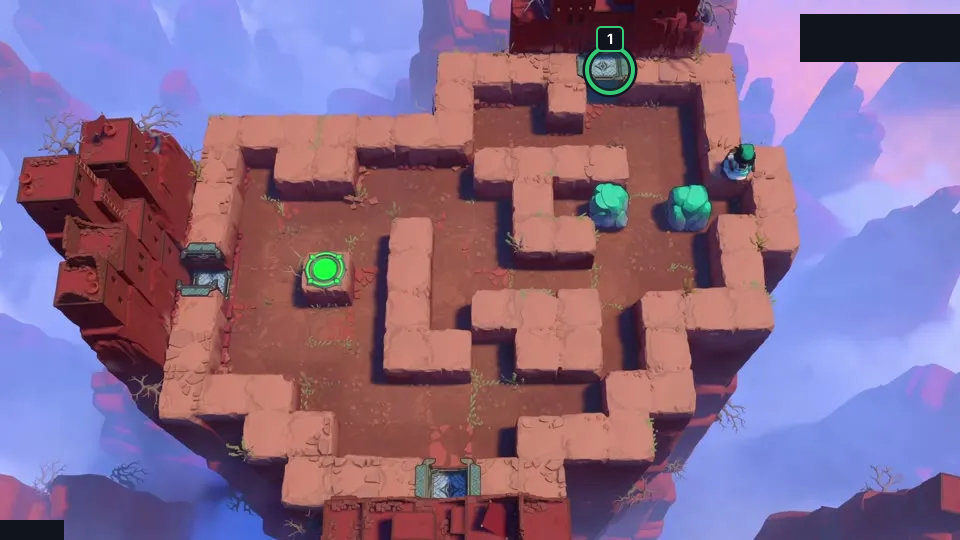
Put two stones beside the elevator, ride up, and walk right.
Check: The article still visually matches sokobridge_v4; this selected layout carries a source-reported idea. It is not exact PTS; no route was independently replayed, no finish is claimed, and exact Steam depot mapping is unverified.
Open full-size image in a new tabPuzzle 3 — elevator_cyan
Section titled “Puzzle 3 — elevator_cyan”Article still from P36; internal elevators set position: 6.
Fill the pit with a crystal and use a cyan beam to empower the upper Explorer.
Selected article still only; the colored ring marks a visible layout landmark, not an input step.
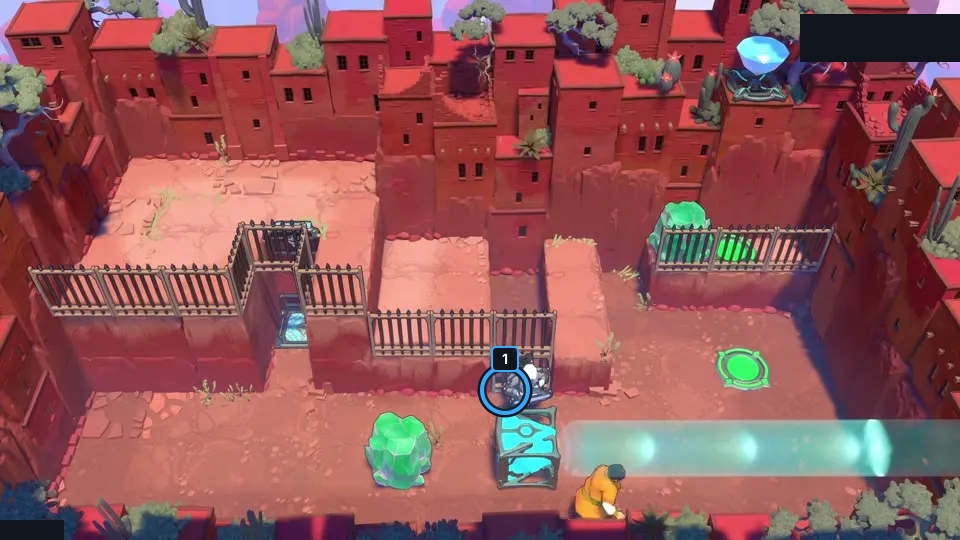
Fill the pit with a crystal and use a cyan beam to empower the upper Explorer.
Check: The article still visually matches elevator_cyan; this selected layout carries a source-reported idea. It is not exact PTS; no route was independently replayed, no finish is claimed, and exact Steam depot mapping is unverified.
Open full-size image in a new tabPuzzle 4 — green_hat
Section titled “Puzzle 4 — green_hat”Article section: Puzzle 4; internal set position: 1.
The ring marks a visible landmark, not an action step.
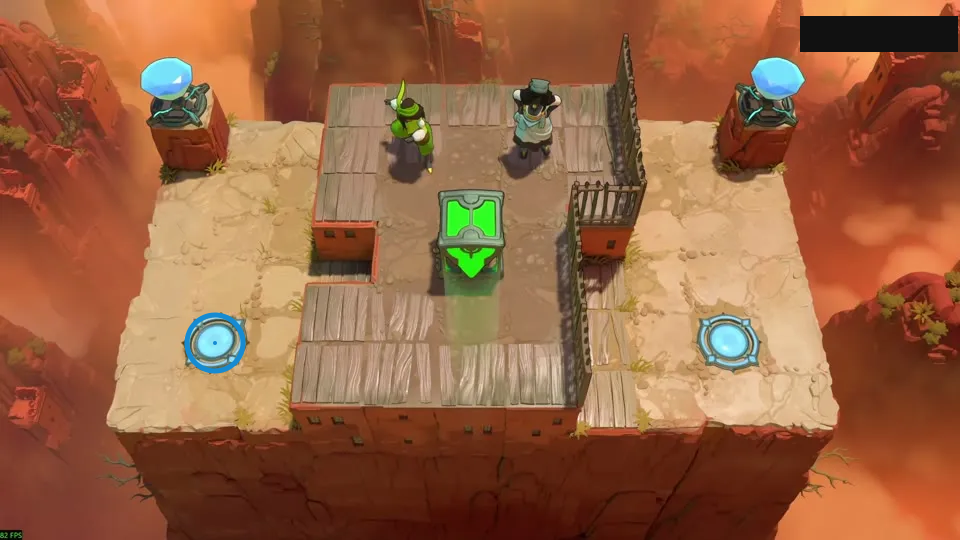
Carry the green emitter on the Sailor’s head.
Check: Ring marks cyan circular pad on the lower-left floor.
Open full-size image in a new tabPuzzle 5 — its_a_tall_order
Section titled “Puzzle 5 — its_a_tall_order”Article section: Puzzle 5; internal set position: 2.
The ring marks a visible landmark, not an action step.
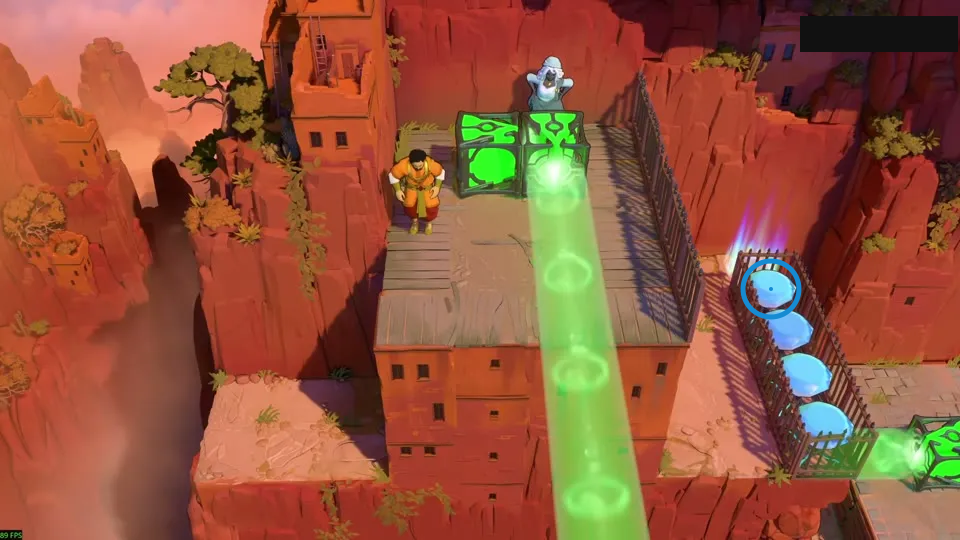
Use stacking rules while crossing green-lit walls.
Check: Ring marks top blue gem in the right-hand row.
Open full-size image in a new tabPuzzle 6 — taking_the_lift
Section titled “Puzzle 6 — taking_the_lift”Article still from P36; internal elevators set position: 3.
Put an object under the raised elevator so it stops at the lower landing.
Selected article still only; the colored ring marks a visible layout landmark, not an input step.
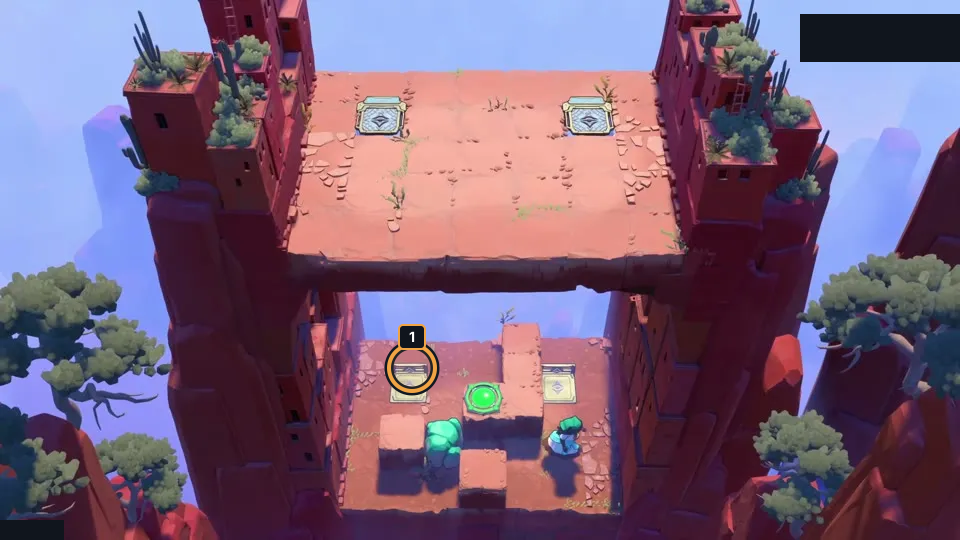
Put an object under the raised elevator so it stops at the lower landing.
Check: The article still visually matches taking_the_lift; this selected layout carries a source-reported idea. It is not exact PTS; no route was independently replayed, no finish is claimed, and exact Steam depot mapping is unverified.
Open full-size image in a new tabPuzzle 7 — trick_landing
Section titled “Puzzle 7 — trick_landing”Article still from P36; internal elevators set position: 4.
Fill the shallow water row, then push the second stone up from below.
Selected article still only; the colored ring marks a visible layout landmark, not an input step.
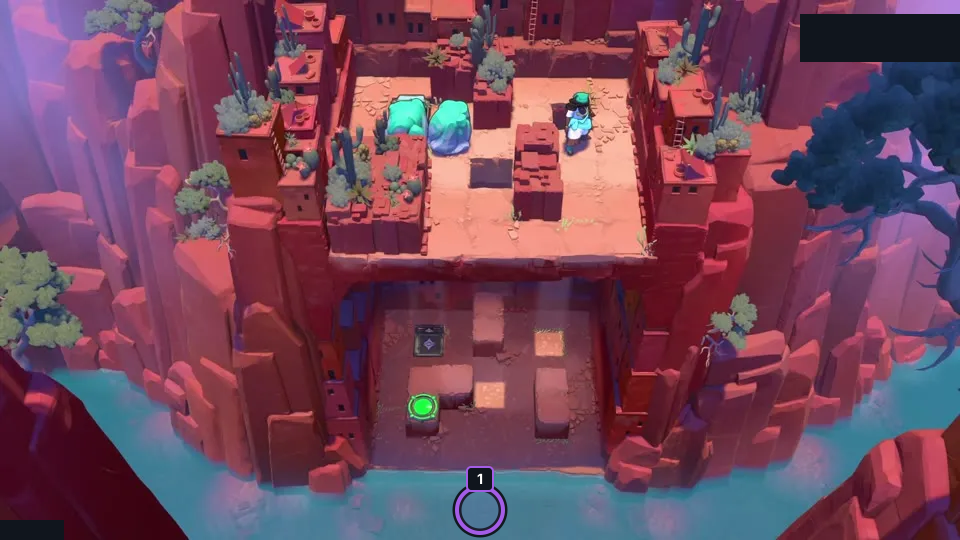
Fill the shallow water row, then push the second stone up from below.
Check: The article still visually matches trick_landing; this selected layout carries a source-reported idea. It is not exact PTS; no route was independently replayed, no finish is claimed, and exact Steam depot mapping is unverified.
Open full-size image in a new tabPuzzle 8 — drop_sokoban
Section titled “Puzzle 8 — drop_sokoban”Article still from P36; internal elevators set position: 5.
Fill the right puddle so a stone can be pushed into the hidden target tile.
Selected article still only; the colored ring marks a visible layout landmark, not an input step.
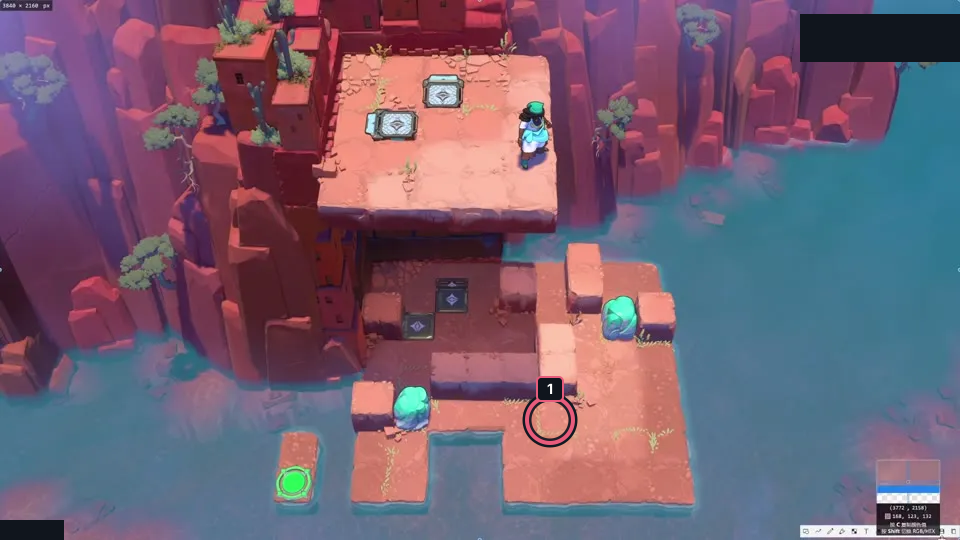
Fill the right puddle so a stone can be pushed into the hidden target tile.
Check: The article still visually matches drop_sokoban; this selected layout carries a source-reported idea. It is not exact PTS; no route was independently replayed, no finish is claimed, and exact Steam depot mapping is unverified.
Open full-size image in a new tabPuzzle 9 — double_the_fun
Section titled “Puzzle 9 — double_the_fun”Article still from P36; internal elevators set position: 2.
Move the lower stone first; the upper stone would block the return loop.
Selected article still only; the colored ring marks a visible layout landmark, not an input step.
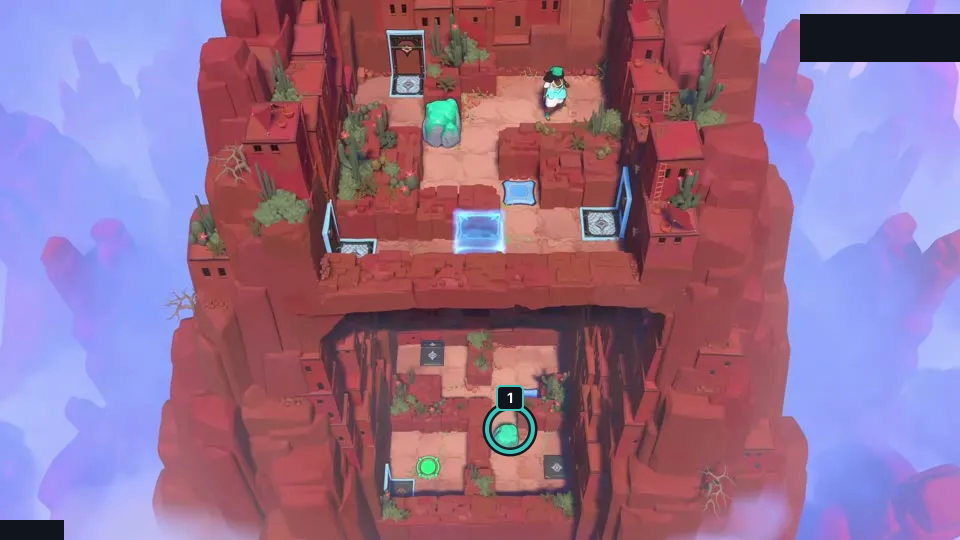
Move the lower stone first; the upper stone would block the return loop.
Check: The article still visually matches double_the_fun; this selected layout carries a source-reported idea. It is not exact PTS; no route was independently replayed, no finish is claimed, and exact Steam depot mapping is unverified.
Open full-size image in a new tabPuzzle 10 — landmines_v3
Section titled “Puzzle 10 — landmines_v3”Article still from P36; internal vertical_endpoint set position: 1.
Use stones to block purple beams before pushing the goblins into the drops.
Selected article still only; the colored ring marks a visible layout landmark, not an input step.
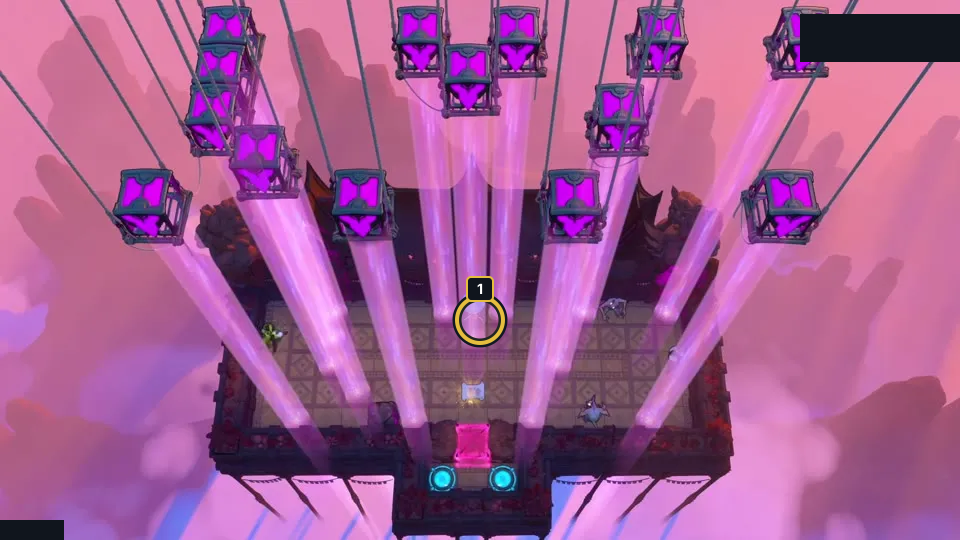
Use stones to block purple beams before pushing the goblins into the drops.
Check: The article still visually matches landmines_v3; this selected layout carries a source-reported idea. It is not exact PTS; no route was independently replayed, no finish is claimed, and exact Steam depot mapping is unverified.
Open full-size image in a new tabPuzzle 11 — shower
Section titled “Puzzle 11 — shower”Article still from P36; internal vertical_endpoint set position: 2.
Place four downward emitters outside the 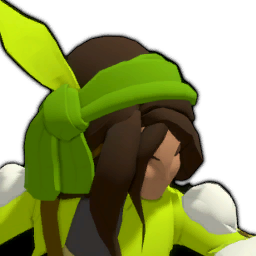 Thief’s route before solving below.
Selected article still only; the colored ring marks a visible layout landmark, not an input step.
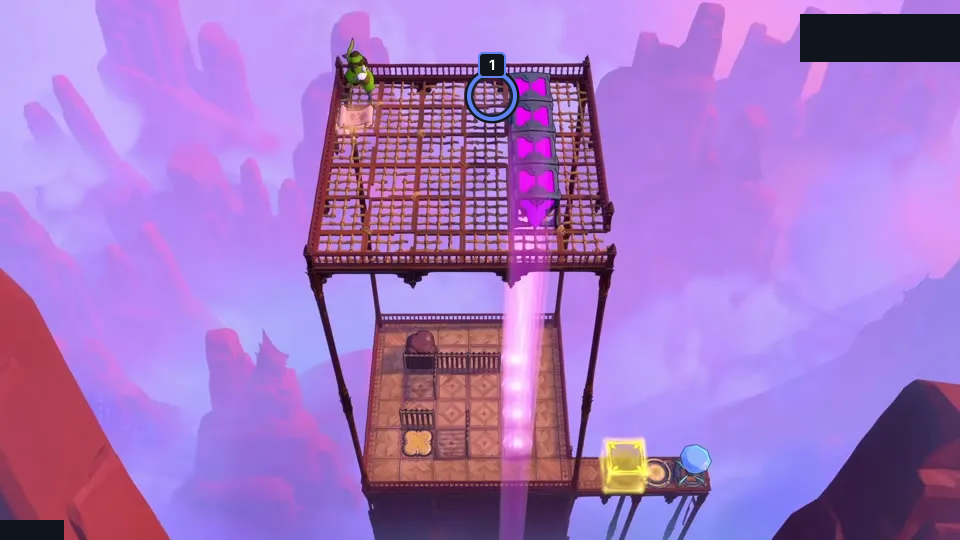
Place four downward emitters outside the Thief’s route before solving below.
Check: The article still visually matches shower; this selected layout carries a source-reported idea. It is not exact PTS; no route was independently replayed, no finish is claimed, and exact Steam depot mapping is unverified.
Open full-size image in a new tabPuzzle 12 — sender_simplified_v2
Section titled “Puzzle 12 — sender_simplified_v2”Article section: Puzzle 12; internal set position: 16.
The ring marks a visible landmark, not an action step.
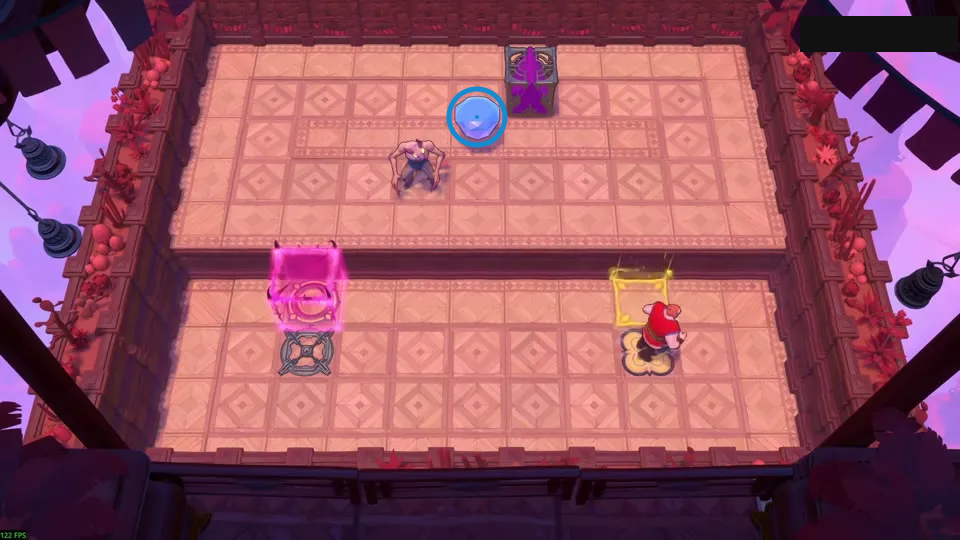
Use the energy gate to push the goblin upward.
Check: Ring marks blue gem on the upper platform.
Open full-size image in a new tabPuzzle 13 — sky_double_intro0
Section titled “Puzzle 13 — sky_double_intro0”Article still from P40; internal double_beam_falling set position: 1.
An orange beam also drops you; jump where floor waits two tiles below.
Selected article still only; the colored ring marks a visible layout landmark, not an input step.
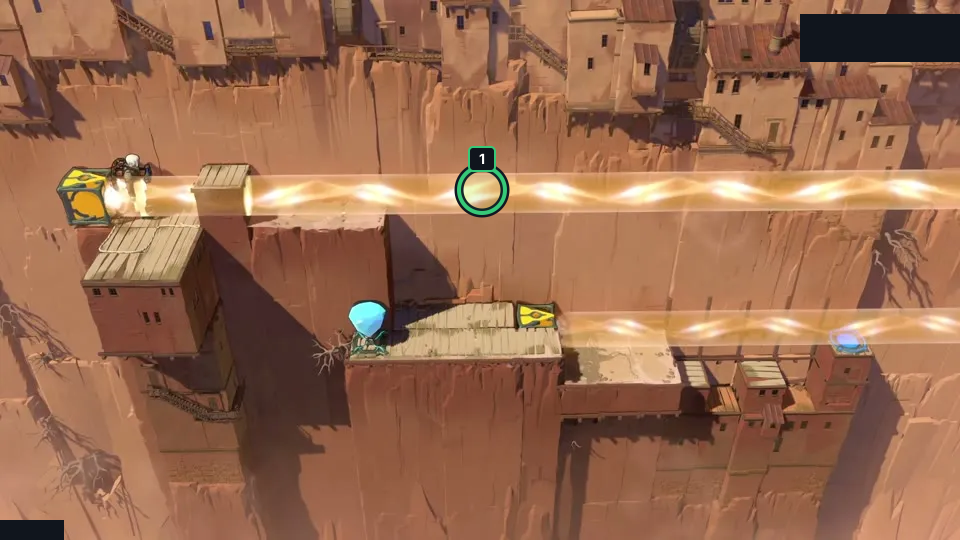
An orange beam also drops you; jump where floor waits two tiles below.
Check: The article still visually matches sky_double_intro0; this selected layout carries a source-reported idea. It is not exact PTS; no route was independently replayed, no finish is claimed, and exact Steam depot mapping is unverified.
Open full-size image in a new tabPuzzle 14 — into_the_water_3
Section titled “Puzzle 14 — into_the_water_3”Article still from P40; internal double_beam_falling set position: 3.
The floor under shallow water catches the two-tile drop; avoid the false alignment.
Selected article still only; the colored ring marks a visible layout landmark, not an input step.
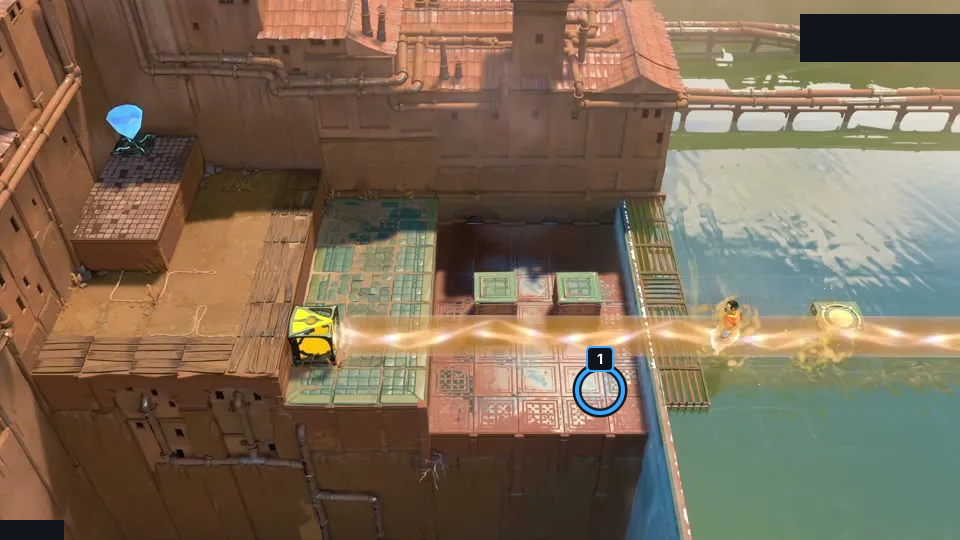
The floor under shallow water catches the two-tile drop; avoid the false alignment.
Check: The article still visually matches into_the_water_3; this selected layout carries a source-reported idea. It is not exact PTS; no route was independently replayed, no finish is claimed, and exact Steam depot mapping is unverified.
Open full-size image in a new tabPuzzle 15 — air_skating_v6
Section titled “Puzzle 15 — air_skating_v6”Article still from P40; internal double_beam_falling set position: 4.
Use two Sailors as a moving floor; the orange beam keeps them at height.
Selected article still only; the colored ring marks a visible layout landmark, not an input step.
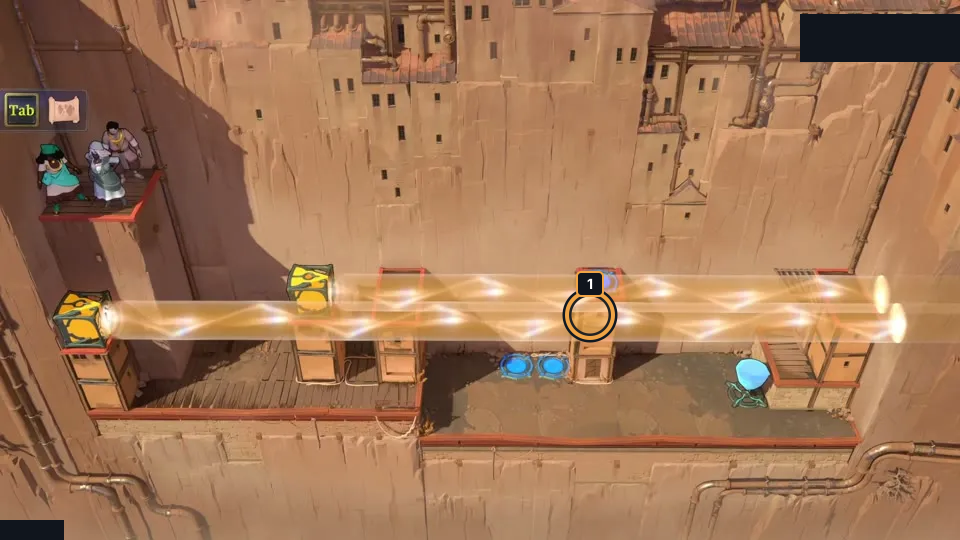
Use two Sailors as a moving floor; the orange beam keeps them at height.
Check: The article still visually matches air_skating_v6; this selected layout carries a source-reported idea. It is not exact PTS; no route was independently replayed, no finish is claimed, and exact Steam depot mapping is unverified.
Open full-size image in a new tabPuzzle 16 — thin_ice_rooms
Section titled “Puzzle 16 — thin_ice_rooms”Article still from P40; internal double_beam_falling set position: 6.
Thin floors let drops pass through; use the beam crossings to set safe landings.
Selected article still only; the colored ring marks a visible layout landmark, not an input step.
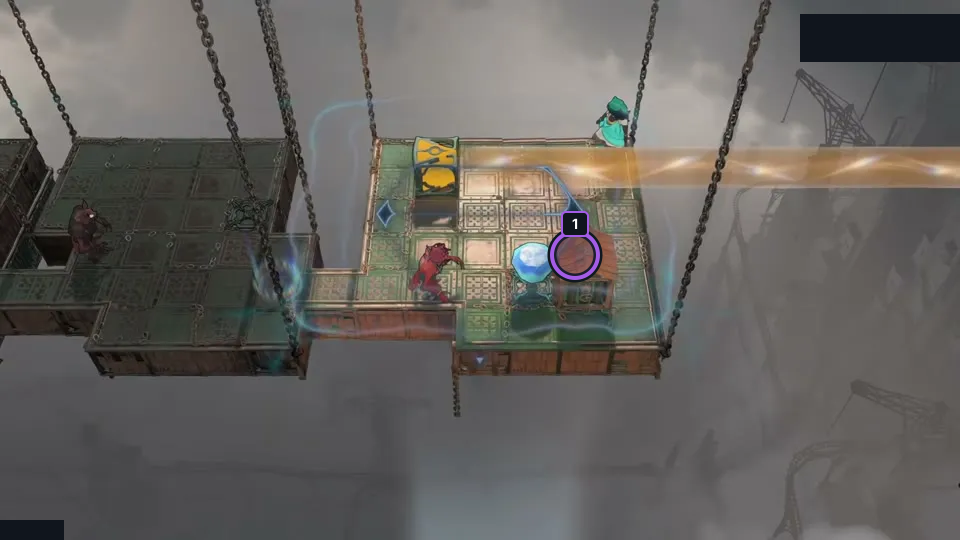
Thin floors let drops pass through; use the beam crossings to set safe landings.
Check: The article still visually matches thin_ice_rooms; this selected layout carries a source-reported idea. It is not exact PTS; no route was independently replayed, no finish is claimed, and exact Steam depot mapping is unverified.
Open full-size image in a new tabPuzzle 17 — dragons_layer
Section titled “Puzzle 17 — dragons_layer”Article still from P40; internal double_beam_falling set position: 9.
Block the dragon fire lines before breaking the beams holding the heroes.
Selected article still only; the colored ring marks a visible layout landmark, not an input step.
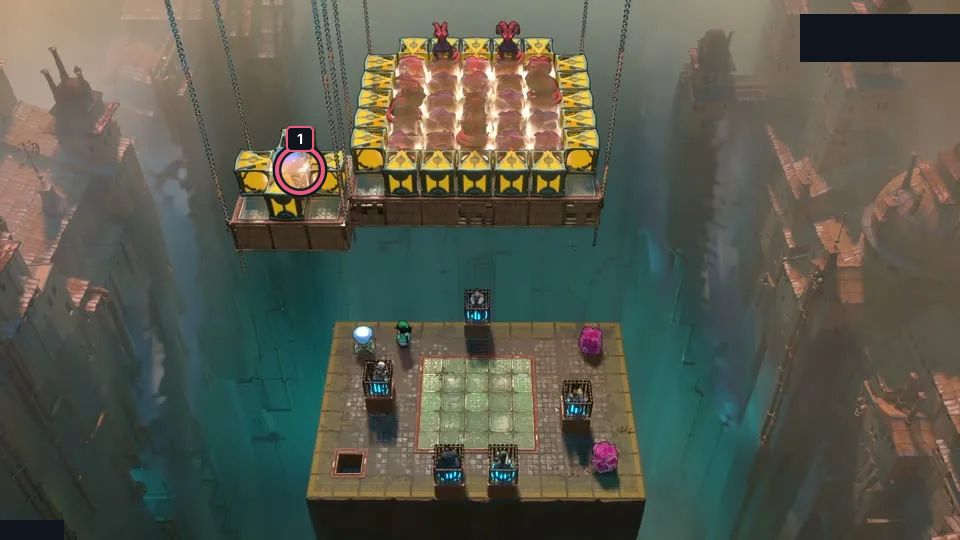
Block the dragon fire lines before breaking the beams holding the heroes.
Check: The article still visually matches dragons_layer; this selected layout carries a source-reported idea. It is not exact PTS; no route was independently replayed, no finish is claimed, and exact Steam depot mapping is unverified.
Open full-size image in a new tabPuzzle 18 — the_sky_is_falling_v2
Section titled “Puzzle 18 — the_sky_is_falling_v2”Article still from P40; internal double_beam_falling set position: 10.
Place a stone and emitter in the Explorer’s row before releasing the stones above.
Selected article still only; the colored ring marks a visible layout landmark, not an input step.
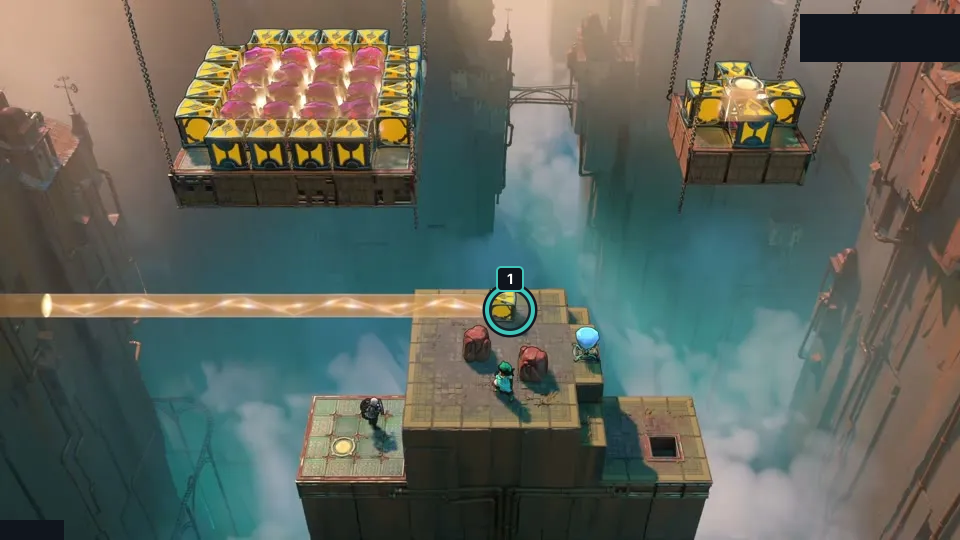
Place a stone and emitter in the Explorer’s row before releasing the stones above.
Check: The article still visually matches the_sky_is_falling_v2; this selected layout carries a source-reported idea. It is not exact PTS; no route was independently replayed, no finish is claimed, and exact Steam depot mapping is unverified.
Open full-size image in a new tabPuzzle 19 — through_the_table_e
Section titled “Puzzle 19 — through_the_table_e”Article still from P40; internal double_beam_falling set position: 7.
Drop stones onto the key tile from above; do not push it there from below.
Selected article still only; the colored ring marks a visible layout landmark, not an input step.
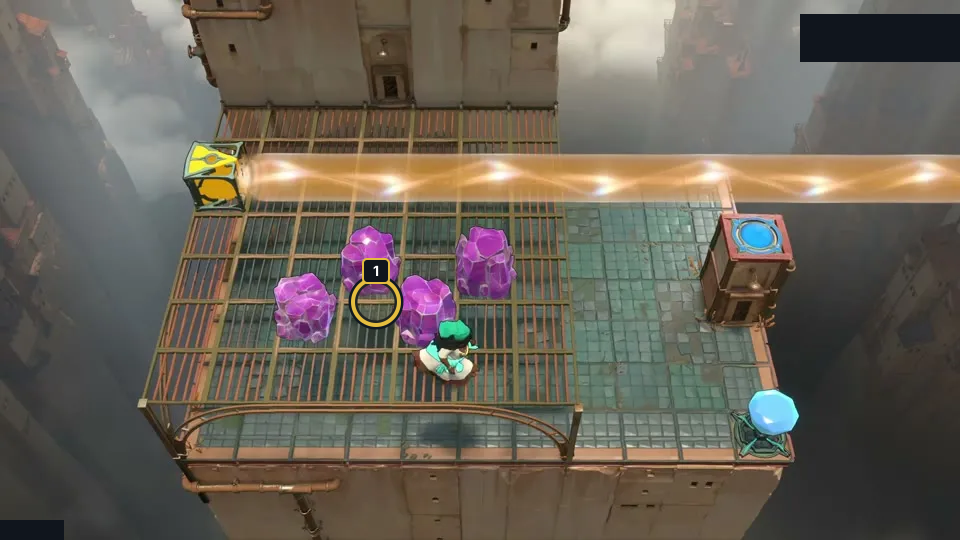
Drop stones onto the key tile from above; do not push it there from below.
Check: The article still visually matches through_the_table_e; this selected layout carries a source-reported idea. It is not exact PTS; no route was independently replayed, no finish is claimed, and exact Steam depot mapping is unverified.
Open full-size image in a new tabPuzzle 20 — through_the_table_f
Section titled “Puzzle 20 — through_the_table_f”Article still from P40; internal double_beam_falling set position: 8.
Use two beams to lift a crystal high enough to cross.
Selected article still only; the colored ring marks a visible layout landmark, not an input step.
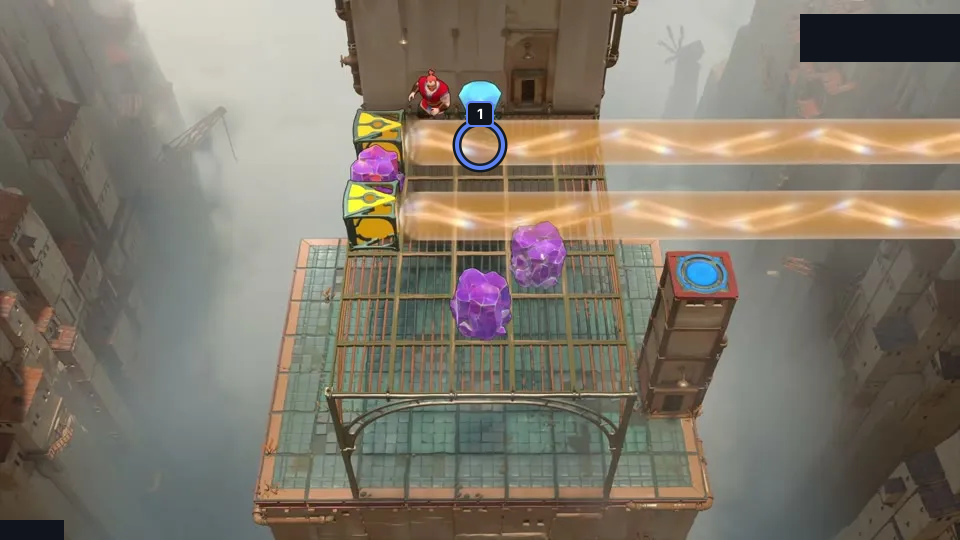
Use two beams to lift a crystal high enough to cross.
Check: The article still visually matches through_the_table_f; this selected layout carries a source-reported idea. It is not exact PTS; no route was independently replayed, no finish is claimed, and exact Steam depot mapping is unverified.
Open full-size image in a new tabPuzzle 21 — monster_drop
Section titled “Puzzle 21 — monster_drop”Article still from P40; internal double_beam_falling set position: 5.
Set two opposing beams to make a four-tile drop past the dragons.
Selected article still only; the colored ring marks a visible layout landmark, not an input step.
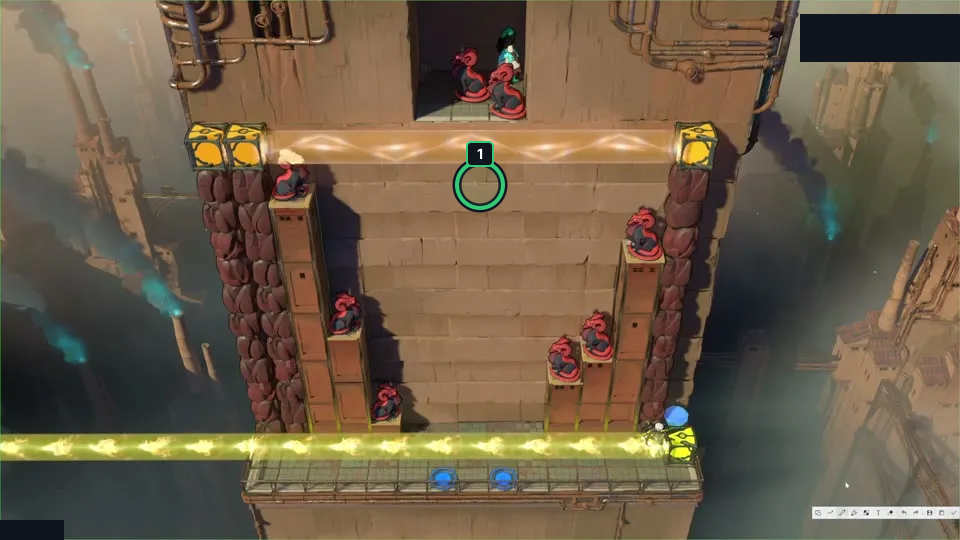
Set two opposing beams to make a four-tile drop past the dragons.
Check: The article still visually matches monster_drop; this selected layout carries a source-reported idea. It is not exact PTS; no route was independently replayed, no finish is claimed, and exact Steam depot mapping is unverified.
Open full-size image in a new tabPuzzle 22 — laser_stop_surprise
Section titled “Puzzle 22 — laser_stop_surprise”Article still from P40; internal double_beam_falling set position: 11.
Carry a blocking stone through the teleport; stacked objects stay behind.
Selected article still only; the colored ring marks a visible layout landmark, not an input step.
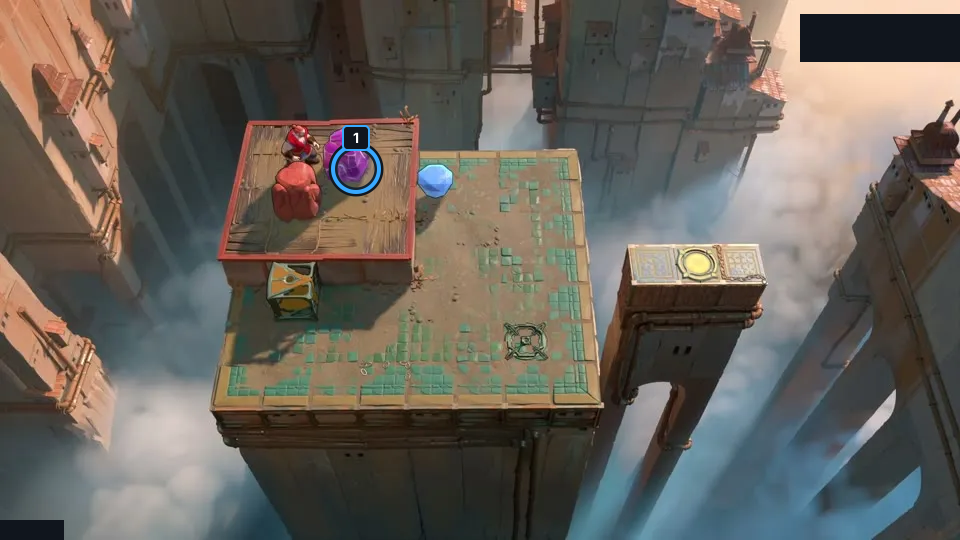
Carry a blocking stone through the teleport; stacked objects stay behind.
Check: The article still visually matches laser_stop_surprise; this selected layout carries a source-reported idea. It is not exact PTS; no route was independently replayed, no finish is claimed, and exact Steam depot mapping is unverified.
Open full-size image in a new tabPuzzle 23 — double_up
Section titled “Puzzle 23 — double_up”Article still from P40; internal double_beam_falling set position: 14.
Use the double button to launch upward, then a doubled orange beam to stay aloft.
Selected article still only; the colored ring marks a visible layout landmark, not an input step.
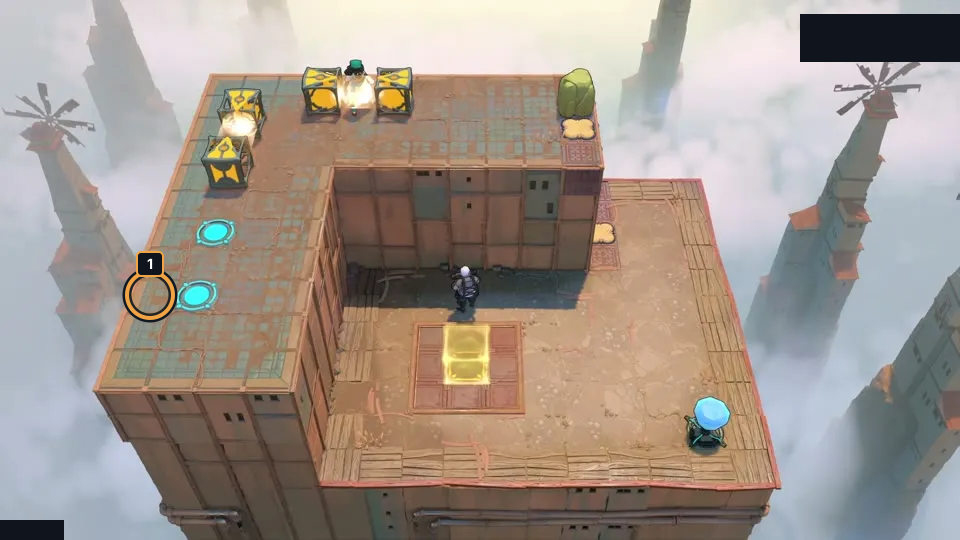
Use the double button to launch upward, then a doubled orange beam to stay aloft.
Check: The article still visually matches double_up; this selected layout carries a source-reported idea. It is not exact PTS; no route was independently replayed, no finish is claimed, and exact Steam depot mapping is unverified.
Open full-size image in a new tabPuzzle 24 — fire_from_above_2
Section titled “Puzzle 24 — fire_from_above_2”Article still from P40; internal double_beam_falling set position: 12.
Carry a stone as a helmet while the teleport switches off the gem beam.
Selected article still only; the colored ring marks a visible layout landmark, not an input step.
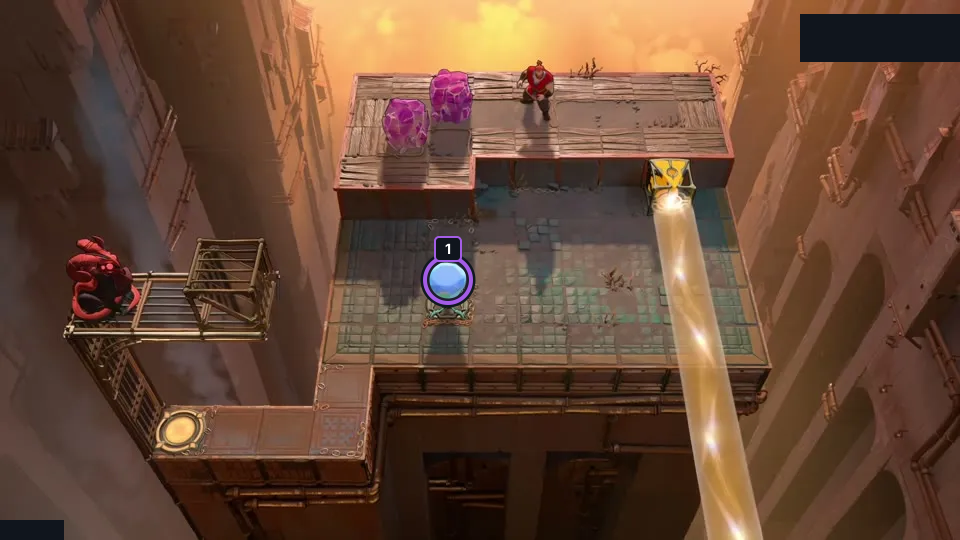
Carry a stone as a helmet while the teleport switches off the gem beam.
Check: The article still visually matches fire_from_above_2; this selected layout carries a source-reported idea. It is not exact PTS; no route was independently replayed, no finish is claimed, and exact Steam depot mapping is unverified.
Open full-size image in a new tabPuzzle 25 — hat_maker
Section titled “Puzzle 25 — hat_maker”Article still from P40; internal double_beam_falling set position: 13.
Stack a laser on a stone to suspend the crystal, then switch the beam off.
Selected article still only; the colored ring marks a visible layout landmark, not an input step.
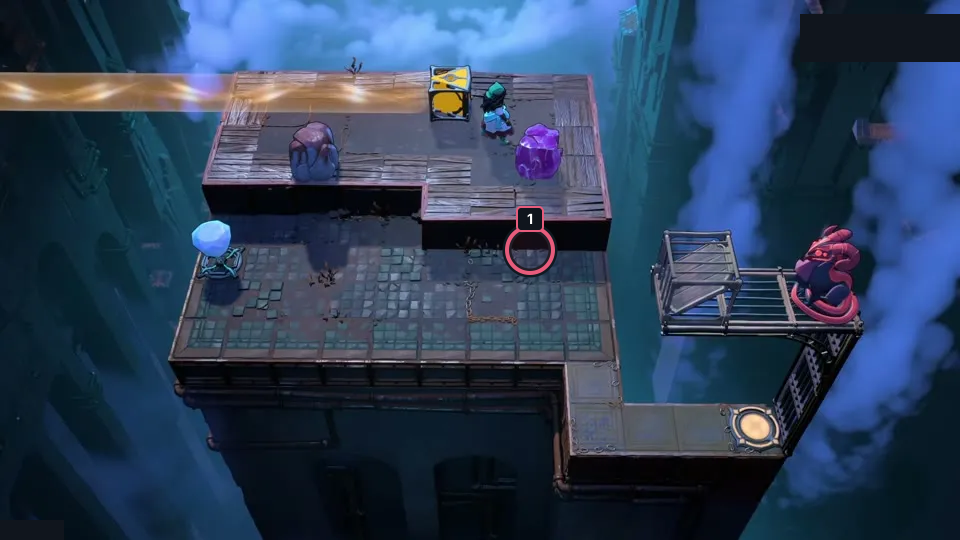
Stack a laser on a stone to suspend the crystal, then switch the beam off.
Check: The article still visually matches hat_maker; this selected layout carries a source-reported idea. It is not exact PTS; no route was independently replayed, no finish is claimed, and exact Steam depot mapping is unverified.
Open full-size image in a new tabPuzzle 28 — side_sub_v2
Section titled “Puzzle 28 — side_sub_v2”Article still from P40; internal double_beam_falling set position: 16.
Build the eight-tile beam drop before the shorter crossing.
Selected article still only; the colored ring marks a visible layout landmark, not an input step.
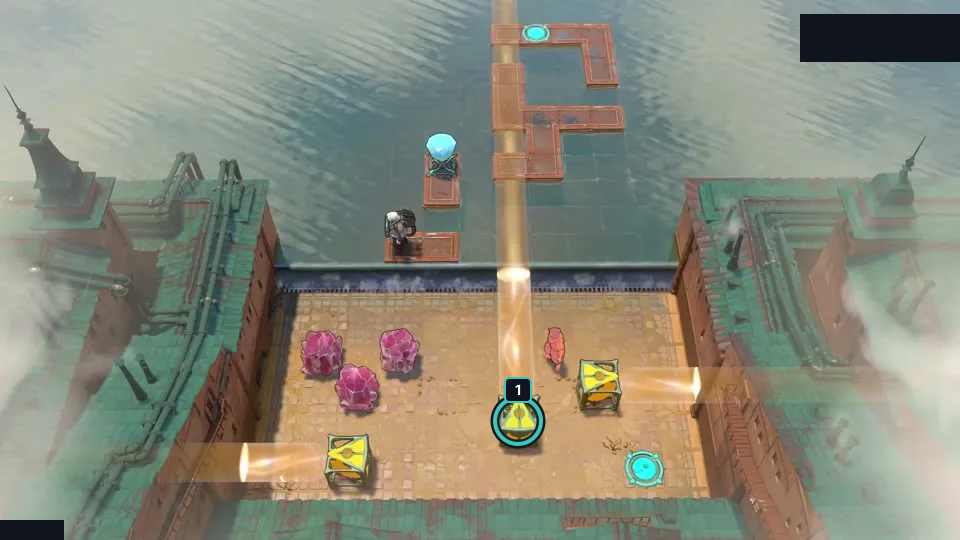
Build the eight-tile beam drop before the shorter crossing.
Check: The article still visually matches side_sub_v2; this selected layout carries a source-reported idea. It is not exact PTS; no route was independently replayed, no finish is claimed, and exact Steam depot mapping is unverified.
Open full-size image in a new tabPuzzle 29 — side_sub_back
Section titled “Puzzle 29 — side_sub_back”Article still from P40; internal double_beam_falling set position: 17.
Use the cart to move the emitter into the water beam and choose a safe landing.
Selected article still only; the colored ring marks a visible layout landmark, not an input step.
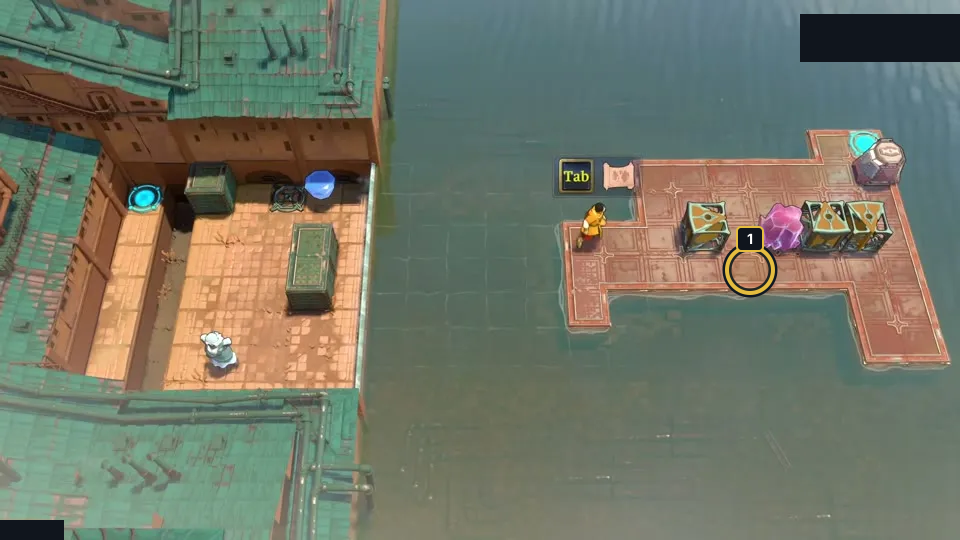
Use the cart to move the emitter into the water beam and choose a safe landing.
Check: The article still visually matches side_sub_back; this selected layout carries a source-reported idea. It is not exact PTS; no route was independently replayed, no finish is claimed, and exact Steam depot mapping is unverified.
Open full-size image in a new tabPuzzle 30 — buff_explorer
Section titled “Puzzle 30 — buff_explorer”Article still from P42; internal strength set position: 1.
Strength depends on the hero and every cyan beam they stand in.
Selected article still only; the colored ring marks a visible layout landmark, not an input step.
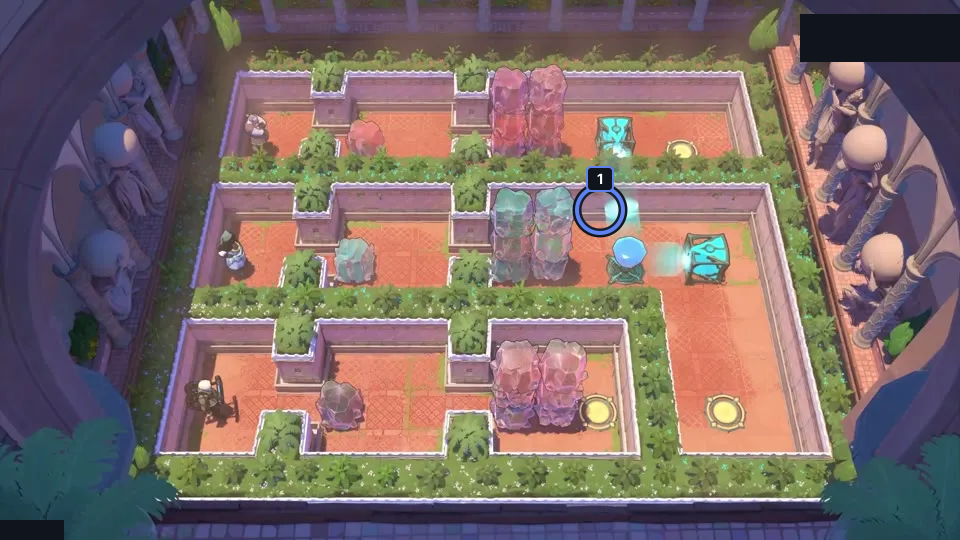
Strength depends on the hero and every cyan beam they stand in.
Check: The article still visually matches buff_explorer; this selected layout carries a source-reported idea. It is not exact PTS; no route was independently replayed, no finish is claimed, and exact Steam depot mapping is unverified.
Open full-size image in a new tabPuzzle 31 — floorhands_v5
Section titled “Puzzle 31 — floorhands_v5”Article still from P42; internal strength set position: 5.
Rebuild the stone bridge one tile at a time and aim cyan beams at its bottlenecks.
Selected article still only; the colored ring marks a visible layout landmark, not an input step.
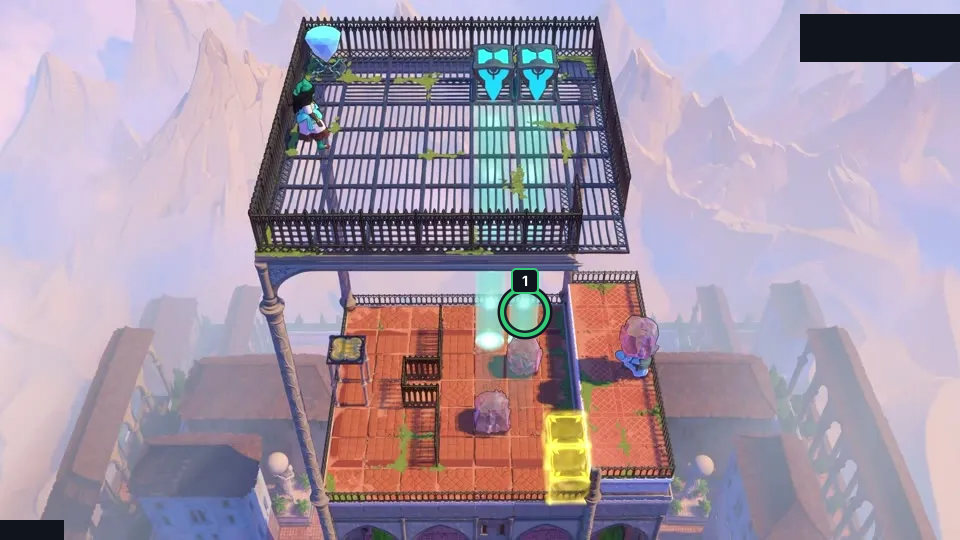
Rebuild the stone bridge one tile at a time and aim cyan beams at its bottlenecks.
Check: The article still visually matches floorhands_v5; this selected layout carries a source-reported idea. It is not exact PTS; no route was independently replayed, no finish is claimed, and exact Steam depot mapping is unverified.
Open full-size image in a new tabPuzzle 32 — stay_lit
Section titled “Puzzle 32 — stay_lit”Article still from P42; internal strength set position: 6.
Keep the Explorer inside a cyan beam while carrying the crystal to the button.
Selected article still only; the colored ring marks a visible layout landmark, not an input step.
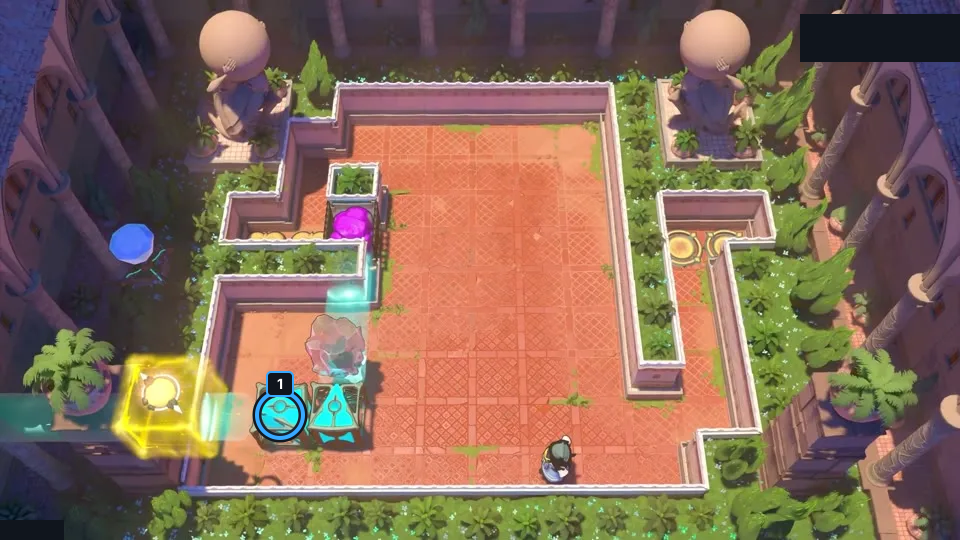
Keep the Explorer inside a cyan beam while carrying the crystal to the button.
Check: The article still visually matches stay_lit; this selected layout carries a source-reported idea. It is not exact PTS; no route was independently replayed, no finish is claimed, and exact Steam depot mapping is unverified.
Open full-size image in a new tabPuzzle 33 — under_pressure
Section titled “Puzzle 33 — under_pressure”Article still from P42; internal strength set position: 3.
Keep the  Wizard and Goblin under cyan strength beams while moving stones.
Selected article still only; the colored ring marks a visible layout landmark, not an input step.
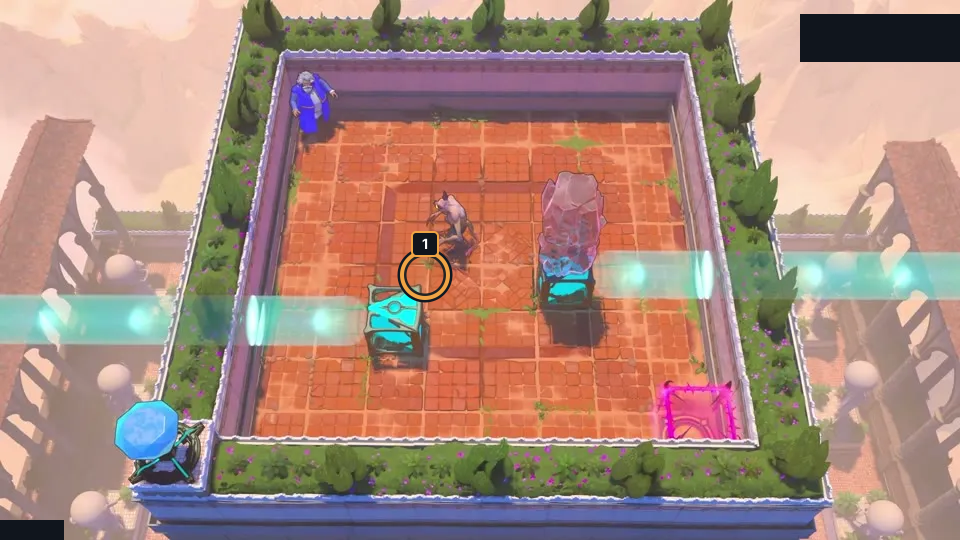
Keep the Wizard and Goblin under cyan strength beams while moving stones.
Check: The article still visually matches under_pressure; this selected layout carries a source-reported idea. It is not exact PTS; no route was independently replayed, no finish is claimed, and exact Steam depot mapping is unverified.
Open full-size image in a new tabPuzzle 34 — strong_monsters_v2
Section titled “Puzzle 34 — strong_monsters_v2”Article still from P42; internal strength set position: 4.
Remove cyan support to crush carried goblins; clear the unneeded one first.
Selected article still only; the colored ring marks a visible layout landmark, not an input step.
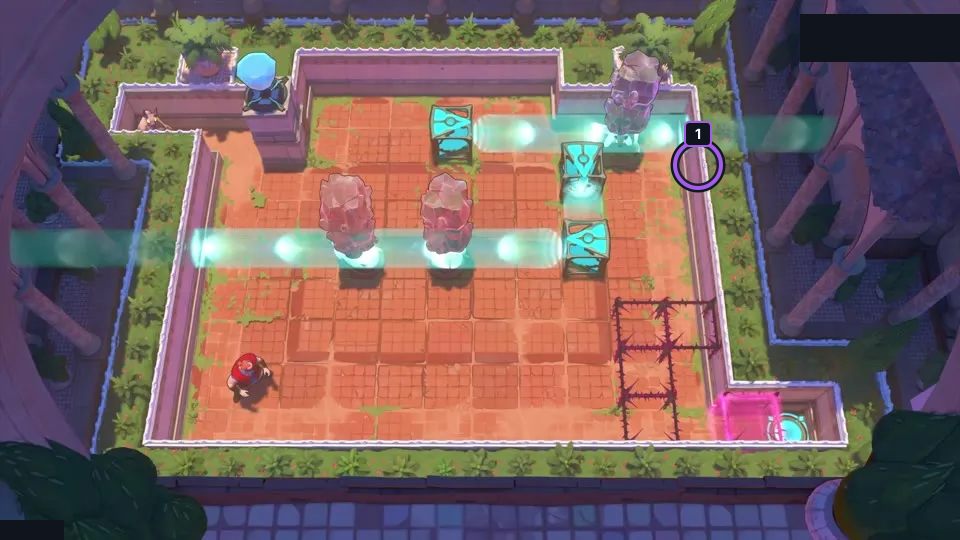
Remove cyan support to crush carried goblins; clear the unneeded one first.
Check: The article still visually matches strong_monsters_v2; this selected layout carries a source-reported idea. It is not exact PTS; no route was independently replayed, no finish is claimed, and exact Steam depot mapping is unverified.
Open full-size image in a new tabPuzzle 36 — crystal_logistics
Section titled “Puzzle 36 — crystal_logistics”Article still from P42; internal beam_carrying set position: 1.
Carry a crystal as a helmet while the Sailor crosses the dragon’s beam.
Selected article still only; the colored ring marks a visible layout landmark, not an input step.
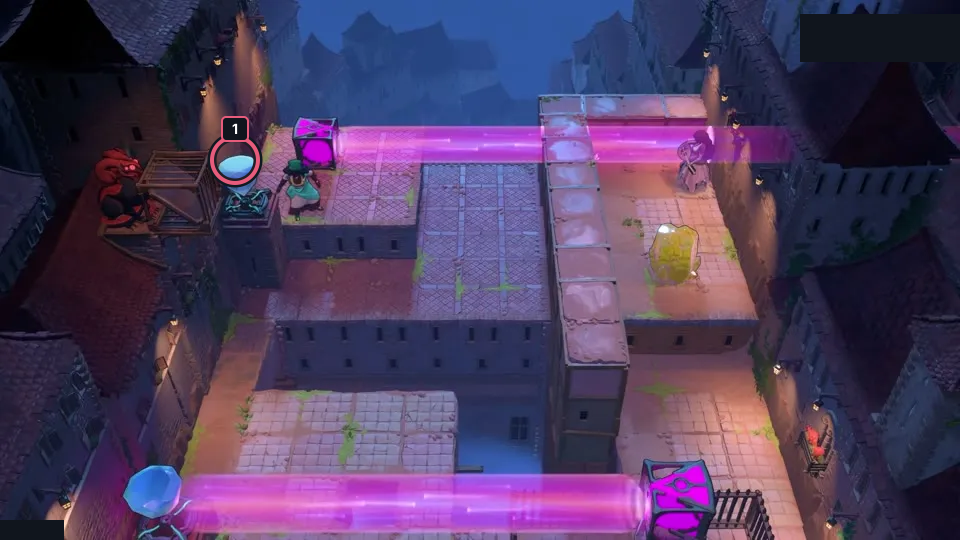
Carry a crystal as a helmet while the Sailor crosses the dragon’s beam.
Check: The article still visually matches crystal_logistics; this selected layout carries a source-reported idea. It is not exact PTS; no route was independently replayed, no finish is claimed, and exact Steam depot mapping is unverified.
Open full-size image in a new tabPuzzle 37 — beam_sisters
Section titled “Puzzle 37 — beam_sisters”Article still from P42; internal beam_carrying set position: 2.
Carry the red emitter down and the orange emitter up; re-aim by pushing.
Selected article still only; the colored ring marks a visible layout landmark, not an input step.
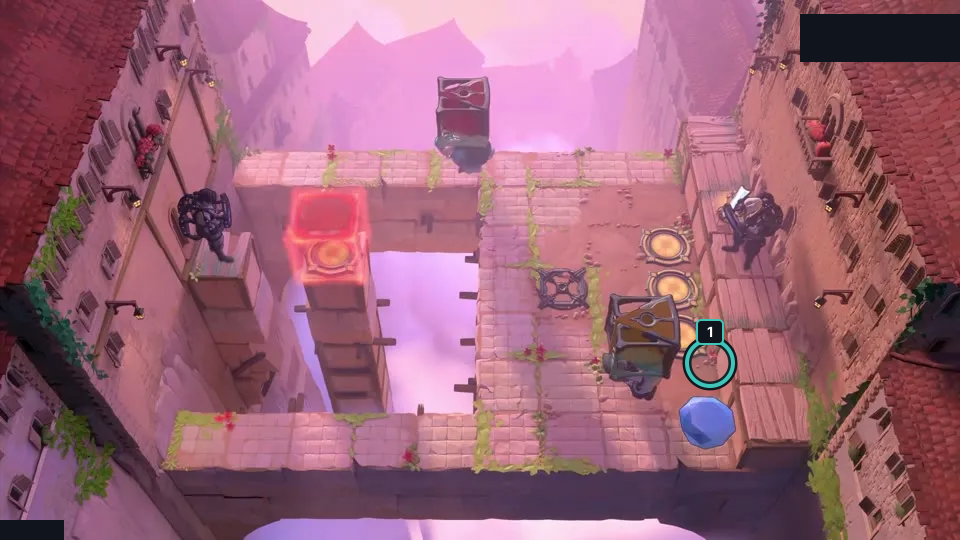
Carry the red emitter down and the orange emitter up; re-aim by pushing.
Check: The article still visually matches beam_sisters; this selected layout carries a source-reported idea. It is not exact PTS; no route was independently replayed, no finish is claimed, and exact Steam depot mapping is unverified.
Open full-size image in a new tabPuzzle 38 — corner_trick_easier
Section titled “Puzzle 38 — corner_trick_easier”Article still from P42; internal beam_carrying set position: 3.
Use the purple endpoint teleport to turn the lower Sailor and change the laser angle.
Selected article still only; the colored ring marks a visible layout landmark, not an input step.
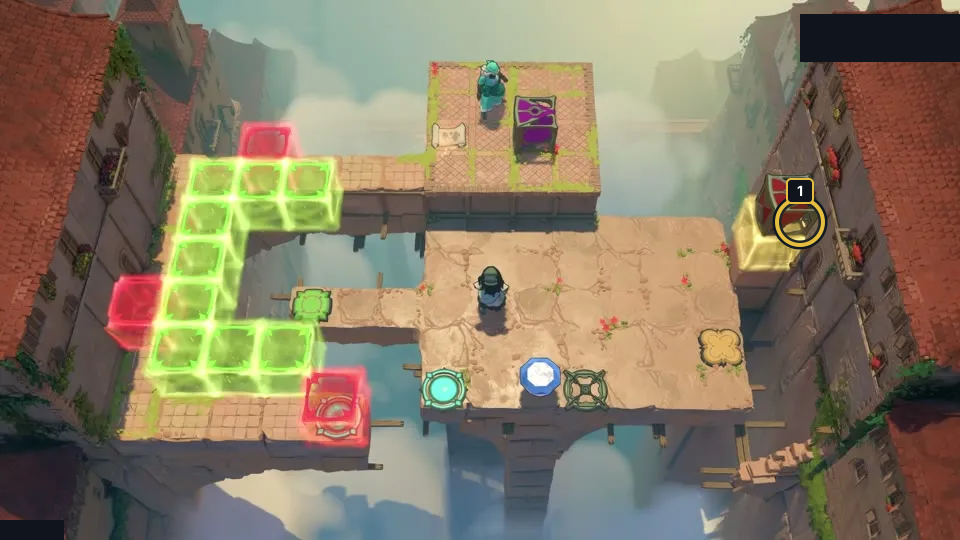
Use the purple endpoint teleport to turn the lower Sailor and change the laser angle.
Check: The article still visually matches corner_trick_easier; this selected layout carries a source-reported idea. It is not exact PTS; no route was independently replayed, no finish is claimed, and exact Steam depot mapping is unverified.
Open full-size image in a new tabPuzzle 39 — goblin_below_intro_same_z
Section titled “Puzzle 39 — goblin_below_intro_same_z”Article still from P42; internal goblin_rotation set position: 1.
Put the green emitter on the Goblin and make it turn to aim the beam upward.
Selected article still only; the colored ring marks a visible layout landmark, not an input step.
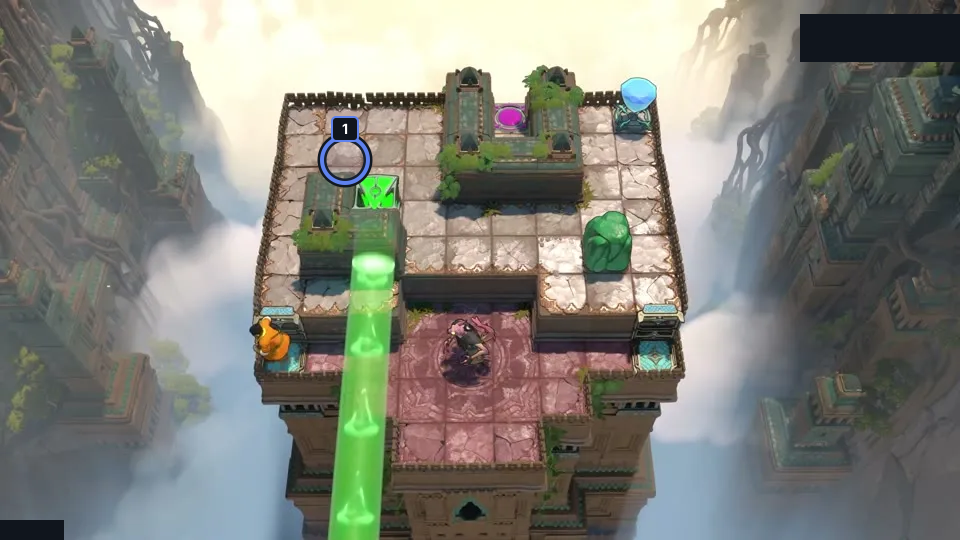
Put the green emitter on the Goblin and make it turn to aim the beam upward.
Check: The article still visually matches goblin_below_intro_same_z; this selected layout carries a source-reported idea. It is not exact PTS; no route was independently replayed, no finish is claimed, and exact Steam depot mapping is unverified.
Open full-size image in a new tabPuzzle 40 — aggro_which0
Section titled “Puzzle 40 — aggro_which0”Article still from P42; internal goblin_rotation set position: 2.
Keep the Goblin holding the blue laser while the Explorer changes its direction.
Selected article still only; the colored ring marks a visible layout landmark, not an input step.
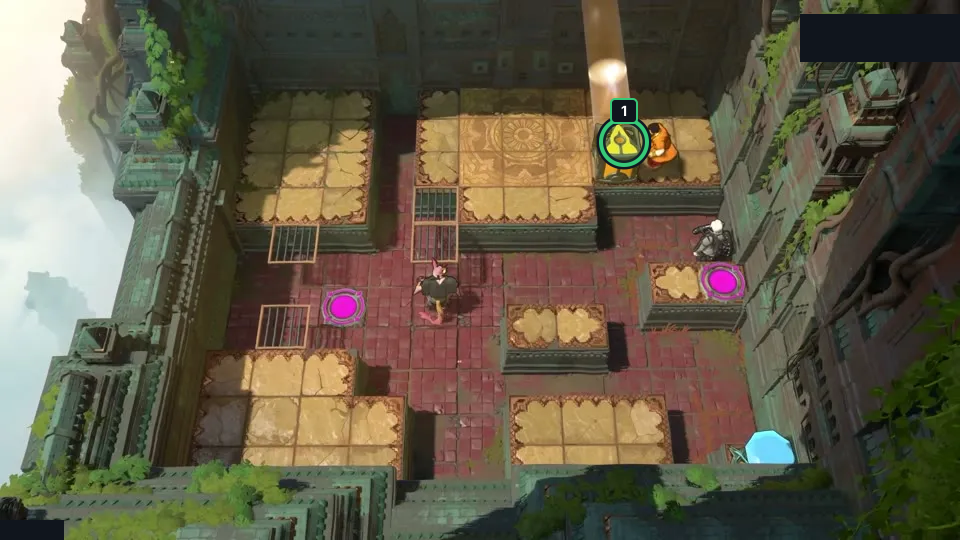
Keep the Goblin holding the blue laser while the Explorer changes its direction.
Check: The article still visually matches aggro_which0; this selected layout carries a source-reported idea. It is not exact PTS; no route was independently replayed, no finish is claimed, and exact Steam depot mapping is unverified.
Open full-size image in a new tabPuzzle 41 — aggro_maze
Section titled “Puzzle 41 — aggro_maze”Article still from P42; internal goblin_rotation set position: 3.
Swap through the chain in order; each Goblin and mirror must face the next target.
Selected article still only; the colored ring marks a visible layout landmark, not an input step.
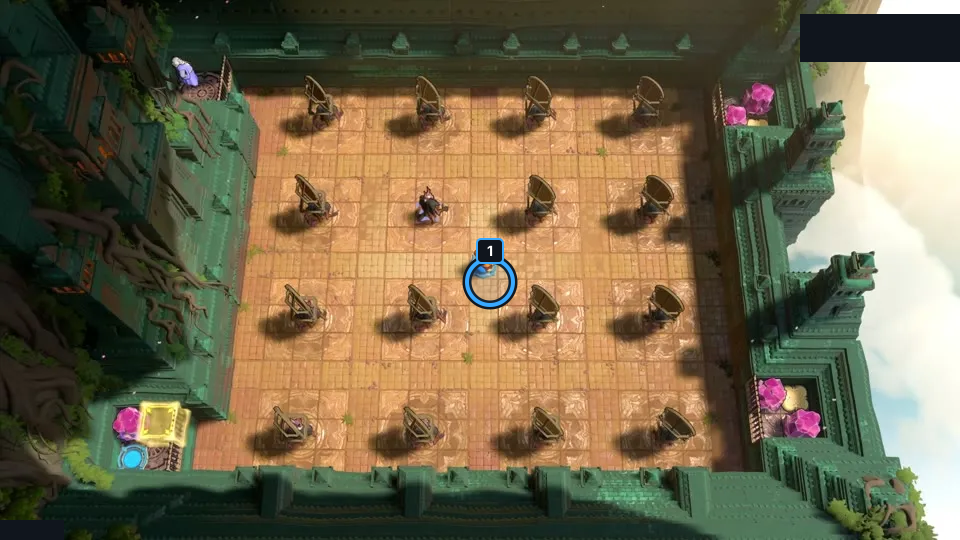
Swap through the chain in order; each Goblin and mirror must face the next target.
Check: The article still visually matches aggro_maze; this selected layout carries a source-reported idea. It is not exact PTS; no route was independently replayed, no finish is claimed, and exact Steam depot mapping is unverified.
Open full-size image in a new tabPuzzle 42 — chain_gang
Section titled “Puzzle 42 — chain_gang”Article still from P42; internal goblin_rotation set position: 4.
Approach the lower Goblin diagonally to turn it downward.
Selected article still only; the colored ring marks a visible layout landmark, not an input step.
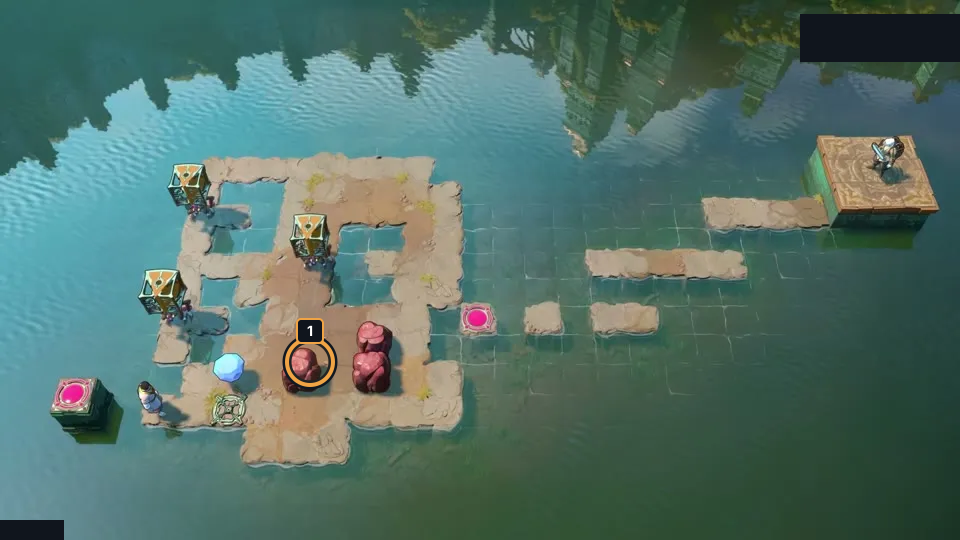
Approach the lower Goblin diagonally to turn it downward.
Check: The article still visually matches chain_gang; this selected layout carries a source-reported idea. It is not exact PTS; no route was independently replayed, no finish is claimed, and exact Steam depot mapping is unverified.
Open full-size image in a new tabPuzzle 43 — chain_gang3
Section titled “Puzzle 43 — chain_gang3”Article still from P42; internal goblin_rotation set position: 5.
Set both Goblins to face right; use stones to block unwanted turns.
Selected article still only; the colored ring marks a visible layout landmark, not an input step.
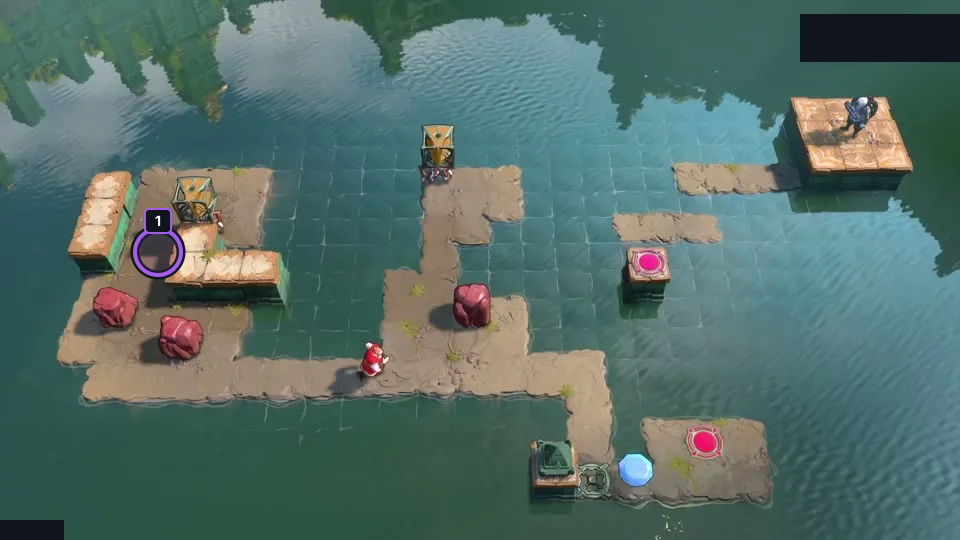
Set both Goblins to face right; use stones to block unwanted turns.
Check: The article still visually matches chain_gang3; this selected layout carries a source-reported idea. It is not exact PTS; no route was independently replayed, no finish is claimed, and exact Steam depot mapping is unverified.
Open full-size image in a new tabPuzzle 44 — pass_through_v2_same_z
Section titled “Puzzle 44 — pass_through_v2_same_z”Article still from P42; internal goblin_rotation set position: 6.
Place the Goblin on the center mirror tile and redirect the stone along the open lane.
Selected article still only; the colored ring marks a visible layout landmark, not an input step.
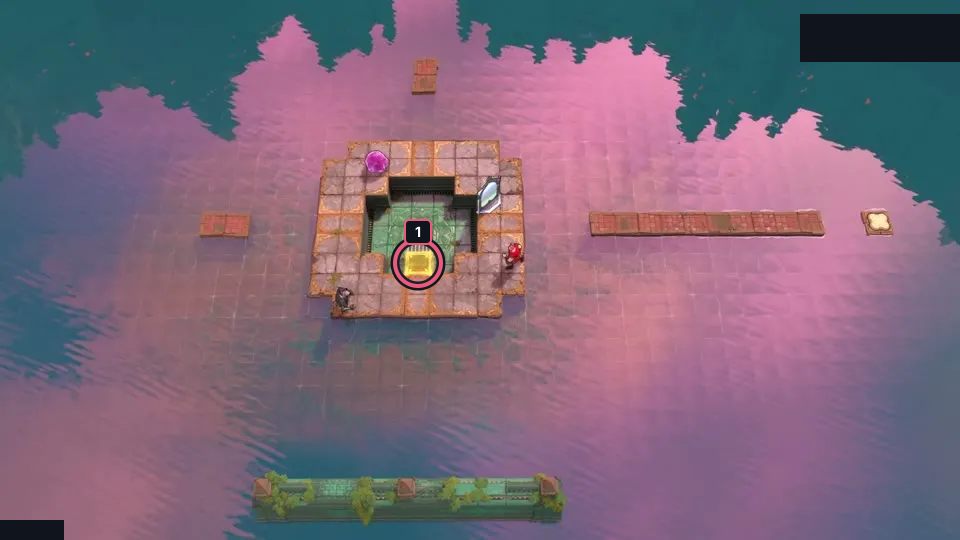
Place the Goblin on the center mirror tile and redirect the stone along the open lane.
Check: The article still visually matches pass_through_v2_same_z; this selected layout carries a source-reported idea. It is not exact PTS; no route was independently replayed, no finish is claimed, and exact Steam depot mapping is unverified.
Open full-size image in a new tabPuzzle 45 — vacuum
Section titled “Puzzle 45 — vacuum”Article section: Puzzle 45; internal set position: 2.
The ring marks a visible landmark, not an action step.
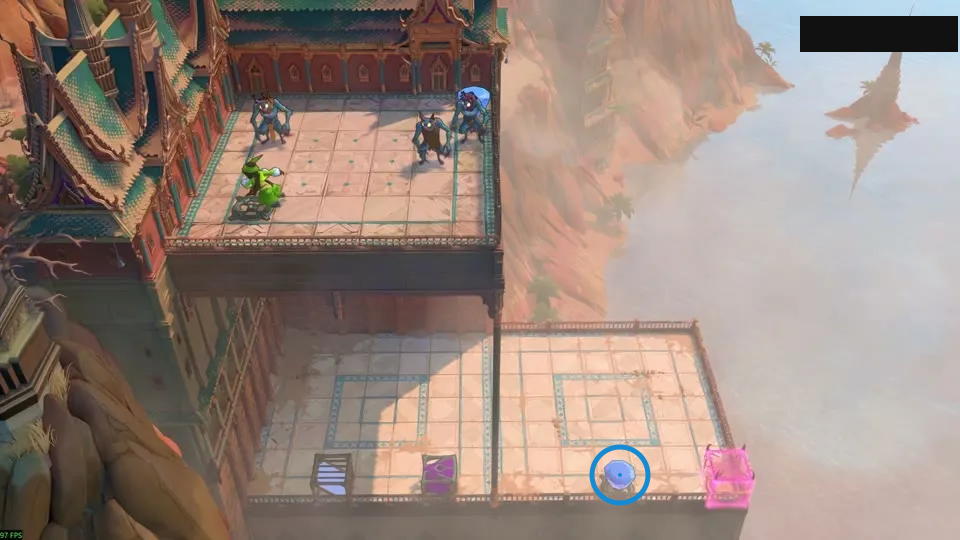
Use the vertical purple beam to pull objects down.
Check: Ring marks blue gem on the lower balcony.
Open full-size image in a new tabPuzzle 46 — pink_platforms
Section titled “Puzzle 46 — pink_platforms”Article section: Puzzle 46; internal set position: 3.
The ring marks a visible landmark, not an action step.
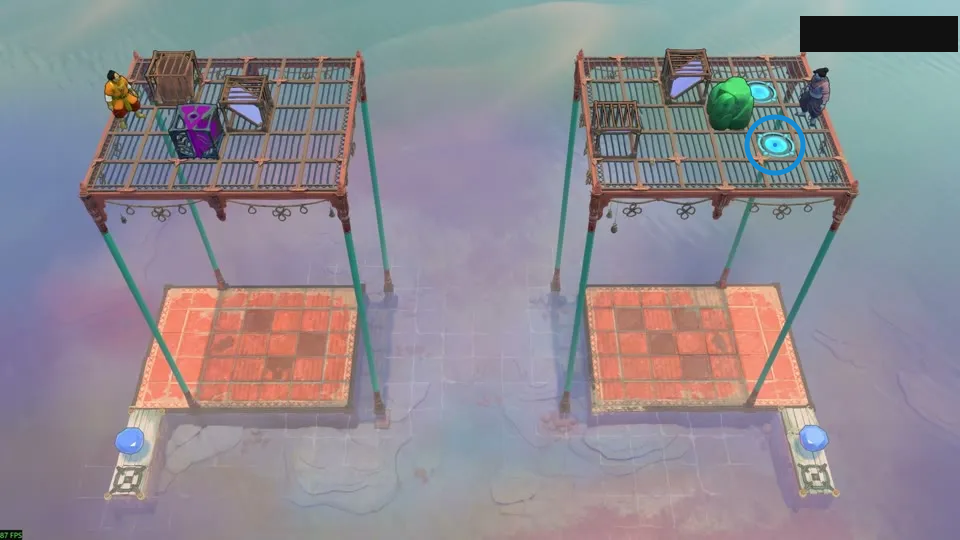
Route both heroes along the same purple beam.
Check: Ring marks lower cyan circular pad on the upper-right platform.
Open full-size image in a new tabPuzzle 47 — suspend_intro
Section titled “Puzzle 47 — suspend_intro”Article section: Puzzle 47; internal set position: 5.
The ring marks a visible landmark, not an action step.
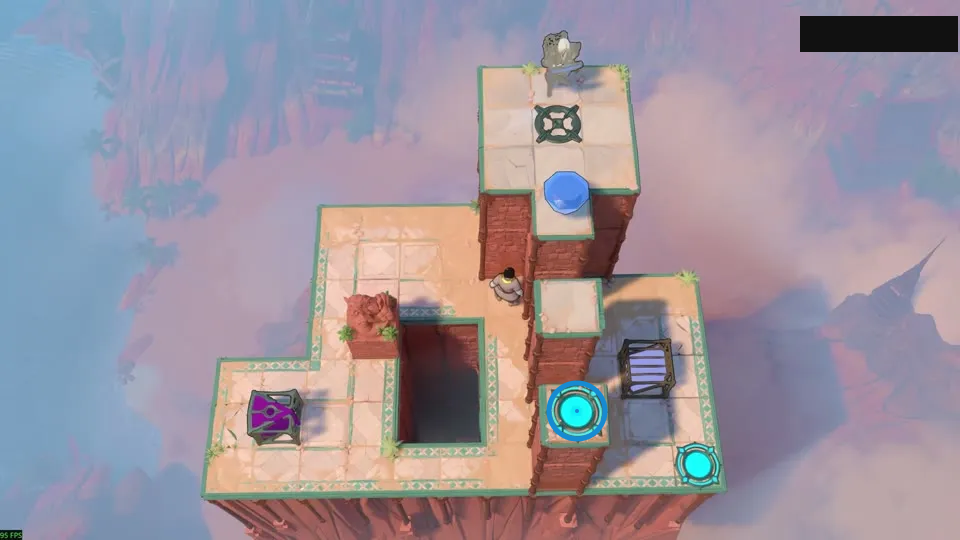
Block the purple beam’s far end to float.
Check: Ring marks cyan circular pad on the central-right pillar.
Open full-size image in a new tabPuzzle 48 — suspend_block_v2
Section titled “Puzzle 48 — suspend_block_v2”Article section: Puzzle 48; internal set position: 6.
The ring marks a visible landmark, not an action step.
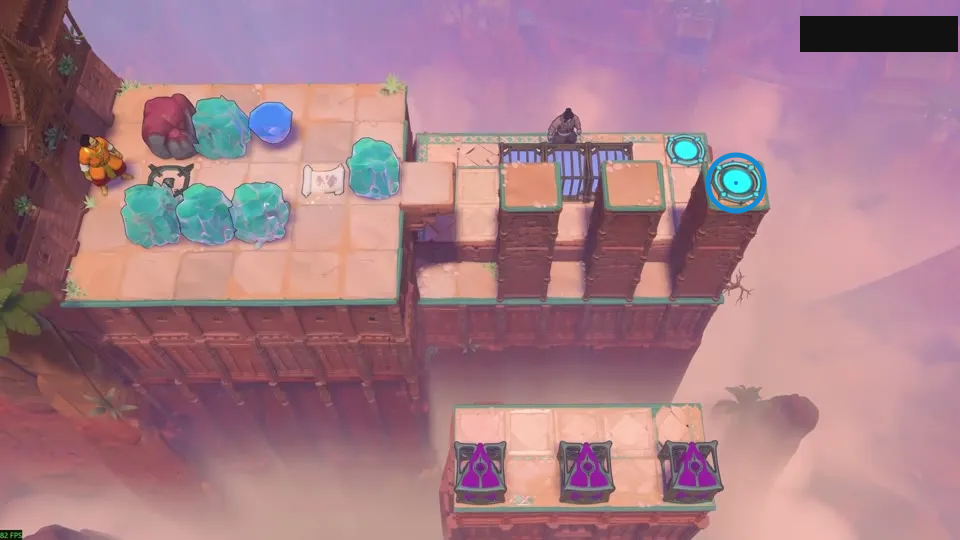
Lower a plain stone before placing beam blockers.
Check: Ring marks cyan circular pad on the far-right pillar.
Open full-size image in a new tabPuzzle 49 — suspend_heterogeneous
Section titled “Puzzle 49 — suspend_heterogeneous”Article section: Puzzle 49; internal set position: 7.
The ring marks a visible landmark, not an action step.
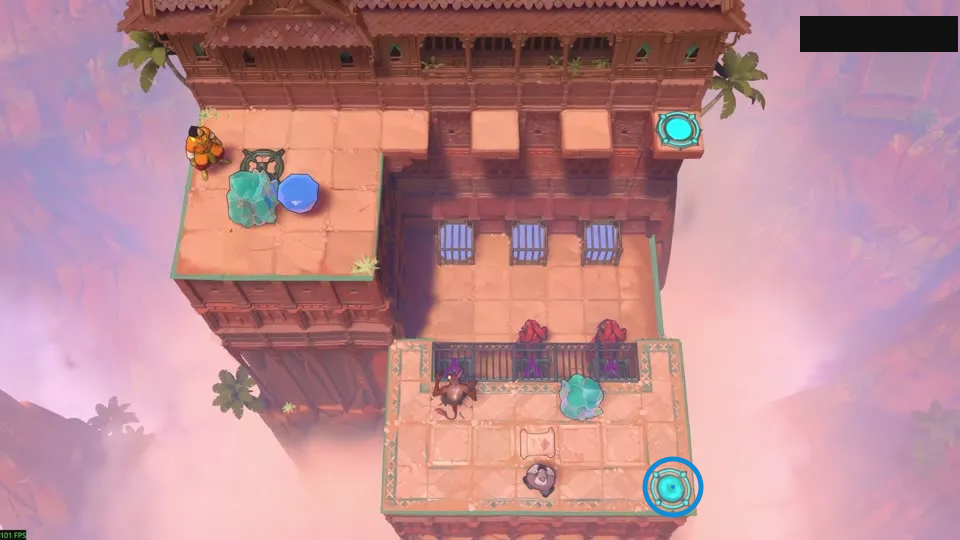
Use a crystal to stop fire without stopping the purple beam.
Check: Ring marks cyan circular pad on the lower-right platform.
Open full-size image in a new tabPuzzle 50 — suspend_directions_v2
Section titled “Puzzle 50 — suspend_directions_v2”Article section: Puzzle 50; internal set position: 8.
The ring marks a visible landmark, not an action step.
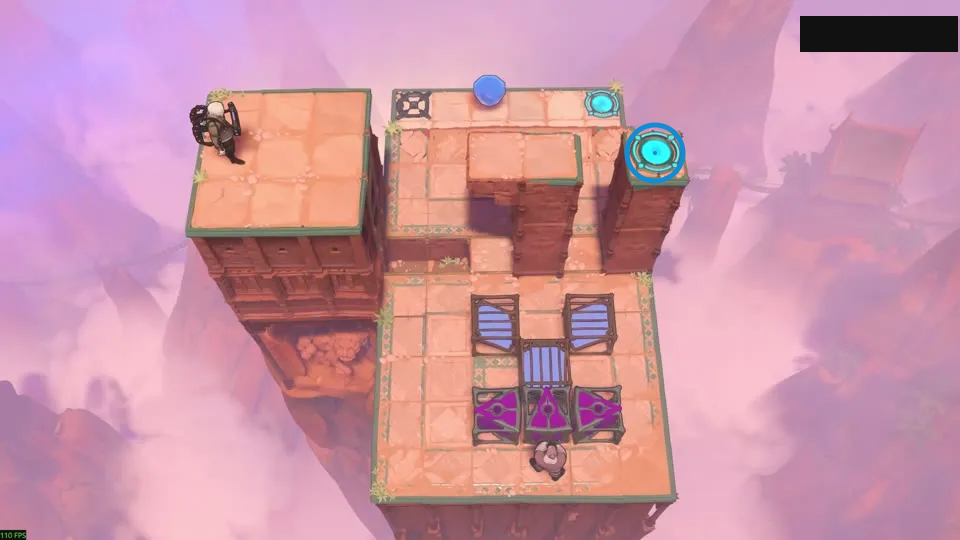
Hide the right-facing emitter behind the wall.
Check: Ring marks cyan circular pad on the right-hand pillar.
Open full-size image in a new tabPuzzle 51 — suspend_swapper_hard
Section titled “Puzzle 51 — suspend_swapper_hard”Article section: Puzzle 51; internal set position: 9.
The ring marks a visible landmark, not an action step.
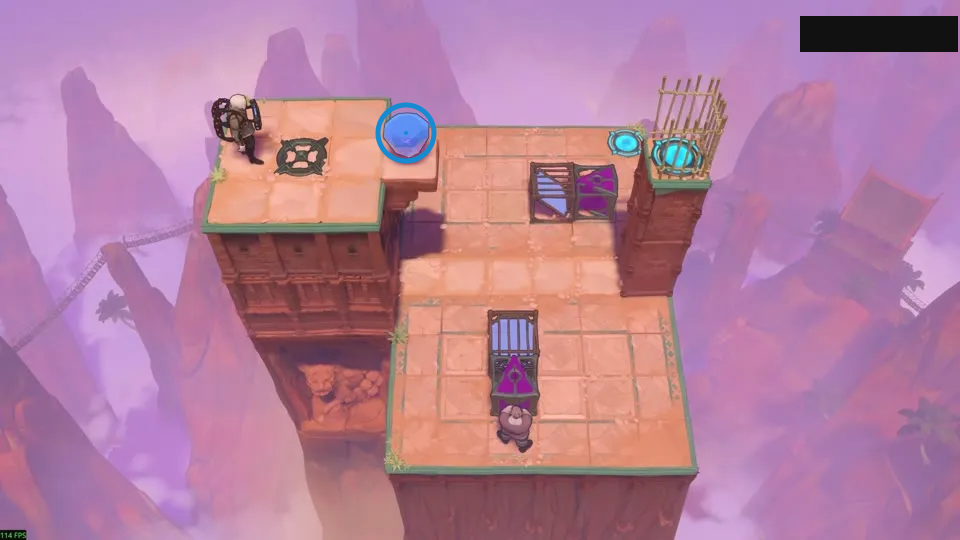
Move the purple-beam structure one tile at a time.
Check: Ring marks blue gem on the upper-left platform.
Open full-size image in a new tabPuzzle 52 — one_floor_down_v2
Section titled “Puzzle 52 — one_floor_down_v2”Article section: Puzzle 52; internal set position: 4.
The ring marks a visible landmark, not an action step.
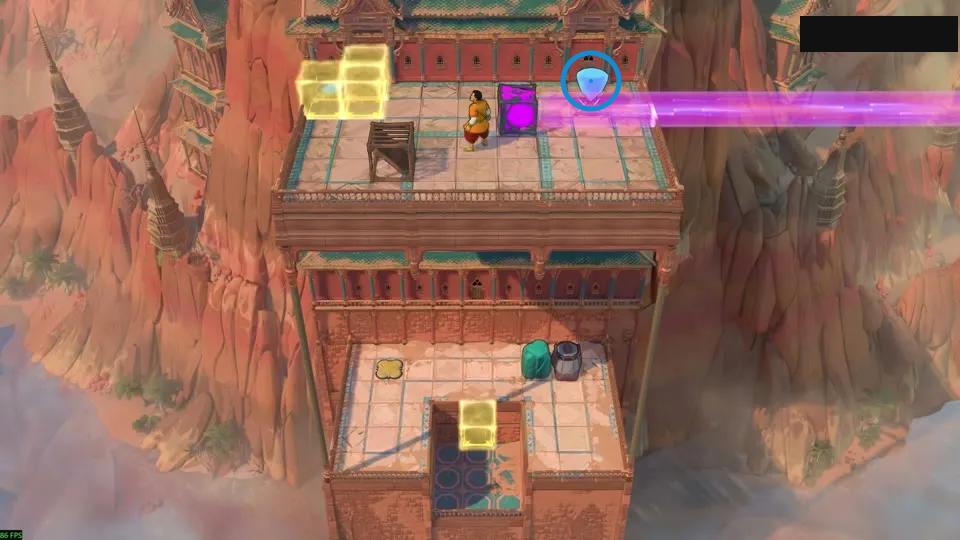
Hold the lower button with the cart.
Check: Ring marks blue gem on the upper platform.
Open full-size image in a new tabPuzzle 54 — beam_jail_v3
Section titled “Puzzle 54 — beam_jail_v3”Article section: Puzzle 54; internal set position: 10.
The ring marks a visible landmark, not an action step.
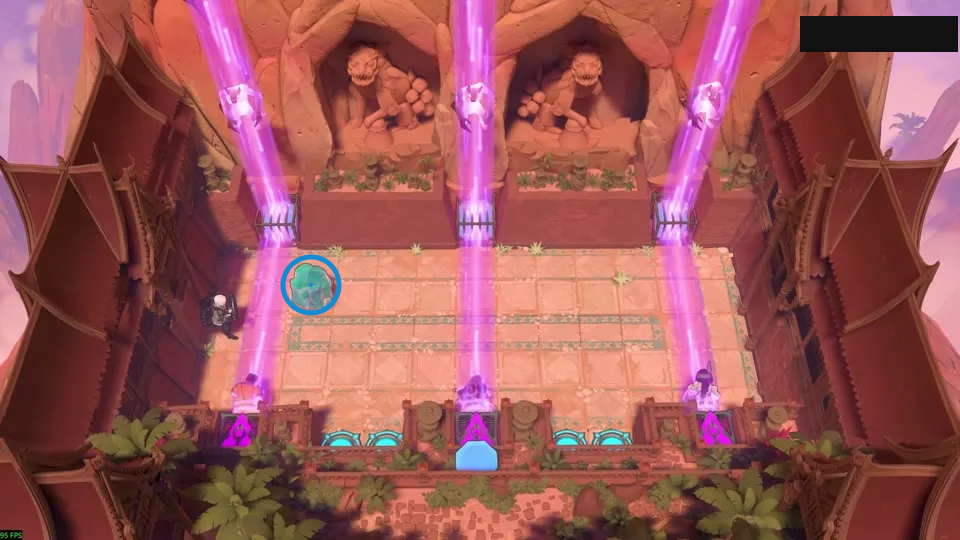
Free one hero at a time while keeping beam ends blocked.
Check: Ring marks green crystal on the left floor.
Open full-size image in a new tabPuzzle 55 — high_endpoint_v2
Section titled “Puzzle 55 — high_endpoint_v2”Article section: Puzzle 55; internal set position: 3.
The ring marks a visible landmark, not an action step.
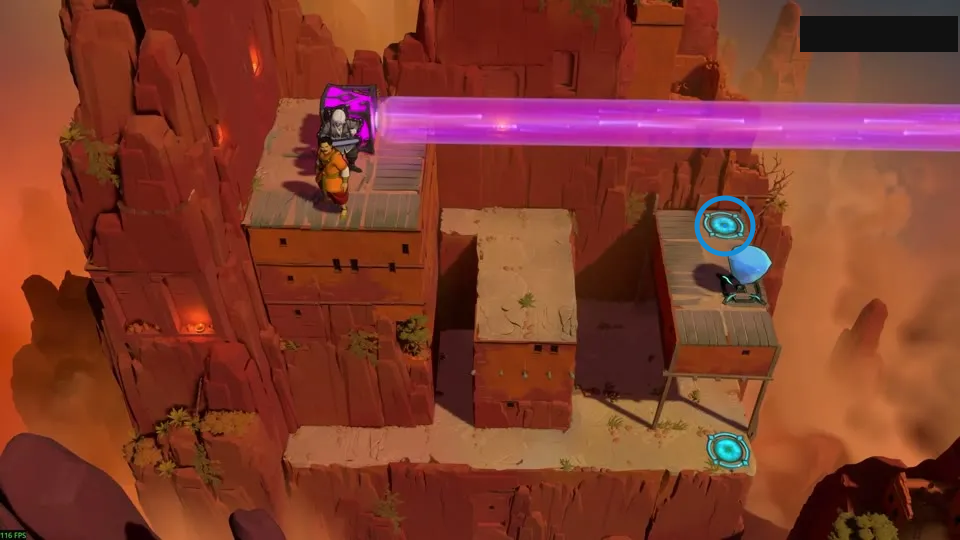
Raise the Explorer, then lower the beamcaster.
Check: Ring marks cyan circular pad on the upper-right ledge.
Open full-size image in a new tabPuzzle 56 — first_flight
Section titled “Puzzle 56 — first_flight”Article still from P41; internal double_beam_falling_dropdown set position: 1.
Use shallow-water catches and crossing beams to manage jump parity.
Selected article still only; the colored ring marks a visible layout landmark, not an input step.
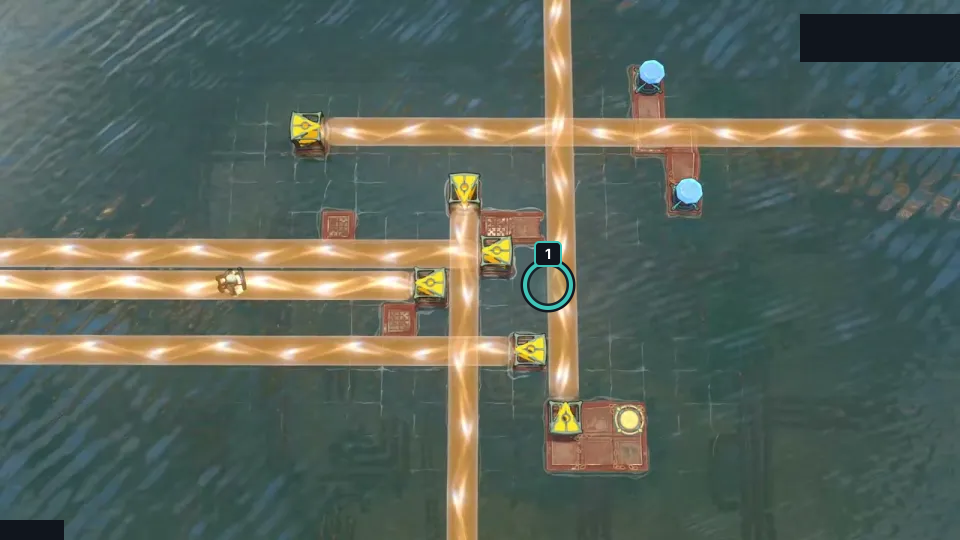
Use shallow-water catches and crossing beams to manage jump parity.
Check: The article still visually matches first_flight; this selected layout carries a source-reported idea. It is not exact PTS; no route was independently replayed, no finish is claimed, and exact Steam depot mapping is unverified.
Open full-size image in a new tabPuzzle 57 — double_trouble
Section titled “Puzzle 57 — double_trouble”Article still from P41; internal double_beam_falling_dropdown set position: 2.
Push the emitter down the platform and switch parity to reach each side.
Selected article still only; the colored ring marks a visible layout landmark, not an input step.
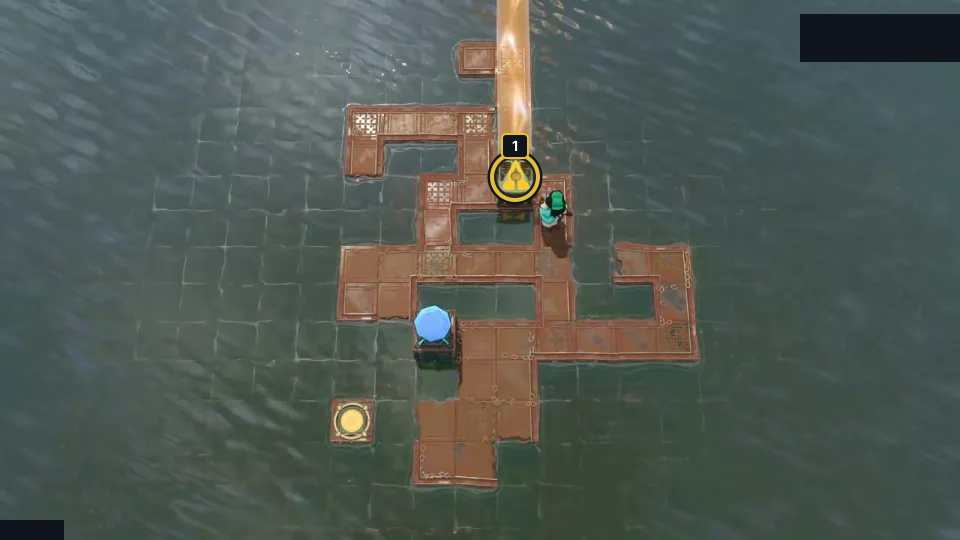
Push the emitter down the platform and switch parity to reach each side.
Check: The article still visually matches double_trouble; this selected layout carries a source-reported idea. It is not exact PTS; no route was independently replayed, no finish is claimed, and exact Steam depot mapping is unverified.
Open full-size image in a new tabPuzzle 58 — orange_cross
Section titled “Puzzle 58 — orange_cross”Article still from P41; internal double_beam_falling_dropdown set position: 3.
Use a doubled orange beam to jump behind the stone and push it left.
Selected article still only; the colored ring marks a visible layout landmark, not an input step.
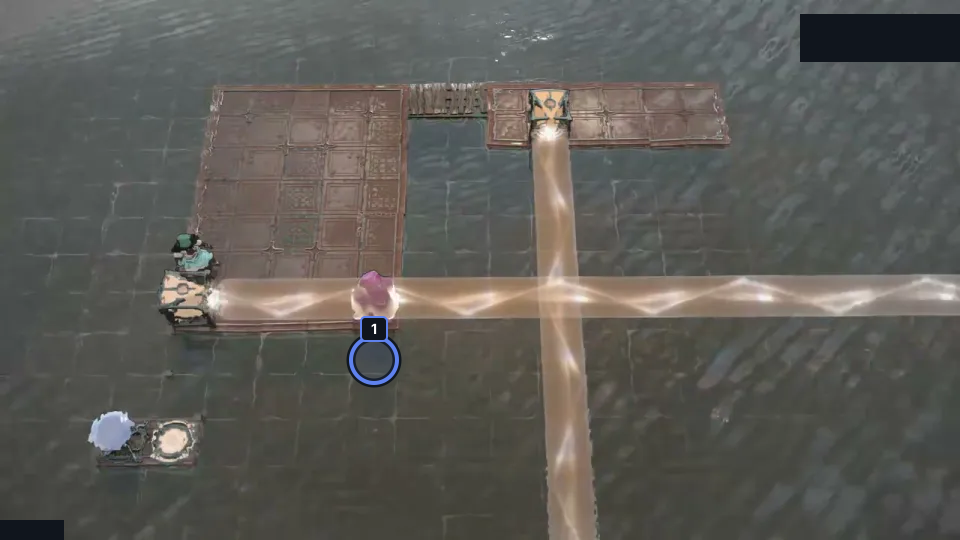
Use a doubled orange beam to jump behind the stone and push it left.
Check: The article still visually matches orange_cross; this selected layout carries a source-reported idea. It is not exact PTS; no route was independently replayed, no finish is claimed, and exact Steam depot mapping is unverified.
Open full-size image in a new tabOverworld puzzle 10 — seeing_red
Section titled “Overworld puzzle 10 — seeing_red”Article section: Overworld puzzle 10; internal set position: 1.
The ring marks a visible landmark, not an action step.
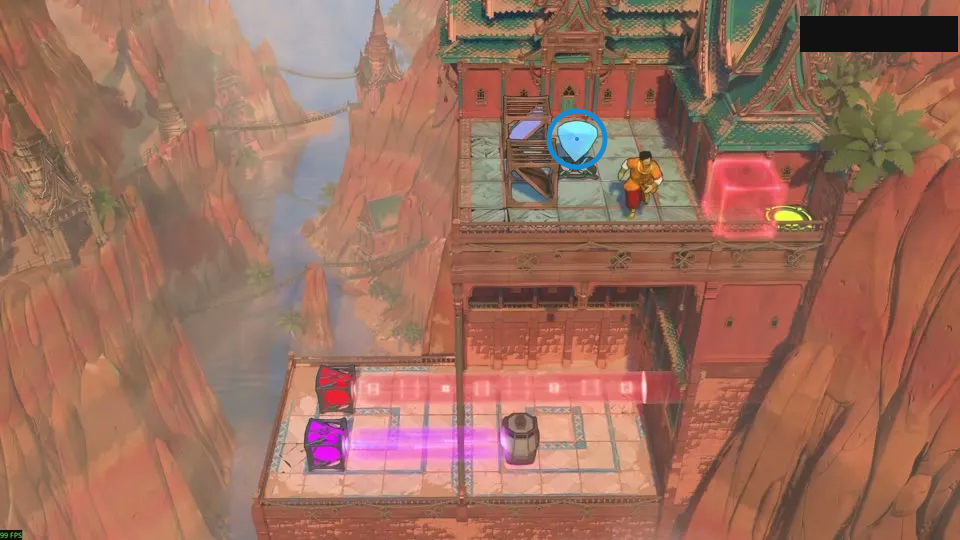
Use the cart to share one mirror between both tasks.
Check: Ring marks blue gem on the upper balcony.
Open full-size image in a new tabAdditional selected video layouts
Section titled “Additional selected video layouts”Crystal heights beside the beam
Section titled “Crystal heights beside the beam”Compare the crystal heights with the orange beam.
The blue ring marks a visible landmark in this selected view.
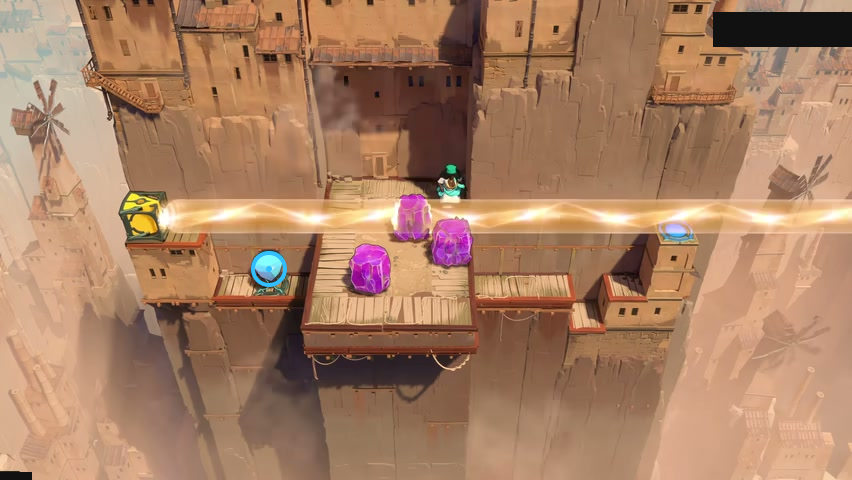
Find the blue gem below the left emitter.
Check: The blue ring marks the blue gem below the left emitter.
Open full-size image in a new tabOrange beams on linked platforms
Section titled “Orange beams on linked platforms”Trace the orange beams across the linked platforms.
The blue ring marks a visible landmark in this selected view.
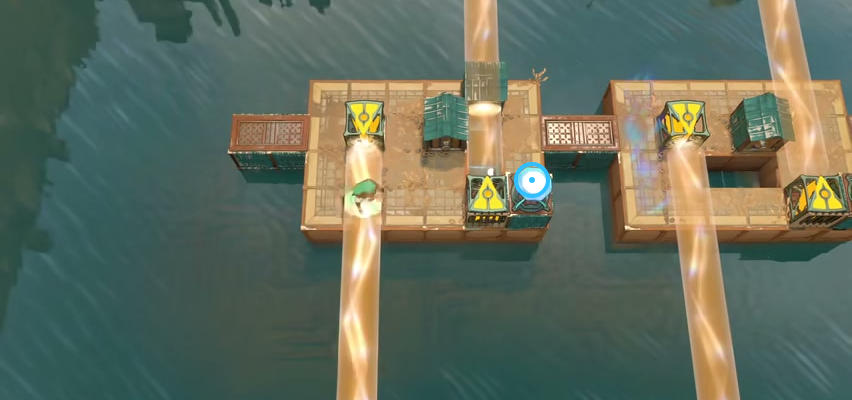
Find the blue gem beside the lower emitter.
Check: The blue ring marks the blue gem beside the lower emitter.
Open full-size image in a new tabUpper emitter and lower button
Section titled “Upper emitter and lower button”Compare the upper emitter with the green button on the lower platform.
The blue ring marks a visible landmark in this selected view.
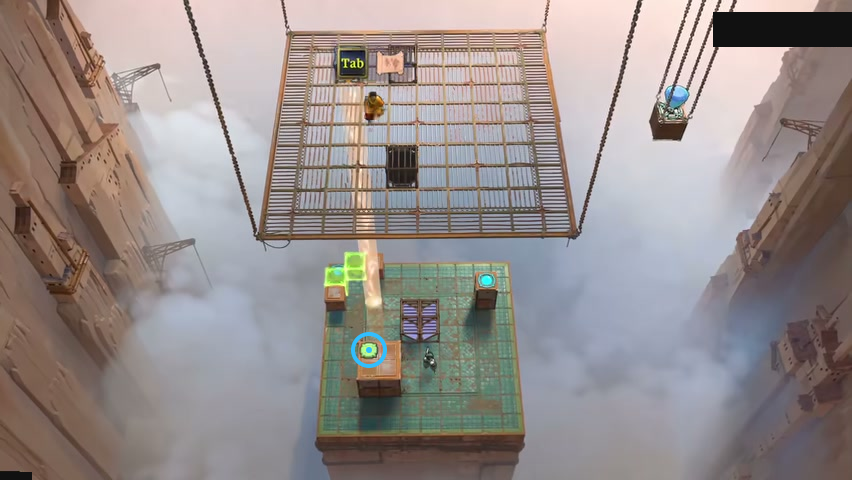
Find the green button on the lower raised block.
Check: The blue ring marks the green button on the lower raised block.
Open full-size image in a new tabA gap between the ledges
Section titled “A gap between the ledges”Look for the gap between the ledges before moving the crystals.
The blue ring marks a visible landmark in this selected view.
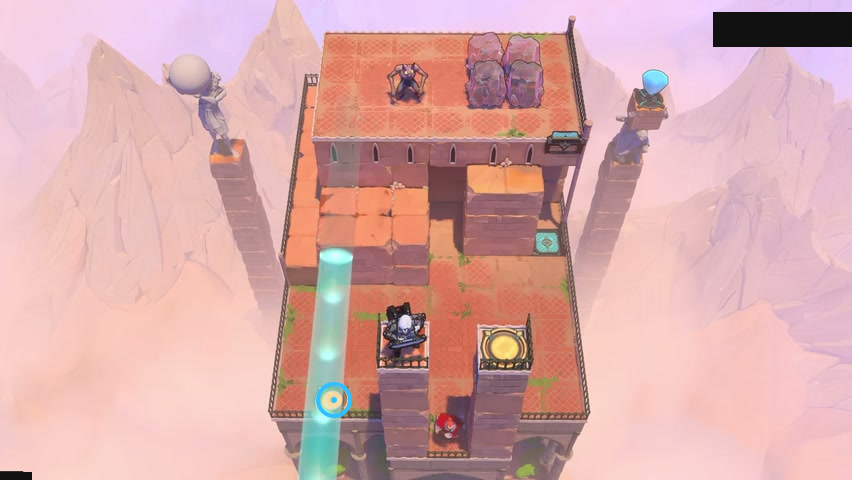
Find the cyan endpoint on the lower-left ledge.
Check: The blue ring marks the cyan endpoint on the lower-left ledge.
Open full-size image in a new tabSelected room views
Section titled “Selected room views”Round stone below the fenced chamber
Section titled “Round stone below the fenced chamber”Check the gap in the fence beside the stone.
The blue ring marks a visible landmark in this selected view.
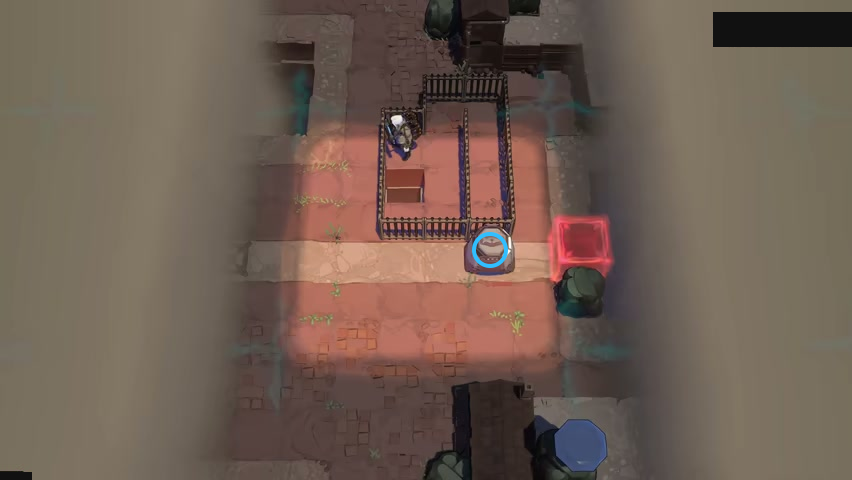
Find round stone below the fenced chamber.
Check: The blue ring marks round stone below the fenced chamber.
Open full-size image in a new tabSources
- High Beamcasters community walkthrough.
- 塞德莎 narrated walkthrough series, selected layouts from parts 41 and 43.
- Full puzzle candidate inventory (PC r67121) — Extracted data
- High Beamcasters (Antipode High) walkthrough — Documentation · walkthrough-updated-2026-10-21
- 塞德莎 High Beamcasters narrated walkthrough series — Observed in-game · high-beamcasters-article-part-cues-2026-10-22
- High Beamcasters shipped-candidate classification — Documentation · high-beamcasters-candidate-review-2026-10-22-additional11-video-layouts-2026-10-25
- High Beamcasters bilingual selected-layout cards — Extracted data · high-beamcasters-selected-layouts-2026-10-22
- Remaining approved source/native candidate crosswalk — Extracted data · remaining-source-candidates-2026-10-25-29-video-display-upgrades
- High Beamcasters bilingual selected-layout evidence — Extracted data · remaining-source-layouts-high-beamcasters-2026-10-24
- Sinking Star Walkthrough article: high beamcasters solutions — Documentation · walkthrough-high-beamcasters-solutions
- Additional selected video layout cards — Extracted data · additional-source-layouts-selected-layouts-2026-10-25
- Additional selected source video frame observations — Observed in-game · additional-source-layouts-video-observations-2026-10-25
- Additional selected-layout display coverage delta — Observed in-game · additional-source-layouts-display-coverage-delta-2026-10-25
- 塞德莎 public walkthrough, playlist part 41 — Observed in-game · bilibili-additional-source-layouts-part-41-2026-10-25
- 塞德莎 public walkthrough, playlist part 43 — Observed in-game · bilibili-additional-source-layouts-part-43-2026-10-25
- Root-approved selected video frame and native layout observations — Observed in-game · verified-backlog-video-frame-observations-2026-10-25
- Verified backlog bilingual selected-layout cards — Extracted data · verified-backlog-selected-layouts-2026-10-25
- Verified backlog current display coverage delta — Extracted data · verified-backlog-display-coverage-delta-2026-10-25
Unofficial fan wiki, not affiliated with Thekla, Inc. / Arc Games / Gamirror Games. Game content belongs to its owners.
Comments & feedback
Share a tip or suggest a correction. Comments are public. Guest names are unverified; verified accounts show their account username. All language pages share this discussion. Please keep personal information private.