
 Order of the Sinking Star
High Mirrors: selected room layouts

This page covers only the article’s Vertical Mirrors room range: 22 of its 23 stills in puzzles 12–25 and 31–39 match distinct local native textures and pinned candidates. Article puzzle 21 remains unassigned. The article also presents eight separate Overworld puzzles. Their local target IDs remain unresolved; this page does not assign them to room candidates. Article numbers follow the narrated source order and stay separate from internal vertical_mirrors set positions. Colored rings mark visible layout landmarks. Each short key idea is source-reported, not an input trace. Static stills are not exact PTS; no video was decoded, no route was independently replayed, no finish is claimed, and exact Steam depot mapping is unverified.
Puzzle 12 — portable_stairs
Section titled “Puzzle 12 — portable_stairs”Article still from P31; internal vertical_mirrors set position: 2. Keep the vertical mirror recoverable; lay it before the final stone.
Selected article still only; the colored ring marks a visible layout landmark, not an input step.
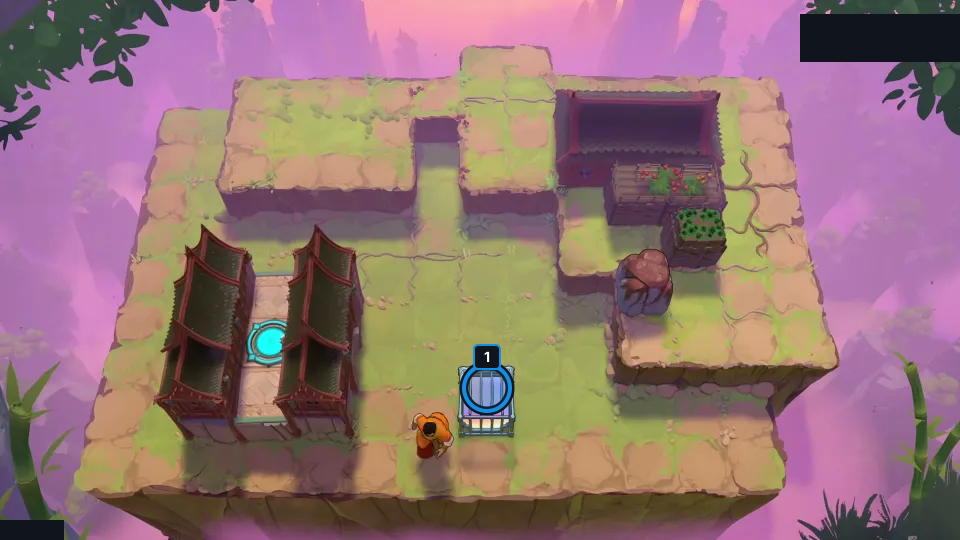
Keep the vertical mirror recoverable; lay it before the final stone.
Check: The article still visually matches portable_stairs; this is a selected layout with a source-reported key idea. It is not exact PTS; no route replay or finish claim is made, and exact Steam depot mapping is unverified.
Open full-size image in a new tabPuzzle 13 — drawbridge
Section titled “Puzzle 13 — drawbridge”Article still from P31; internal vertical_mirrors set position: 3. Raise and lower a mirror in the channel to bridge it for the crystal.
Selected article still only; the colored ring marks a visible layout landmark, not an input step.
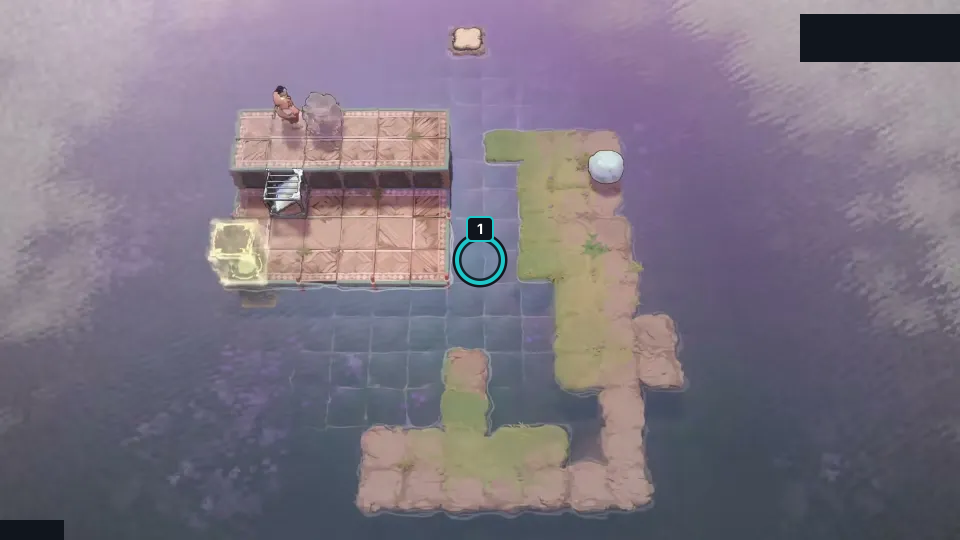
Raise and lower a mirror in the channel to bridge it for the crystal.
Check: The article still visually matches drawbridge; this is a selected layout with a source-reported key idea. It is not exact PTS; no route replay or finish claim is made, and exact Steam depot mapping is unverified.
Open full-size image in a new tabPuzzle 14 — implausible_bridge
Section titled “Puzzle 14 — implausible_bridge”Article still from P31; internal vertical_mirrors set position: 4. Reflect the crystal out of the water, then push it across.
Selected article still only; the colored ring marks a visible layout landmark, not an input step.
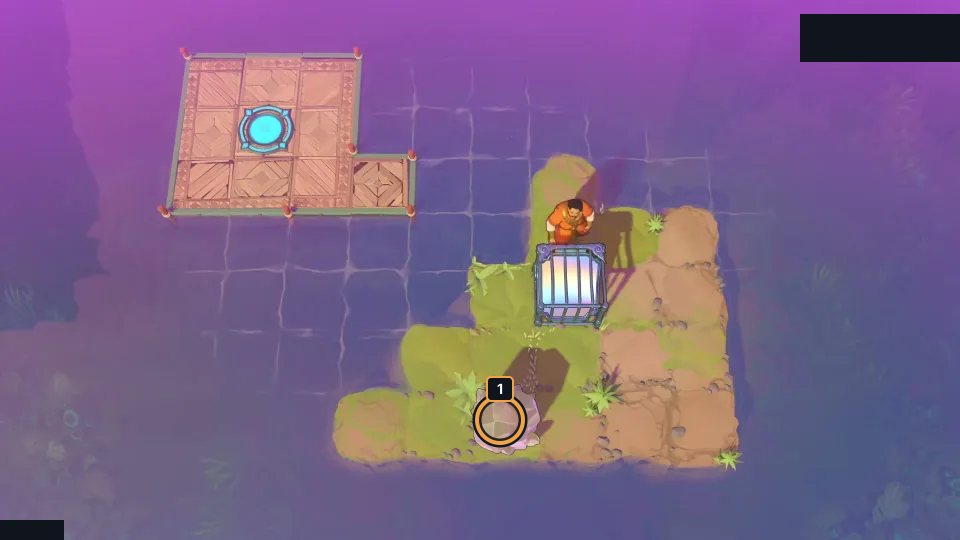
Reflect the crystal out of the water, then push it across.
Check: The article still visually matches implausible_bridge; this is a selected layout with a source-reported key idea. It is not exact PTS; no route replay or finish claim is made, and exact Steam depot mapping is unverified.
Open full-size image in a new tabPuzzle 15 — bottom_bridge_v2
Section titled “Puzzle 15 — bottom_bridge_v2”Article still from P31; internal vertical_mirrors set position: 6. Set a U of vertical mirrors; each bounce moves by their gap.
Selected article still only; the colored ring marks a visible layout landmark, not an input step.
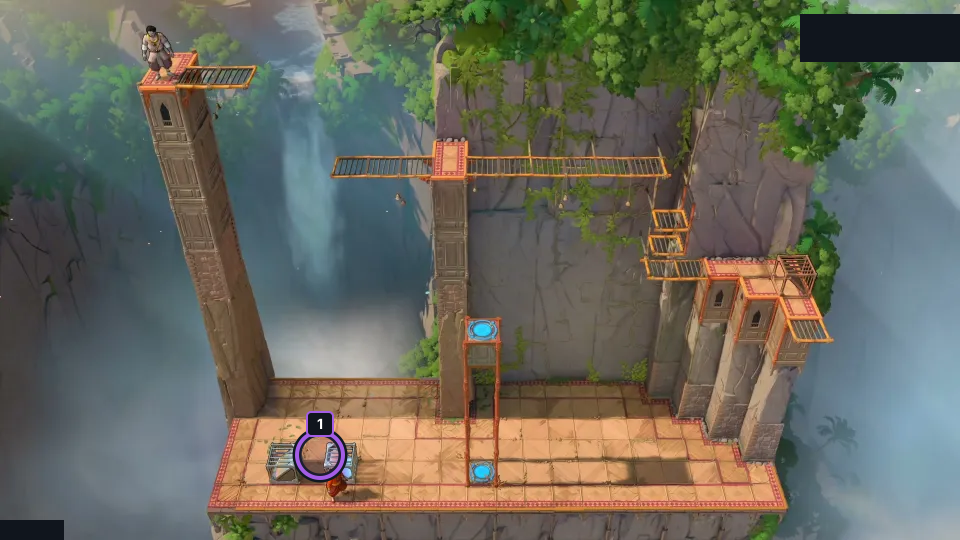
Set a U of vertical mirrors; each bounce moves by their gap.
Check: The article still visually matches bottom_bridge_v2; this is a selected layout with a source-reported key idea. It is not exact PTS; no route replay or finish claim is made, and exact Steam depot mapping is unverified.
Open full-size image in a new tabPuzzle 16 — bottom_bridge_tall
Section titled “Puzzle 16 — bottom_bridge_tall”Article still from P31; internal vertical_mirrors set position: 7. Combine U-bounces with a timed falling reflection to reach the netted exit.
Selected article still only; the colored ring marks a visible layout landmark, not an input step.
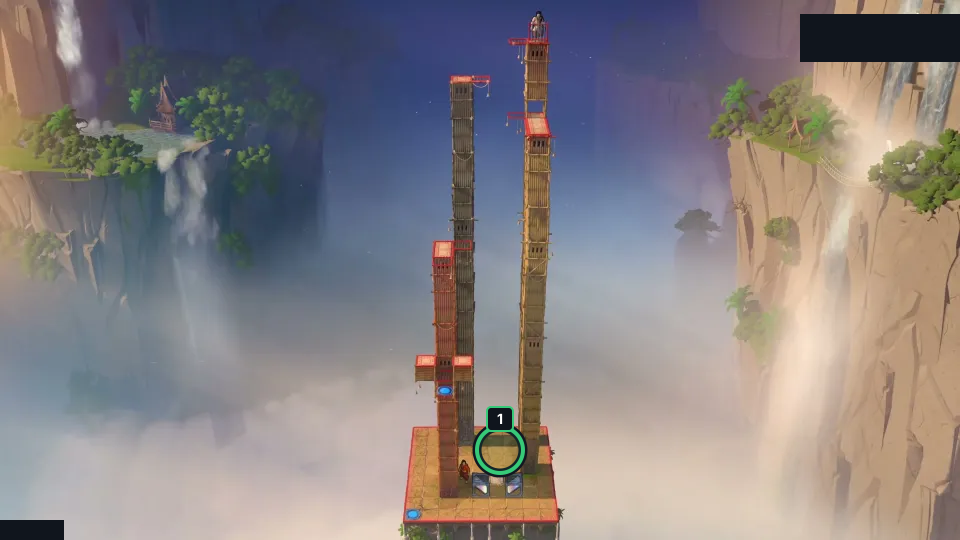
Combine U-bounces with a timed falling reflection to reach the netted exit.
Check: The article still visually matches bottom_bridge_tall; this is a selected layout with a source-reported key idea. It is not exact PTS; no route replay or finish claim is made, and exact Steam depot mapping is unverified.
Open full-size image in a new tabPuzzle 17 — mission_impossible
Section titled “Puzzle 17 — mission_impossible”Article still from P31; internal vertical_mirrors set position: 8.
Reflect the  Wizard upward, then swap with a stone while falling beside it.
Selected article still only; the colored ring marks a visible layout landmark, not an input step.
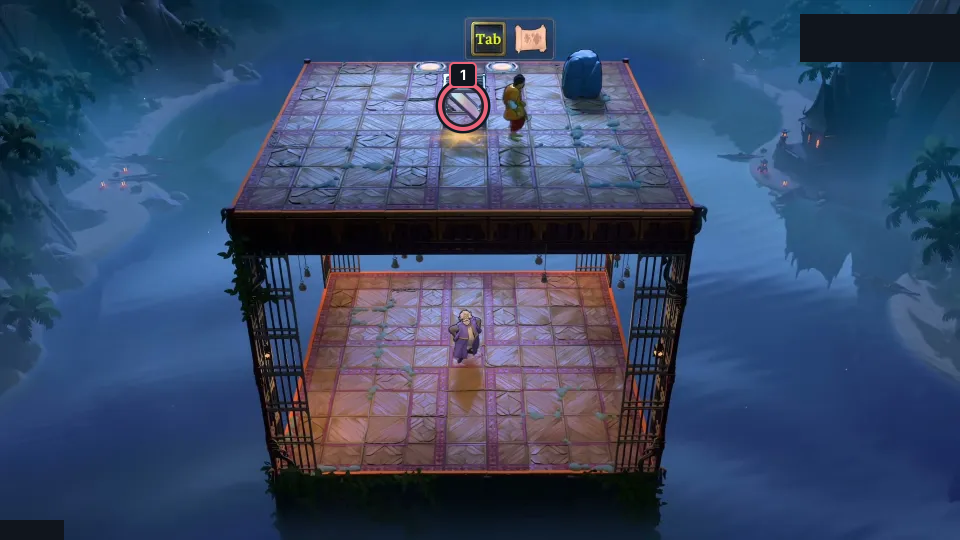
Reflect the Wizard upward, then swap with a stone while falling beside it.
Check: The article still visually matches mission_impossible; this is a selected layout with a source-reported key idea. It is not exact PTS; no route replay or finish claim is made, and exact Steam depot mapping is unverified.
Open full-size image in a new tabPuzzle 18 — repel
Section titled “Puzzle 18 — repel”Article still from P31; internal vertical_mirrors set position: 9. Use reflection plus gravity as a sideways shift for yourself and the crystal.
Selected article still only; the colored ring marks a visible layout landmark, not an input step.
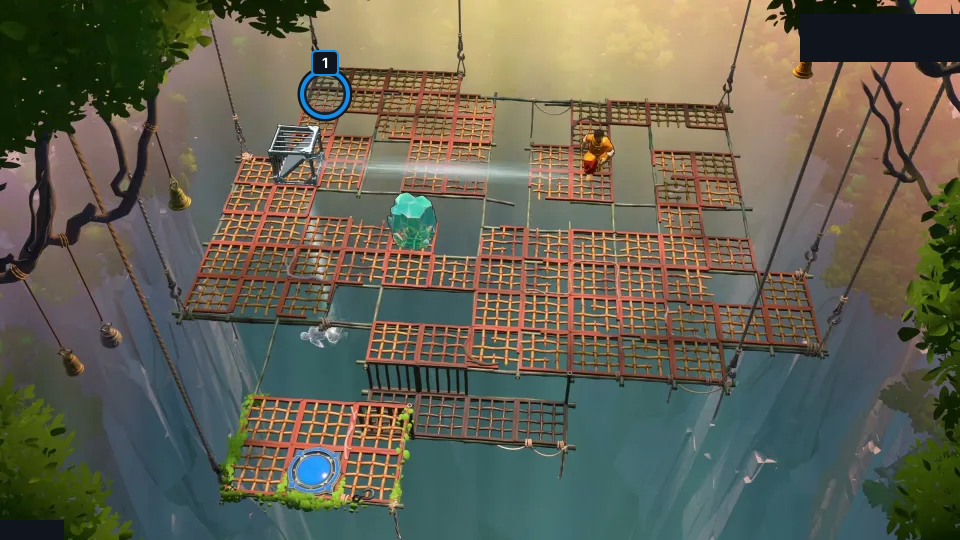
Use reflection plus gravity as a sideways shift for yourself and the crystal.
Check: The article still visually matches repel; this is a selected layout with a source-reported key idea. It is not exact PTS; no route replay or finish claim is made, and exact Steam depot mapping is unverified.
Open full-size image in a new tabPuzzle 19 — overwrite
Section titled “Puzzle 19 — overwrite”Article still from P31; internal vertical_mirrors set position: 5. Drop a mirror during your fall, then chain reflections left to the exit.
Selected article still only; the colored ring marks a visible layout landmark, not an input step.
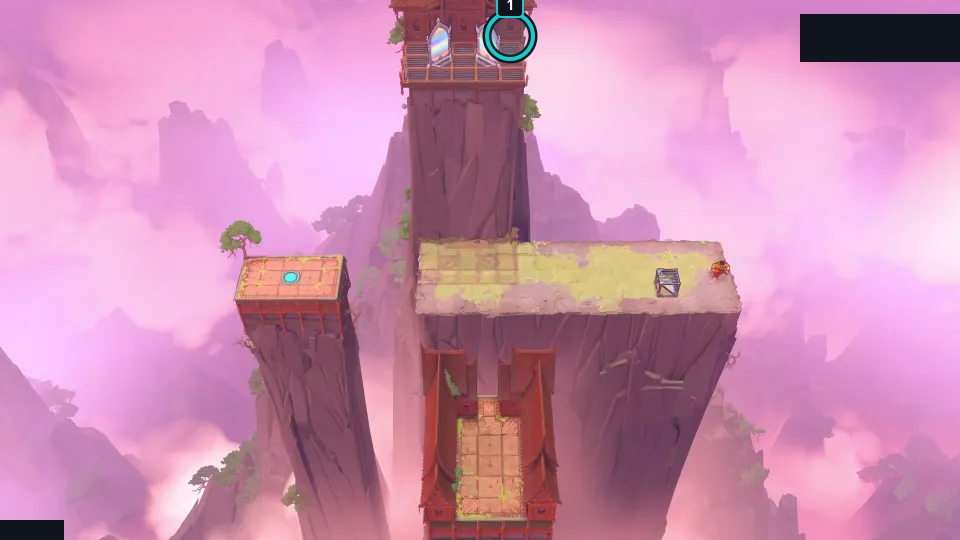
Drop a mirror during your fall, then chain reflections left to the exit.
Check: The article still visually matches overwrite; this is a selected layout with a source-reported key idea. It is not exact PTS; no route replay or finish claim is made, and exact Steam depot mapping is unverified.
Open full-size image in a new tabPuzzle 20 — implausible_bridge_2
Section titled “Puzzle 20 — implausible_bridge_2”Article still from P31; internal vertical_mirrors set position: 11. Push a mirror into the water and reflect from it to lay bridge tiles.
Selected article still only; the colored ring marks a visible layout landmark, not an input step.
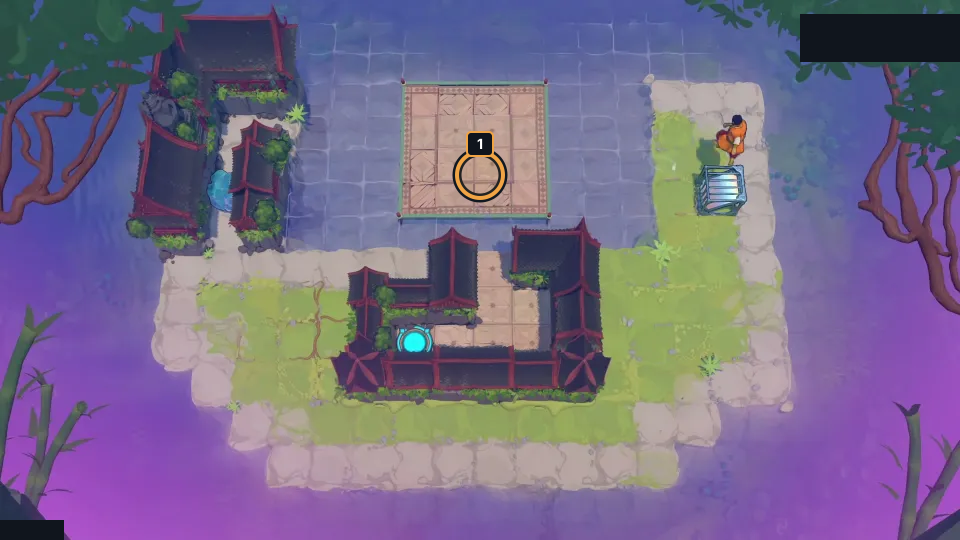
Push a mirror into the water and reflect from it to lay bridge tiles.
Check: The article still visually matches implausible_bridge_2; this is a selected layout with a source-reported key idea. It is not exact PTS; no route replay or finish claim is made, and exact Steam depot mapping is unverified.
Open full-size image in a new tabPuzzle 22 — quick_redirect_v5
Section titled “Puzzle 22 — quick_redirect_v5”Article still from P31; internal vertical_mirrors set position: 13. Bounce the stone high, then switch mirrors to land it on the right button.
Selected article still only; the colored ring marks a visible layout landmark, not an input step.
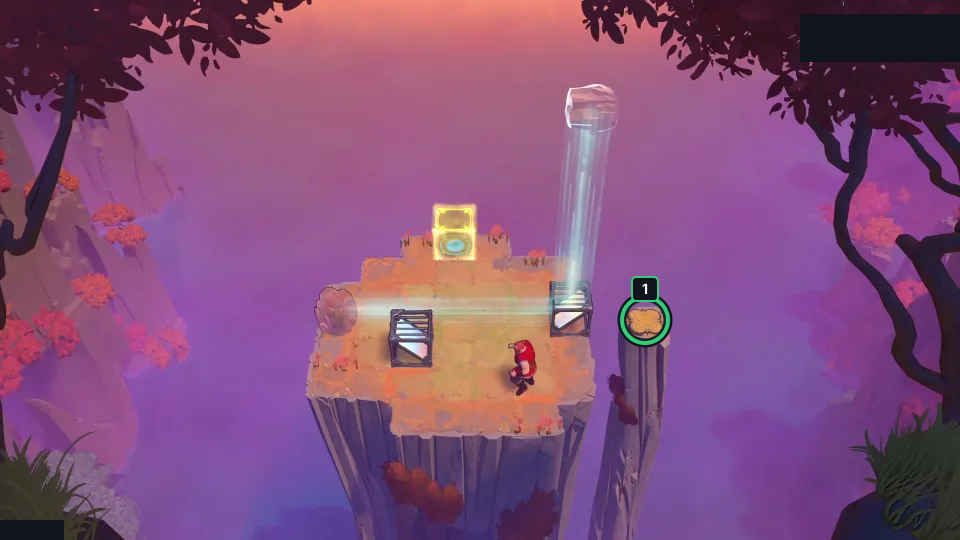
Bounce the stone high, then switch mirrors to land it on the right button.
Check: The article still visually matches quick_redirect_v5; this is a selected layout with a source-reported key idea. It is not exact PTS; no route replay or finish claim is made, and exact Steam depot mapping is unverified.
Open full-size image in a new tabPuzzle 23 — to_kill_a_goblin
Section titled “Puzzle 23 — to_kill_a_goblin”Article still from P31; internal vertical_mirrors set position: 14. Drop a crystal on the Goblin to clear the courtyard.
Selected article still only; the colored ring marks a visible layout landmark, not an input step.
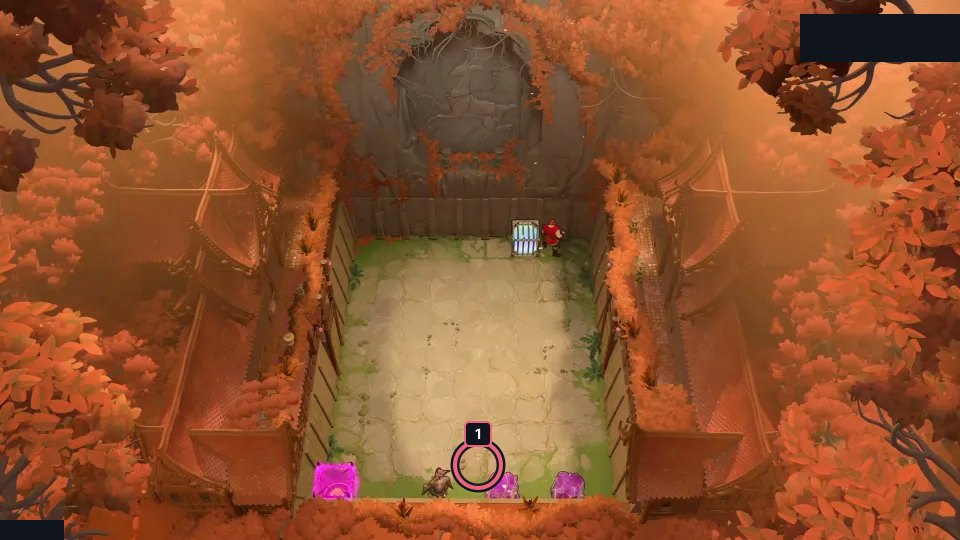
Drop a crystal on the Goblin to clear the courtyard.
Check: The article still visually matches to_kill_a_goblin; this is a selected layout with a source-reported key idea. It is not exact PTS; no route replay or finish claim is made, and exact Steam depot mapping is unverified.
Open full-size image in a new tabPuzzle 24 — tall_stack
Section titled “Puzzle 24 — tall_stack”Article still from P31; internal vertical_mirrors set position: 15. Clone one stone with two mirrors, then stack the copies five high.
Selected article still only; the colored ring marks a visible layout landmark, not an input step.
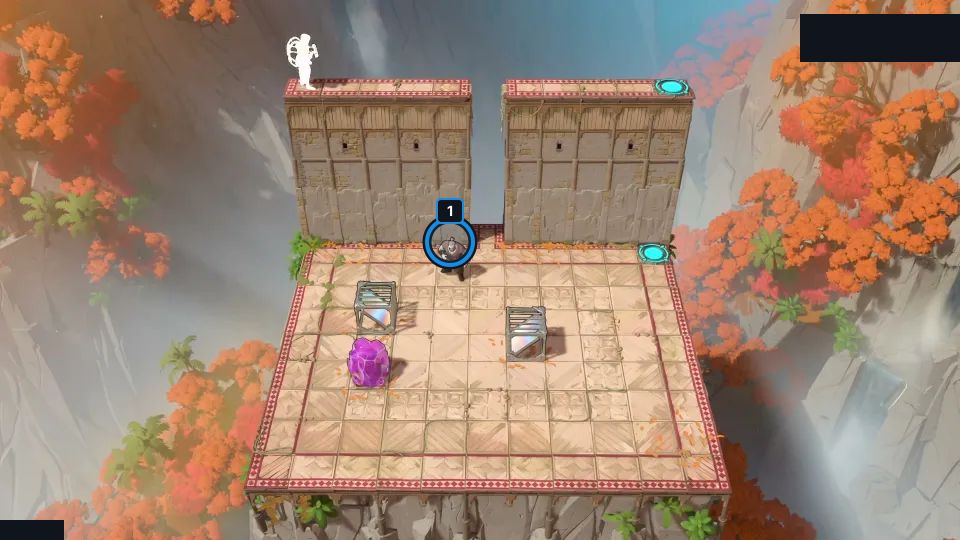
Clone one stone with two mirrors, then stack the copies five high.
Check: The article still visually matches tall_stack; this is a selected layout with a source-reported key idea. It is not exact PTS; no route replay or finish claim is made, and exact Steam depot mapping is unverified.
Open full-size image in a new tabPuzzle 25 — bottom_adjust
Section titled “Puzzle 25 — bottom_adjust”Article still from P31; internal vertical_mirrors set position: 16. Send a hero high to extend the mirror’s reach to the summit.
Selected article still only; the colored ring marks a visible layout landmark, not an input step.
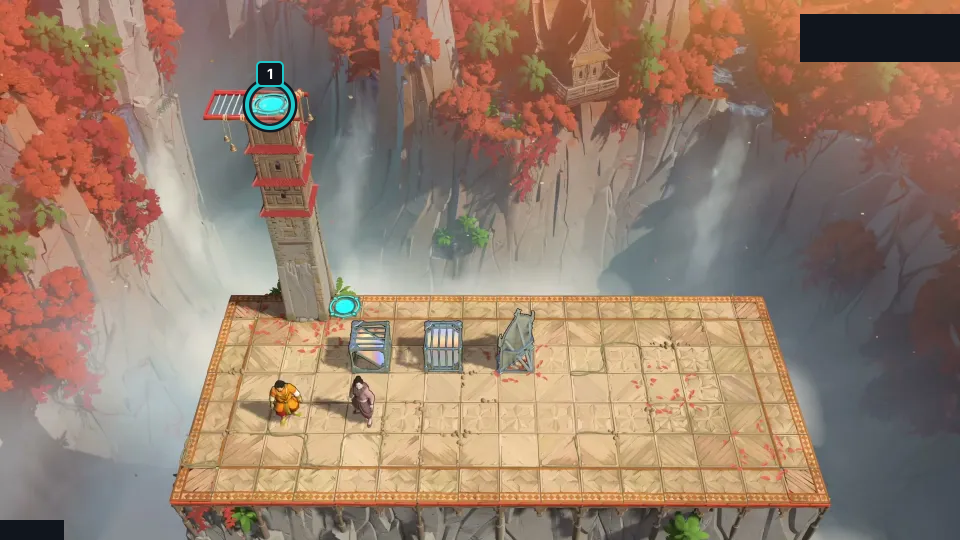
Send a hero high to extend the mirror’s reach to the summit.
Check: The article still visually matches bottom_adjust; this is a selected layout with a source-reported key idea. It is not exact PTS; no route replay or finish claim is made, and exact Steam depot mapping is unverified.
Open full-size image in a new tabPuzzle 31 — bridgey
Section titled “Puzzle 31 — bridgey”Article still from P32; internal vertical_mirrors set position: 21. Use the vertical mirror and stones to fill the water crossing.
Selected article still only; the colored ring marks a visible layout landmark, not an input step.
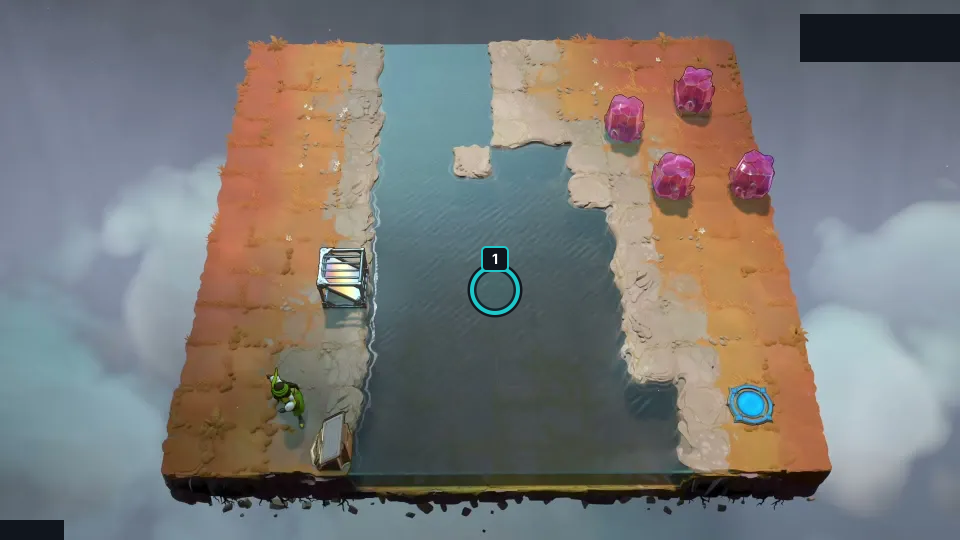
Use the vertical mirror and stones to fill the water crossing.
Check: The article still visually matches bridgey; this is a selected layout with a source-reported key idea. It is not exact PTS; no route replay or finish claim is made, and exact Steam depot mapping is unverified.
Open full-size image in a new tabPuzzle 32 — bridgey2
Section titled “Puzzle 32 — bridgey2”Article still from P32; internal vertical_mirrors set position: 22. Add a ground tile before the last stone, which otherwise falls short.
Selected article still only; the colored ring marks a visible layout landmark, not an input step.
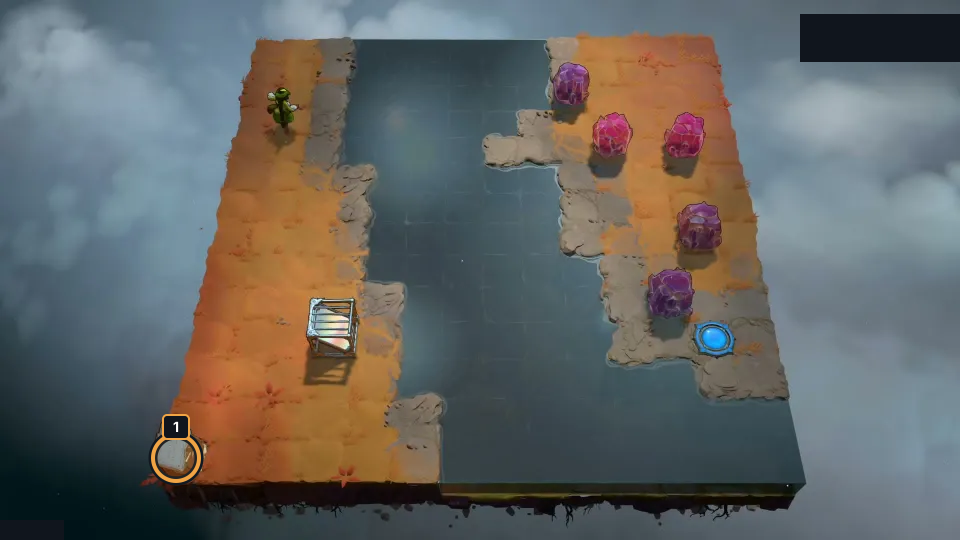
Add a ground tile before the last stone, which otherwise falls short.
Check: The article still visually matches bridgey2; this is a selected layout with a source-reported key idea. It is not exact PTS; no route replay or finish claim is made, and exact Steam depot mapping is unverified.
Open full-size image in a new tabPuzzle 33 — bridgey2b
Section titled “Puzzle 33 — bridgey2b”Article still from P32; internal vertical_mirrors set position: 23.
Build a straight stone path so the  Thief can pull the mirror across.
Selected article still only; the colored ring marks a visible layout landmark, not an input step.
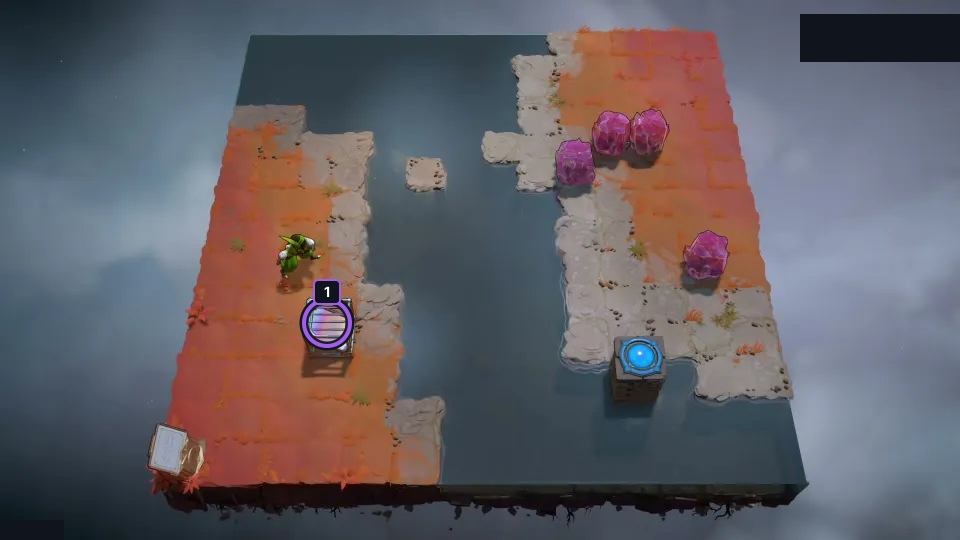
Build a straight stone path so the Thief can pull the mirror across.
Check: The article still visually matches bridgey2b; this is a selected layout with a source-reported key idea. It is not exact PTS; no route replay or finish claim is made, and exact Steam depot mapping is unverified.
Open full-size image in a new tabPuzzle 34 — bridgey3_abstract_art
Section titled “Puzzle 34 — bridgey3_abstract_art”Article still from P32; internal vertical_mirrors set position: 24. Use the lower vertical mirror to split stacked crystals and recover the far mirror.
Selected article still only; the colored ring marks a visible layout landmark, not an input step.
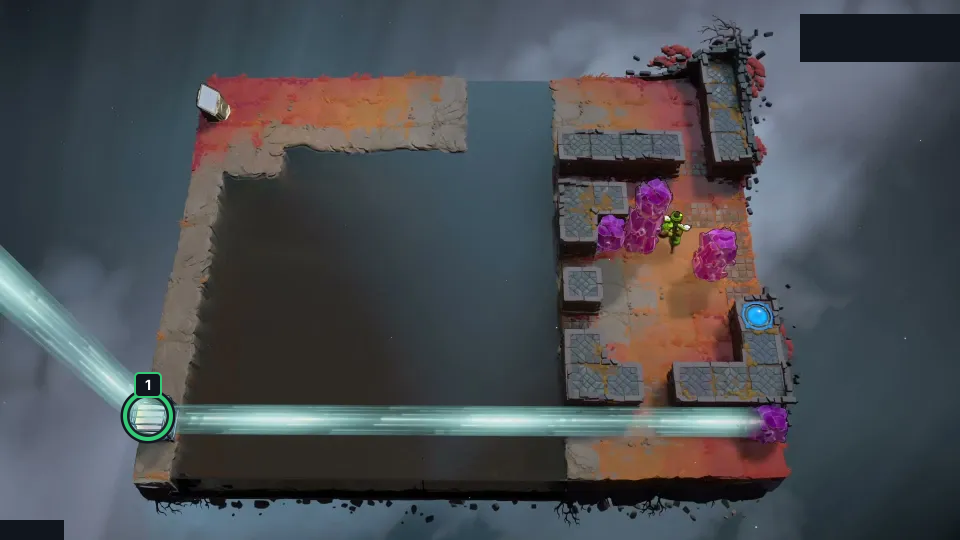
Use the lower vertical mirror to split stacked crystals and recover the far mirror.
Check: The article still visually matches bridgey3_abstract_art; this is a selected layout with a source-reported key idea. It is not exact PTS; no route replay or finish claim is made, and exact Steam depot mapping is unverified.
Open full-size image in a new tabPuzzle 35 — all_out_goblin_war
Section titled “Puzzle 35 — all_out_goblin_war”Article still from P32; internal vertical_mirrors set position: 25. Reserve the Goblin that can reach the bottom-right corner; plan the kills around it.
Selected article still only; the colored ring marks a visible layout landmark, not an input step.
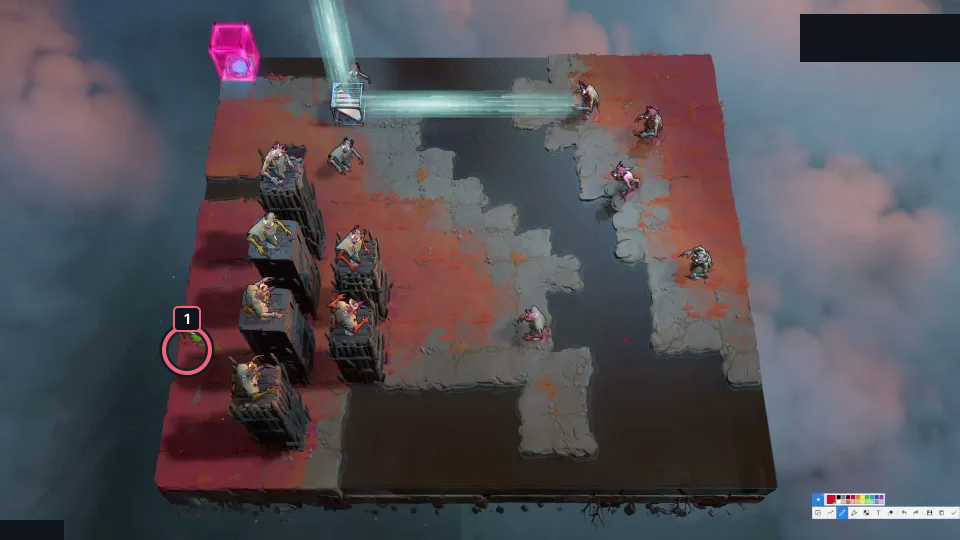
Reserve the Goblin that can reach the bottom-right corner; plan the kills around it.
Check: The article still visually matches all_out_goblin_war; this is a selected layout with a source-reported key idea. It is not exact PTS; no route replay or finish claim is made, and exact Steam depot mapping is unverified.
Open full-size image in a new tabPuzzle 36 — escape_bridge
Section titled “Puzzle 36 — escape_bridge”Article still from P32; internal vertical_mirrors set position: 26. Drop one Goblin to break the ring around the Cleric.
Selected article still only; the colored ring marks a visible layout landmark, not an input step.
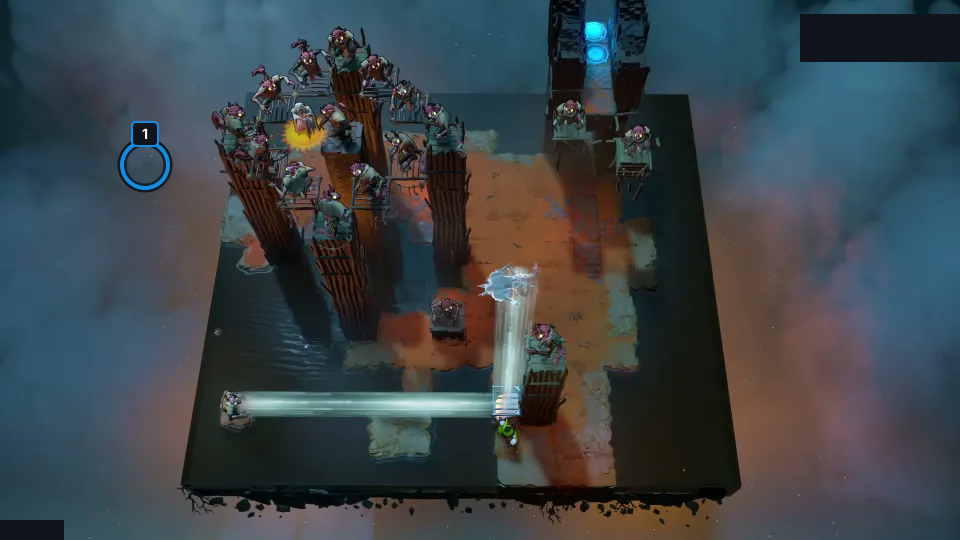
Drop one Goblin to break the ring around the Cleric.
Check: The article still visually matches escape_bridge; this is a selected layout with a source-reported key idea. It is not exact PTS; no route replay or finish claim is made, and exact Steam depot mapping is unverified.
Open full-size image in a new tabPuzzle 37 — tandem
Section titled “Puzzle 37 — tandem”Article still from P32; internal vertical_mirrors set position: 27. Set two upward mirrors, then coordinate the Thief and Cleric’s rise.
Selected article still only; the colored ring marks a visible layout landmark, not an input step.
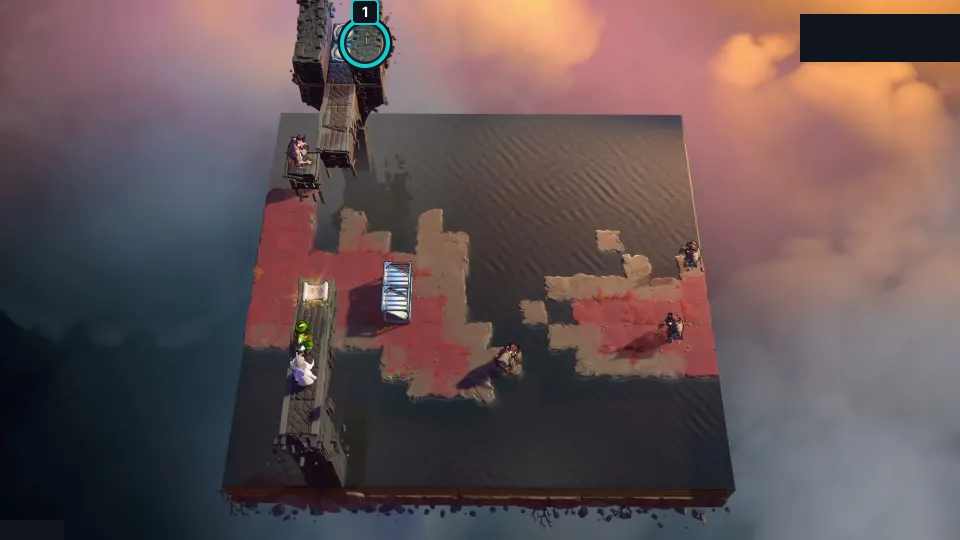
Set two upward mirrors, then coordinate the Thief and Cleric’s rise.
Check: The article still visually matches tandem; this is a selected layout with a source-reported key idea. It is not exact PTS; no route replay or finish claim is made, and exact Steam depot mapping is unverified.
Open full-size image in a new tabPuzzle 38 — wolf_boat_carry
Section titled “Puzzle 38 — wolf_boat_carry”Article still from P32; internal vertical_mirrors set position: 20. Use a head-mirror carrier to move the Wizard without crushing it.
Selected article still only; the colored ring marks a visible layout landmark, not an input step.
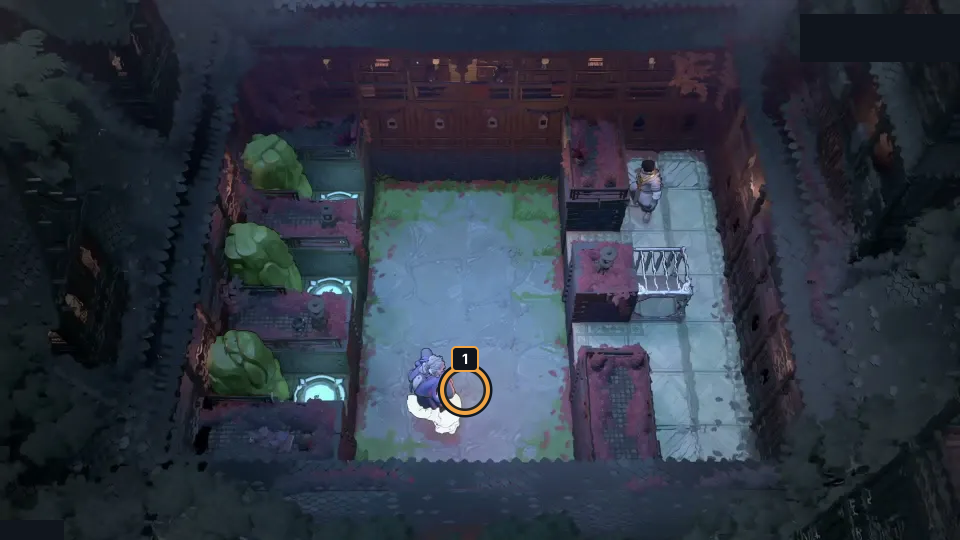
Use a head-mirror carrier to move the Wizard without crushing it.
Check: The article still visually matches wolf_boat_carry; this is a selected layout with a source-reported key idea. It is not exact PTS; no route replay or finish claim is made, and exact Steam depot mapping is unverified.
Open full-size image in a new tabPuzzle 39 — juggle
Section titled “Puzzle 39 — juggle”Article still from P32; internal vertical_mirrors set position: 19. Throw the crystal high and reflect as it falls so it lands safely on your head.
Selected article still only; the colored ring marks a visible layout landmark, not an input step.
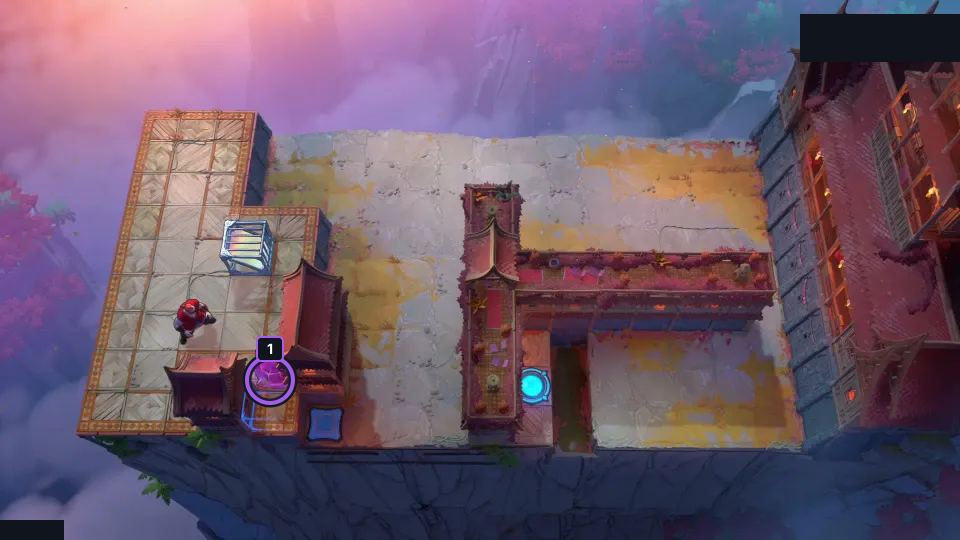
Throw the crystal high and reflect as it falls so it lands safely on your head.
Check: The article still visually matches juggle; this is a selected layout with a source-reported key idea. It is not exact PTS; no route replay or finish claim is made, and exact Steam depot mapping is unverified.
Open full-size image in a new tabUnassigned article material
Section titled “Unassigned article material”Article puzzle 21 has no distinct native-texture match in this crosswalk. Eight Overworld puzzles remain separate and unassigned by target ID.
Sources and credits
Article stills and key ideas: High Mirrors walkthrough. Video: 塞德莎, Order of the Sinking Star narrated series. The cards show selected static article stills, not exact PTS; ideas are source-reported, no route was independently replayed, and no finish or exact Steam depot mapping is claimed. Game art: Thekla, Inc.- Full puzzle candidate inventory (PC r67121) — Extracted data
- High Mirrors (Antipode High) walkthrough — Documentation · walkthrough-updated-2026-10-21
- 塞德莎 High Mirrors narrated series — Observed in-game · high-mirrors-article-part-cues-2026-10-22
- High Mirrors Vertical Mirrors candidate classification — Documentation · high-mirrors-candidate-review-2026-10-22;remaining-source-candidates-2026-10-24
- High Mirrors bilingual selected-layout cards — Extracted data · high-mirrors-selected-layouts-2026-10-22
Unofficial fan wiki, not affiliated with Thekla, Inc. / Arc Games / Gamirror Games. Game content belongs to its owners.
Comments & feedback
Share a tip or suggest a correction. Comments are public. Guest names are unverified; verified accounts show their account username. All language pages share this discussion. Please keep personal information private.