
 Order of the Sinking Star
Mirrors and Stones: selected room layouts

All 49 numbered article rooms have distinct source/native matches; P7–P26 map to additional candidate families rather than the original 29 mirrors_and_stones cohort. The 11 separate Overworld target IDs remain unassigned.
Article numbers are kept separate from internal set positions. Each colored ring marks one visible layout landmark, not an input step. The short ideas are summarized from the article. The article’s part labels are not exact PTS; no video was decoded, no route was independently replayed, and no finish is claimed. Exact Steam depot mapping remains unverified.
Puzzle 1 — airmail
Section titled “Puzzle 1 — airmail”Article still from series part P13; internal mirrors_and_stones set position: 1. Set a crystal on the drifting lily pad and reflect it off the pad into the water gap.
Selected article still only; the colored ring marks one layout landmark, not an input step.
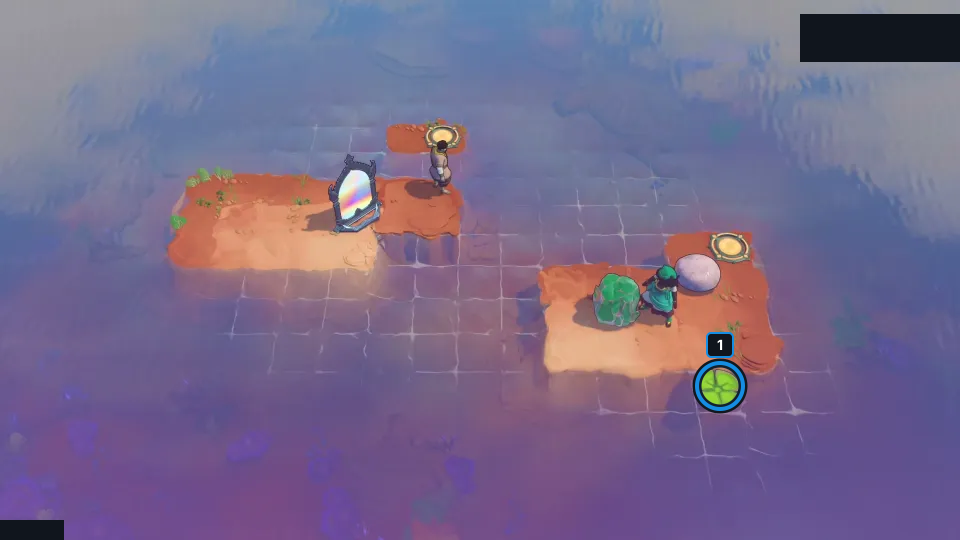
Set a crystal on the drifting lily pad and reflect it off the pad into the water gap.
Check: The article still visually matches airmail; this card records a short article-reported idea, not a route trace. It is not exact PTS; no video was decoded, no route was independently replayed, no finish is claimed, and exact Steam depot mapping is unverified.
Open full-size image in a new tabPuzzle 2 — thats_my_ride
Section titled “Puzzle 2 — thats_my_ride”Article still from series part P13; internal mirrors_and_stones set position: 2. Reflect onto the moving lily pad, then use the right-hand mirror to reach the exit island.
Selected article still only; the colored ring marks one layout landmark, not an input step.
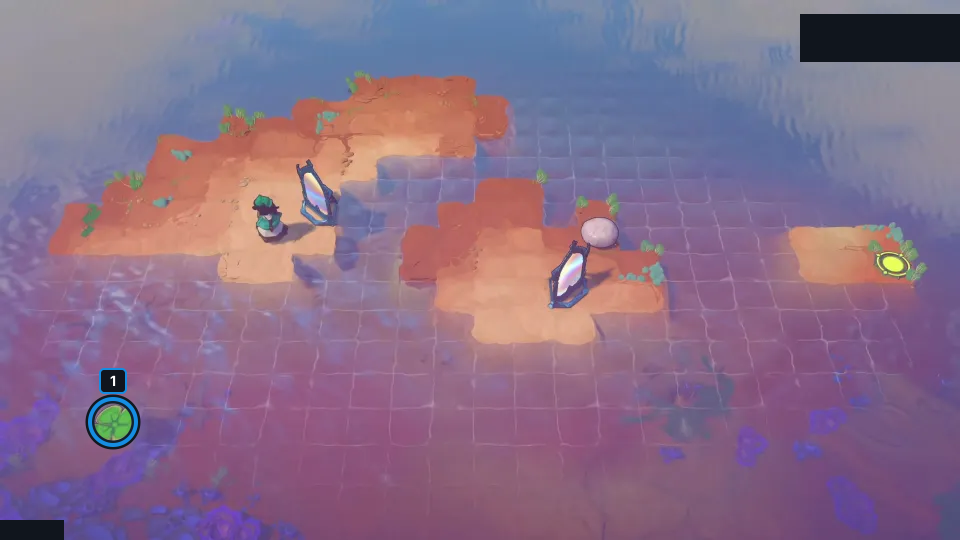
Reflect onto the moving lily pad, then use the right-hand mirror to reach the exit island.
Check: The article still visually matches thats_my_ride; this card records a short article-reported idea, not a route trace. It is not exact PTS; no video was decoded, no route was independently replayed, no finish is claimed, and exact Steam depot mapping is unverified.
Open full-size image in a new tabPuzzle 3 — place_to_stand
Section titled “Puzzle 3 — place_to_stand”Article still from series part P13; internal mirrors_and_stones set position: 3. Reflect both crystals into the water to make a two-tile platform beside the pad, then kick from it.
Selected article still only; the colored ring marks one layout landmark, not an input step.
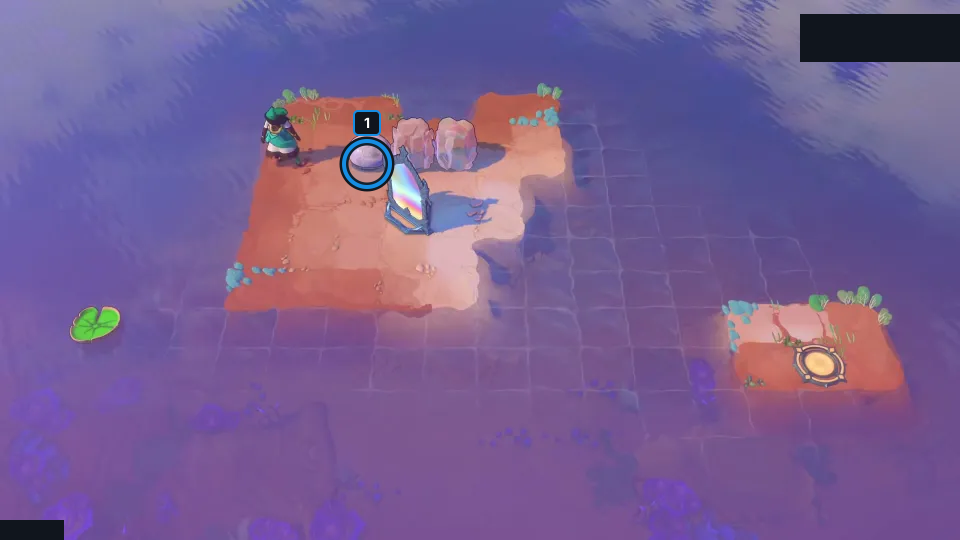
Reflect both crystals into the water to make a two-tile platform beside the pad, then kick from it.
Check: The article still visually matches place_to_stand; this card records a short article-reported idea, not a route trace. It is not exact PTS; no video was decoded, no route was independently replayed, no finish is claimed, and exact Steam depot mapping is unverified.
Open full-size image in a new tabPuzzle 4 — emergency_brake
Section titled “Puzzle 4 — emergency_brake”Article still from series part P13; internal mirrors_and_stones set position: 4. Reflect a crystal into the pad’s row so the drifting pad stops at the middle island.
Selected article still only; the colored ring marks one layout landmark, not an input step.
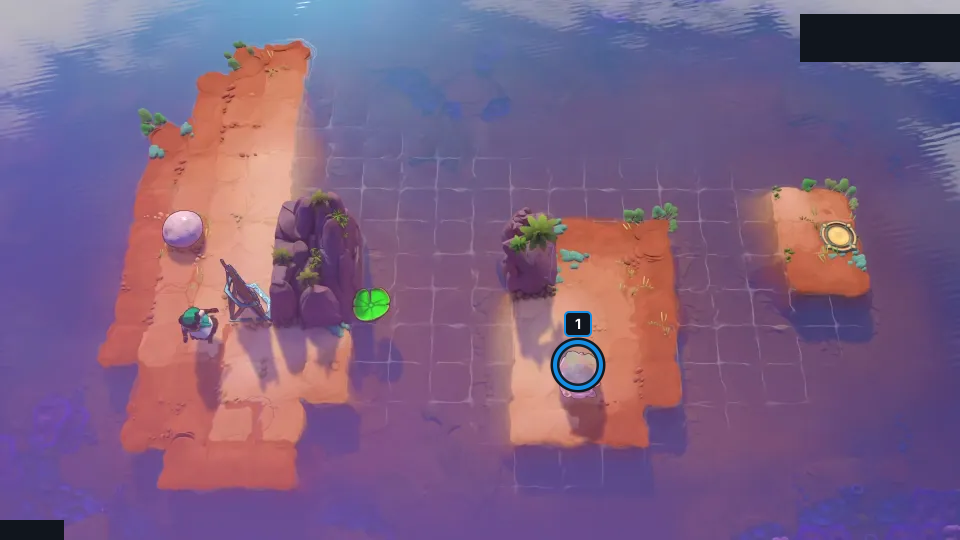
Reflect a crystal into the pad’s row so the drifting pad stops at the middle island.
Check: The article still visually matches emergency_brake; this card records a short article-reported idea, not a route trace. It is not exact PTS; no video was decoded, no route was independently replayed, no finish is claimed, and exact Steam depot mapping is unverified.
Open full-size image in a new tabPuzzle 5 — highway
Section titled “Puzzle 5 — highway”Article still from series part P13; internal mirrors_and_stones set position: 6. Use two quick mirror jumps to get ahead of the stone and stop it on the tile above the exit.
Selected article still only; the colored ring marks one layout landmark, not an input step.
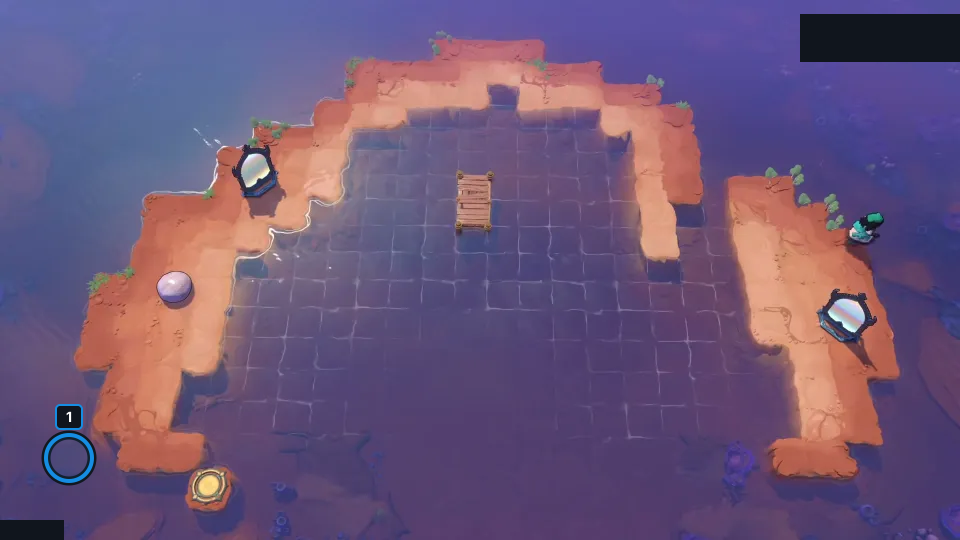
Use two quick mirror jumps to get ahead of the stone and stop it on the tile above the exit.
Check: The article still visually matches highway; this card records a short article-reported idea, not a route trace. It is not exact PTS; no video was decoded, no route was independently replayed, no finish is claimed, and exact Steam depot mapping is unverified.
Open full-size image in a new tabPuzzle 6 — short_ride_option_b
Section titled “Puzzle 6 — short_ride_option_b”Article still from series part P13; internal mirrors_and_stones set position: 5. Use the exit’s diagonal to choose where a crystal must land so the mirror can reach the fenced exit.
Selected article still only; the colored ring marks one layout landmark, not an input step.
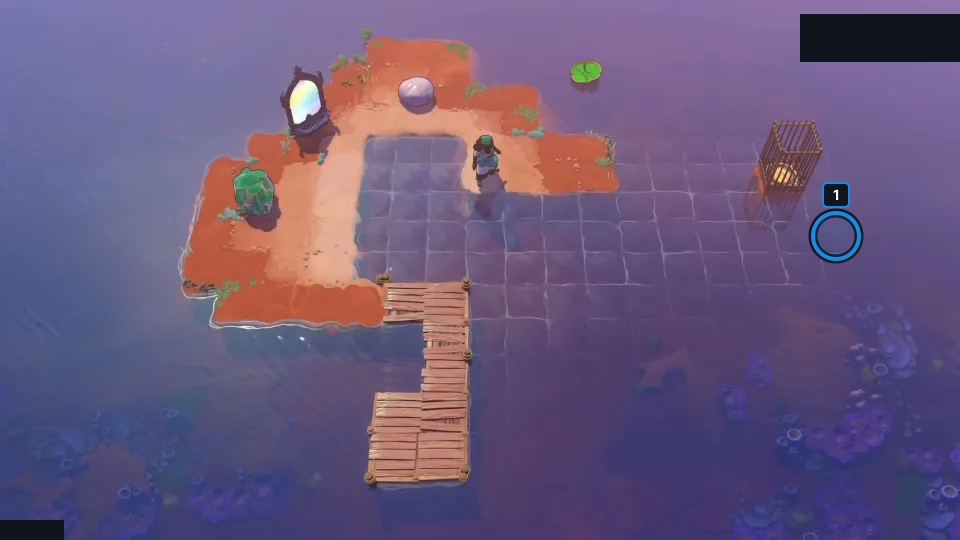
Use the exit’s diagonal to choose where a crystal must land so the mirror can reach the fenced exit.
Check: The article still visually matches short_ride_option_b; this card records a short article-reported idea, not a route trace. It is not exact PTS; no video was decoded, no route was independently replayed, no finish is claimed, and exact Steam depot mapping is unverified.
Open full-size image in a new tabPuzzle 7 — mirror_stone_intro
Section titled “Puzzle 7 — mirror_stone_intro”Article section: Puzzle 7; internal set position: 1.
The ring marks a visible landmark, not an action step.
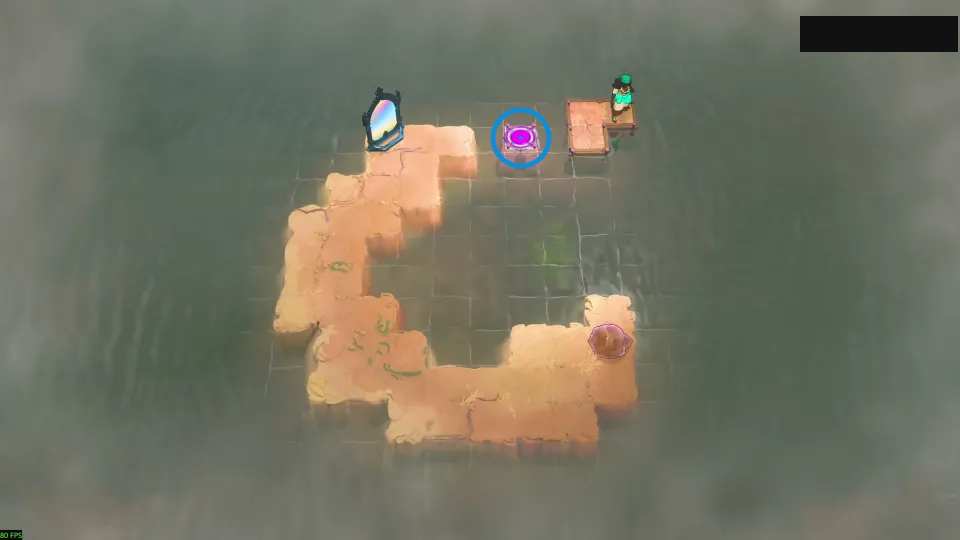
Kick and reflect the crystal skipping stone.
Check: Ring marks pink circular pad between the upper ledges.
Open full-size image in a new tabPuzzle 8 — catch_and_drop
Section titled “Puzzle 8 — catch_and_drop”Article section: Puzzle 8; internal set position: 2.
The ring marks a visible landmark, not an action step.
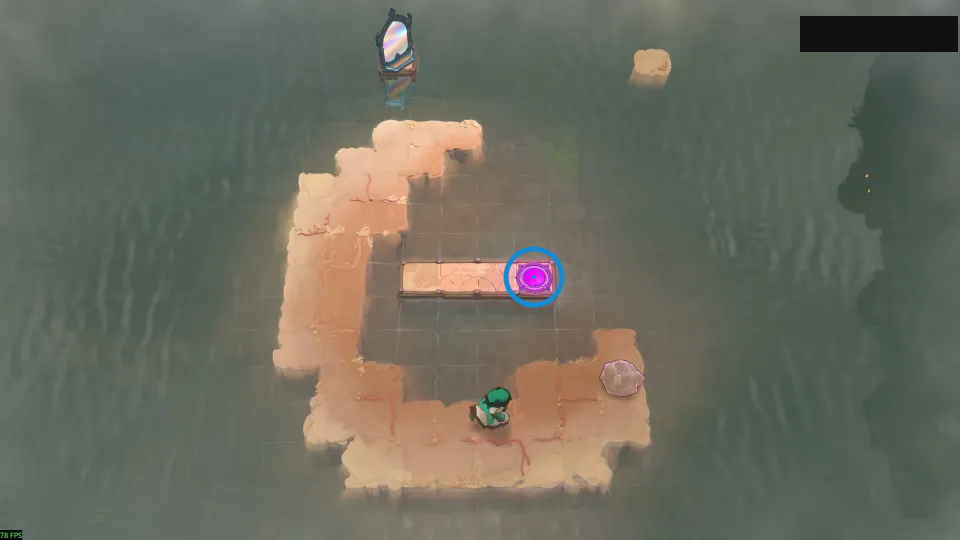
Stop the skipping stone, then reflect it back.
Check: Ring marks pink circular pad on the middle ledge.
Open full-size image in a new tabPuzzle 9 — catch_and_throw
Section titled “Puzzle 9 — catch_and_throw”Article section: Puzzle 9; internal set position: 3.
The ring marks a visible landmark, not an action step.
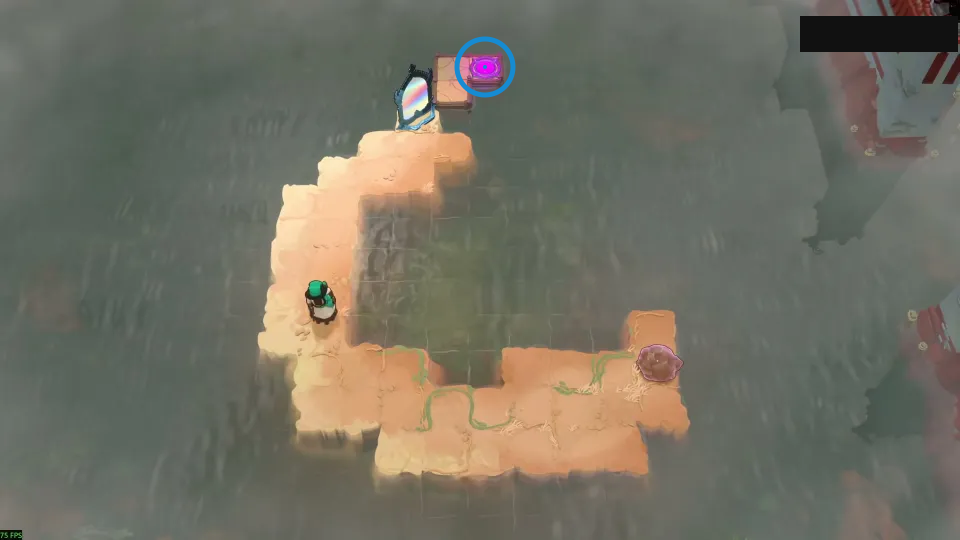
Reflect mid-skip to drop the stone beside the mirror.
Check: Ring marks pink circular pad above the mirror.
Open full-size image in a new tabPuzzle 10 — reflect_momentum
Section titled “Puzzle 10 — reflect_momentum”Article section: Puzzle 10; internal set position: 4.
The ring marks a visible landmark, not an action step.
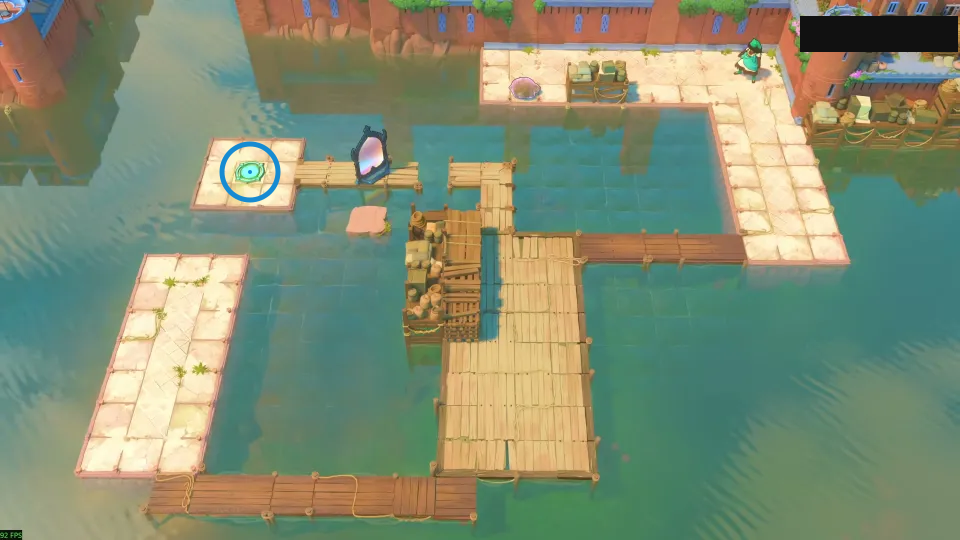
Use two bounces to reposition the crystal.
Check: Ring marks green circular pad on the upper-left island.
Open full-size image in a new tabPuzzle 11 — launch_and_collect
Section titled “Puzzle 11 — launch_and_collect”Article section: Puzzle 11; internal set position: 9.
The ring marks a visible landmark, not an action step.
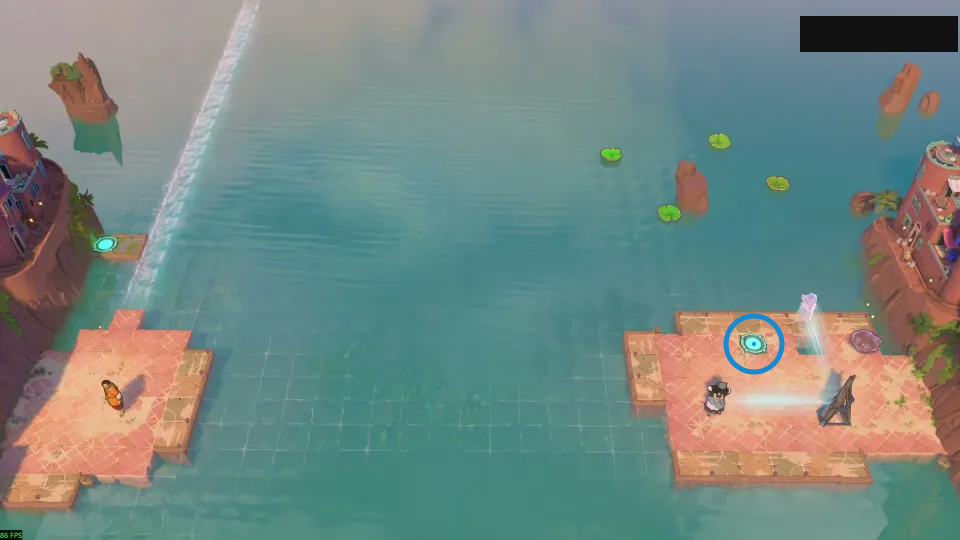
Send the pad with a stone beside it last.
Check: Ring marks cyan circular pad on the right island.
Open full-size image in a new tabPuzzle 12 — lilyruga_simpler
Section titled “Puzzle 12 — lilyruga_simpler”Article section: Puzzle 12; internal set position: 10.
The ring marks a visible landmark, not an action step.
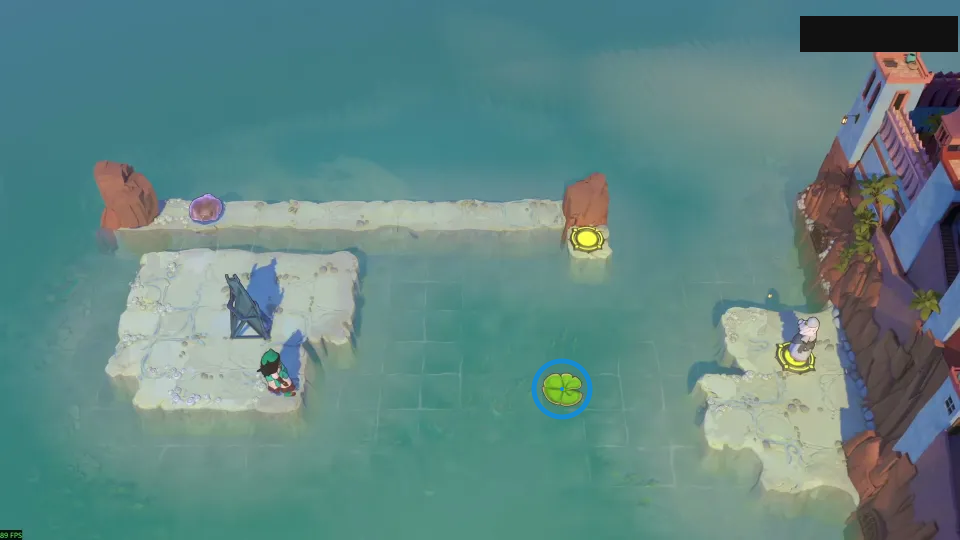
Reflect the crystal just before it reaches the pad.
Check: Ring marks green lily in the lower water.
Open full-size image in a new tabPuzzle 13 — sidestone_zach_1
Section titled “Puzzle 13 — sidestone_zach_1”Article section: Puzzle 13; internal set position: 5.
The ring marks a visible landmark, not an action step.
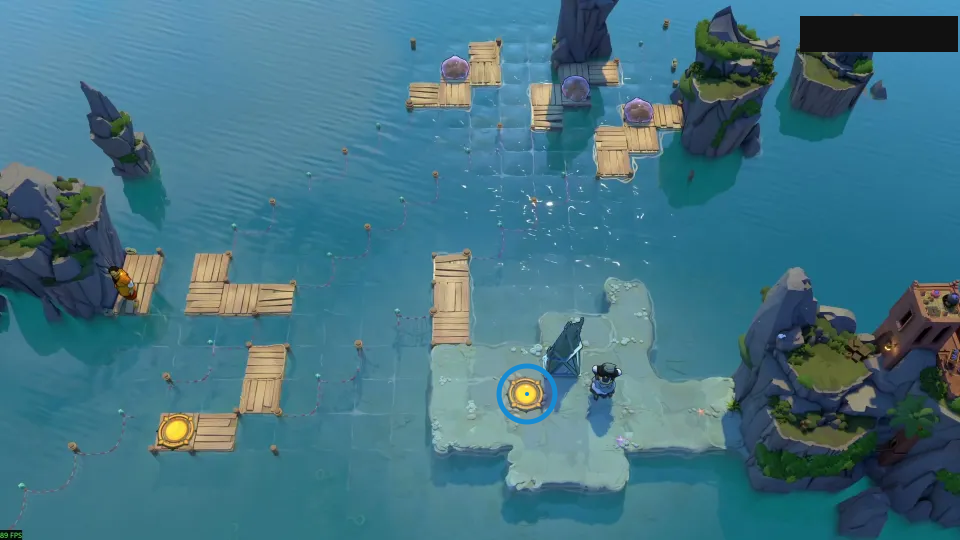
Read the water diagonals before filling pits.
Check: Ring marks yellow circular pad beside the right-hand mirror.
Open full-size image in a new tabPuzzle 14 — sidestone_zach_2
Section titled “Puzzle 14 — sidestone_zach_2”Article section: Puzzle 14; internal set position: 6.
The ring marks a visible landmark, not an action step.
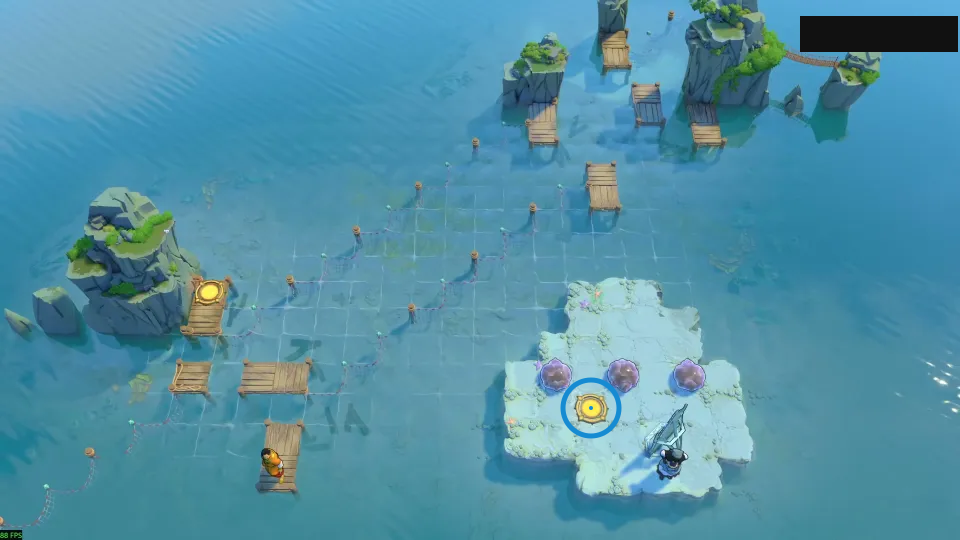
Reflect the crystal diagonally into each pit.
Check: Ring marks yellow circular pad below the three stones.
Open full-size image in a new tabPuzzle 15 — sidestone_zach_3
Section titled “Puzzle 15 — sidestone_zach_3”Article section: Puzzle 15; internal set position: 7.
The ring marks a visible landmark, not an action step.
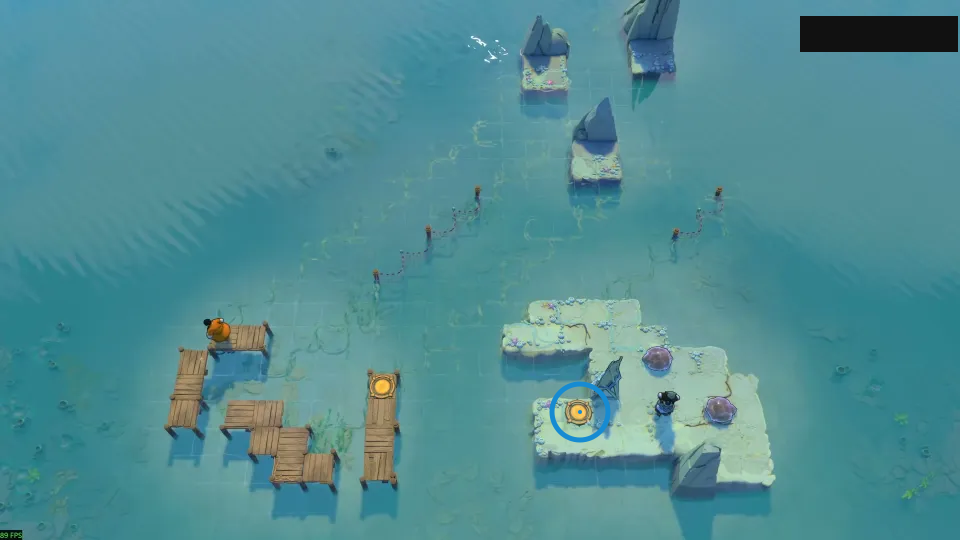
Use the Trader to bypass one gap.
Check: Ring marks yellow circular pad on the right island.
Open full-size image in a new tabPuzzle 16 — sidestone_zach_4
Section titled “Puzzle 16 — sidestone_zach_4”Article section: Puzzle 16; internal set position: 8.
The ring marks a visible landmark, not an action step.
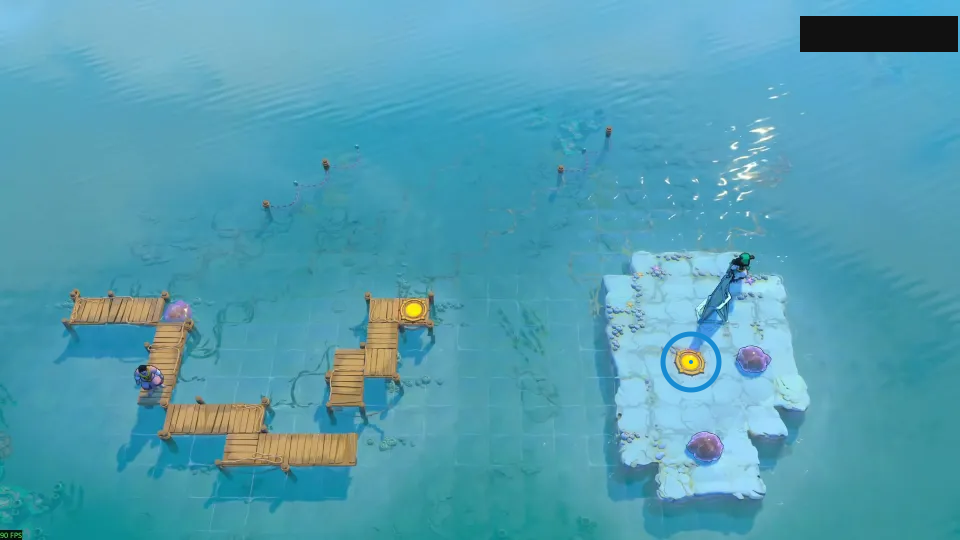
Use the Trader and diagonals to build footholds.
Check: Ring marks yellow circular pad on the right island.
Open full-size image in a new tabPuzzle 17 — make_it_happen_v6
Section titled “Puzzle 17 — make_it_happen_v6”Article section: Puzzle 17; internal set position: 19.
The ring marks a visible landmark, not an action step.
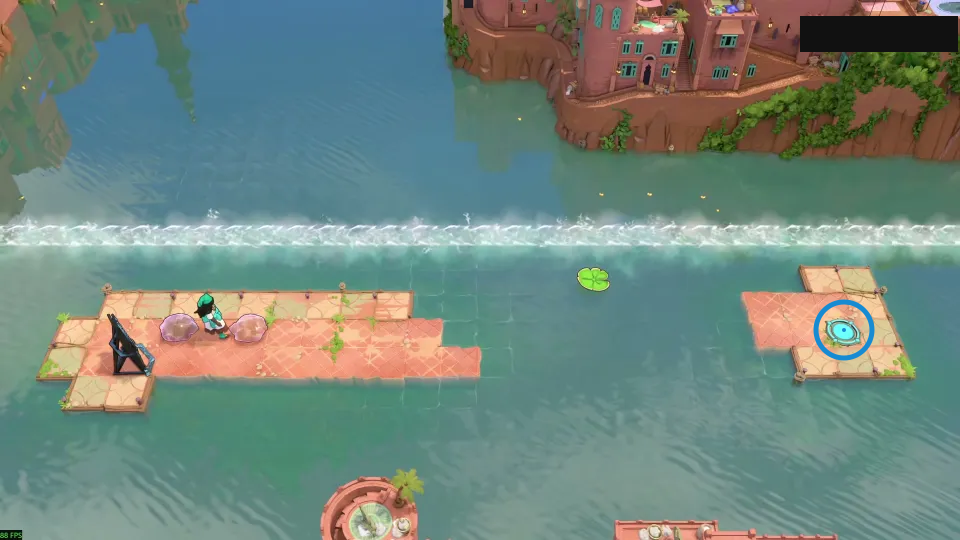
Ride the pad to move the mirror’s reflection point.
Check: Ring marks cyan circular pad on the small right island.
Open full-size image in a new tabPuzzle 18 — wider_ocean
Section titled “Puzzle 18 — wider_ocean”Article section: Puzzle 18; internal set position: 17.
The ring marks a visible landmark, not an action step.
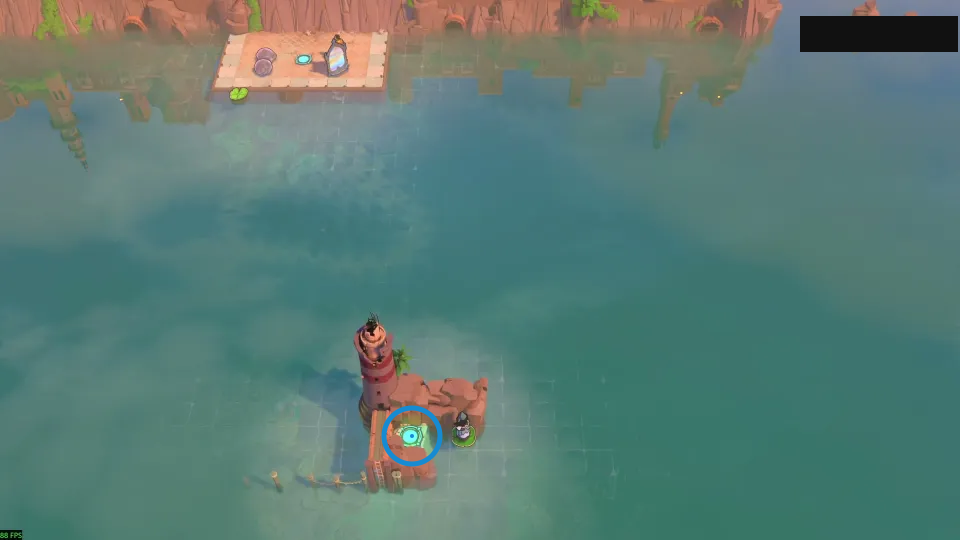
Let a drifting pad carry the mirror’s beam.
Check: Ring marks cyan circular pad on the lower island.
Open full-size image in a new tabPuzzle 19 — reel_it_in
Section titled “Puzzle 19 — reel_it_in”Article section: Puzzle 19; internal set position: 18.
The ring marks a visible landmark, not an action step.
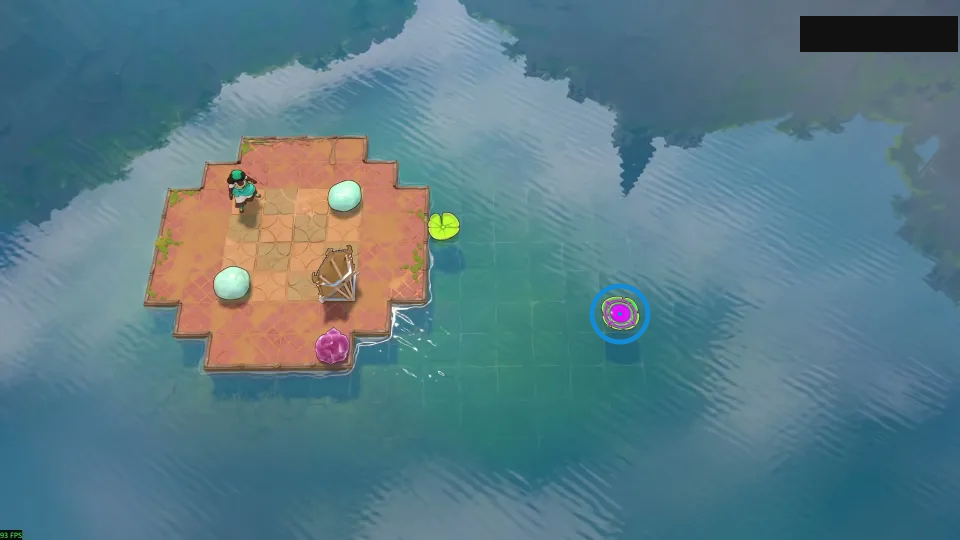
Knock the exit pad back toward shore.
Check: Ring marks pink circular pad in the right-hand water.
Open full-size image in a new tabPuzzle 20 — new_new_new_slam
Section titled “Puzzle 20 — new_new_new_slam”Article section: Puzzle 20; internal set position: 20.
The ring marks a visible landmark, not an action step.
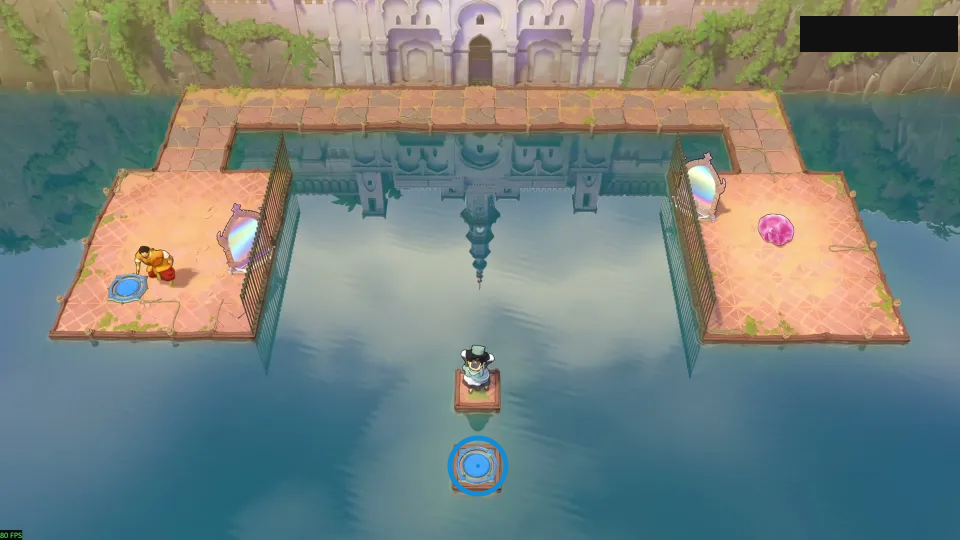
Clone the stone so both copies collide.
Check: Ring marks blue circular pad below the central figure.
Open full-size image in a new tabPuzzle 21 — bad_aim_v2
Section titled “Puzzle 21 — bad_aim_v2”Article section: Puzzle 21; internal set position: 11.
The ring marks a visible landmark, not an action step.
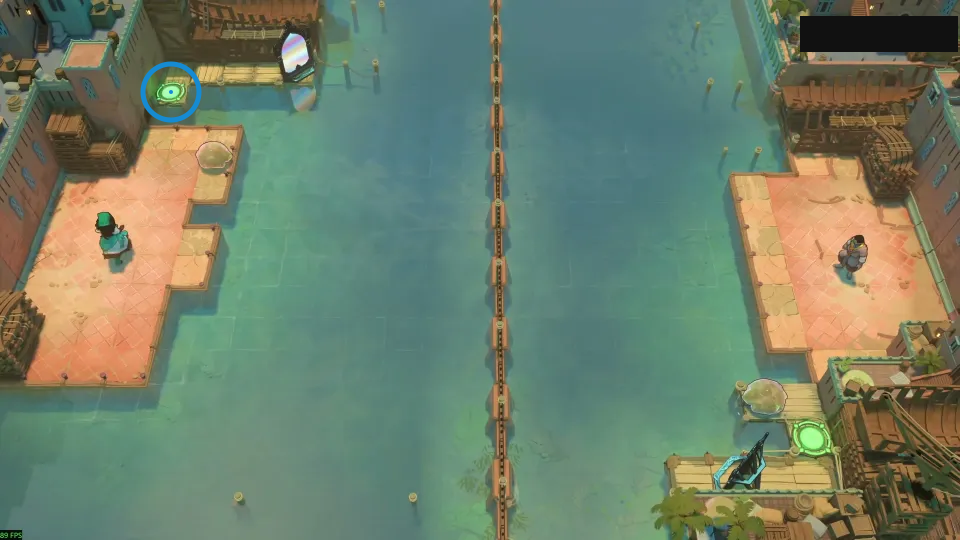
Shift the launch row to aim the bounce.
Check: Ring marks green circular pad at the upper-left landing.
Open full-size image in a new tabPuzzle 22 — multipurpose
Section titled “Puzzle 22 — multipurpose”Article section: Puzzle 22; internal set position: 12.
The ring marks a visible landmark, not an action step.
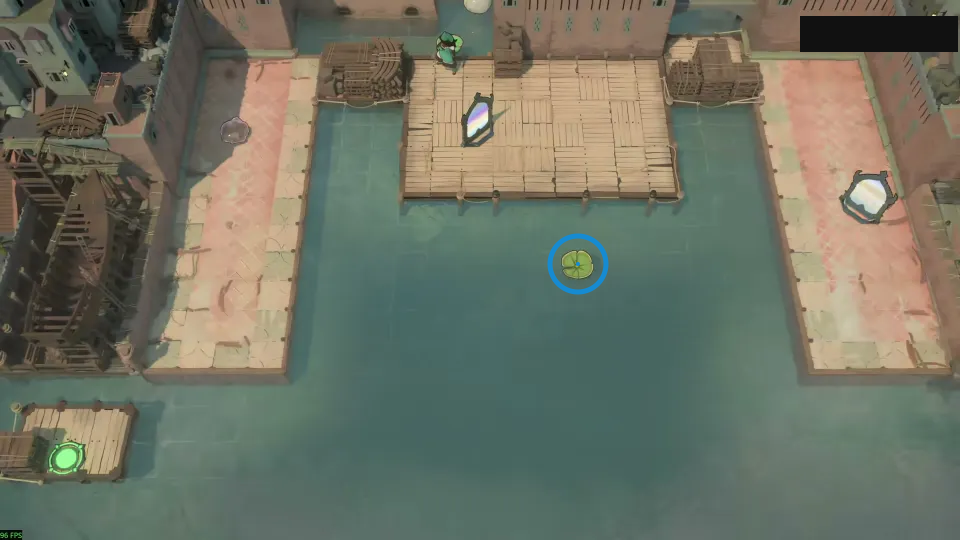
Loop the lone crystal back to the pad.
Check: Ring marks green lily near the center of the water.
Open full-size image in a new tabPuzzle 23 — wide_ocean
Section titled “Puzzle 23 — wide_ocean”Article section: Puzzle 23; internal set position: 13.
The ring marks a visible landmark, not an action step.
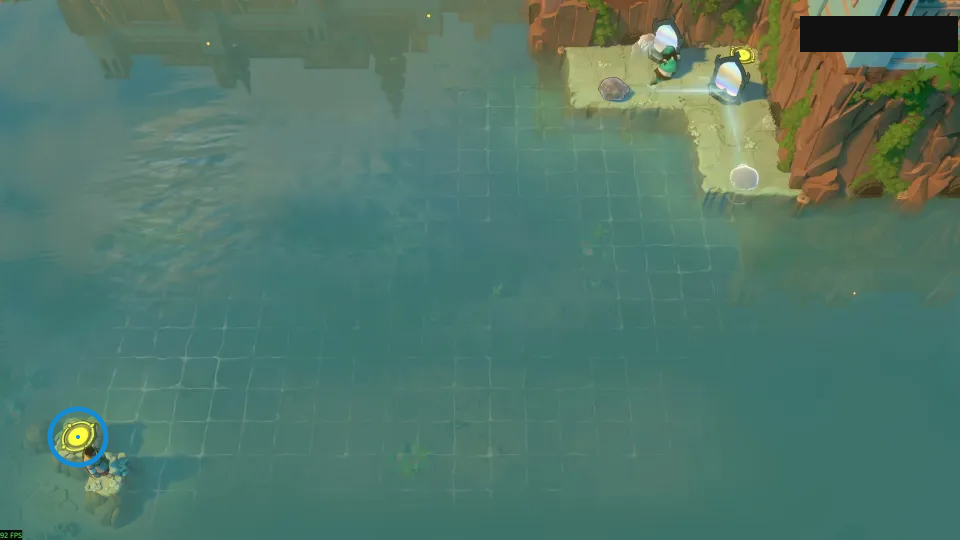
Adjust mirror gaps to tune each bounce.
Check: Ring marks yellow circular pad on the small lower-left island.
Open full-size image in a new tabPuzzle 24 — zig_zag
Section titled “Puzzle 24 — zig_zag”Article section: Puzzle 24; internal set position: 14.
The ring marks a visible landmark, not an action step.
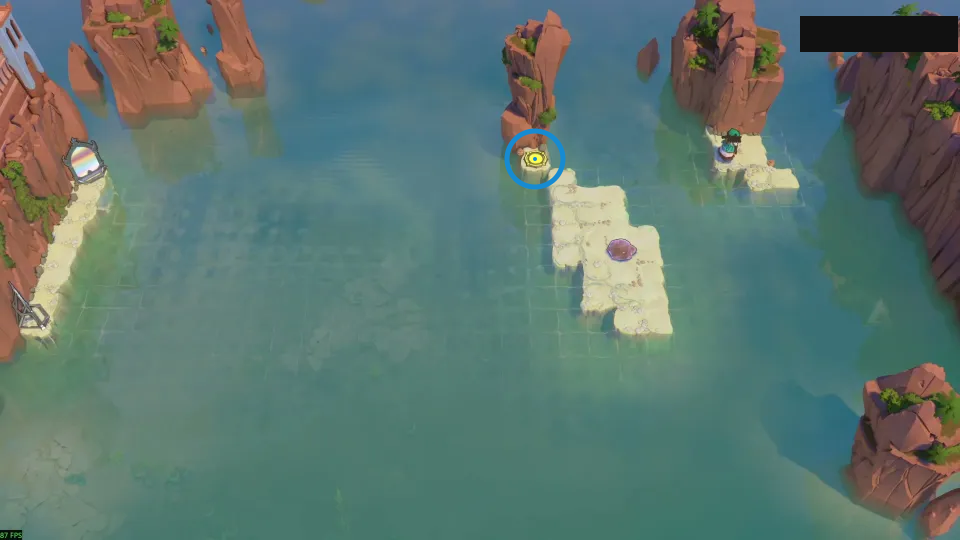
Keep the crystal skipping with quick reflections.
Check: Ring marks yellow circular pad beside the upper rock.
Open full-size image in a new tabPuzzle 25 — ricochet_v2
Section titled “Puzzle 25 — ricochet_v2”Article section: Puzzle 25; internal set position: 15.
The ring marks a visible landmark, not an action step.
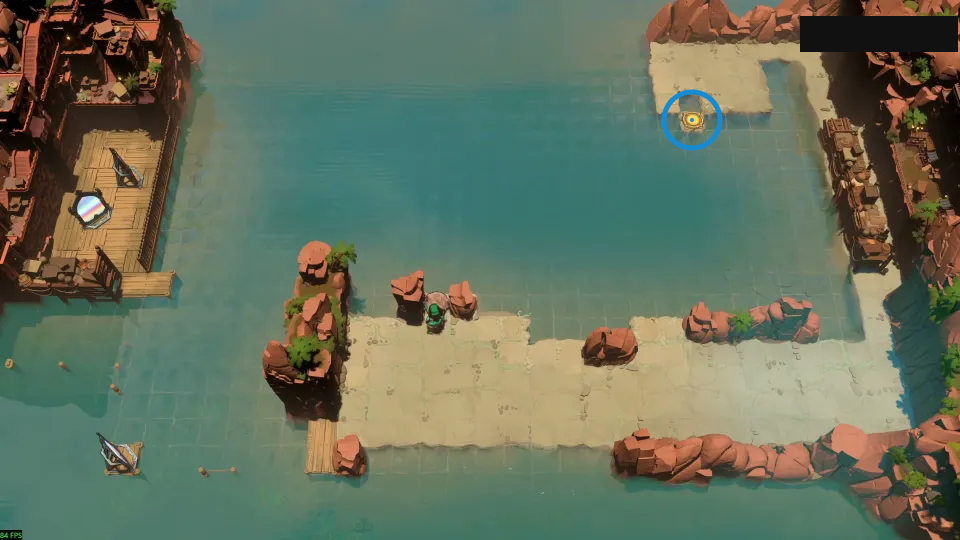
Set mirror spacing to shift the stone.
Check: Ring marks yellow circular pad on the upper island.
Open full-size image in a new tabPuzzle 26 — run_the_clock_alt
Section titled “Puzzle 26 — run_the_clock_alt”Article section: Puzzle 26; internal set position: 16.
The ring marks a visible landmark, not an action step.
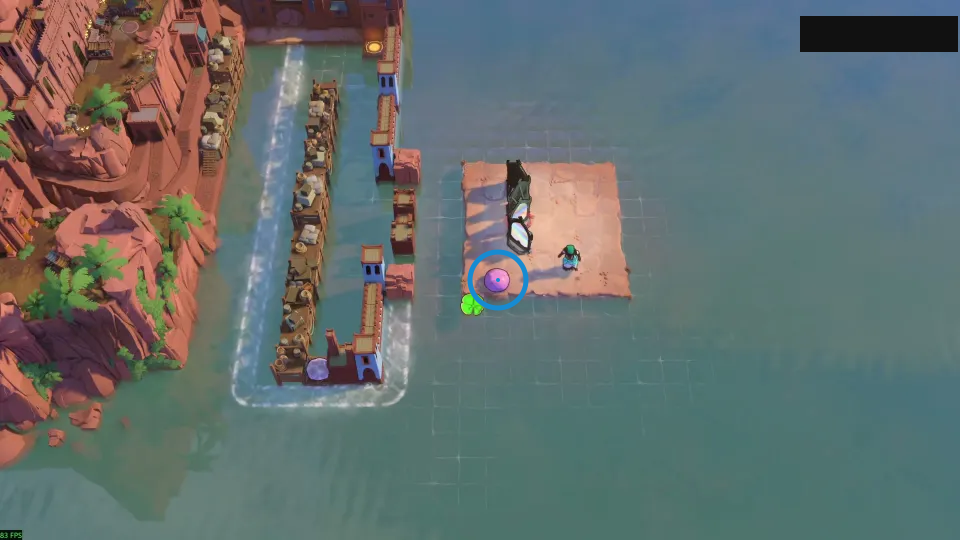
Slow the crystal with a mirror ring.
Check: Ring marks purple round stone on the right island.
Open full-size image in a new tabPuzzle 27 — cancel_out
Section titled “Puzzle 27 — cancel_out”Article still from series part P13; internal mirrors_and_stones set position: 7. The article shows a mirror-clone route and a simpler one-hero alternative; the still marks the mirror setup.
Selected article still only; the colored ring marks one layout landmark, not an input step.
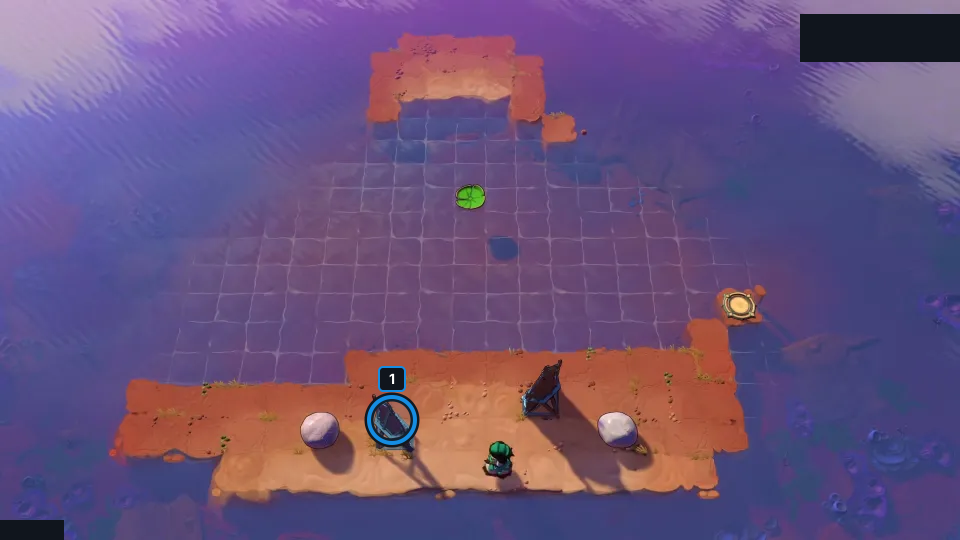
The article shows a mirror-clone route and a simpler one-hero alternative; the still marks the mirror setup.
Check: The article still visually matches cancel_out; this card records a short article-reported idea, not a route trace. It is not exact PTS; no video was decoded, no route was independently replayed, no finish is claimed, and exact Steam depot mapping is unverified.
Open full-size image in a new tabPuzzle 28 — mirror_motion
Section titled “Puzzle 28 — mirror_motion”Article still from series part P14; internal mirrors_and_stones set position: 8. Put the mirror on a lily pad so it reaches reflection tiles that are out of range from shore.
Selected article still only; the colored ring marks one layout landmark, not an input step.
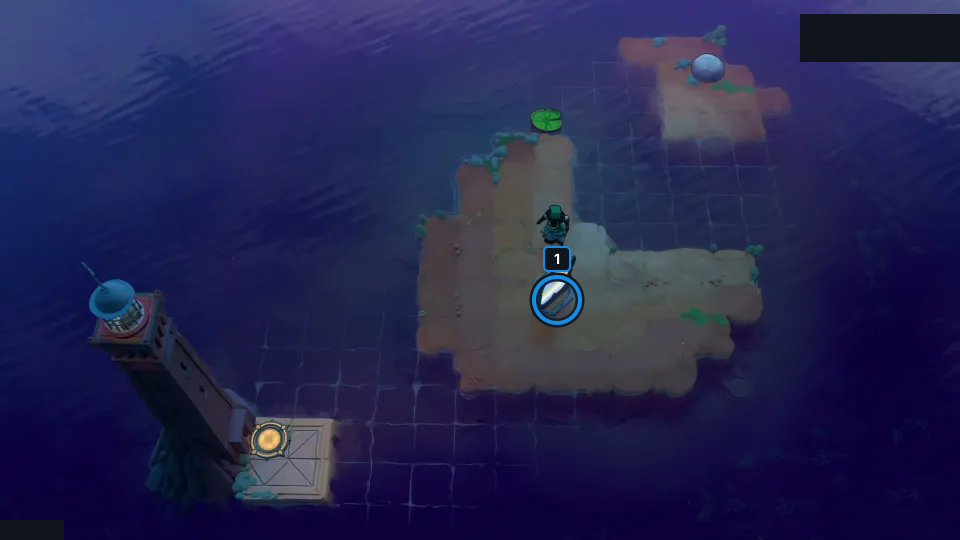
Put the mirror on a lily pad so it reaches reflection tiles that are out of range from shore.
Check: The article still visually matches mirror_motion; this card records a short article-reported idea, not a route trace. It is not exact PTS; no video was decoded, no route was independently replayed, no finish is claimed, and exact Steam depot mapping is unverified.
Open full-size image in a new tabPuzzle 29 — diag_slide
Section titled “Puzzle 29 — diag_slide”Article still from series part P14; internal mirrors_and_stones set position: 9. Reflect the stone onto the moving pad, then reflect again when the pad carries the mirror into place.
Selected article still only; the colored ring marks one layout landmark, not an input step.
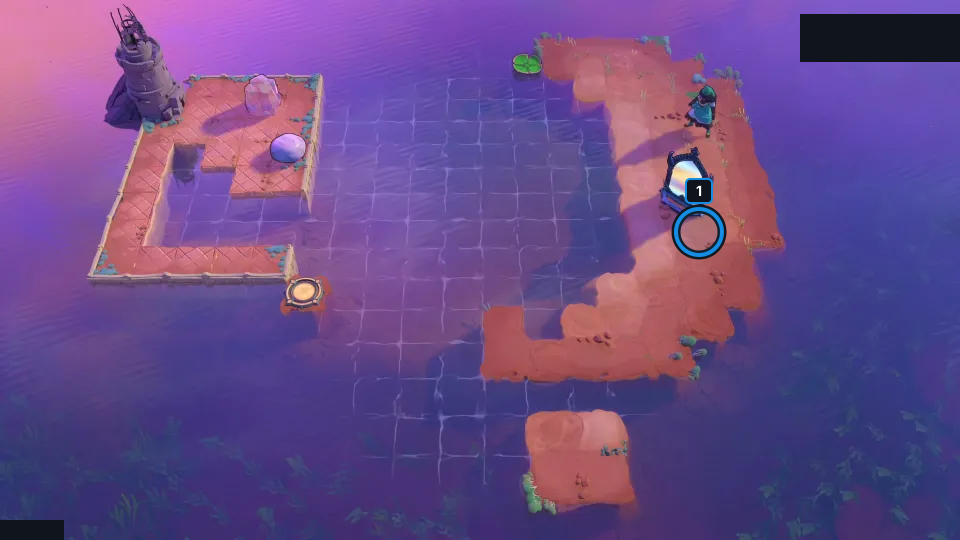
Reflect the stone onto the moving pad, then reflect again when the pad carries the mirror into place.
Check: The article still visually matches diag_slide; this card records a short article-reported idea, not a route trace. It is not exact PTS; no video was decoded, no route was independently replayed, no finish is claimed, and exact Steam depot mapping is unverified.
Open full-size image in a new tabPuzzle 30 — the_long_way
Section titled “Puzzle 30 — the_long_way”Article still from series part P14; internal mirrors_and_stones set position: 10. Move the pad into the correct row and use the mirror as a shortcut to board it before it leaves.
Selected article still only; the colored ring marks one layout landmark, not an input step.
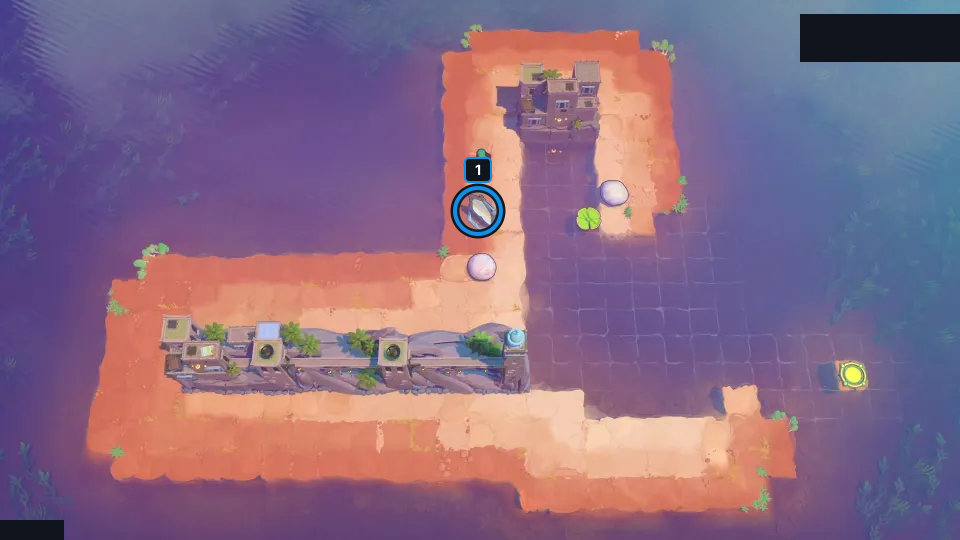
Move the pad into the correct row and use the mirror as a shortcut to board it before it leaves.
Check: The article still visually matches the_long_way; this card records a short article-reported idea, not a route trace. It is not exact PTS; no video was decoded, no route was independently replayed, no finish is claimed, and exact Steam depot mapping is unverified.
Open full-size image in a new tabPuzzle 31 — ride_together
Section titled “Puzzle 31 — ride_together”Article still from series part P14; internal mirrors_and_stones set position: 11. Line up the two pads and move them together; reflect onto the lower pad, then across again.
Selected article still only; the colored ring marks one layout landmark, not an input step.
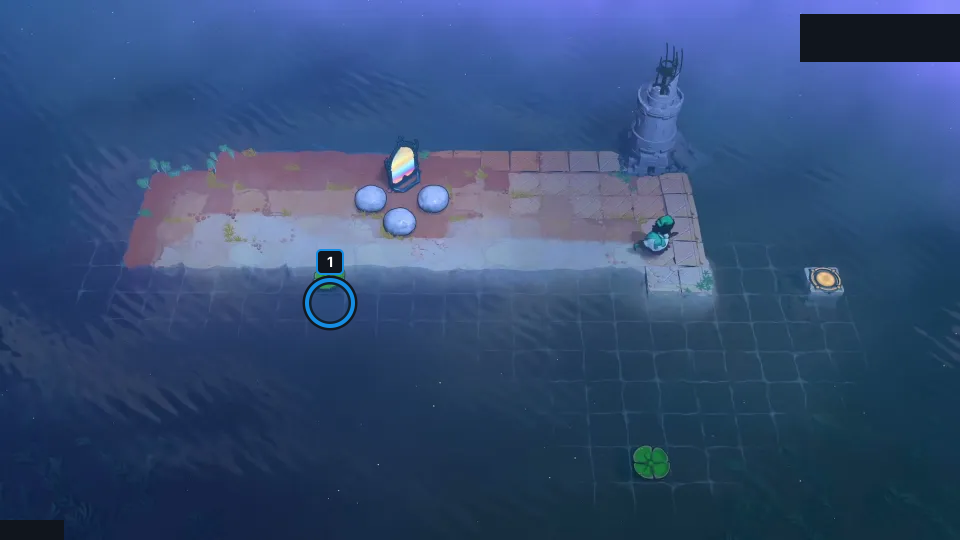
Line up the two pads and move them together; reflect onto the lower pad, then across again.
Check: The article still visually matches ride_together; this card records a short article-reported idea, not a route trace. It is not exact PTS; no video was decoded, no route was independently replayed, no finish is claimed, and exact Steam depot mapping is unverified.
Open full-size image in a new tabPuzzle 32 — two_bounce_v2
Section titled “Puzzle 32 — two_bounce_v2”Article still from series part P14; internal mirrors_and_stones set position: 12. Bring two pads together, then use the two mirrors to hop between them and reflect to the exit.
Selected article still only; the colored ring marks one layout landmark, not an input step.
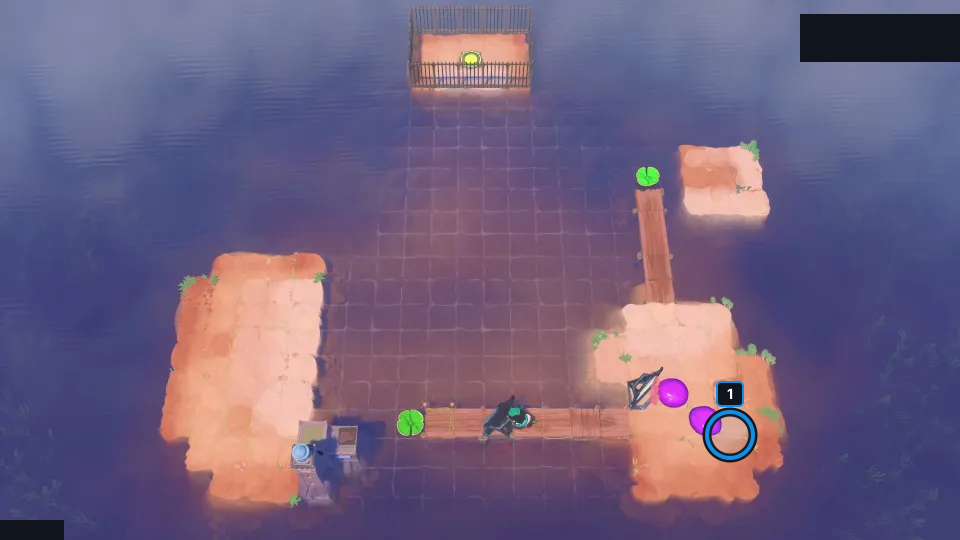
Bring two pads together, then use the two mirrors to hop between them and reflect to the exit.
Check: The article still visually matches two_bounce_v2; this card records a short article-reported idea, not a route trace. It is not exact PTS; no video was decoded, no route was independently replayed, no finish is claimed, and exact Steam depot mapping is unverified.
Open full-size image in a new tabPuzzle 33 — first_diversions
Section titled “Puzzle 33 — first_diversions”Article still from series part P14; internal mirrors_and_stones set position: 13. A mirror standing in the current can block it and redirect the flow.
Selected article still only; the colored ring marks one layout landmark, not an input step.
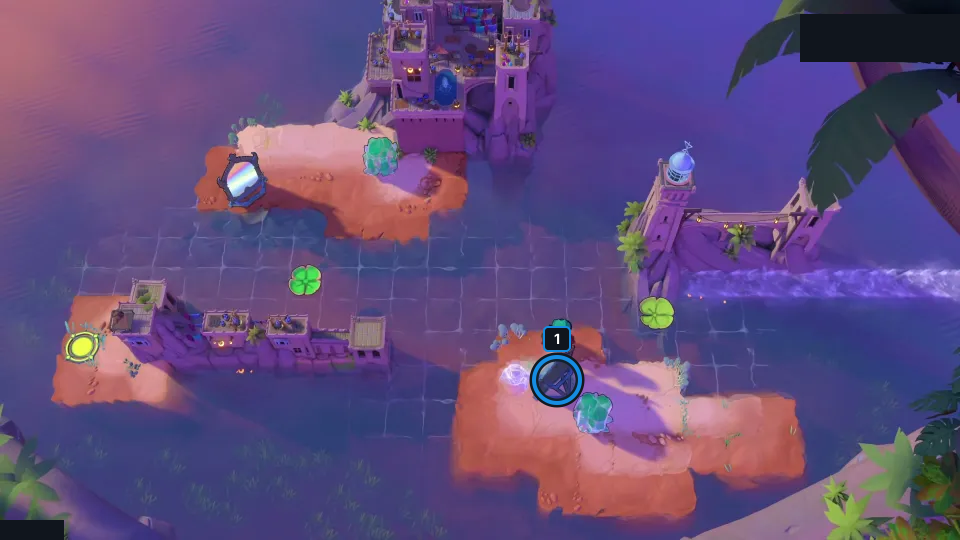
A mirror standing in the current can block it and redirect the flow.
Check: The article still visually matches first_diversions; this card records a short article-reported idea, not a route trace. It is not exact PTS; no video was decoded, no route was independently replayed, no finish is claimed, and exact Steam depot mapping is unverified.
Open full-size image in a new tabPuzzle 34 — river_dictionary_alt_up
Section titled “Puzzle 34 — river_dictionary_alt_up”Article still from series part P14; internal mirrors_and_stones set position: 20. A blocked current turns right by default; it turns left only when the tile on its right is blocked.
Selected article still only; the colored ring marks one layout landmark, not an input step.
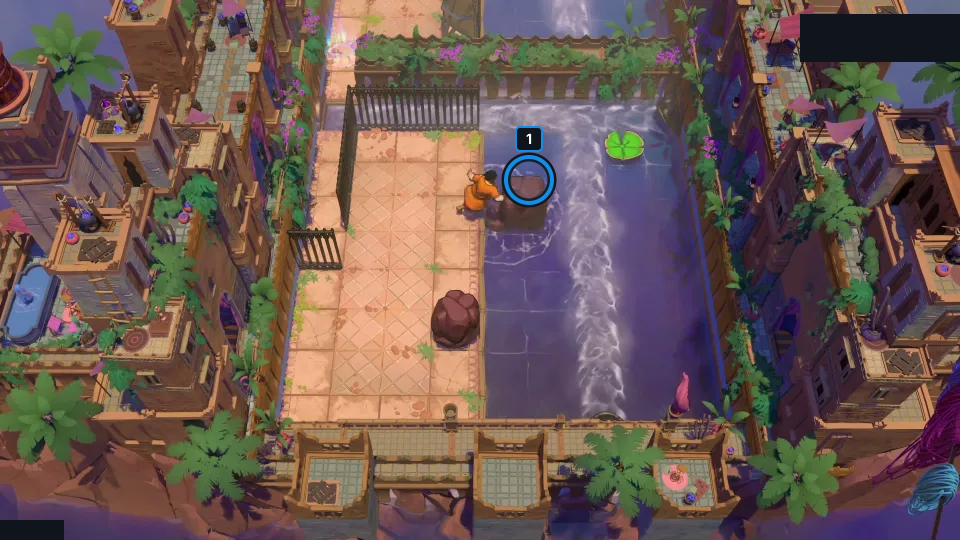
A blocked current turns right by default; it turns left only when the tile on its right is blocked.
Check: The article still visually matches river_dictionary_alt_up; this card records a short article-reported idea, not a route trace. It is not exact PTS; no video was decoded, no route was independently replayed, no finish is claimed, and exact Steam depot mapping is unverified.
Open full-size image in a new tabPuzzle 35 — far_river
Section titled “Puzzle 35 — far_river”Article still from series part P14; internal mirrors_and_stones set position: 14. Ride the mirror and a crystal on the pad to extend the reflection far enough to cut the upper current.
Selected article still only; the colored ring marks one layout landmark, not an input step.
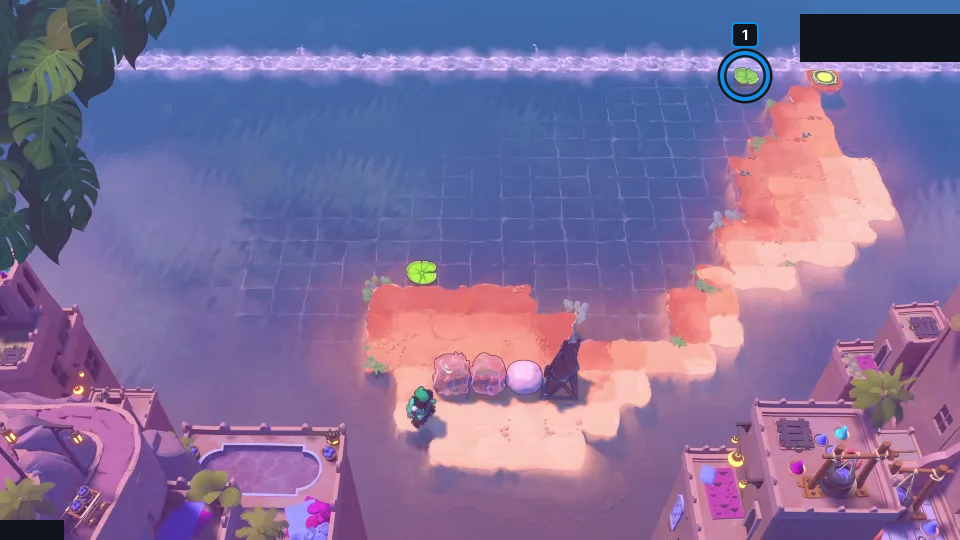
Ride the mirror and a crystal on the pad to extend the reflection far enough to cut the upper current.
Check: The article still visually matches far_river; this card records a short article-reported idea, not a route trace. It is not exact PTS; no video was decoded, no route was independently replayed, no finish is claimed, and exact Steam depot mapping is unverified.
Open full-size image in a new tabPuzzle 36 — ditching_cargo
Section titled “Puzzle 36 — ditching_cargo”Article still from series part P14; internal mirrors_and_stones set position: 15. Reach the bottom-right channel on two pads, then push a crystal into the water to cut the current.
Selected article still only; the colored ring marks one layout landmark, not an input step.
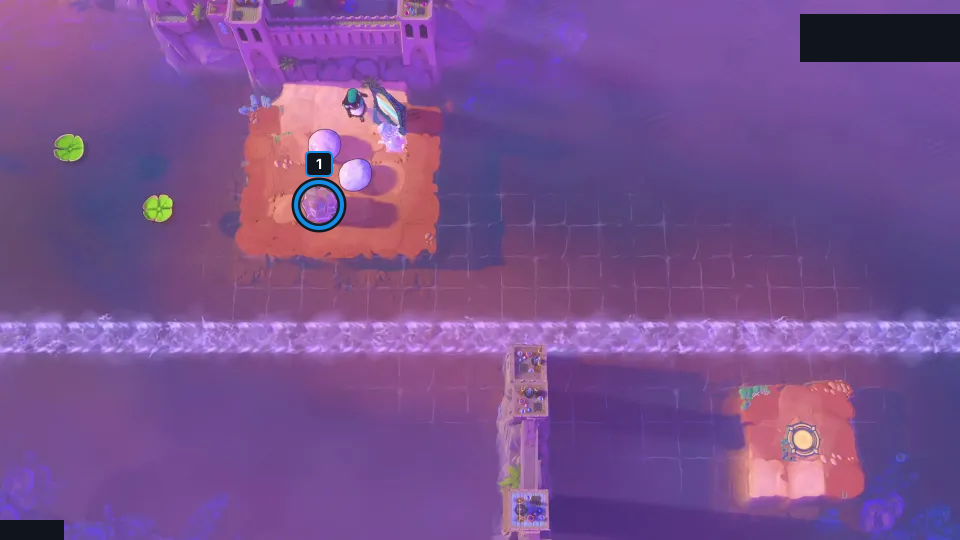
Reach the bottom-right channel on two pads, then push a crystal into the water to cut the current.
Check: The article still visually matches ditching_cargo; this card records a short article-reported idea, not a route trace. It is not exact PTS; no video was decoded, no route was independently replayed, no finish is claimed, and exact Steam depot mapping is unverified.
Open full-size image in a new tabPuzzle 37 — unblock_block_alt
Section titled “Puzzle 37 — unblock_block_alt”Article still from series part P14; internal mirrors_and_stones set position: 16. Cut only a short branch: guide the current to the lily-pad column, then block it again.
Selected article still only; the colored ring marks one layout landmark, not an input step.
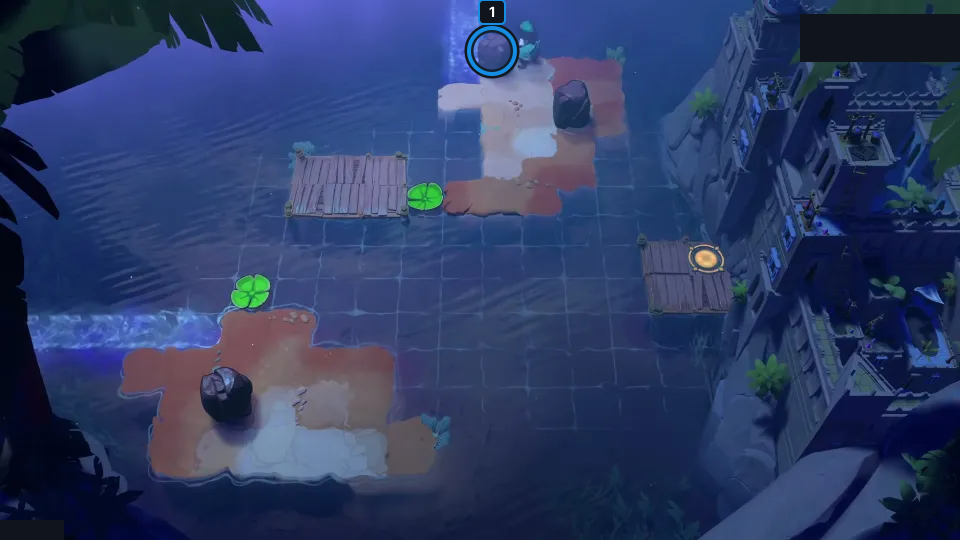
Cut only a short branch: guide the current to the lily-pad column, then block it again.
Check: The article still visually matches unblock_block_alt; this card records a short article-reported idea, not a route trace. It is not exact PTS; no video was decoded, no route was independently replayed, no finish is claimed, and exact Steam depot mapping is unverified.
Open full-size image in a new tabPuzzle 38 — there_and_back
Section titled “Puzzle 38 — there_and_back”Article still from series part P14; internal mirrors_and_stones set position: 17. Load the first two passing pads with stones and time both drops so they land on the same tile.
Selected article still only; the colored ring marks one layout landmark, not an input step.
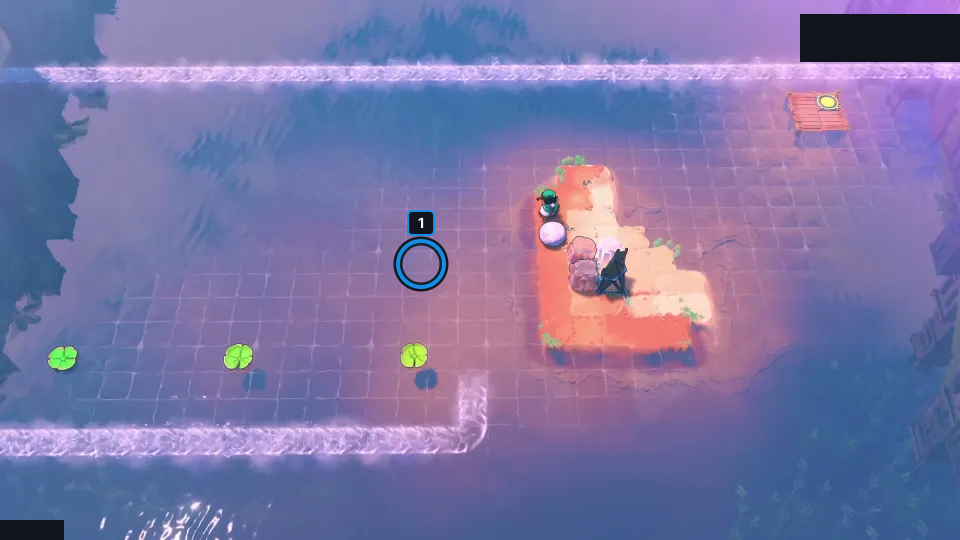
Load the first two passing pads with stones and time both drops so they land on the same tile.
Check: The article still visually matches there_and_back; this card records a short article-reported idea, not a route trace. It is not exact PTS; no video was decoded, no route was independently replayed, no finish is claimed, and exact Steam depot mapping is unverified.
Open full-size image in a new tabPuzzle 39 — sink_together
Section titled “Puzzle 39 — sink_together”Article still from series part P14; internal mirrors_and_stones set position: 18. Stop the stone exactly above or below the blocker by reflecting a second stone into its path.
Selected article still only; the colored ring marks one layout landmark, not an input step.
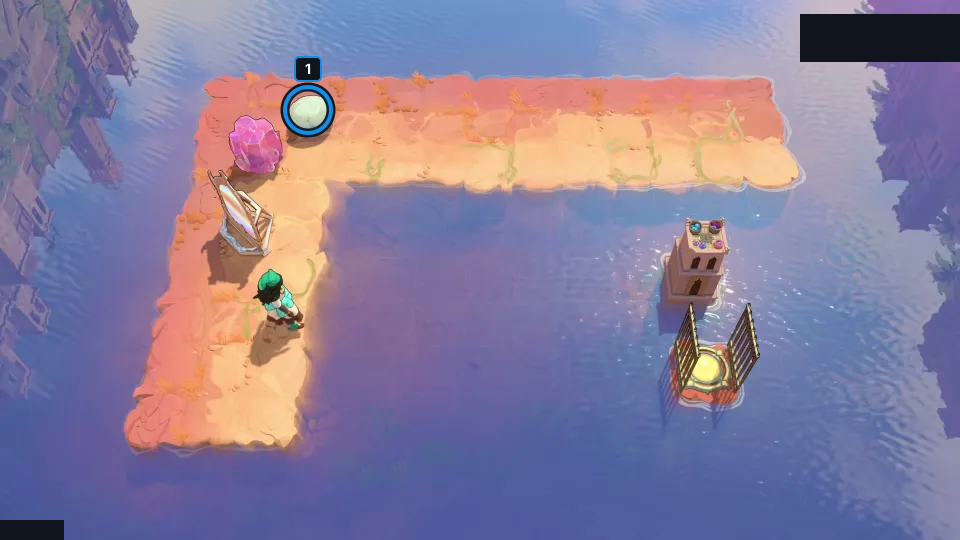
Stop the stone exactly above or below the blocker by reflecting a second stone into its path.
Check: The article still visually matches sink_together; this card records a short article-reported idea, not a route trace. It is not exact PTS; no video was decoded, no route was independently replayed, no finish is claimed, and exact Steam depot mapping is unverified.
Open full-size image in a new tabPuzzle 40 — in_the_way_alt_3
Section titled “Puzzle 40 — in_the_way_alt_3”Article still from series part P14; internal mirrors_and_stones set position: 19. Stop two current branches at a time so the flow is diverted onto the central ruin.
Selected article still only; the colored ring marks one layout landmark, not an input step.
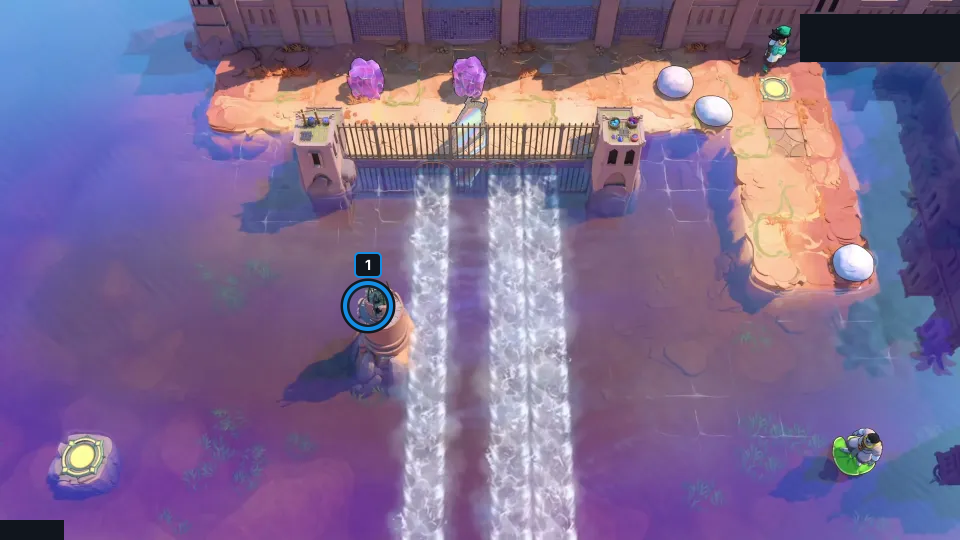
Stop two current branches at a time so the flow is diverted onto the central ruin.
Check: The article still visually matches in_the_way_alt_3; this card records a short article-reported idea, not a route trace. It is not exact PTS; no video was decoded, no route was independently replayed, no finish is claimed, and exact Steam depot mapping is unverified.
Open full-size image in a new tabPuzzle 41 — coax_a_lot
Section titled “Puzzle 41 — coax_a_lot”Article still from series part P14; internal mirrors_and_stones set position: 22. Ride the draining current on a lily pad and push it down five rows before it fades.
Selected article still only; the colored ring marks one layout landmark, not an input step.
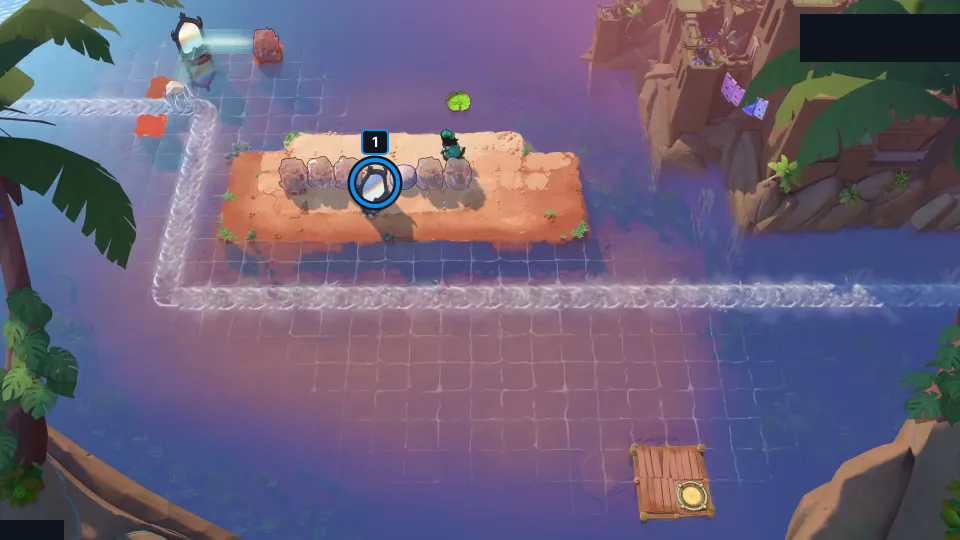
Ride the draining current on a lily pad and push it down five rows before it fades.
Check: The article still visually matches coax_a_lot; this card records a short article-reported idea, not a route trace. It is not exact PTS; no video was decoded, no route was independently replayed, no finish is claimed, and exact Steam depot mapping is unverified.
Open full-size image in a new tabPuzzle 42 — river_push_v4
Section titled “Puzzle 42 — river_push_v4”Article still from series part P14; internal mirrors_and_stones set position: 21. Send the current under the wall and turn it back up; block the right-hand tile before a left turn.
Selected article still only; the colored ring marks one layout landmark, not an input step.
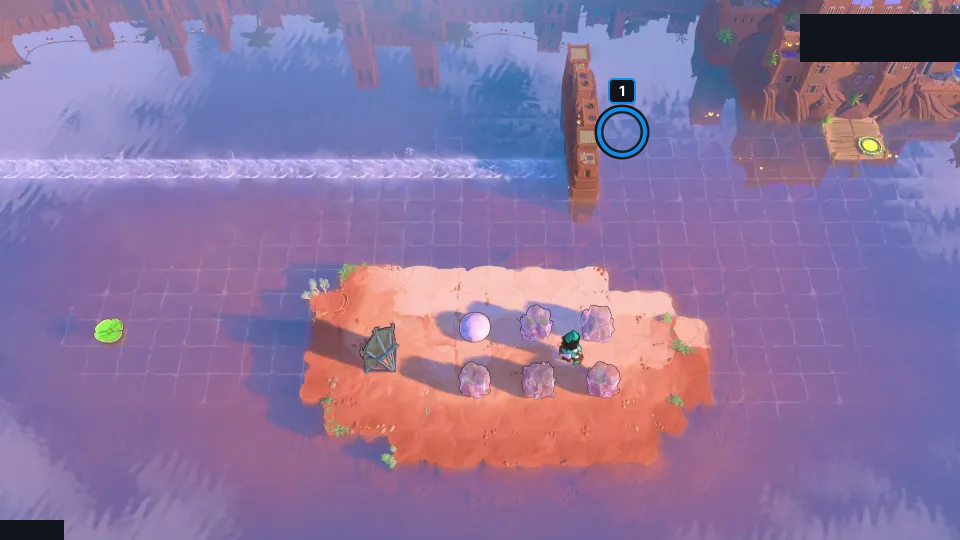
Send the current under the wall and turn it back up; block the right-hand tile before a left turn.
Check: The article still visually matches river_push_v4; this card records a short article-reported idea, not a route trace. It is not exact PTS; no video was decoded, no route was independently replayed, no finish is claimed, and exact Steam depot mapping is unverified.
Open full-size image in a new tabPuzzle 43 — river_plinko_v2_actual
Section titled “Puzzle 43 — river_plinko_v2_actual”Article still from series part P14; internal mirrors_and_stones set position: 29. Bend the current through four stages so the pad ends between the two stones beside the exit.
Selected article still only; the colored ring marks one layout landmark, not an input step.
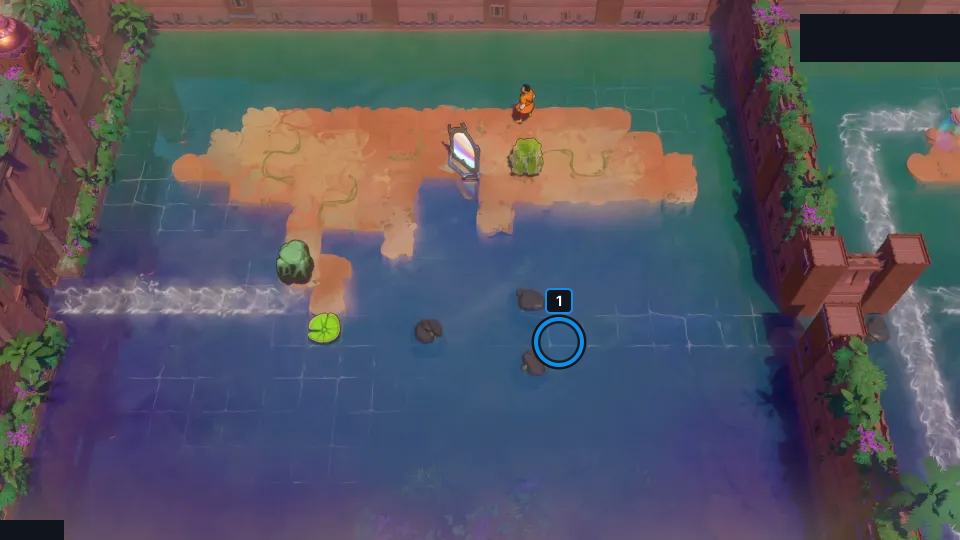
Bend the current through four stages so the pad ends between the two stones beside the exit.
Check: The article still visually matches river_plinko_v2_actual; this card records a short article-reported idea, not a route trace. It is not exact PTS; no video was decoded, no route was independently replayed, no finish is claimed, and exact Steam depot mapping is unverified.
Open full-size image in a new tabPuzzle 44 — already_dropped_v2
Section titled “Puzzle 44 — already_dropped_v2”Article still from series part P33; internal mirrors_and_stones set position: 23. Reflect the stone again after it sinks in water to reach one tile beyond a normal reflection.
Selected article still only; the colored ring marks one layout landmark, not an input step.
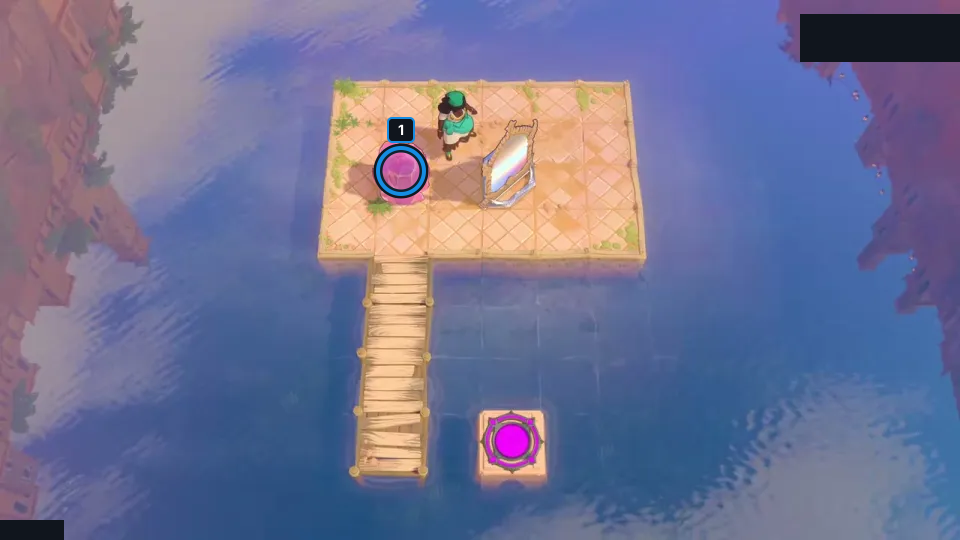
Reflect the stone again after it sinks in water to reach one tile beyond a normal reflection.
Check: The article still visually matches already_dropped_v2; this card records a short article-reported idea, not a route trace. It is not exact PTS; no video was decoded, no route was independently replayed, no finish is claimed, and exact Steam depot mapping is unverified.
Open full-size image in a new tabPuzzle 45 — two_step
Section titled “Puzzle 45 — two_step”Article still from series part P33; internal mirrors_and_stones set position: 24. Use the target’s diagonal to pick the starting tile, sink the stone, then reflect it to the target.
Selected article still only; the colored ring marks one layout landmark, not an input step.
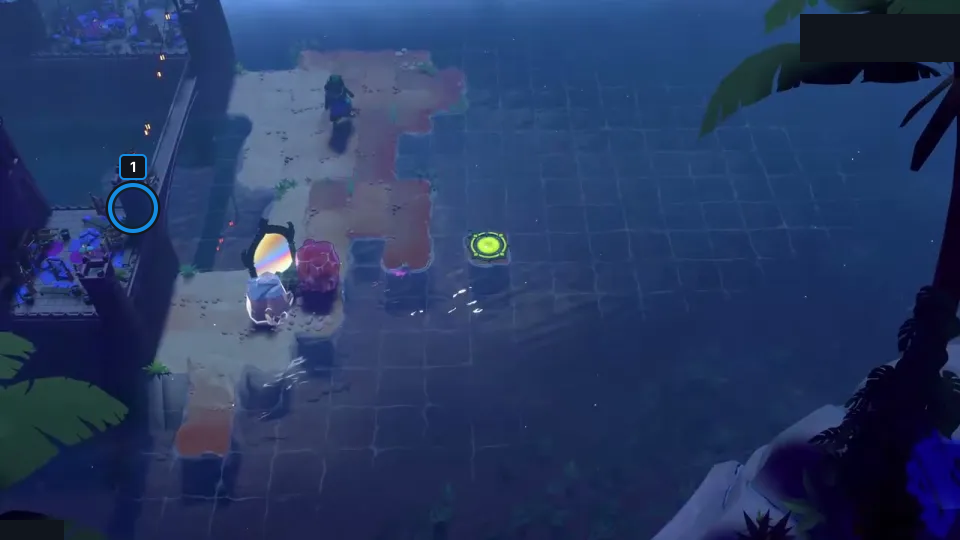
Use the target’s diagonal to pick the starting tile, sink the stone, then reflect it to the target.
Check: The article still visually matches two_step; this card records a short article-reported idea, not a route trace. It is not exact PTS; no video was decoded, no route was independently replayed, no finish is claimed, and exact Steam depot mapping is unverified.
Open full-size image in a new tabPuzzle 46 — use_and_remove
Section titled “Puzzle 46 — use_and_remove”Article still from series part P33; internal mirrors_and_stones set position: 27. Use one mirror on land to send the stone into water and a second water-side mirror to the target.
Selected article still only; the colored ring marks one layout landmark, not an input step.
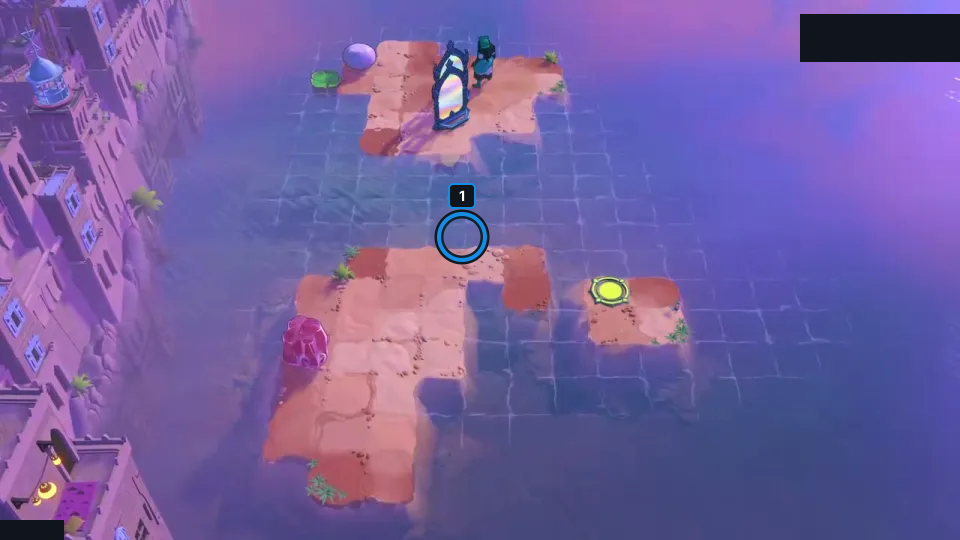
Use one mirror on land to send the stone into water and a second water-side mirror to the target.
Check: The article still visually matches use_and_remove; this card records a short article-reported idea, not a route trace. It is not exact PTS; no video was decoded, no route was independently replayed, no finish is claimed, and exact Steam depot mapping is unverified.
Open full-size image in a new tabPuzzle 47 — infinite_crystal_hack_v5
Section titled “Puzzle 47 — infinite_crystal_hack_v5”Article still from series part P33; internal mirrors_and_stones set position: 28. Place a mirror in the water at the target’s diagonal point; keep its beam clear of a stuck stone.
Selected article still only; the colored ring marks one layout landmark, not an input step.
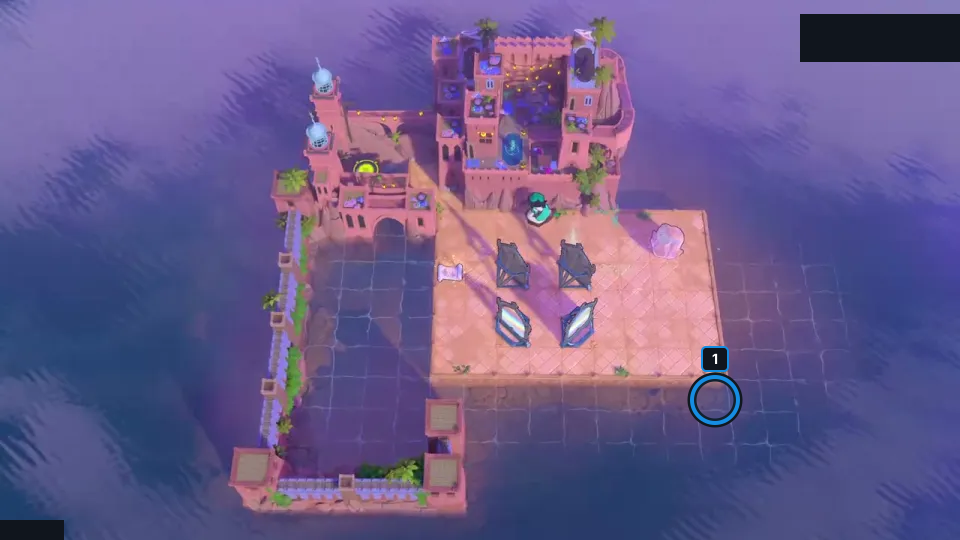
Place a mirror in the water at the target’s diagonal point; keep its beam clear of a stuck stone.
Check: The article still visually matches infinite_crystal_hack_v5; this card records a short article-reported idea, not a route trace. It is not exact PTS; no video was decoded, no route was independently replayed, no finish is claimed, and exact Steam depot mapping is unverified.
Open full-size image in a new tabPuzzle 48 — square_dance
Section titled “Puzzle 48 — square_dance”Article still from series part P33; internal mirrors_and_stones set position: 26. Set a stone at the shore and a mirror in the water on its diagonal to reach the target.
Selected article still only; the colored ring marks one layout landmark, not an input step.
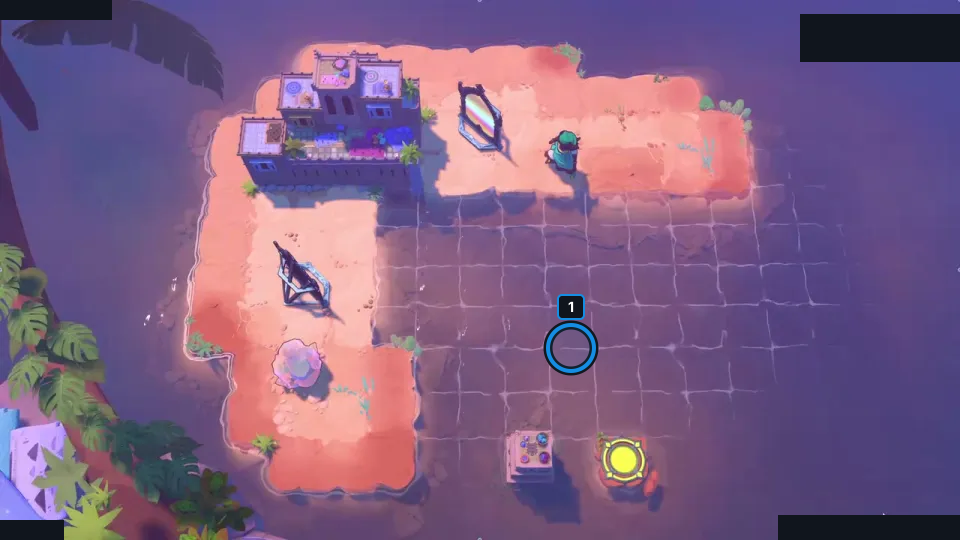
Set a stone at the shore and a mirror in the water on its diagonal to reach the target.
Check: The article still visually matches square_dance; this card records a short article-reported idea, not a route trace. It is not exact PTS; no video was decoded, no route was independently replayed, no finish is claimed, and exact Steam depot mapping is unverified.
Open full-size image in a new tabPuzzle 49 — moving_bridge
Section titled “Puzzle 49 — moving_bridge”Article still from series part P33; internal mirrors_and_stones set position: 25. Use a mirror standing in the water to switch one stone between two tiles and bridge the gap with two stones.
Selected article still only; the colored ring marks one layout landmark, not an input step.
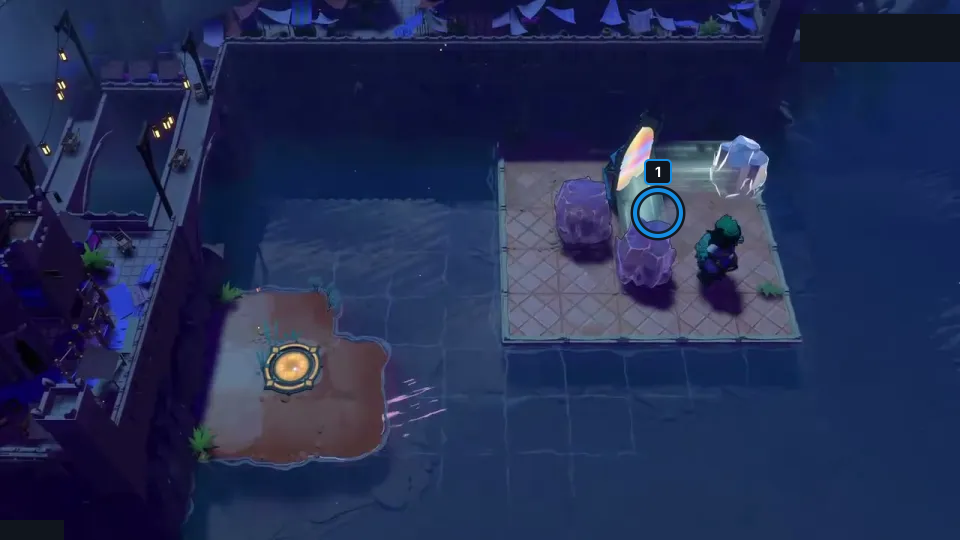
Use a mirror standing in the water to switch one stone between two tiles and bridge the gap with two stones.
Check: The article still visually matches moving_bridge; this card records a short article-reported idea, not a route trace. It is not exact PTS; no video was decoded, no route was independently replayed, no finish is claimed, and exact Steam depot mapping is unverified.
Open full-size image in a new tabUnassigned article material
Section titled “Unassigned article material”Article puzzles 7–26 have no candidate assignment within this mirrors_and_stones crosswalk. The eleven separate Overworld puzzles remain unresolved by local target ID.
Sources and credits
Article stills and key ideas: Mirrors and Stones walkthrough. Video: 塞德莎, Order of the Sinking Star narrated series. Cards show selected article stills, not exact PTS; ideas are source-reported, no route was independently replayed, and no finish or exact Steam depot mapping is claimed. Game art: Thekla, Inc.- Full puzzle candidate inventory (PC r67121) — Extracted data
- Mirrors and Stones walkthrough — Documentation · walkthrough-updated-2026-10-21
- 塞德莎 Mirrors and Stones narrated walkthrough series — Observed in-game · article-parts-reviewed-2026-10-22
- Mirrors and Stones candidate shipping classification — Documentation · mirrors-and-stones-candidate-review-2026-10-22;remaining-source-candidates-2026-10-24
- Mirrors and Stones bilingual selected-layout cards — Extracted data · mirrors-and-stones-selected-layouts-2026-10-22
- Remaining approved source/native candidate crosswalk — Extracted data · remaining-source-candidates-2026-10-25-29-video-display-upgrades
- Mirrors And Stones bilingual selected-layout evidence — Extracted data · remaining-source-layouts-mirrors-and-stones-2026-10-24
- Sinking Star Walkthrough article: mirrors and stones solutions — Documentation · walkthrough-mirrors-and-stones-solutions
Unofficial fan wiki, not affiliated with Thekla, Inc. / Arc Games / Gamirror Games. Game content belongs to its owners.
Comments & feedback
Share a tip or suggest a correction. Comments are public. Guest names are unverified; verified accounts show their account username. All language pages share this discussion. Please keep personal information private.