
 Order of the Sinking Star
Reflected Beams selected layouts

This guide covers 24 matched room layouts from the article’s 25 numbered Reflected Beams stills. Puzzle 1 remains unassigned. Article puzzle numbers are separate from internal level-set positions.
Article stills show selected layouts, not confirmed starting states. Compare your board with these selected views, then use the hint below each image. Blue rings identify visible landmarks. Video views show selected states; routes and finishes were not independently checked, and the Steam depot mapping remains unverified.
Puzzle 1 — unassigned
Section titled “Puzzle 1 — unassigned”No distinct candidate match was approved for this article still.
Puzzle 2 — dual_screen
Section titled “Puzzle 2 — dual_screen”Internal level-set position: 16.
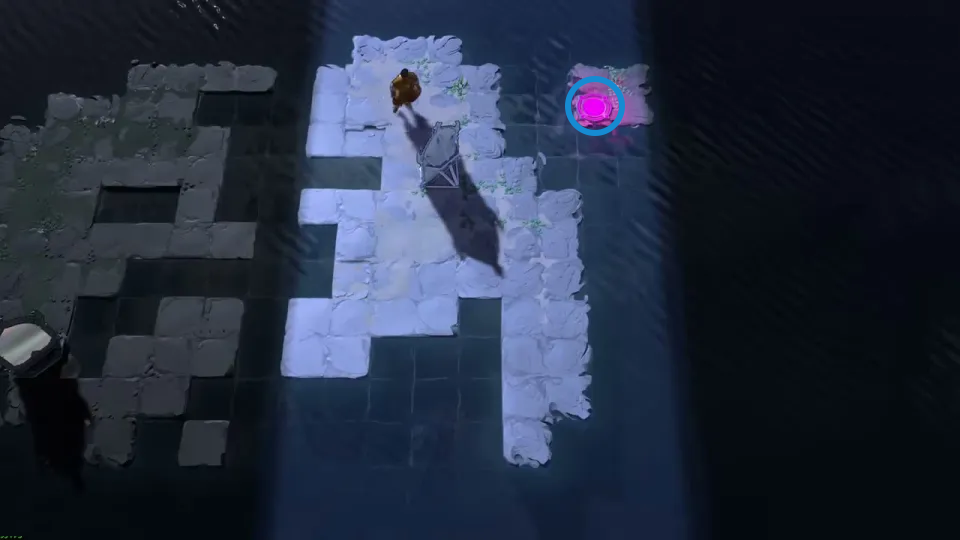
Article-reported hint: Work backward from the exit.
Check: The blue ring marks the pink exit on the upper-right island.
Open full-size image in a new tabPuzzle 3 — tempered_glass_red
Section titled “Puzzle 3 — tempered_glass_red”Internal level-set position: 1.
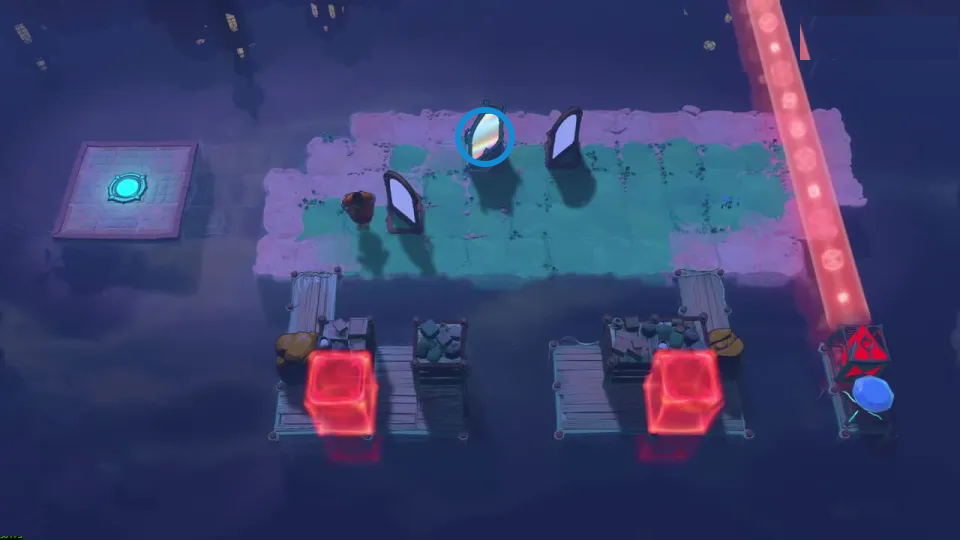
Article-reported hint: Bend red light beside the door.
Check: The blue ring marks the upper middle mirror.
Open full-size image in a new tabPuzzle 4 — red_rooms_v5
Section titled “Puzzle 4 — red_rooms_v5”Internal level-set position: 2.
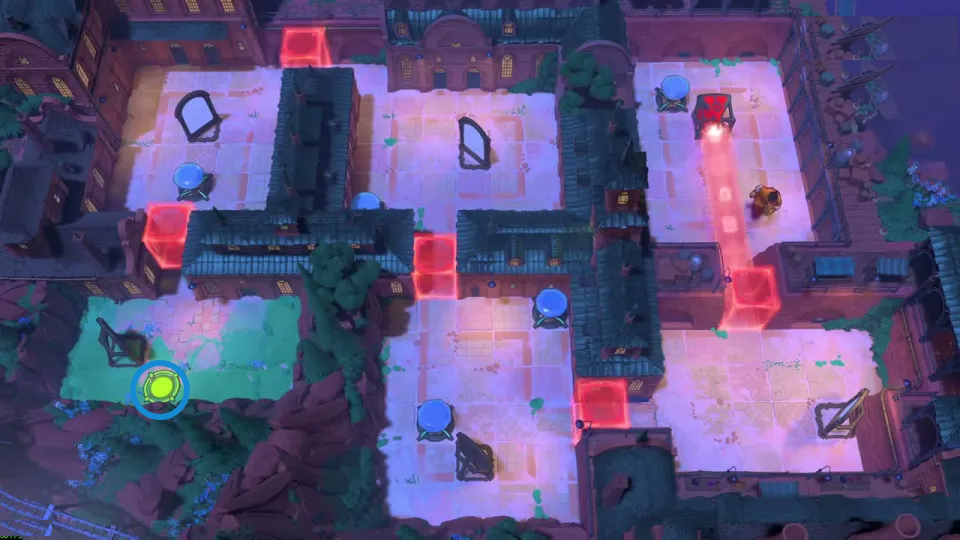
Article-reported hint: Open each red gate separately.
Check: The blue ring marks the green exit pad at the lower-left corner.
Open full-size image in a new tabPuzzle 5 — wrapping_mirror_red_v4
Section titled “Puzzle 5 — wrapping_mirror_red_v4”Source-reported hint: Push mirrors through the room’s wrap.
Selected room detail.
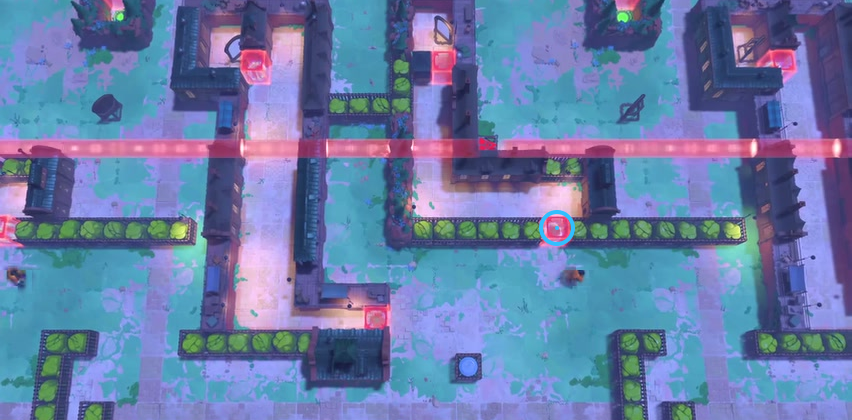
Find the red gate in the horizontal green strip.
Check: The blue ring marks the red gate in the horizontal green strip.
Open full-size image in a new tabPuzzle 6 — smash_or_dash_vs2
Section titled “Puzzle 6 — smash_or_dash_vs2”Internal level-set position: 4.
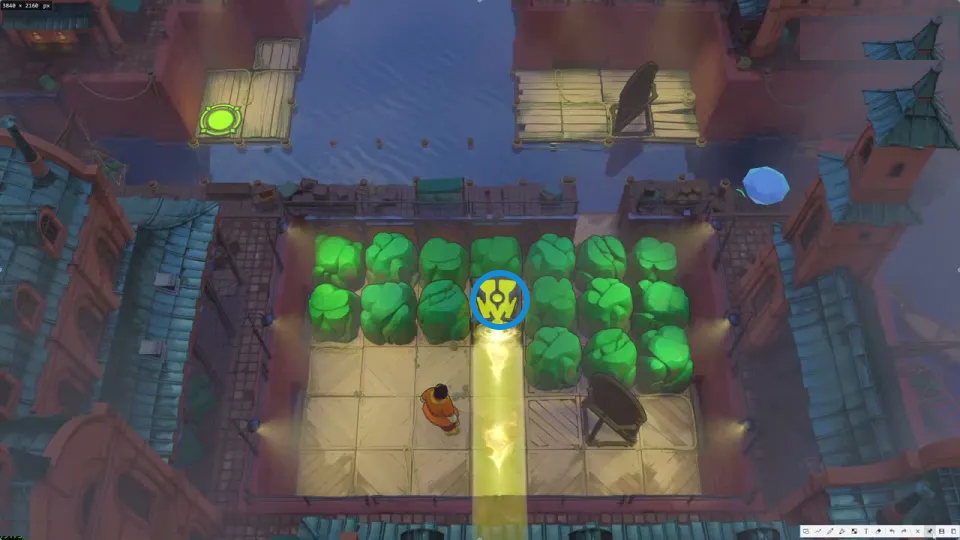
Article-reported hint: Push the emitter into water.
Check: The blue ring marks the yellow emitter at the top of the courtyard.
Open full-size image in a new tabPuzzle 7 — across_the_fence_vtrader_m_p
Section titled “Puzzle 7 — across_the_fence_vtrader_m_p”Internal level-set position: 12.
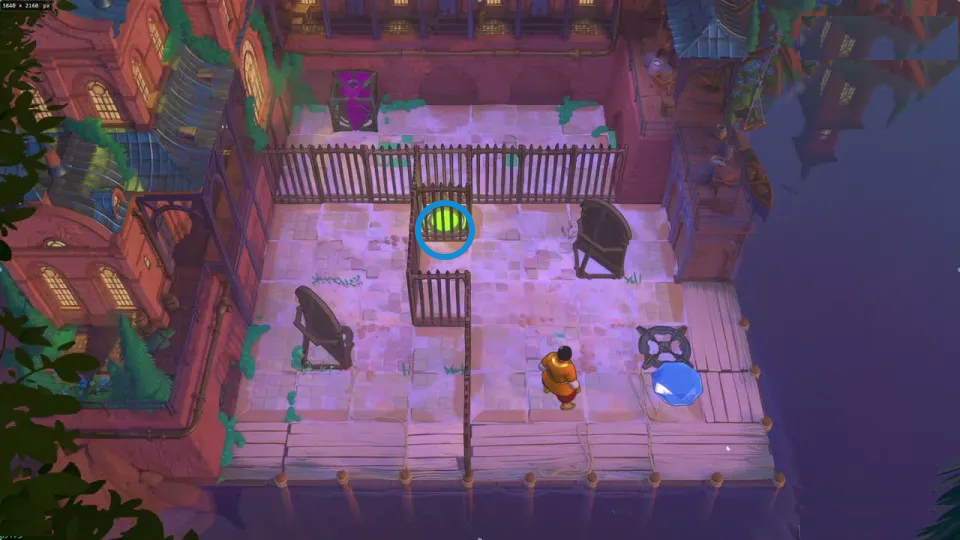
Article-reported hint: Stop purple light beside the exit.
Check: The blue ring marks the green exit inside the fence.
Open full-size image in a new tabPuzzle 8 — break_through_focused
Section titled “Puzzle 8 — break_through_focused”Internal level-set position: 5.
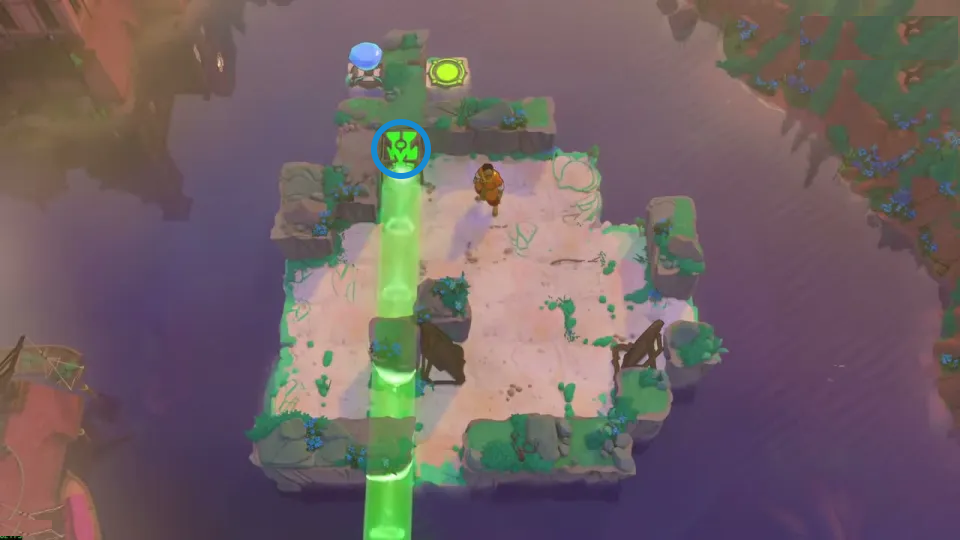
Article-reported hint: Use green light behind each mirror.
Check: The blue ring marks the green emitter above the left side of the island.
Open full-size image in a new tabPuzzle 9 — rover_water_purple_v9
Section titled “Puzzle 9 — rover_water_purple_v9”Internal level-set position: 23.
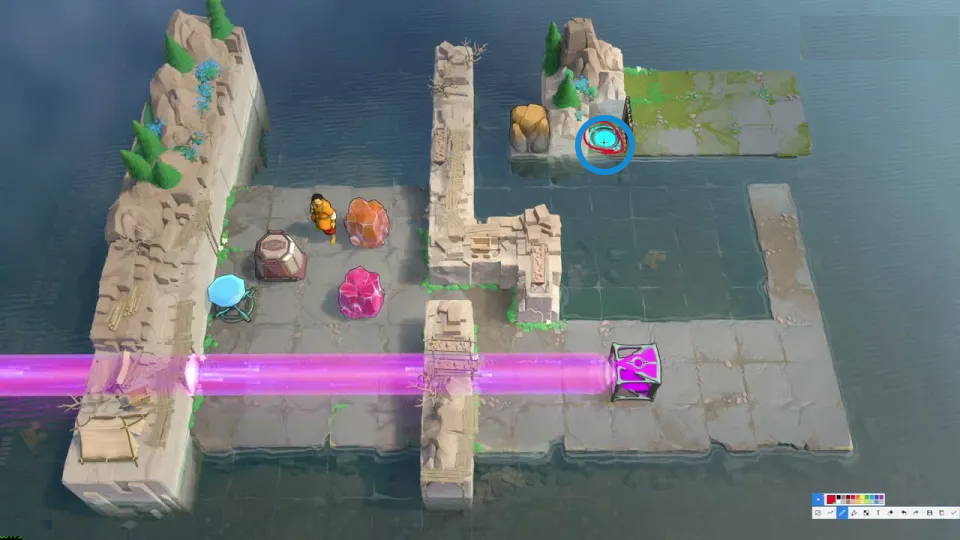
Article-reported hint: Let the cart carry stones.
Check: The blue ring marks the cyan exit at the far end of the stone wall.
Open full-size image in a new tabPuzzle 10 — rover_water_purple_sequel_v3
Section titled “Puzzle 10 — rover_water_purple_sequel_v3”Internal level-set position: 24.
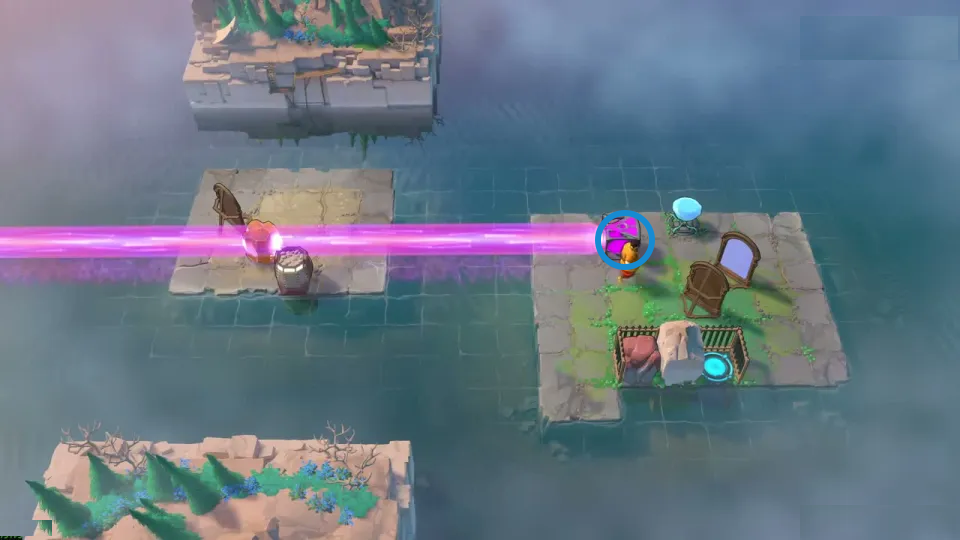
Article-reported hint: Time the beam with the crystal.
Check: The blue ring marks the purple emitter beside the right island.
Open full-size image in a new tabPuzzle 11 — magic_rover
Section titled “Puzzle 11 — magic_rover”Internal level-set position: 25.
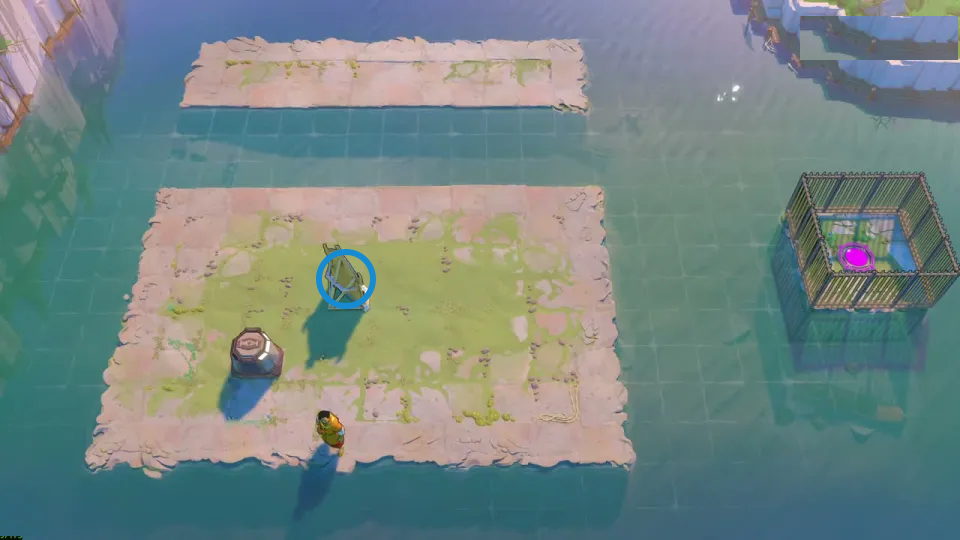
Article-reported hint: Let the cart move a mirror.
Check: The blue ring marks the mirror on the grassy stone platform.
Open full-size image in a new tabPuzzle 12 — remote_work
Section titled “Puzzle 12 — remote_work”Internal level-set position: 26.
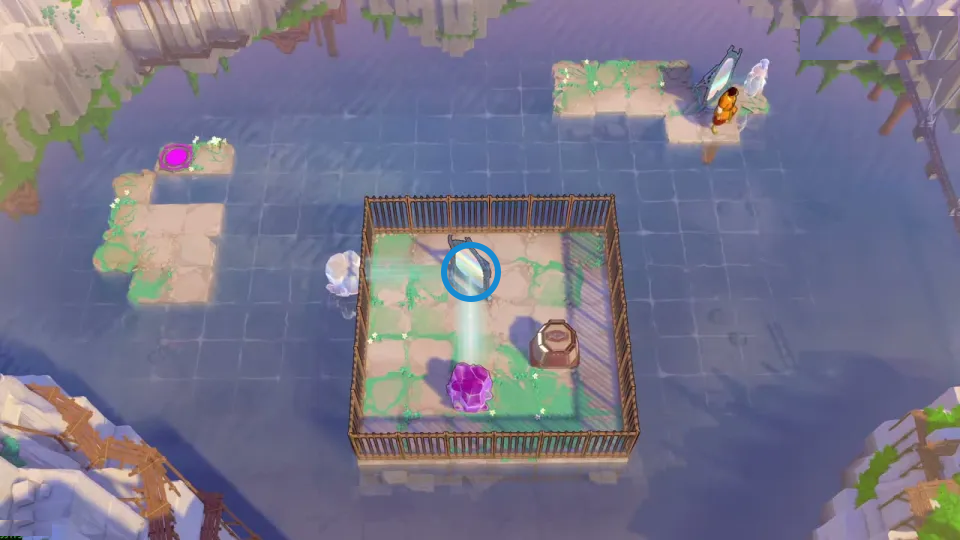
Article-reported hint: Ferry mirror and crystal separately.
Check: The blue ring marks the mirror inside the square fence.
Open full-size image in a new tabPuzzle 13 — mirror_non_turner_v3
Section titled “Puzzle 13 — mirror_non_turner_v3”Internal level-set position: 18.
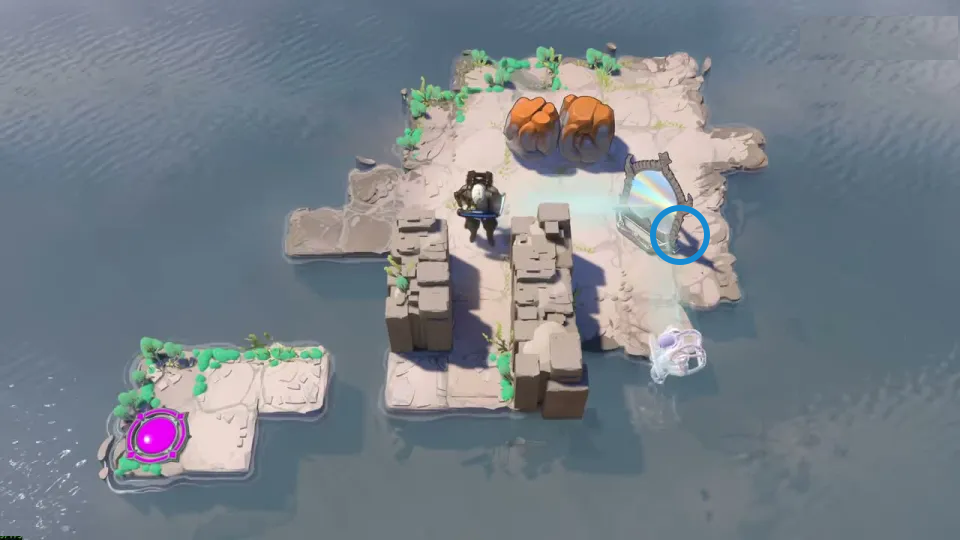
Article-reported hint: Use reflection to turn the Explorer.
Check: The blue ring marks the mirror on the right island.
Open full-size image in a new tabPuzzle 14 — adjust_explorer_v4
Section titled “Puzzle 14 — adjust_explorer_v4”Internal level-set position: 19.
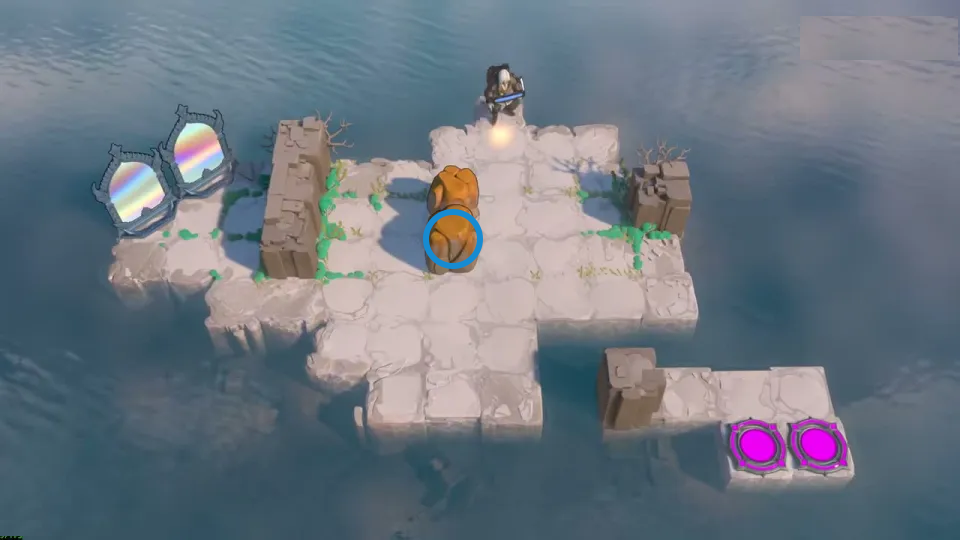
Article-reported hint: Turn only the unblocked clone.
Check: The blue ring marks the lower orange stone on the main island.
Open full-size image in a new tabPuzzle 15 — green_torq_mirror_vs4
Section titled “Puzzle 15 — green_torq_mirror_vs4”Internal level-set position: 20.
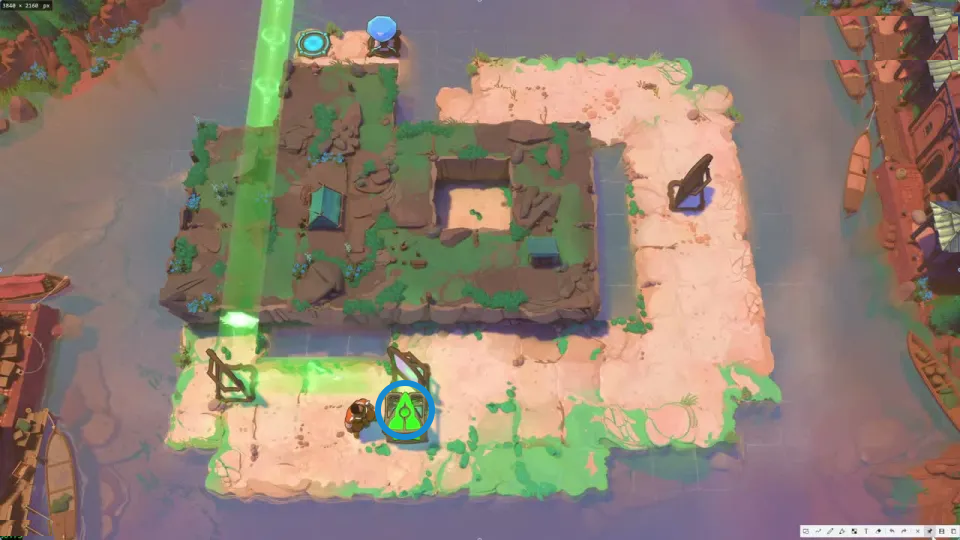
Article-reported hint: Torc rotates the emitter with facing.
Check: The blue ring marks the green emitter on the lower platform.
Open full-size image in a new tabPuzzle 16 — top_green_purple_v3
Section titled “Puzzle 16 — top_green_purple_v3”Internal level-set position: 9.
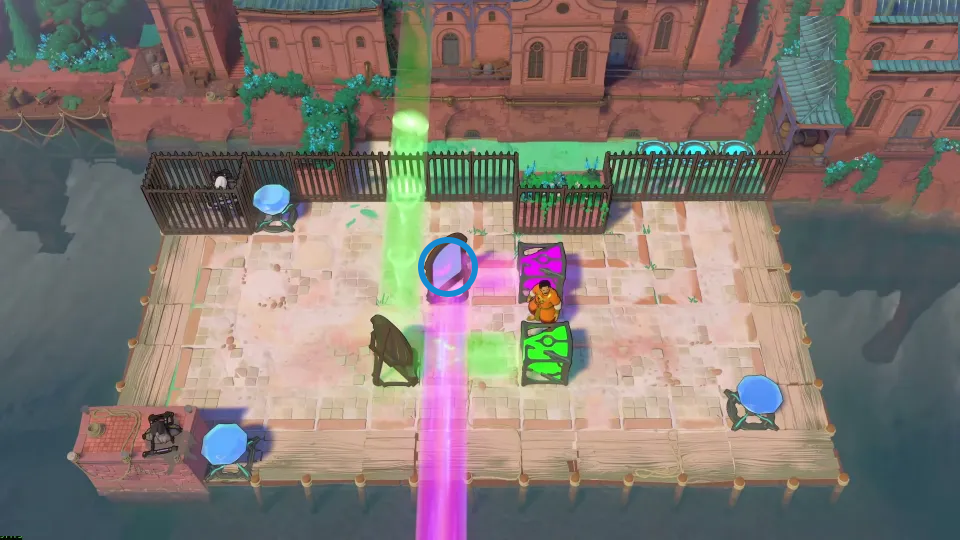
Article-reported hint: End purple light at green emitter.
Check: The blue ring marks the mirror at the purple beam’s turn.
Open full-size image in a new tabPuzzle 17 — fun_house
Section titled “Puzzle 17 — fun_house”Internal level-set position: 7.
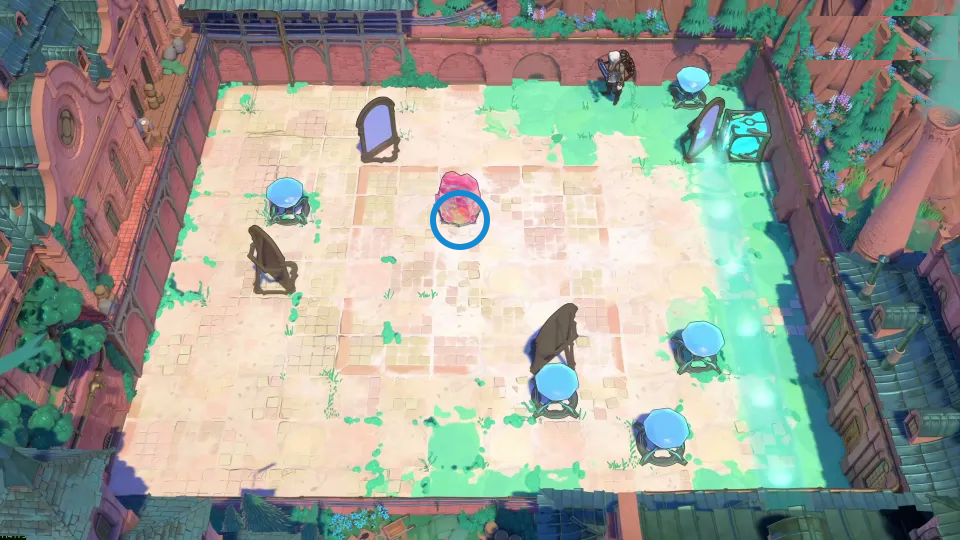
Article-reported hint: Move cyan emitter beside the crystal.
Check: The blue ring marks the pink crystal near the courtyard center.
Open full-size image in a new tabPuzzle 18 — cyan_torc_maze_vs
Section titled “Puzzle 18 — cyan_torc_maze_vs”Internal level-set position: 8.
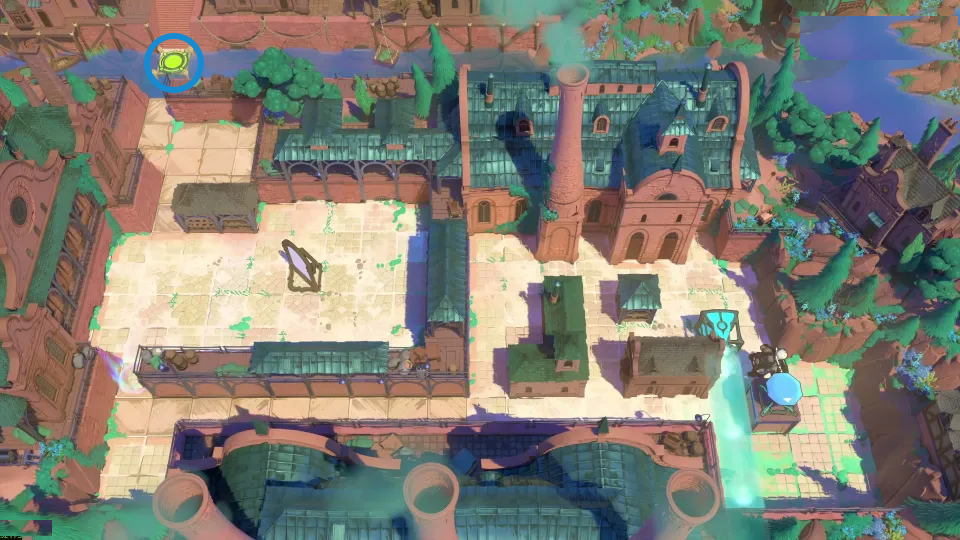
Article-reported hint: Bring the lower-right mirror over first.
Check: The blue ring marks the green exit pad on the upper-left terrace.
Open full-size image in a new tabPuzzle 19 — cyan_counter_med3
Section titled “Puzzle 19 — cyan_counter_med3”Internal level-set position: 6.
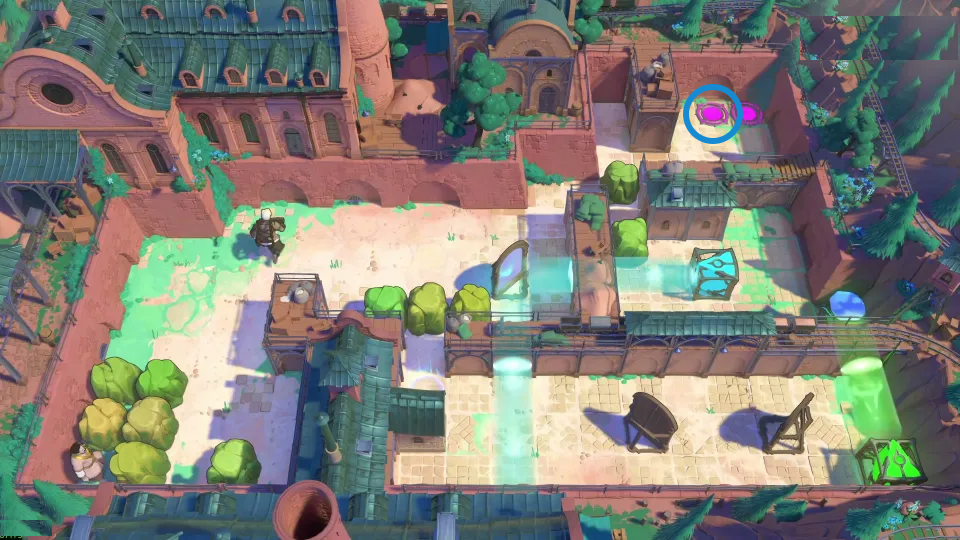
Article-reported hint: Use crossing cyan beams to push.
Check: The blue ring marks the left magenta pad on the upper-right terrace.
Open full-size image in a new tabPuzzle 20 — crystal_rover_intro
Section titled “Puzzle 20 — crystal_rover_intro”Source-reported hint: Cart opens the hidden red door.
Selected room detail.
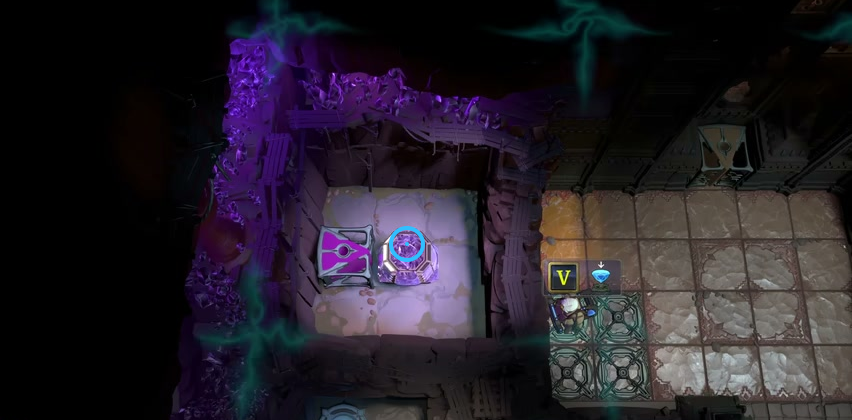
Find the purple crystal beside the purple beamcaster.
Check: The blue ring marks the purple crystal beside the purple beamcaster.
Open full-size image in a new tabPuzzle 21 — green_crystal_rover
Section titled “Puzzle 21 — green_crystal_rover”Internal level-set position: 30.
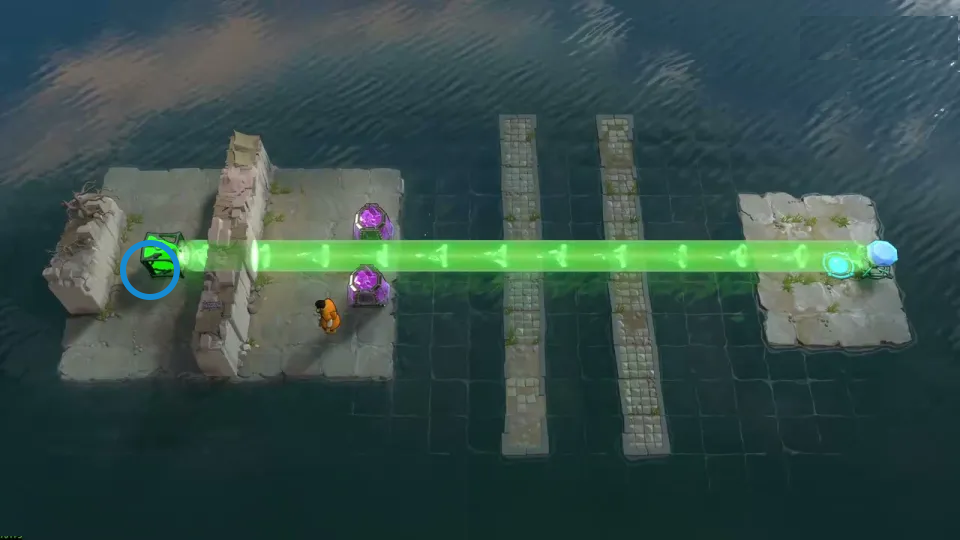
Article-reported hint: Aim green light across cart row.
Check: The blue ring marks the green emitter at the left edge.
Open full-size image in a new tabPuzzle 22 — mirror_rover_orange_2
Section titled “Puzzle 22 — mirror_rover_orange_2”Source-reported hint: Let the cart carry orange light.
Selected room view.
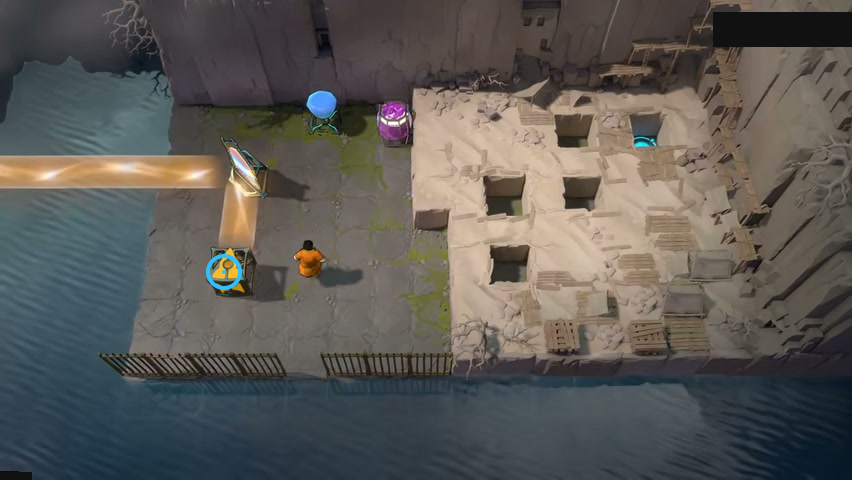
Find the orange beamcaster below the mirror.
Check: The blue ring marks the orange beamcaster below the mirror.
Open full-size image in a new tabPuzzle 23 — orange_predicament
Section titled “Puzzle 23 — orange_predicament”Internal level-set position: 29.
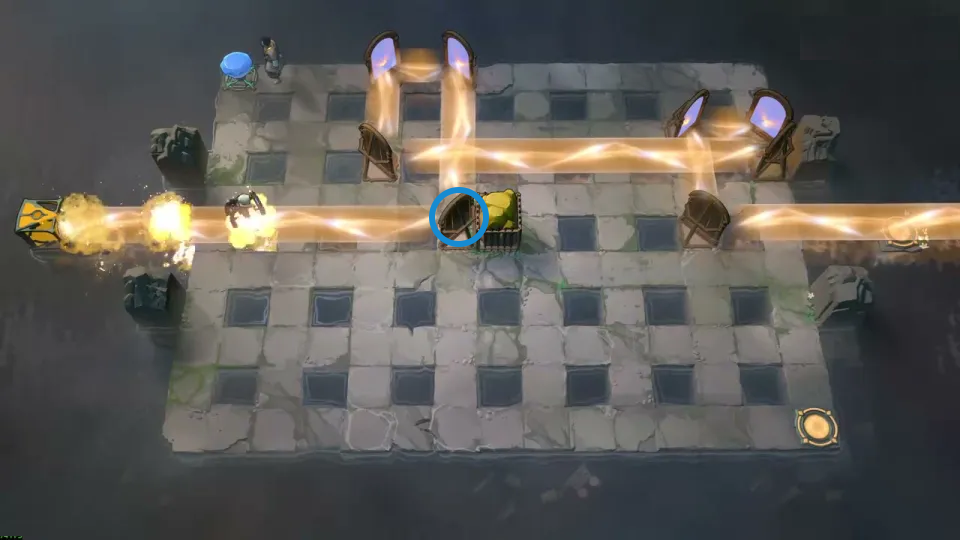
Article-reported hint: Use orange light to cross water.
Check: The blue ring marks the mirror immediately left of the central cage.
Open full-size image in a new tabPuzzle 24 — double_sideways
Section titled “Puzzle 24 — double_sideways”Internal level-set position: 27.
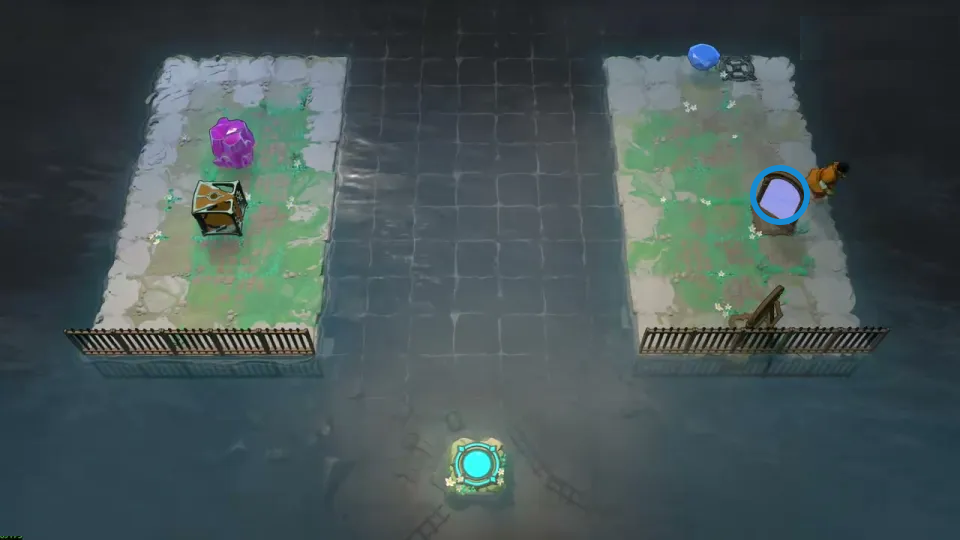
Article-reported hint: Push stone above the goal.
Check: The blue ring marks the mirror on the far-right platform.
Open full-size image in a new tabPuzzle 25 — floating_orange_purple
Section titled “Puzzle 25 — floating_orange_purple”Internal level-set position: 28.
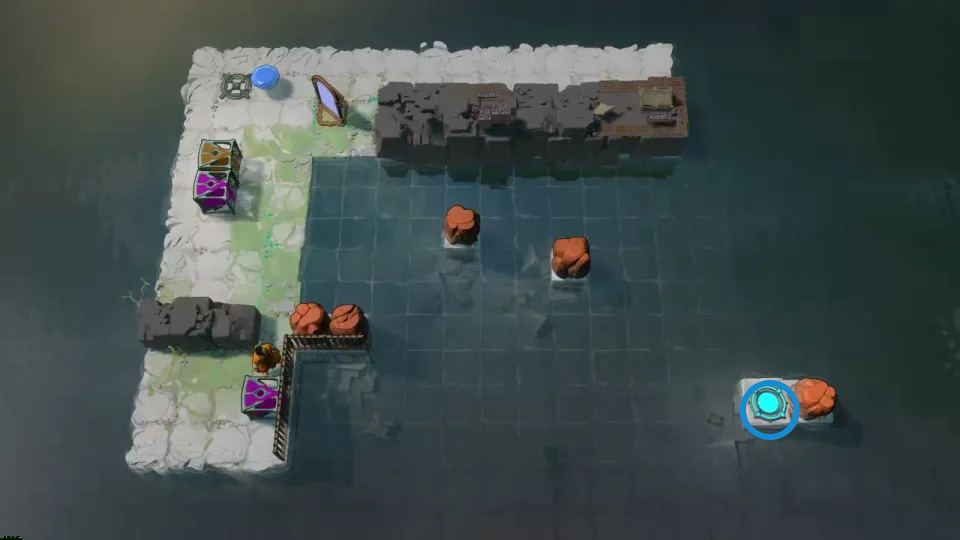
Article-reported hint: Jump into the purple beam’s range.
Check: The blue ring marks the cyan goal below the right platform.
Open full-size image in a new tabSelected room views
Section titled “Selected room views”Blue gem beside the right-hand divider
Section titled “Blue gem beside the right-hand divider”Compare the mirrors around the central divider.
The blue ring marks a visible landmark in this selected view.
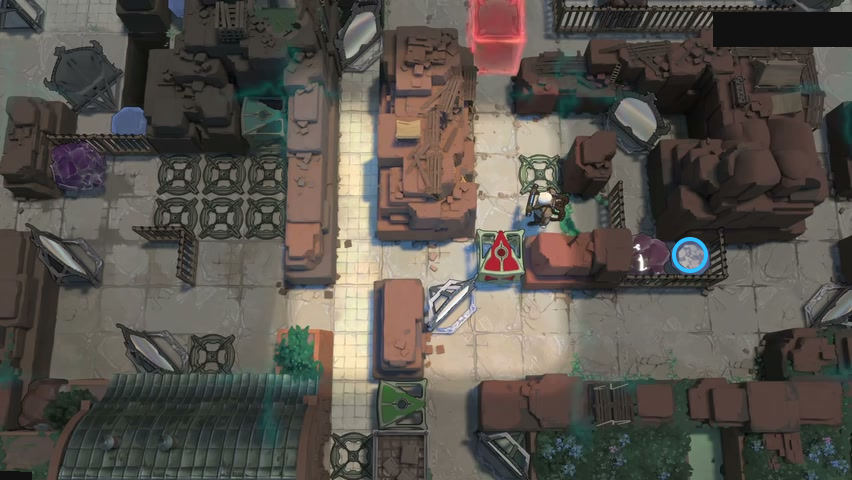
Find blue gem beside the right-hand divider.
Check: The blue ring marks blue gem beside the right-hand divider.
Open full-size image in a new tabHero on the icy island
Section titled “Hero on the icy island”Check the narrow crossing on the icy island.
The blue ring marks a visible landmark in this selected view.
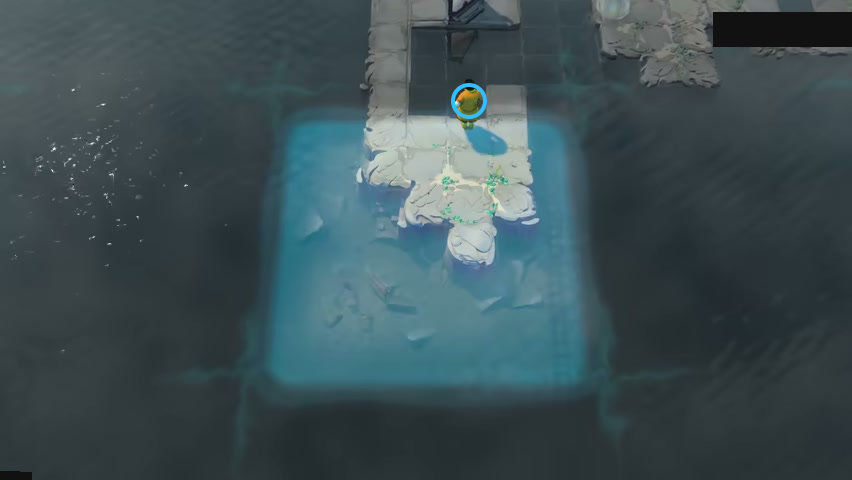
Find hero on the icy island.
Check: The blue ring marks hero on the icy island.
Open full-size image in a new tabBlue gem in the enclosed courtyard
Section titled “Blue gem in the enclosed courtyard”Compare the two angled mirrors and gem inside the courtyard.
The blue ring marks a visible landmark in this selected view.
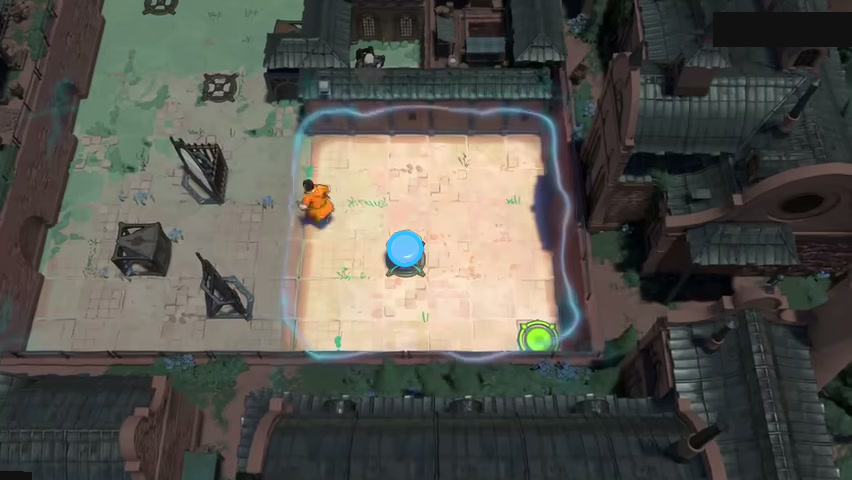
Find blue gem in the enclosed courtyard.
Check: The blue ring marks blue gem in the enclosed courtyard.
Open full-size image in a new tabSources
Article: Sinking Star Walkthrough — Reflected Beams. Video: 塞德莎, Order of the Sinking Star walkthrough. The video link is an untimed source credit; no exact playhead is claimed.
- Order of the Sinking Star Reflected Beams Walkthrough – All 25 Puzzle Solutions — Documentation · article-capture-2026-10-23
- Order of the Sinking Star walkthrough video, untimed source link — Observed in-game · article-capture-2026-10-23
- Beam/Mirror crossover candidate crosswalk — Extracted data · beam-mirror-crossover-source-review-2026-10-23-remaining29-display-upgrades-2026-10-25
- Beam/Mirror crossover bilingual selected layouts — Extracted data · beam-mirror-crossovers-selected-layouts-2026-10-23-remaining29-display-upgrades-2026-10-25
- Twenty-nine selected video frames for previously confirmed room identities — Observed in-game · remaining29-selected-video-frame-observations-2026-10-25
- Display-only coverage delta for29 existing confirmed identities — Extracted data · remaining29-display-coverage-delta-2026-10-25
- Root-approved selected video frame and native layout observations — Observed in-game · verified-backlog-video-frame-observations-2026-10-25
- Verified backlog bilingual selected-layout cards — Extracted data · verified-backlog-selected-layouts-2026-10-25
- Verified backlog current display coverage delta — Extracted data · verified-backlog-display-coverage-delta-2026-10-25
Unofficial fan wiki, not affiliated with Thekla, Inc. / Arc Games / Gamirror Games. Game content belongs to its owners.
Comments & feedback
Share a tip or suggest a correction. Comments are public. Guest names are unverified; verified accounts show their account username. All language pages share this discussion. Please keep personal information private.