
 Order of the Sinking Star
Heroes and Mirrors: starting layouts and clear-state checkpoints

This reference pairs five launch-room layouts from the local r67121 package with native maps and P11 footage. Two for One, Gate Shatter and Iodine Clock now include visible clear emblems; the exact input routes remain unresolved.
Flip Flop (flip_flop_v2)
Section titled “Flip Flop (flip_flop_v2)”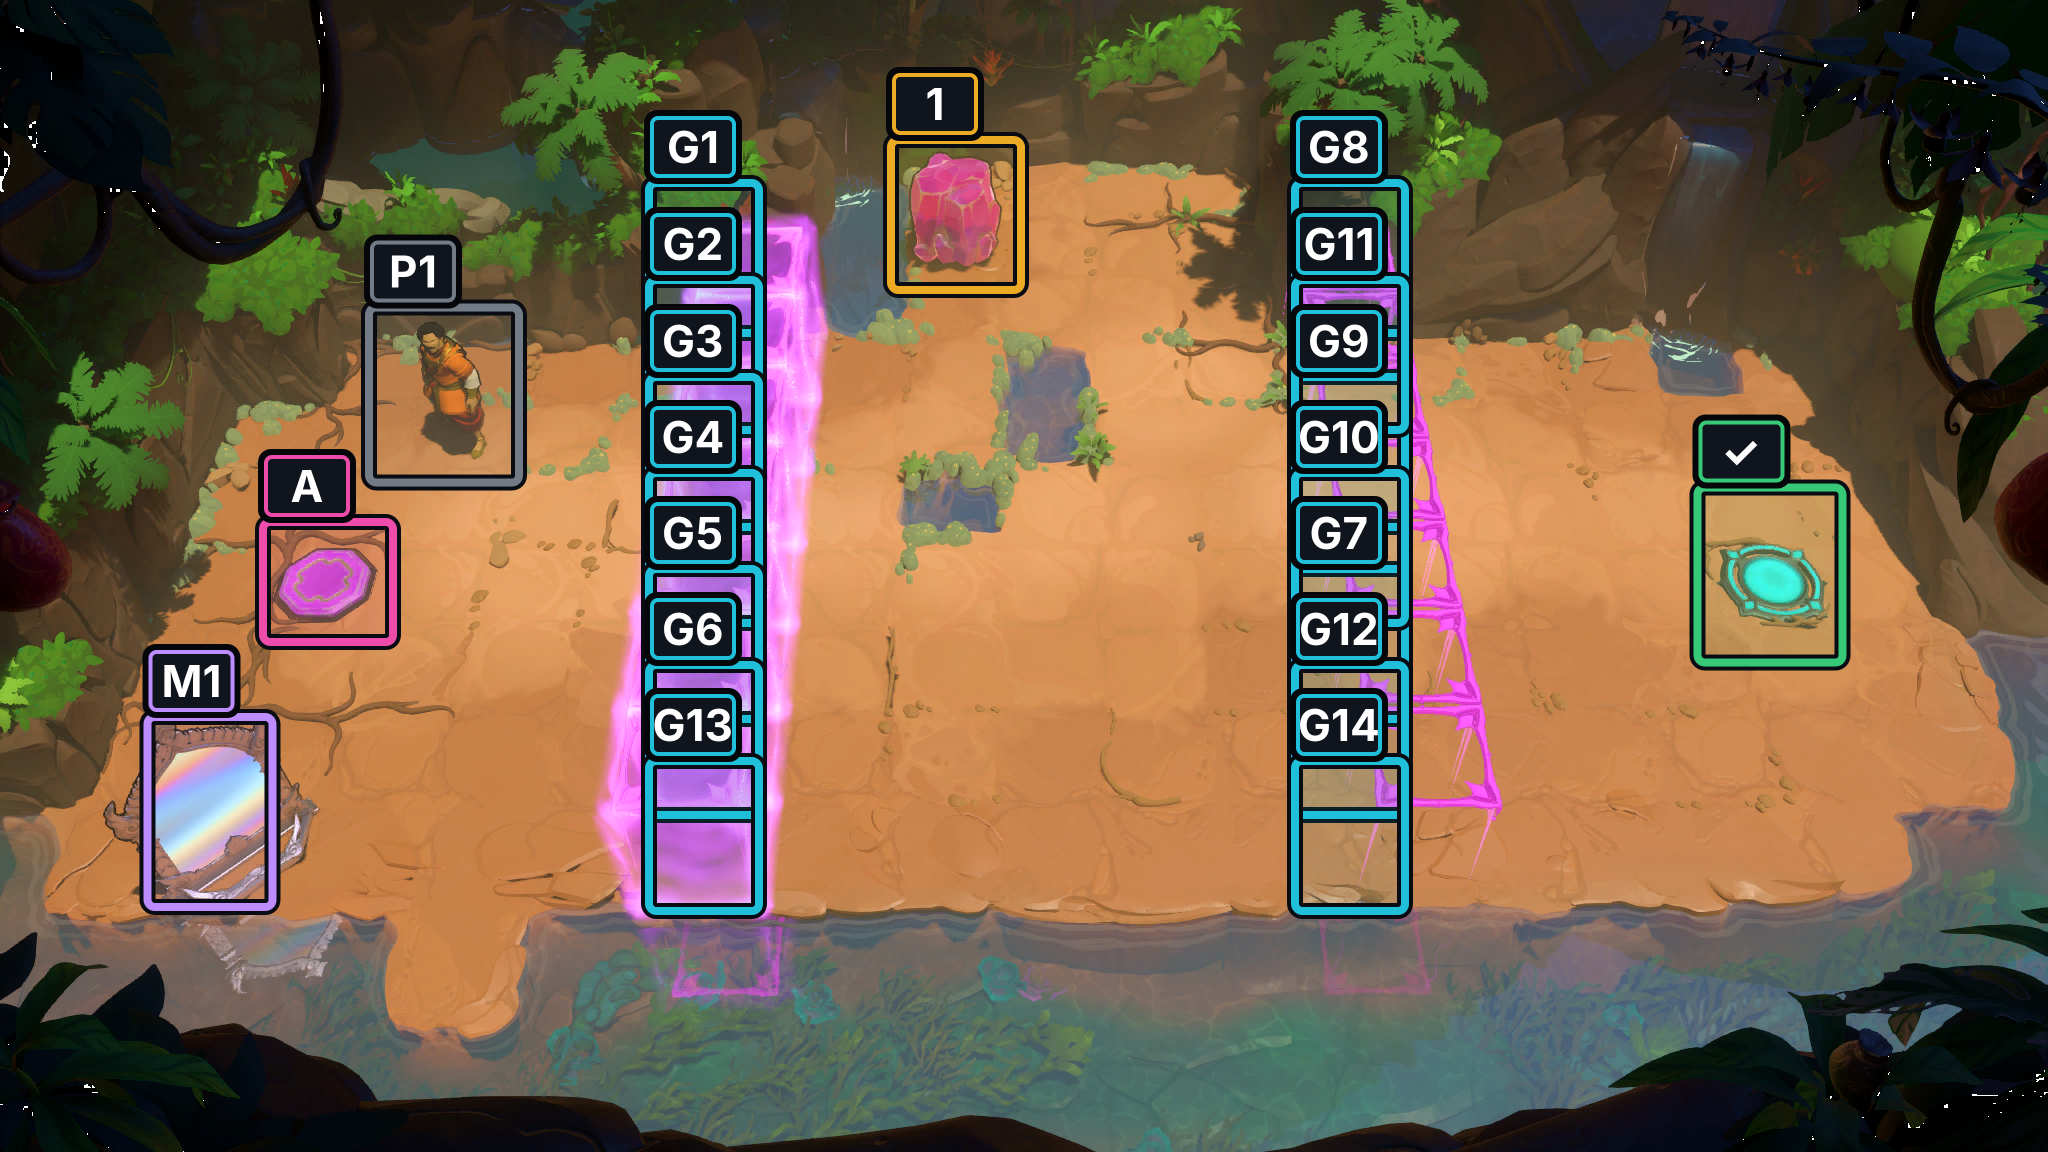
- Figure P1
- Crystal 1
- Mirror M1
- Switch A
- Gates G1–G14
- Exit
The 37:18 frame marks the start layout. Later frames at 37:25, 37:35, 37:43 and 37:55 show changing positions; the trader is partly obscured at 37:35. At 37:59 the trader stands on the cyan exit pad, and the next shot at 38:00 begins another room. No clear emblem or exact input route is shown, so neither a confirmed finish nor the route is claimed.
Images show selected video checkpoints; the first frame is the starting position.
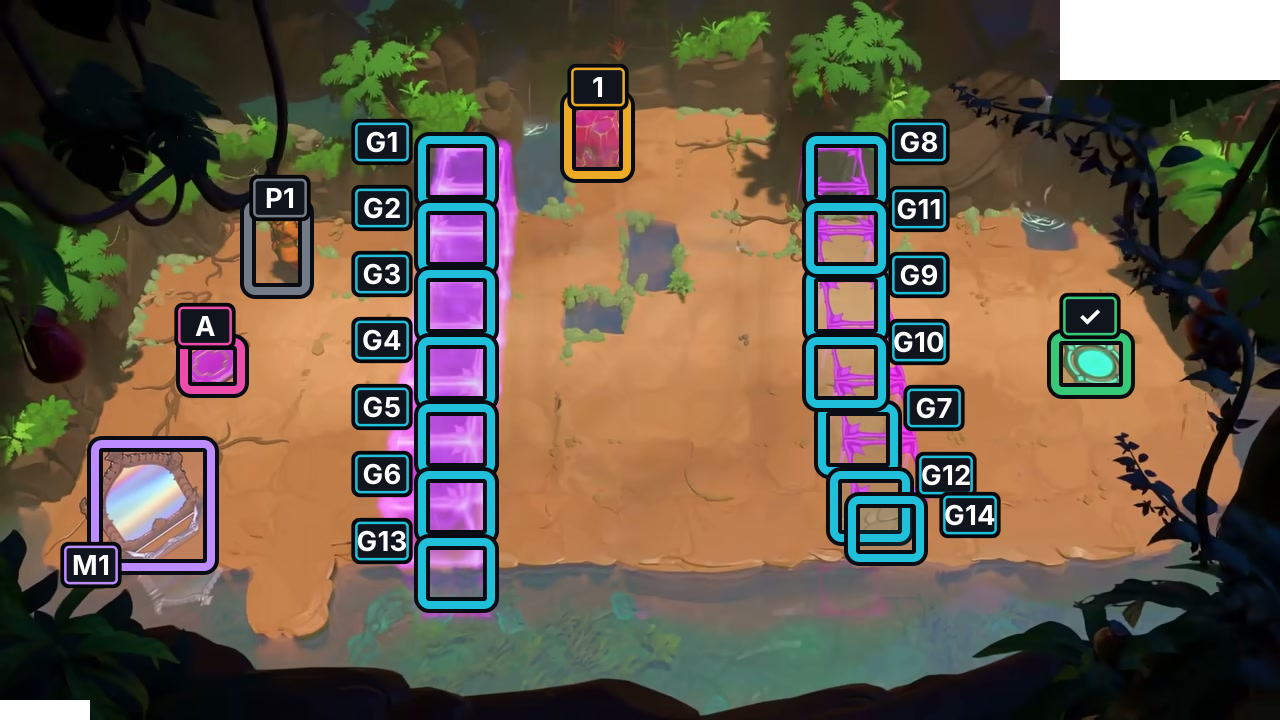
At 37:18, identify the trader, mirror, crystal and first switch before exploring the gate lanes.
Check: The selected start is marked; it does not recover the route or completion.
Open full-size image in a new tab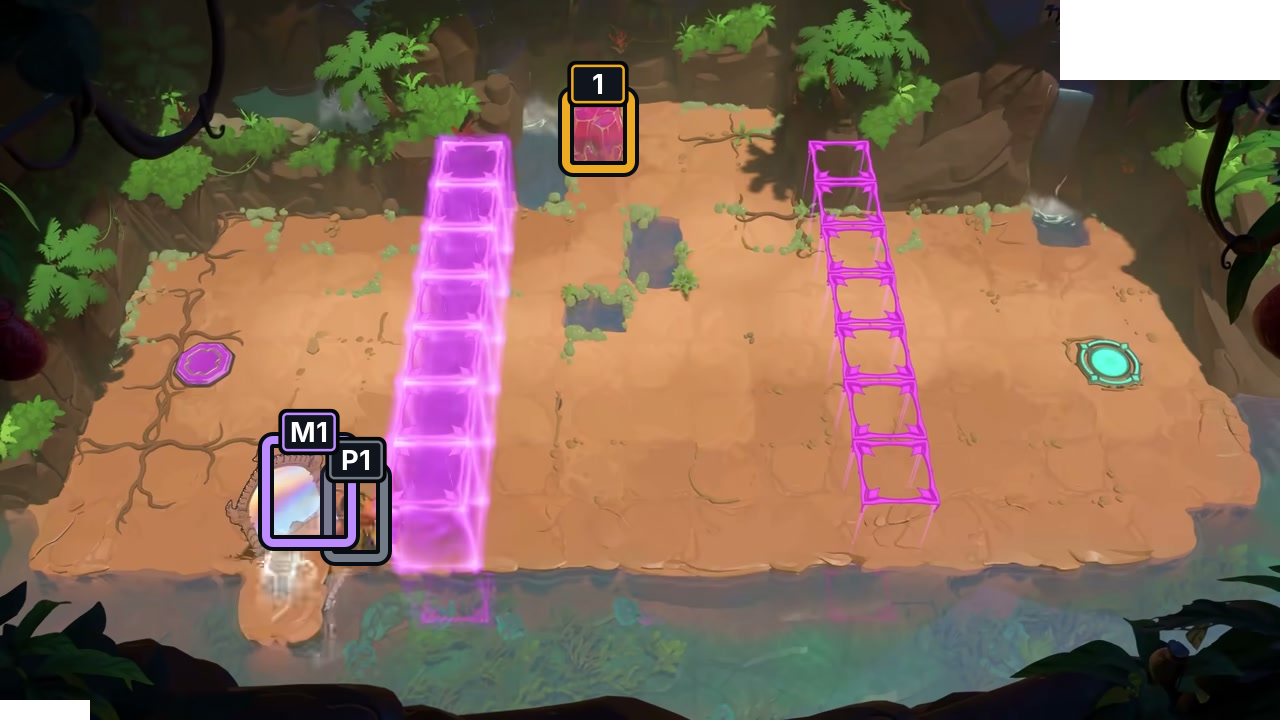
At 37:25, the trader is beside the mirror; the crystal remains by the upper gate lane.
Check: This is a visual checkpoint only; no exact input or completion is established.
Open full-size image in a new tab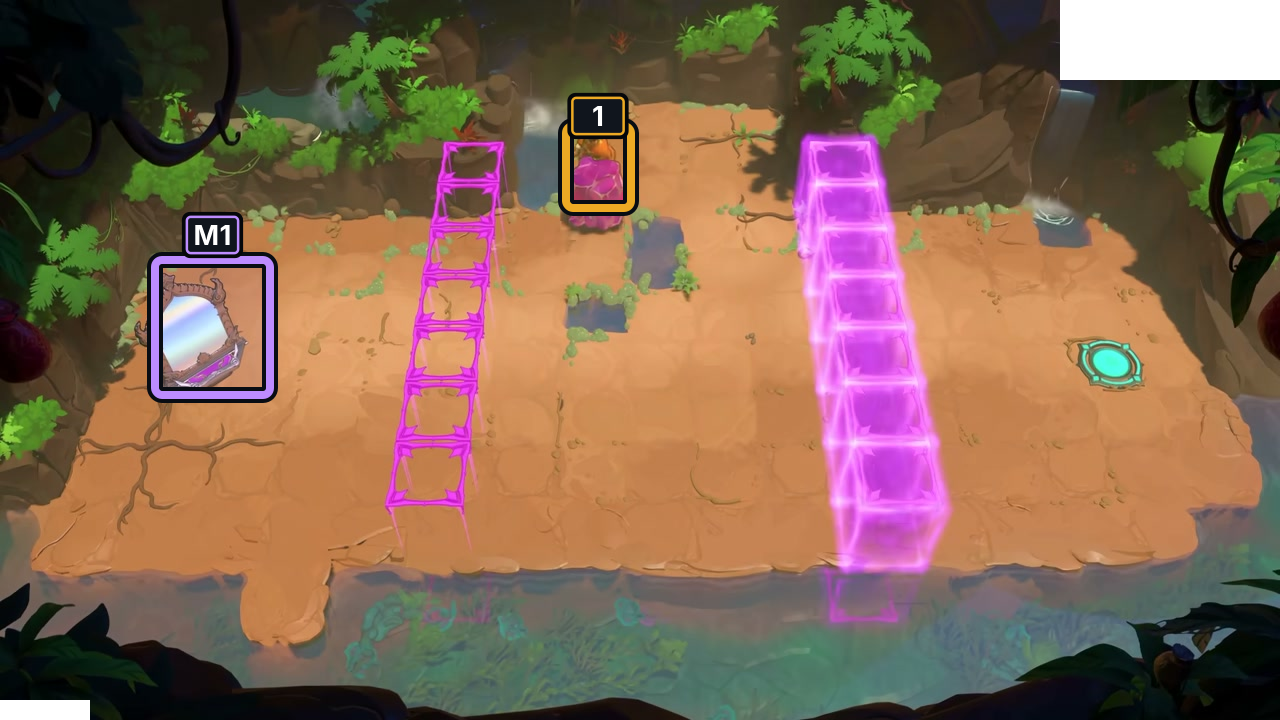
At 37:35, the mirror is on the left and the crystal remains near the upper center.
Check: This is a visual checkpoint only; no exact input or completion is established.
Open full-size image in a new tab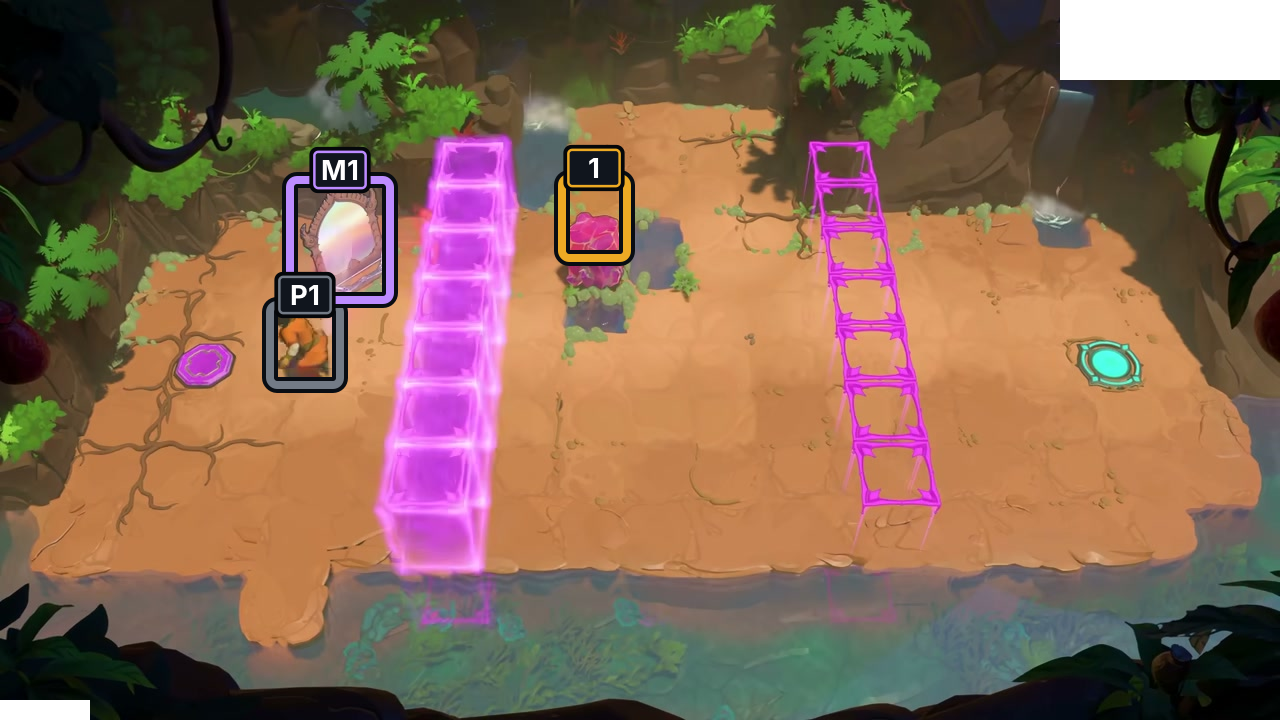
At 37:43, the trader and mirror are on the left; the crystal is near the upper center.
Check: This is a visual checkpoint only; no exact input or completion is established.
Open full-size image in a new tab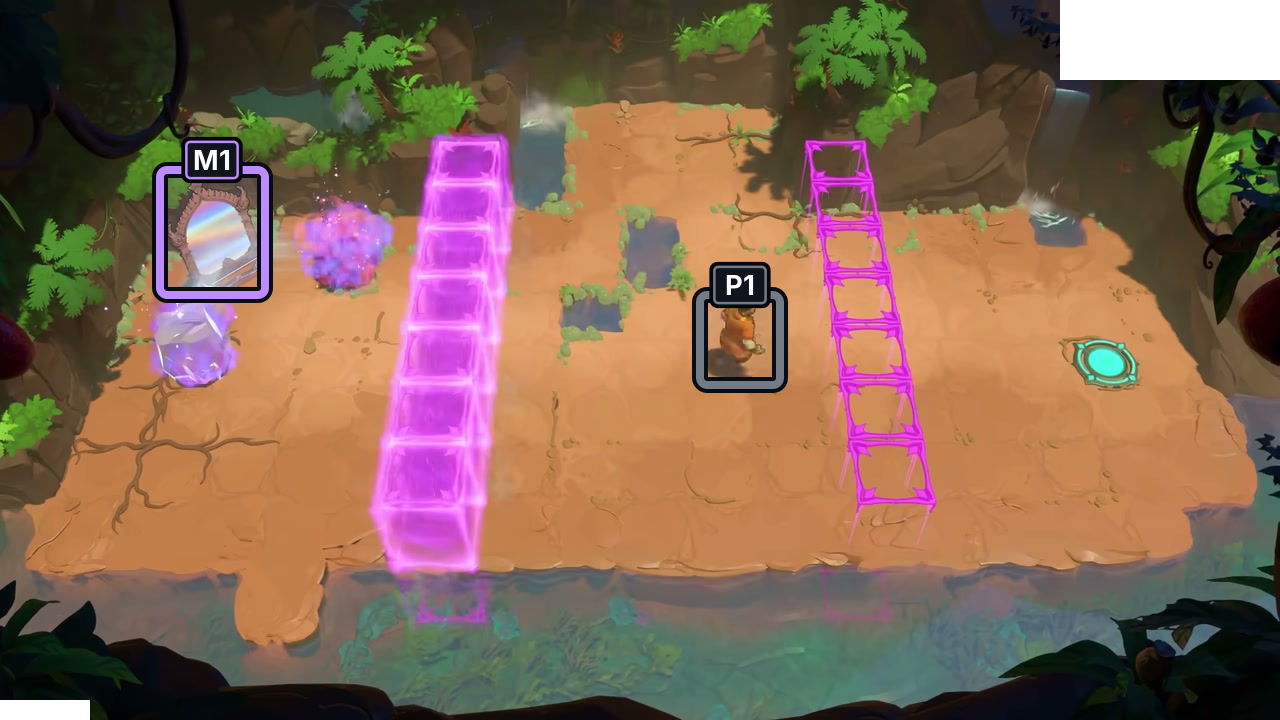
At 37:55, the trader is between the two gate lanes and the mirror is on the left. The room remains on screen.
Check: This is a visual checkpoint only; no exact input or completion is established.
Open full-size image in a new tab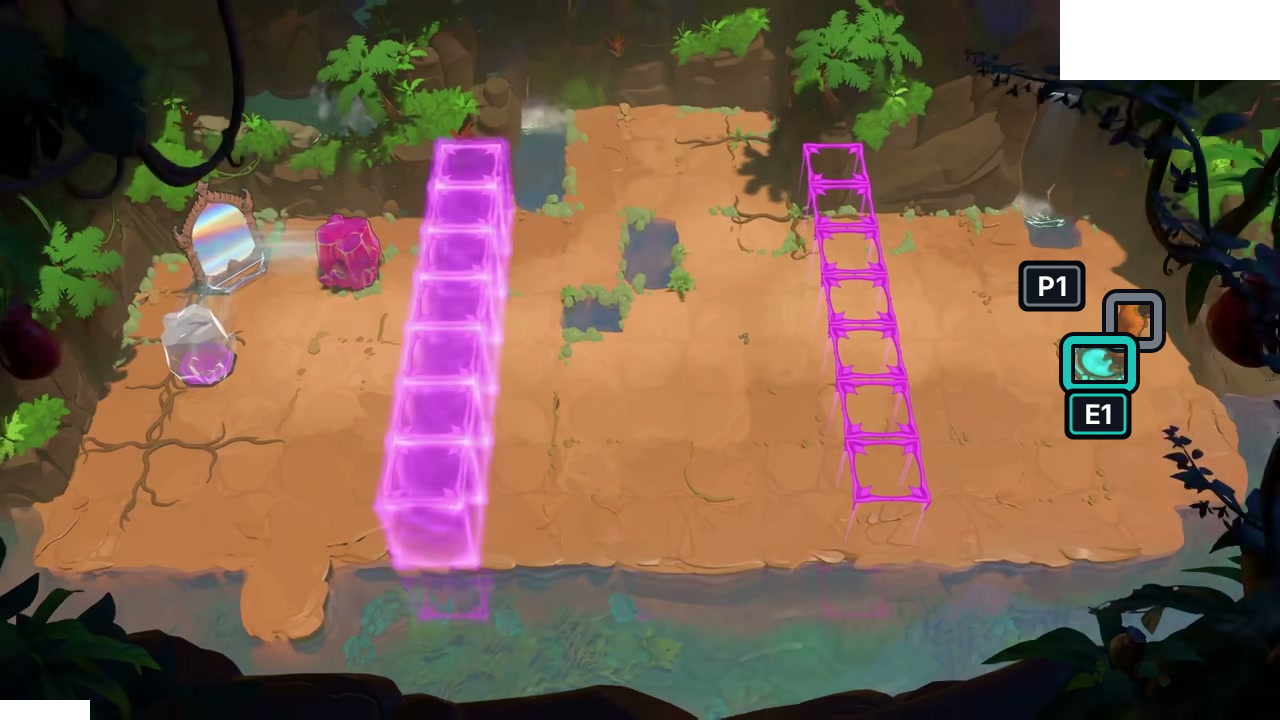
At 37:59, the trader stands on the cyan exit pad. The next shot is another room.
Check: The clip shows no clear emblem, so the exact route and confirmed clear remain unresolved.
Open full-size image in a new tabTwo for One (two_for_one)
Section titled “Two for One (two_for_one)”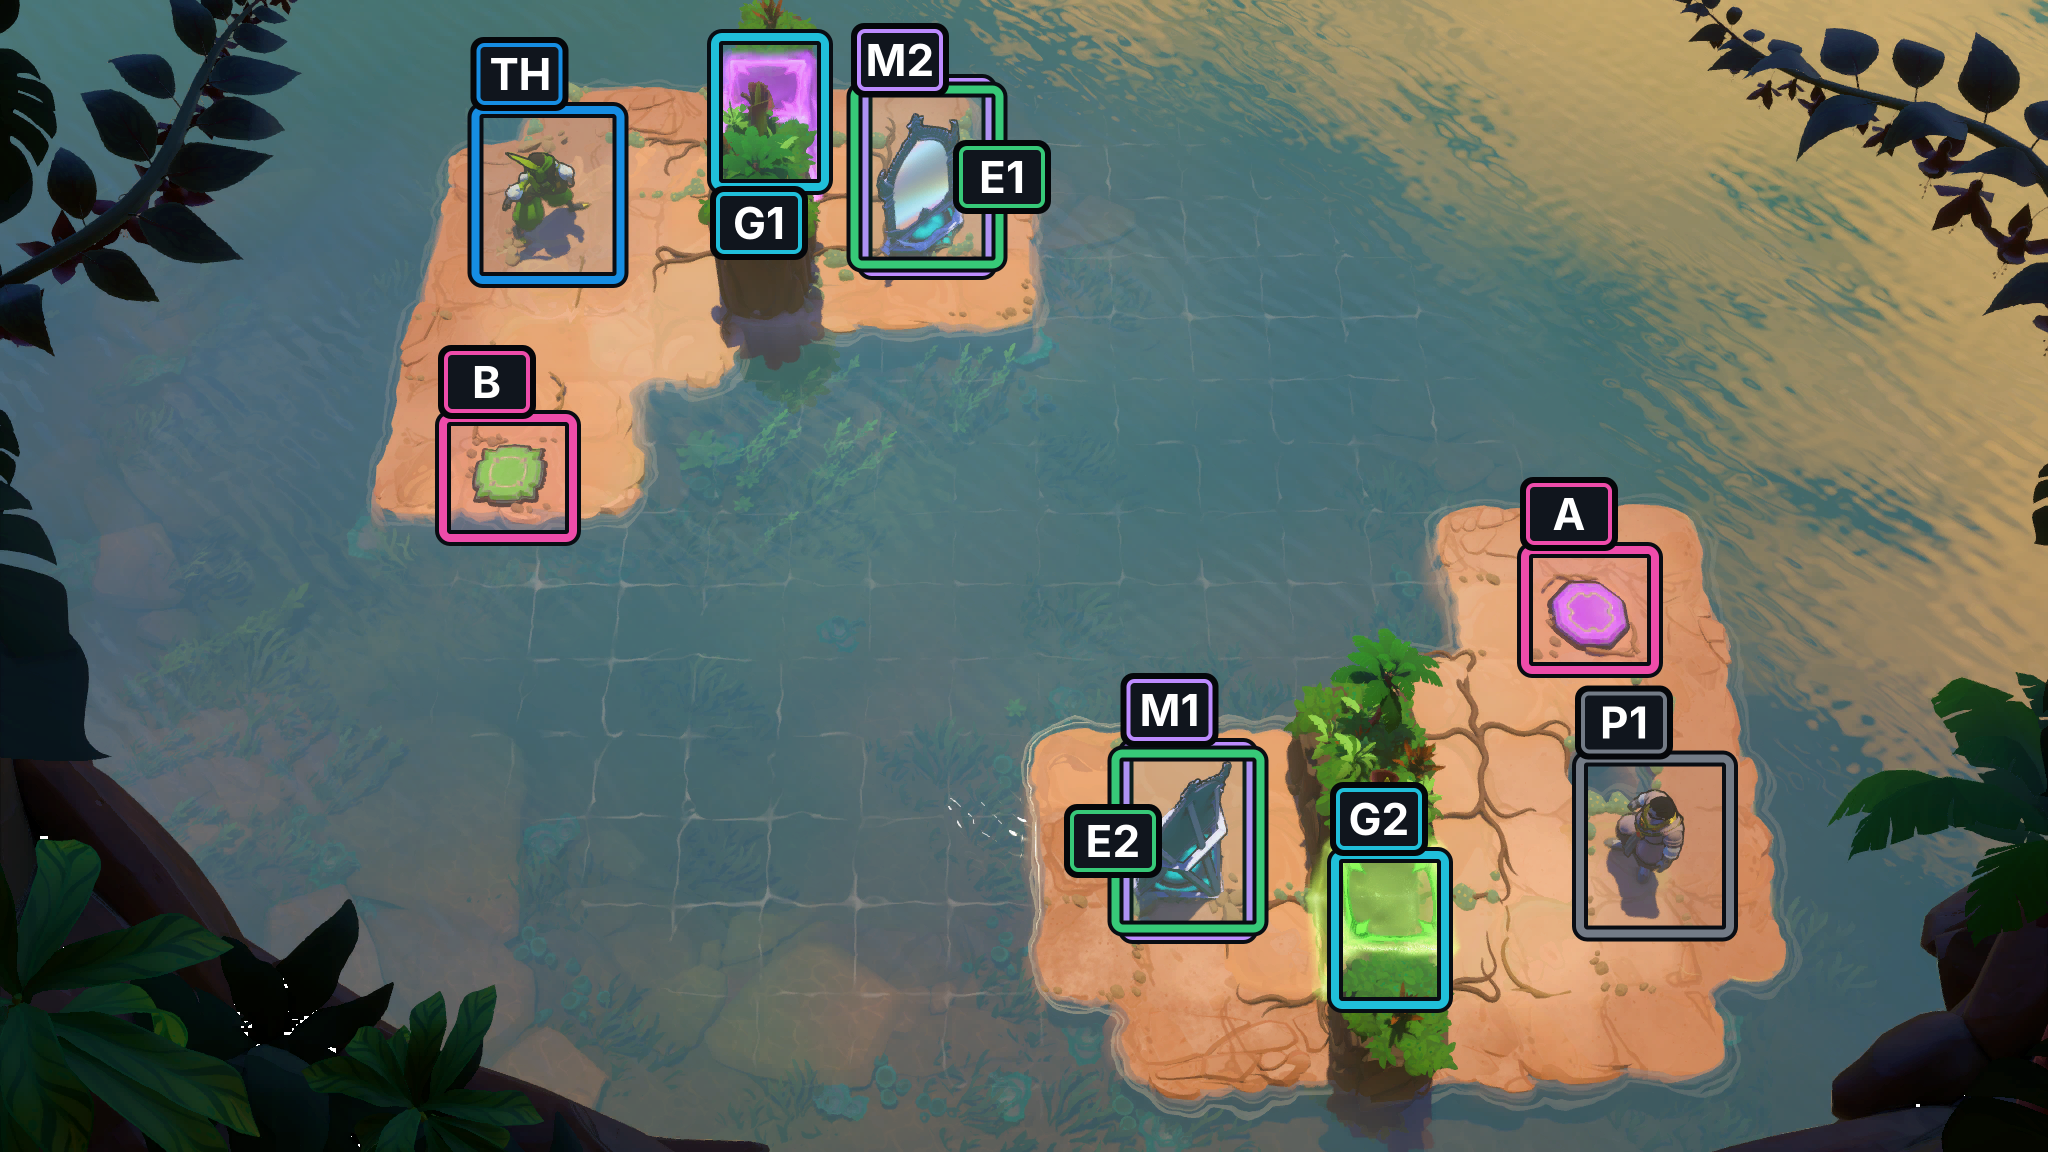
- Figure P1
- Mirrors M1–M2
- Switches A–B
- Gates G1–G2
- Exits E1–E2
- TH Thief
At 38:13 both switches are active; the 38:25 and 38:31 frames show the gate and mirror-beam changes. At 38:35 both characters stand on the cyan target pads, followed by the clear emblem at 38:37. The footage confirms the finish and key phases, but not every input.
Images show selected video checkpoints; the first frame is the starting position.
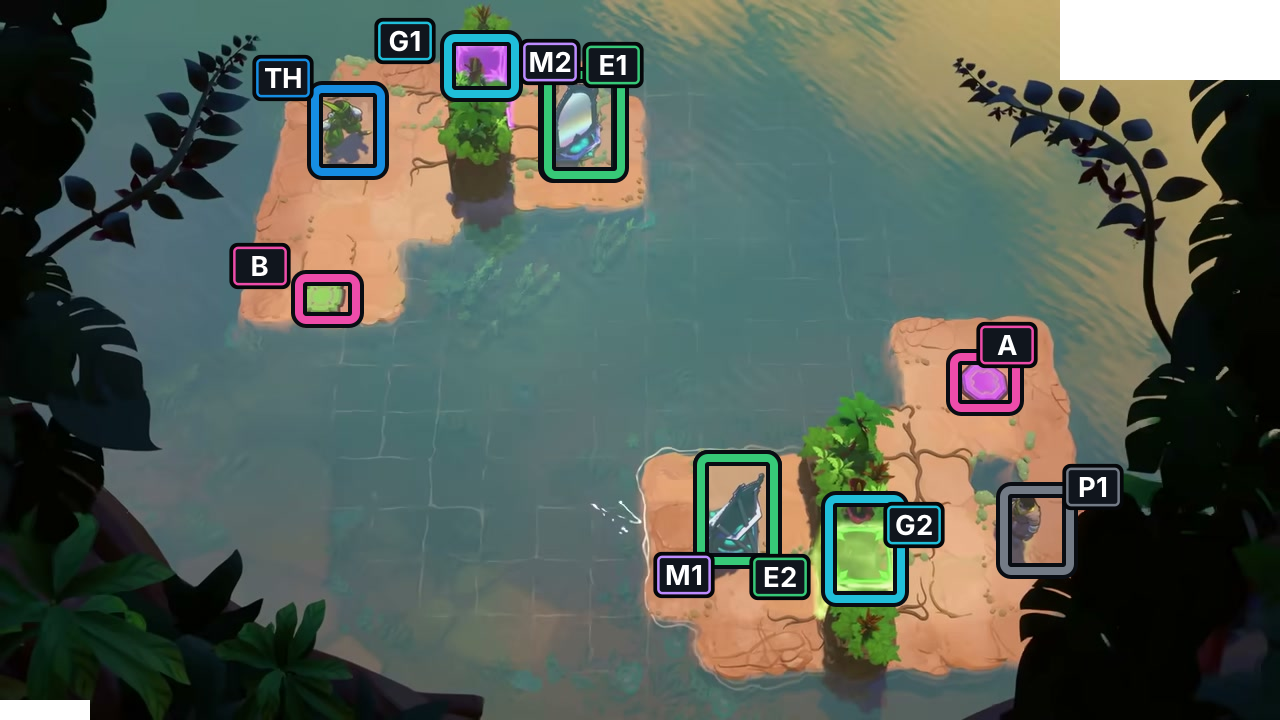
At 38:01, compare the two traders and mirror positions with the two-switch layout.
Check: The frame shows the start only; later scene transitions are not assigned to this room.
Open full-size image in a new tab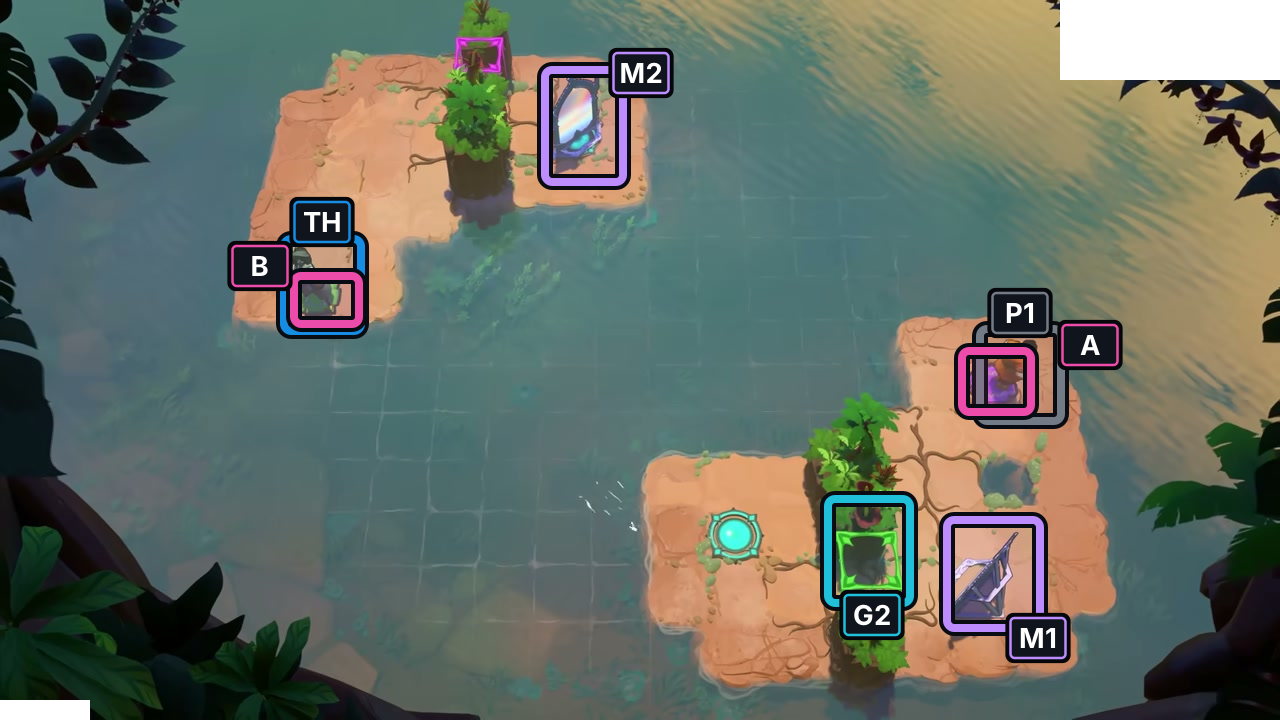
Hold the green and purple switches together; the lower green gate is open.
Check: The P11 frame shows one trader on each colored switch and the lower gate lit.
Open full-size image in a new tab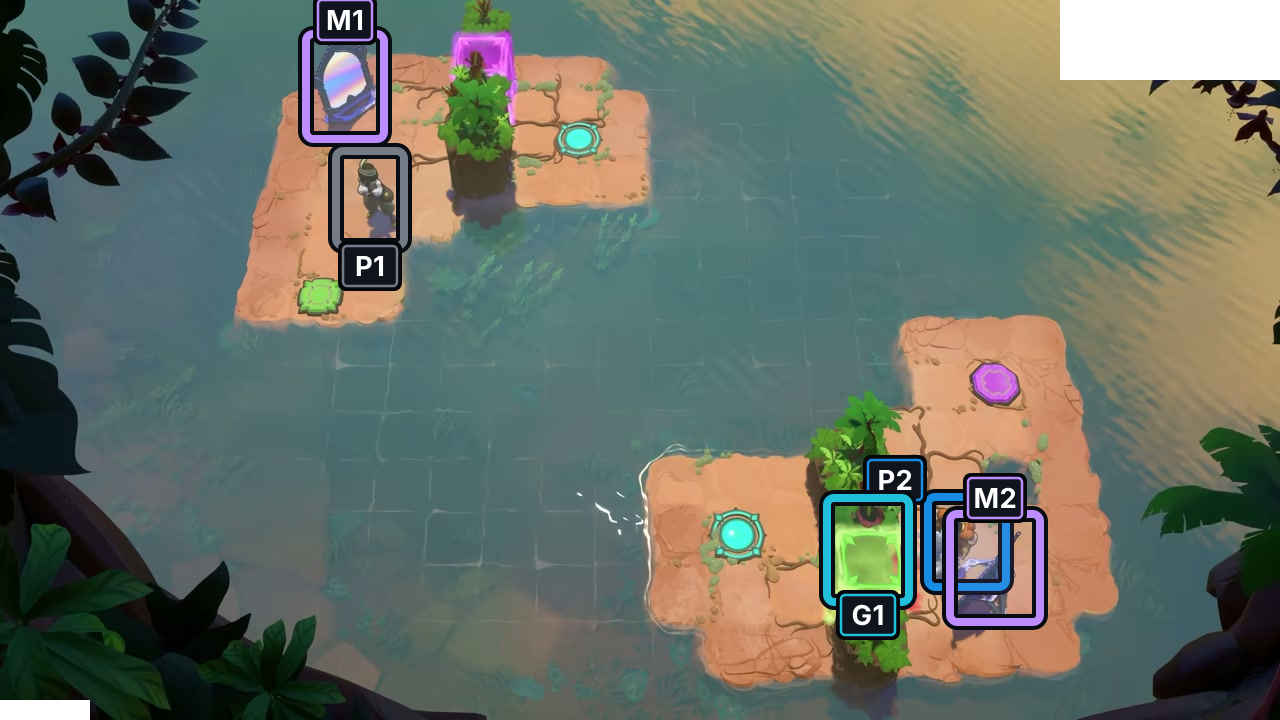
At 38:25, the green gate is open; a trader stands beside the lower mirror while the other character advances on the upper island.
Check: This frame records visible gate and actor positions only; it does not specify every input.
Open full-size image in a new tab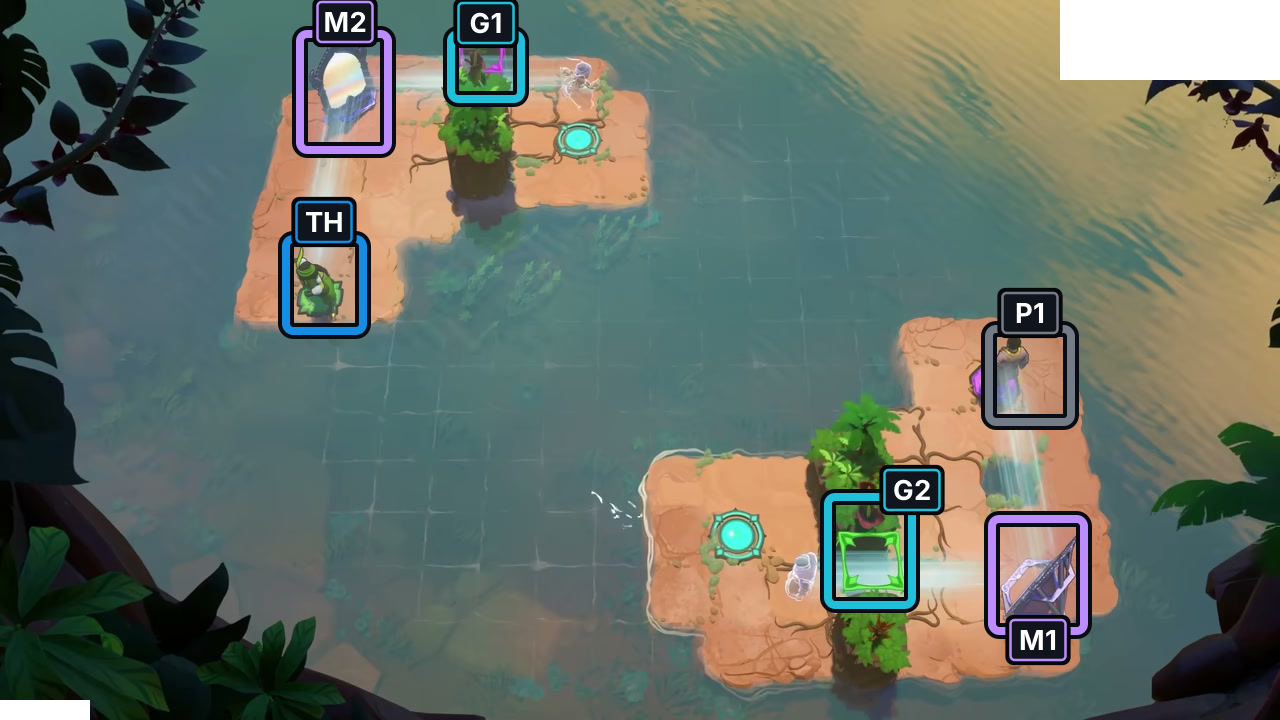
Follow the light through both mirrors and the opened gate lanes.
Check: By 38:31, both mirrors are transmitting light across the two islands.
Open full-size image in a new tab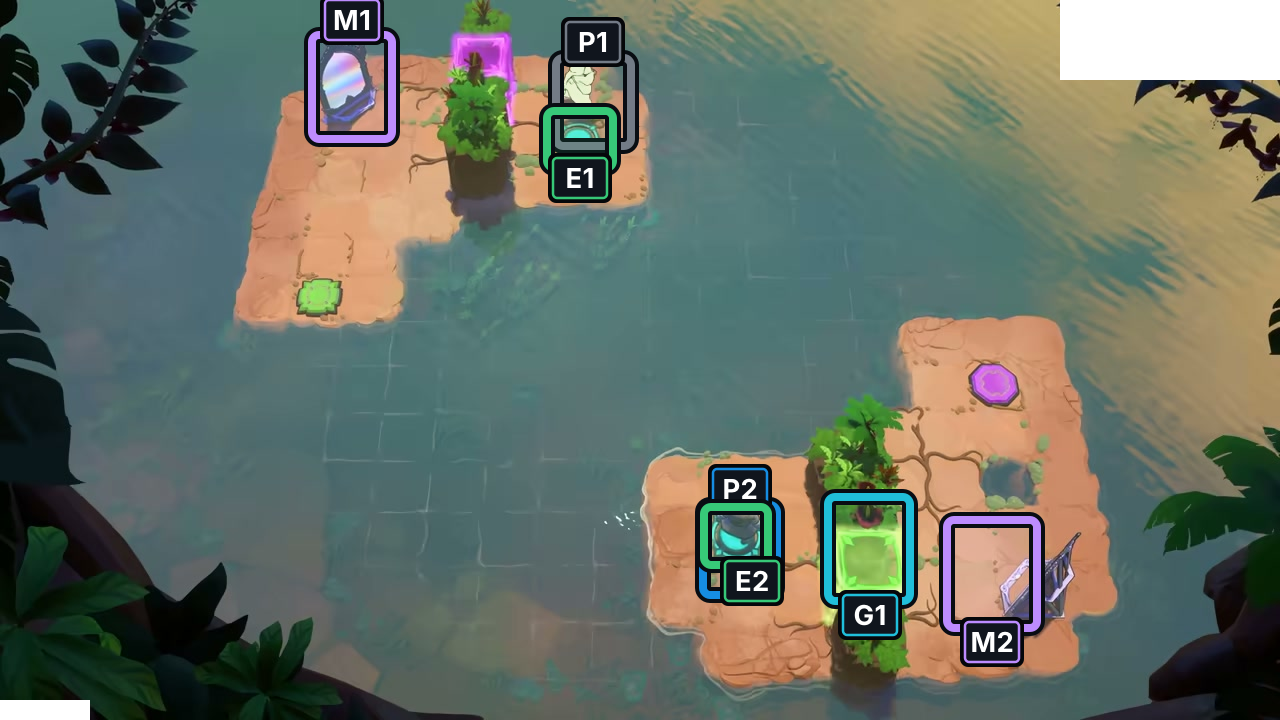
At 38:35, both characters occupy the cyan target pads; the clear emblem appears two seconds later.
Check: This is the final visible placement before the clear frame; exact directions and timing are not shown.
Open full-size image in a new tab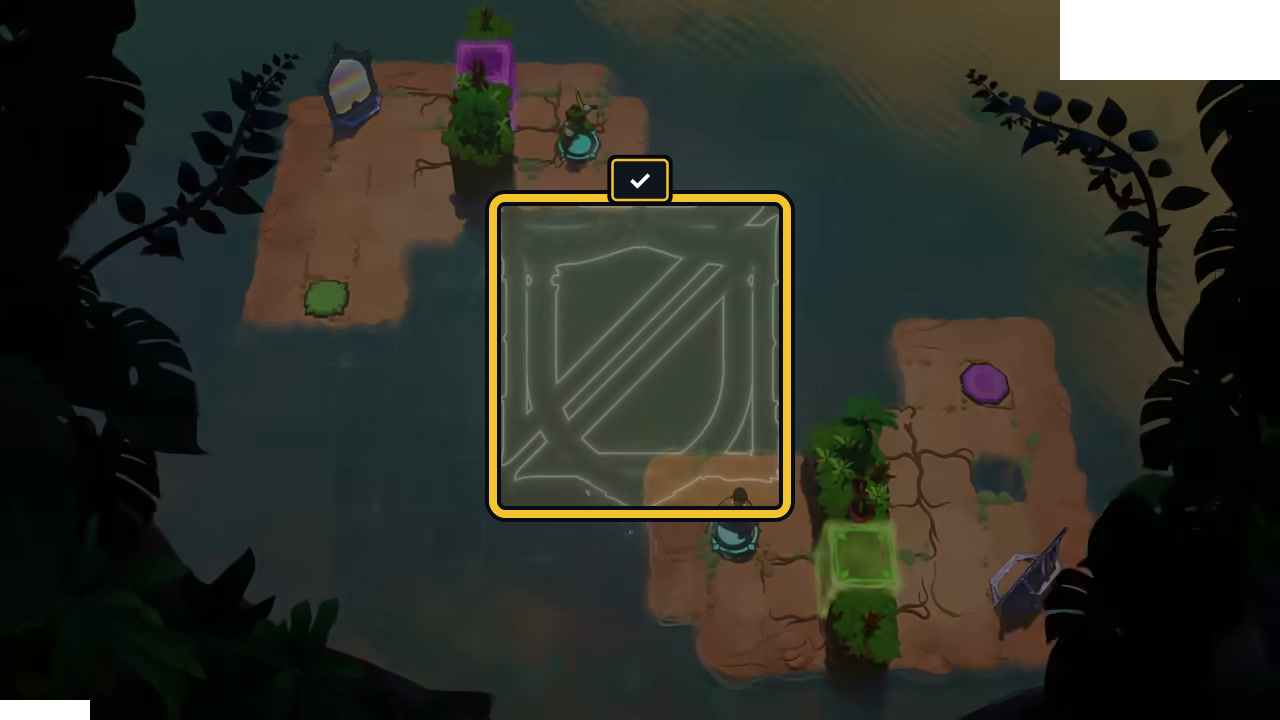
The level-clear emblem appears at 38:37; this checkpoint confirms the finish.
Check: The video shows the outcome, but not every input between the checkpoints.
Open full-size image in a new tabGate Shatter (gate_shatter)
Section titled “Gate Shatter (gate_shatter)”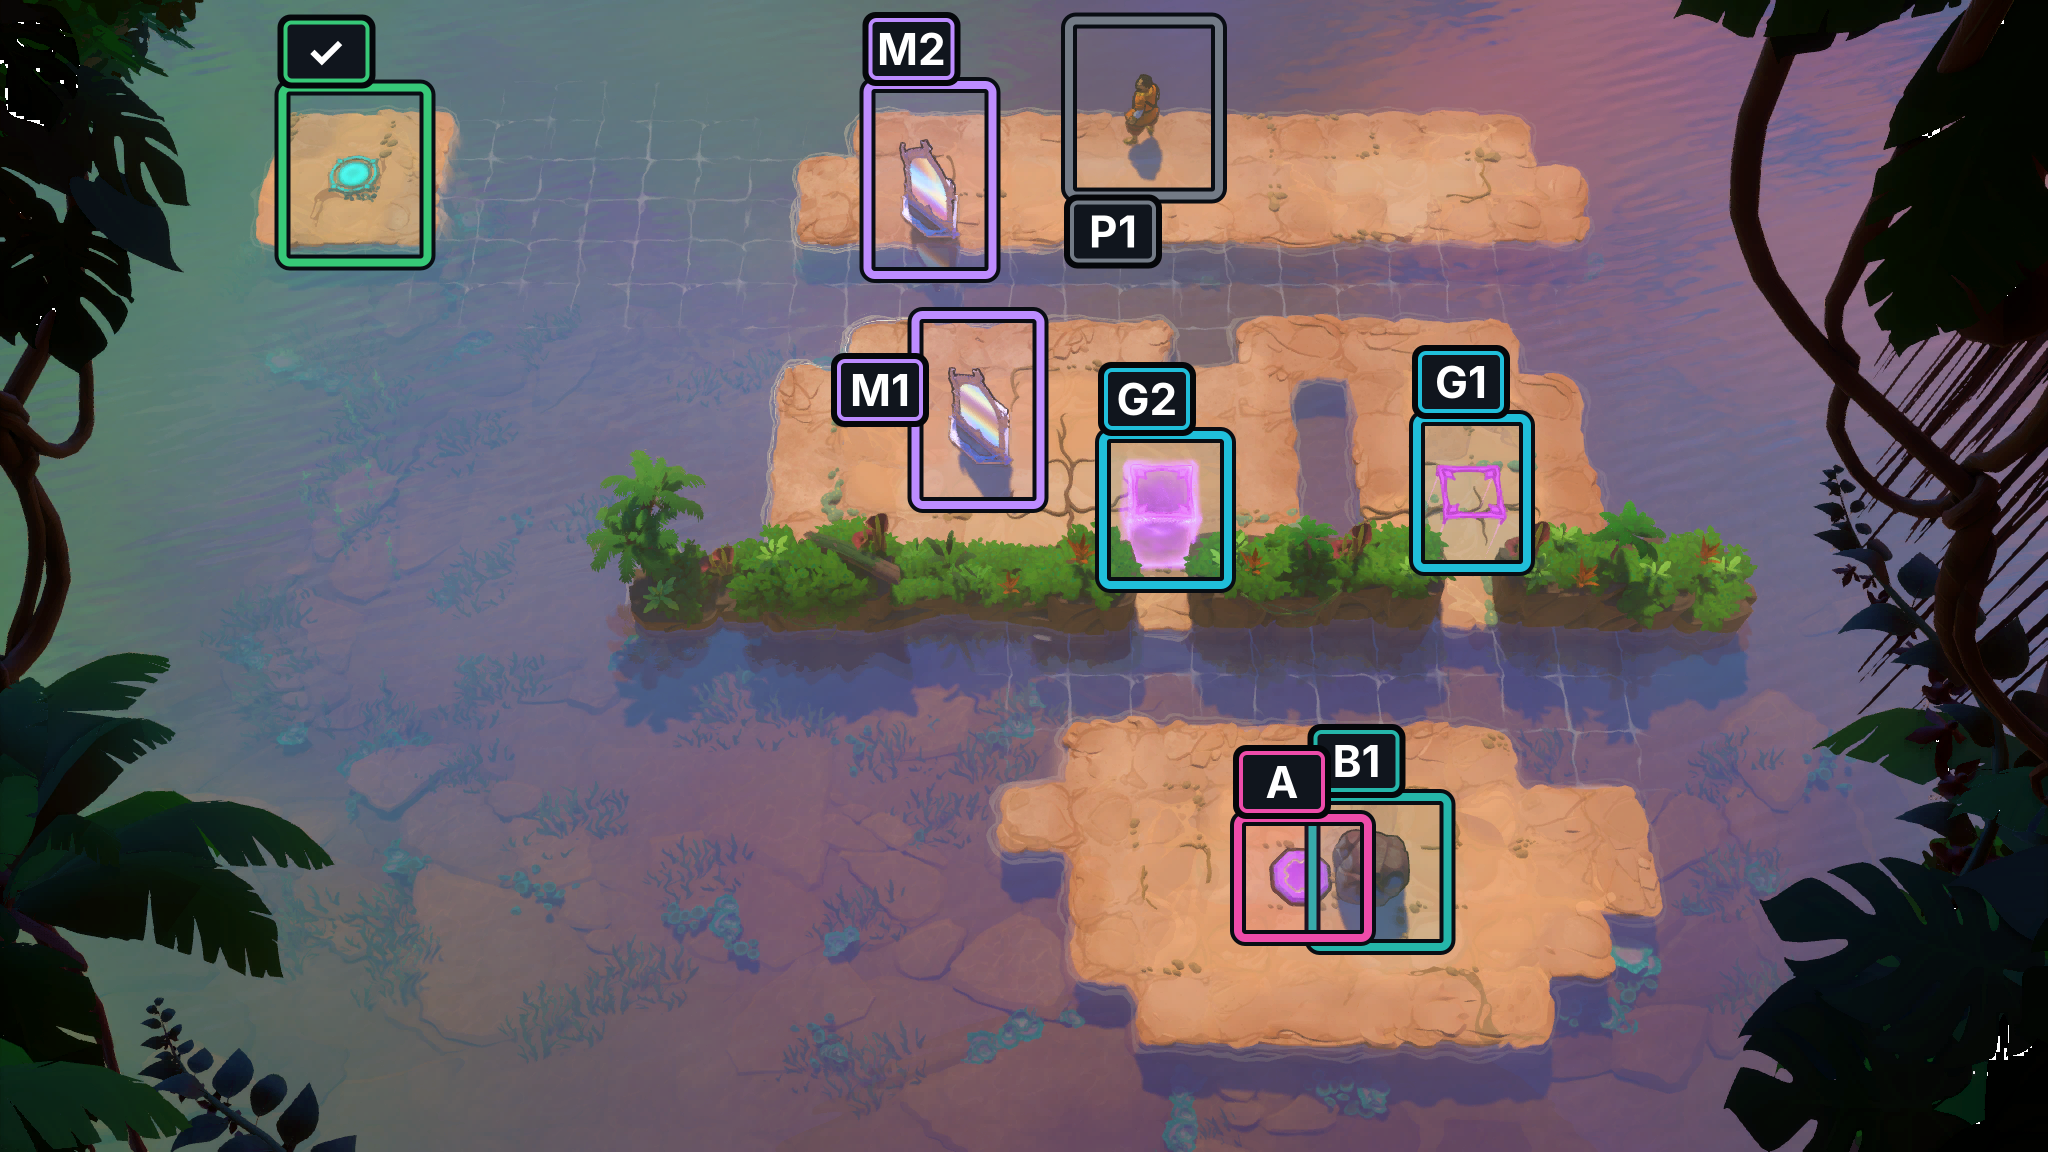
- Figure P1
- Boulder B1
- Mirrors M1–M2
- Switch A
- Gates G1–G2
- Exit
P11 checkpoints at 40:00 and 40:30 show the beam and actor states changing; the clear emblem appears at 41:01. These frames document the visible route phases, but not every input.
Images show selected video checkpoints; the first frame is the starting position.
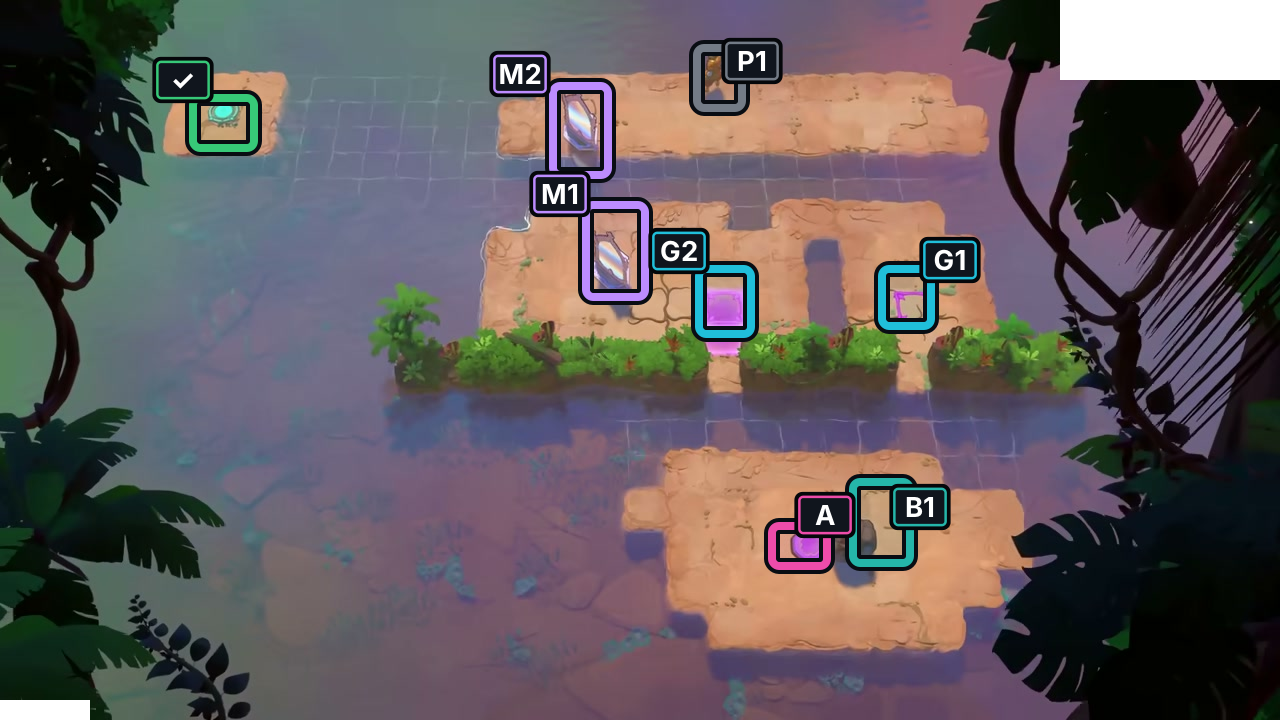
At 38:49, note the mirror pair, crystal, switch and two gates in the starting room.
Check: Later sampled frames show state changes, but not exact inputs or a finish.
Open full-size image in a new tab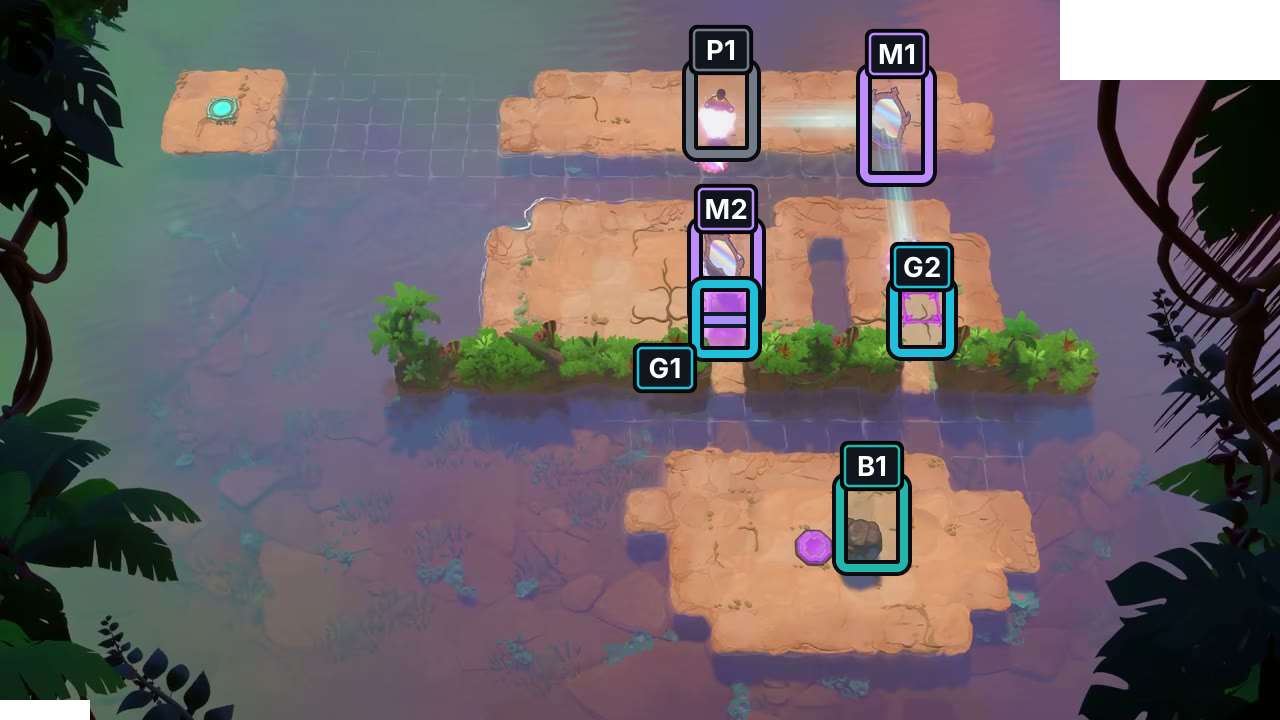
At 40:00, the upper mirror beam reaches the middle route while both gate lanes remain visible.
Check: This selected state shows a beam/actor change; the inputs between frames are not recorded.
Open full-size image in a new tab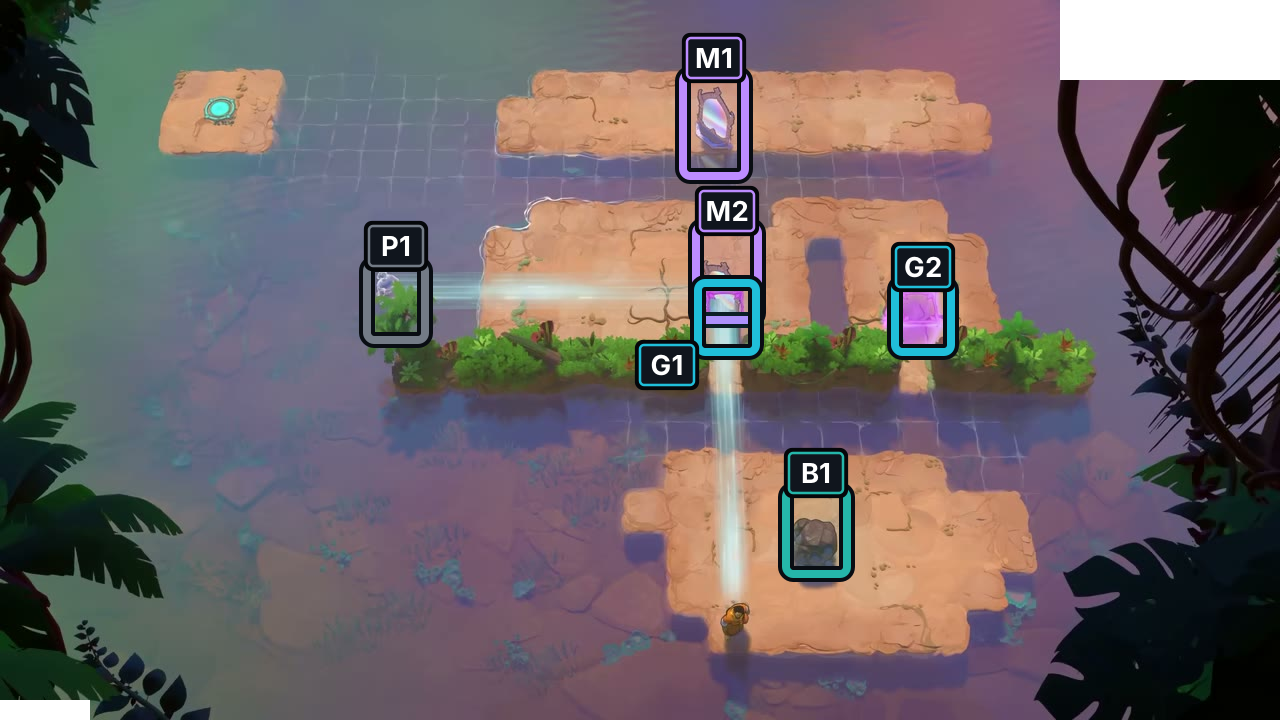
At 40:30, the trader appears at the left edge of the middle route as the mirror and gates change state.
Check: The later actor state is visible, but the video still does not provide a complete input route.
Open full-size image in a new tab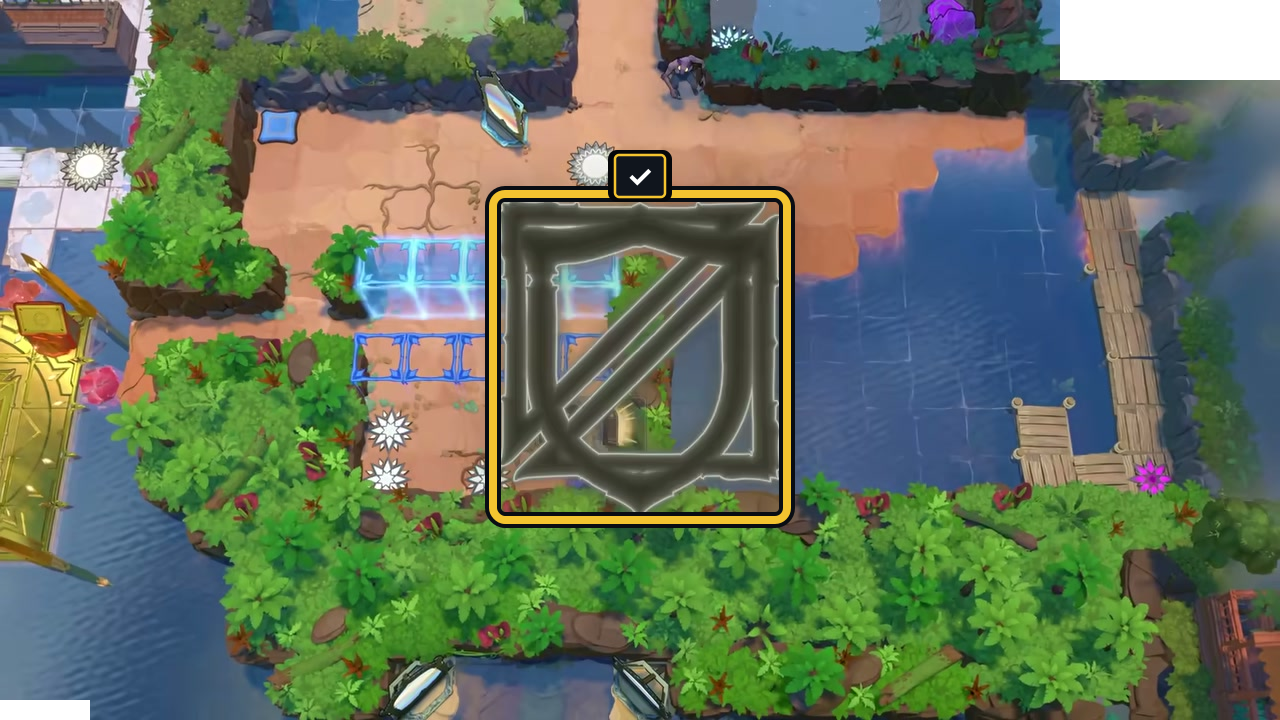
The clear emblem overlays the exit at 41:01, confirming this room is complete.
Check: The finish is visible; the preceding input sequence is not shown.
Open full-size image in a new tabIodine Clock (iodine_clock_v2)
Section titled “Iodine Clock (iodine_clock_v2)”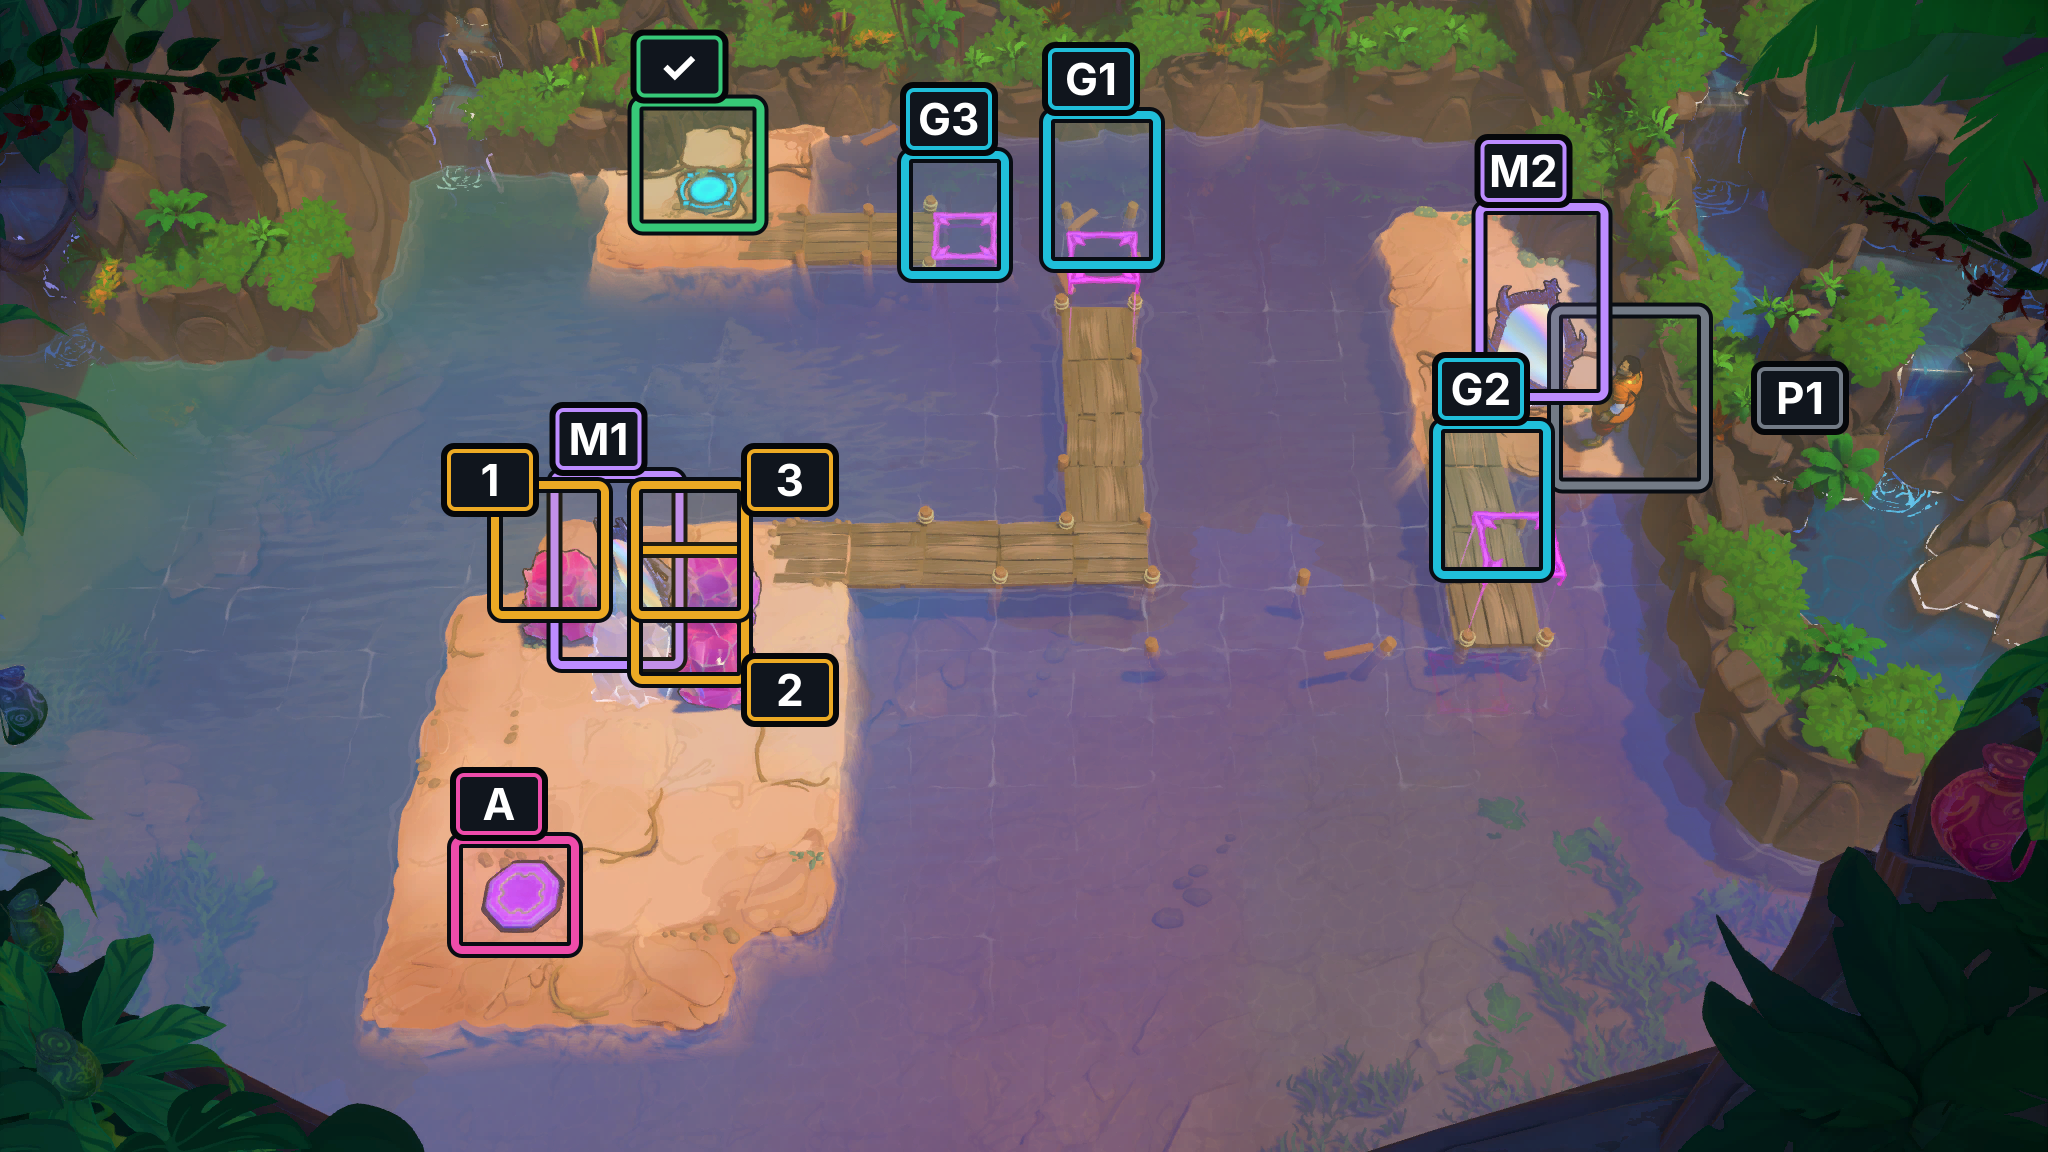
- Figure P1
- Crystals 1–3
- Mirrors M1–M2
- Switch A
- Gates G1–G3
- Exit
The 44:00 P11 checkpoint shows both mirror beams with the Trader on the right platform; M1/M2 mark screen positions only. The 41:30 frame with an external resolution label/editor toolbar and the 42:00 red-X frame are excluded. The clear emblem appears at 44:13, but the exact input route remains unresolved.
Images show selected video checkpoints; the first frame is the starting position.
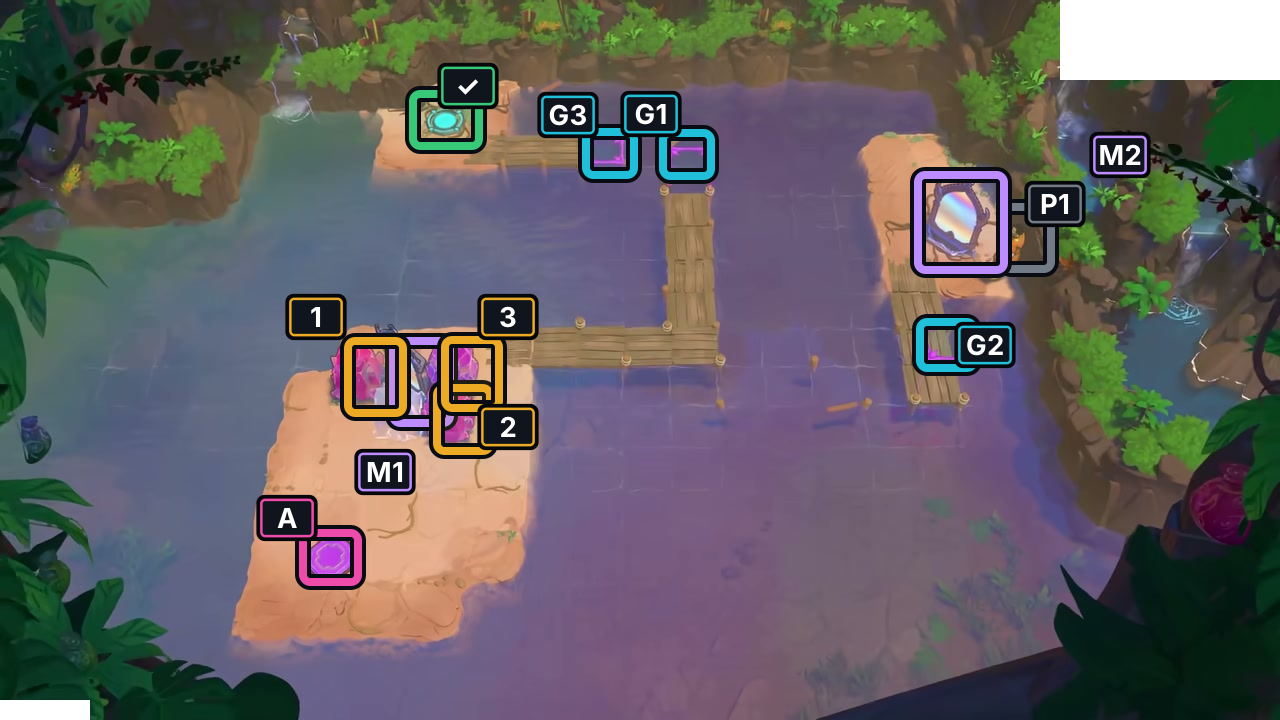
At 41:04, note the two mirrors, three rocks, switch and three gate lanes.
Check: This P11 frame shows the start; the later sequence does not establish exact moves or a finish.
Open full-size image in a new tab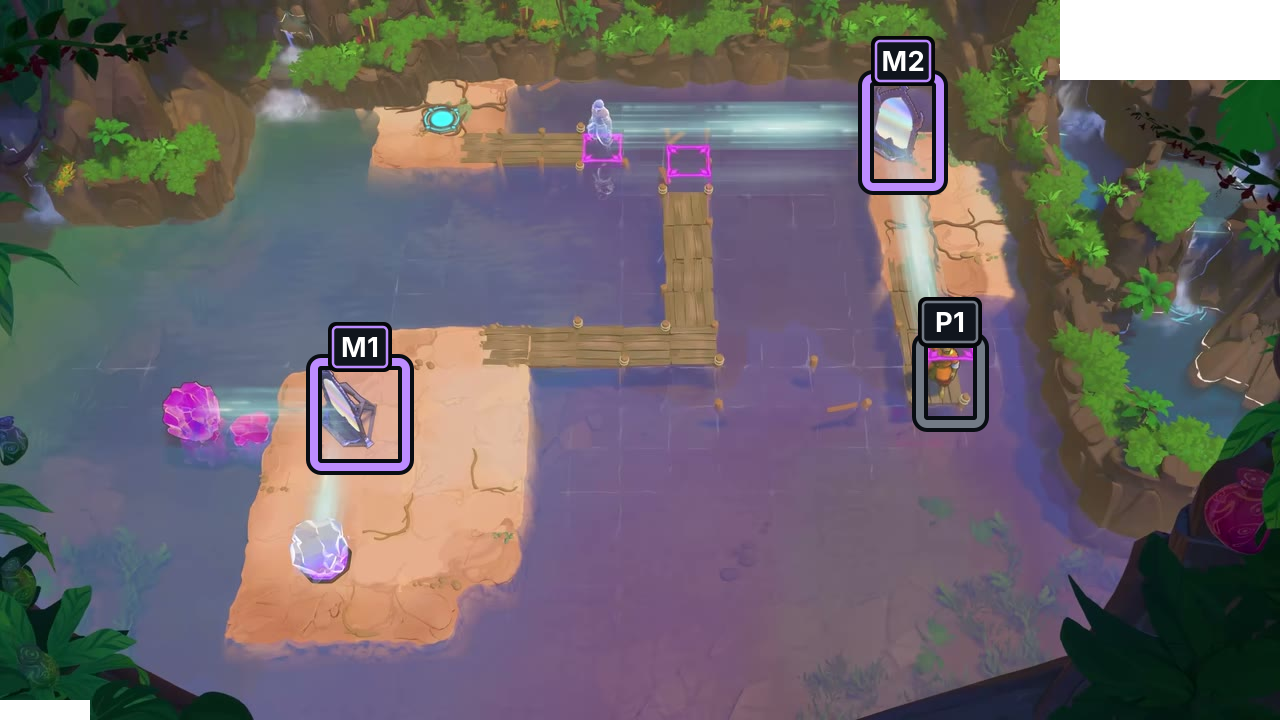
At 44:00, two mirror beams cross the water while the Trader stands on the right platform. M1/M2 label screen positions only.
Check: This checkpoint documents the visible beam state; the clear emblem follows at 44:13, but the full input order remains unresolved.
Open full-size image in a new tab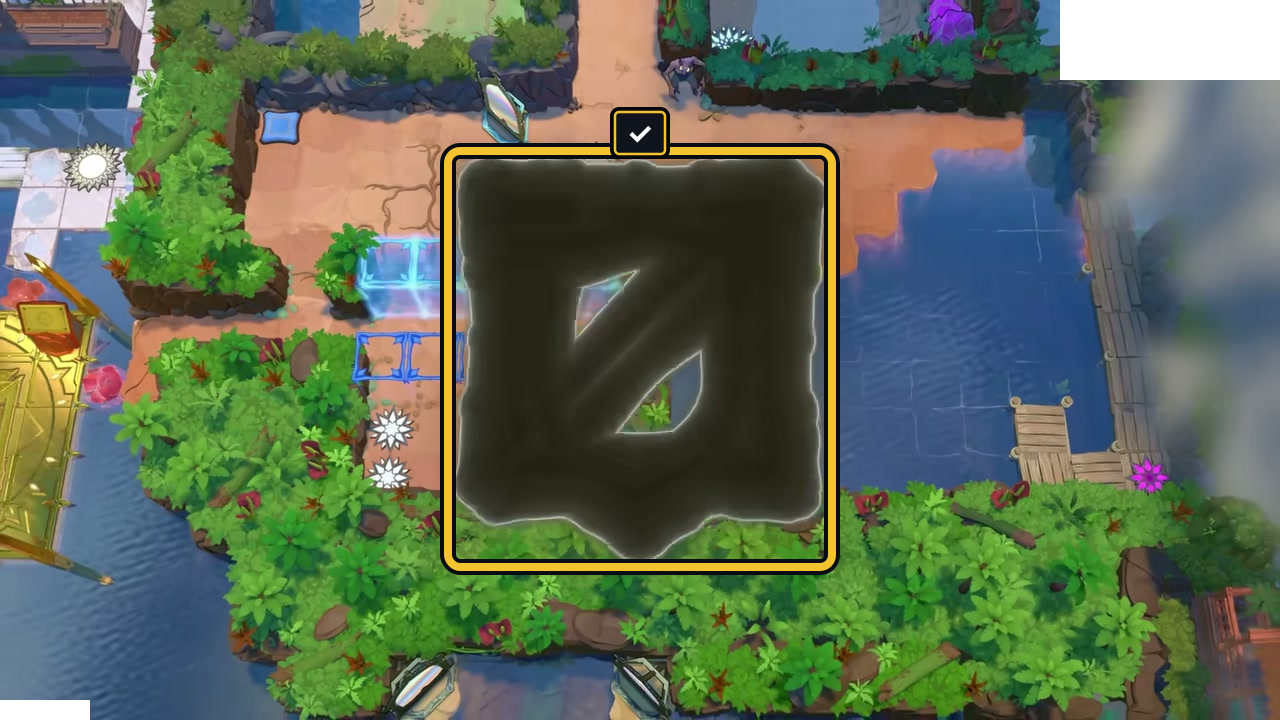
The clear emblem overlays the room at 44:13, confirming the finish.
Check: The finish is visible; the exact route remains unresolved.
Open full-size image in a new tabMirror Clocks (mirror_clocks)
Section titled “Mirror Clocks (mirror_clocks)”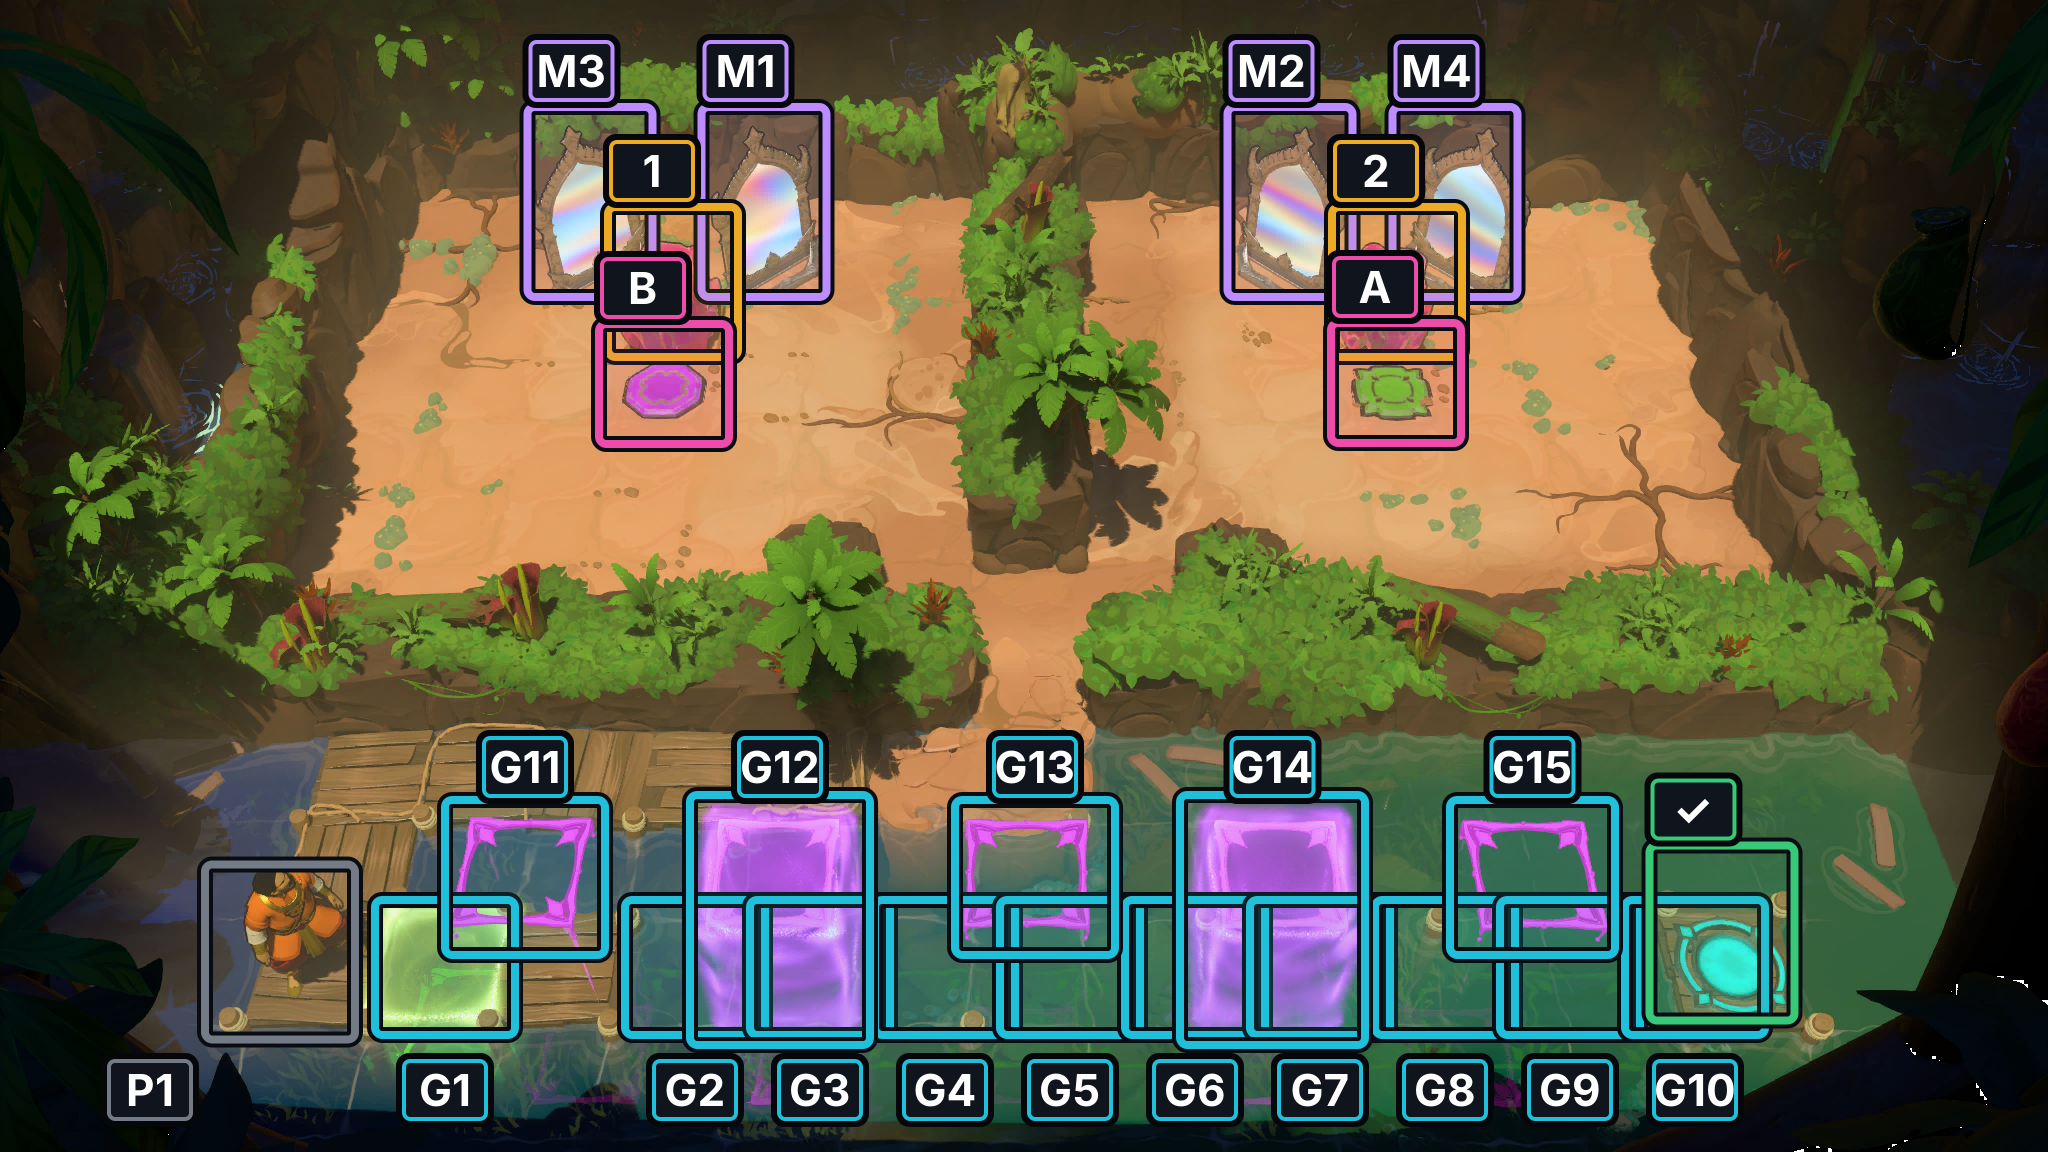
- Figure P1
- Crystals 1–2
- Mirrors M1–M4
- Switches A–B
- Gates G1–G15
- Exit
P11 frames at 44:30 and 47:00 show the mirror positions changing; M1–M4 label current screen positions only. The video changes to a new scene by 47:30, so no finish is claimed. The exact route remains unresolved.
Images show selected video checkpoints; the first frame is the starting position.
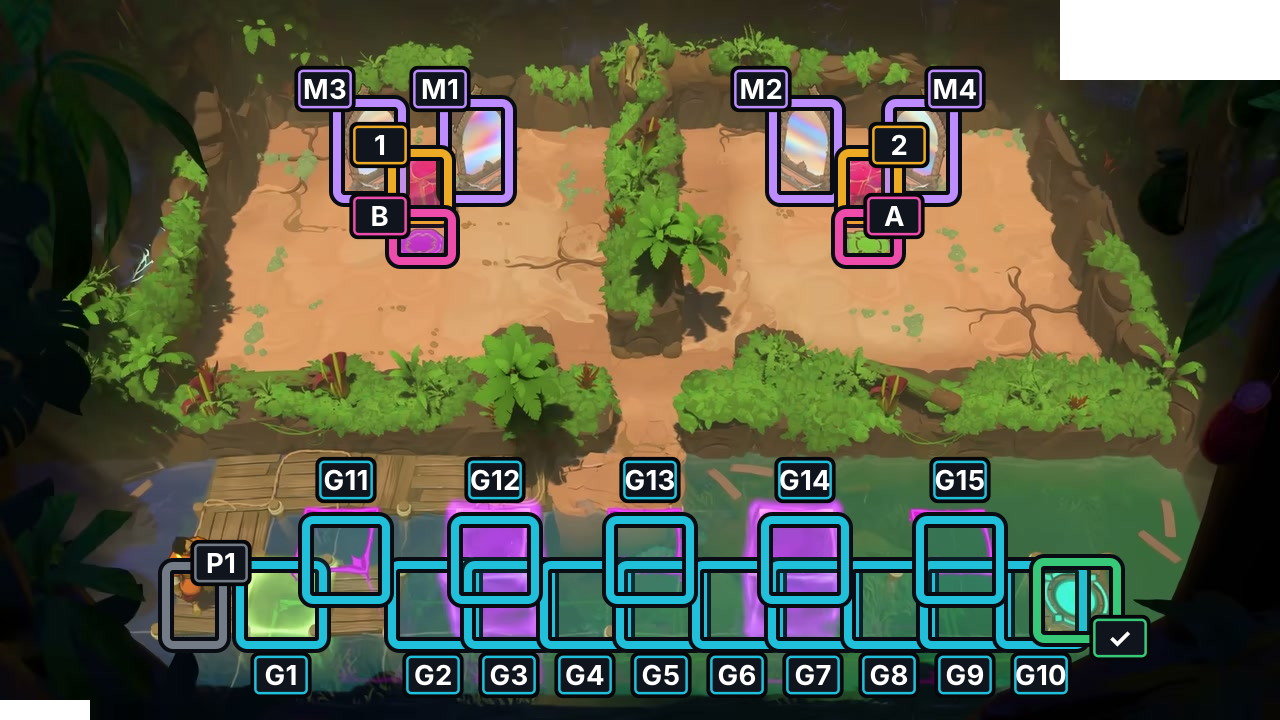
At 44:15, identify all four mirrors and the two switches in the starting layout.
Check: Later sampled frames show changing states, not a complete route or confirmed finish.
Open full-size image in a new tab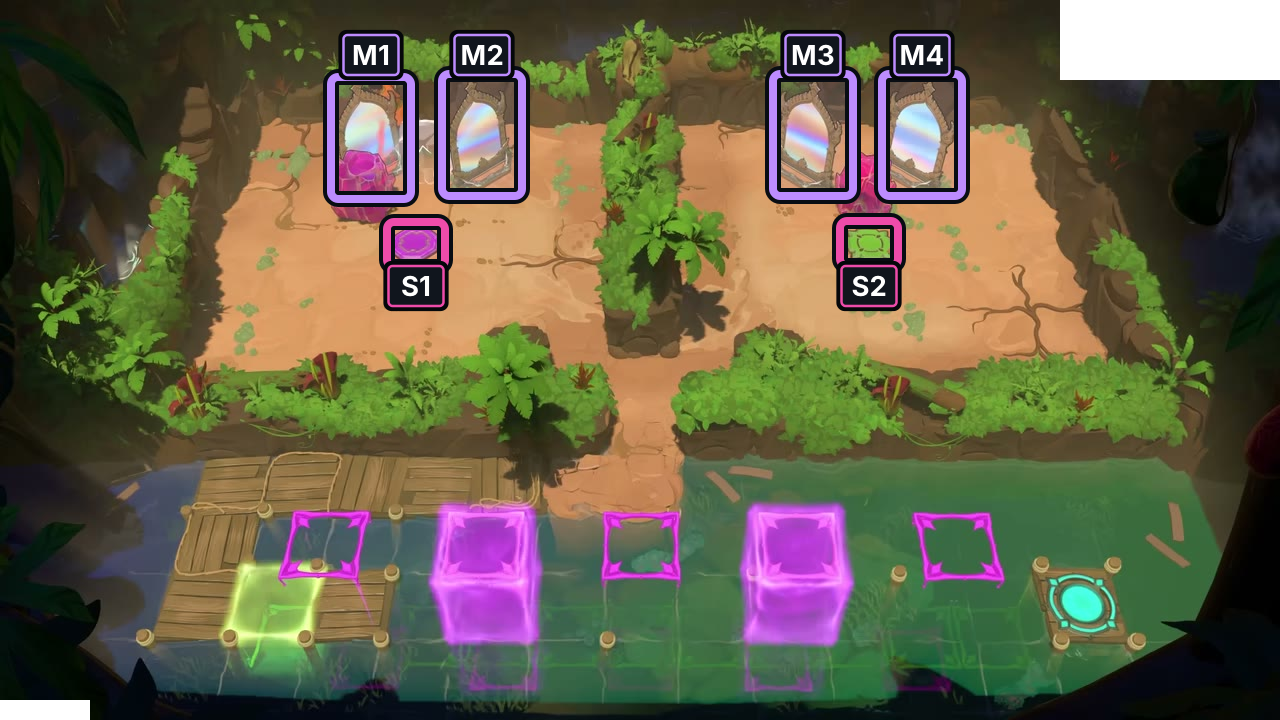
At 44:30, four mirrors bracket two crystal and switch groups. M1–M4 are left-to-right screen labels, not tracked identities.
Check: Selected state only; the intervening inputs and a finish are not shown.
Open full-size image in a new tab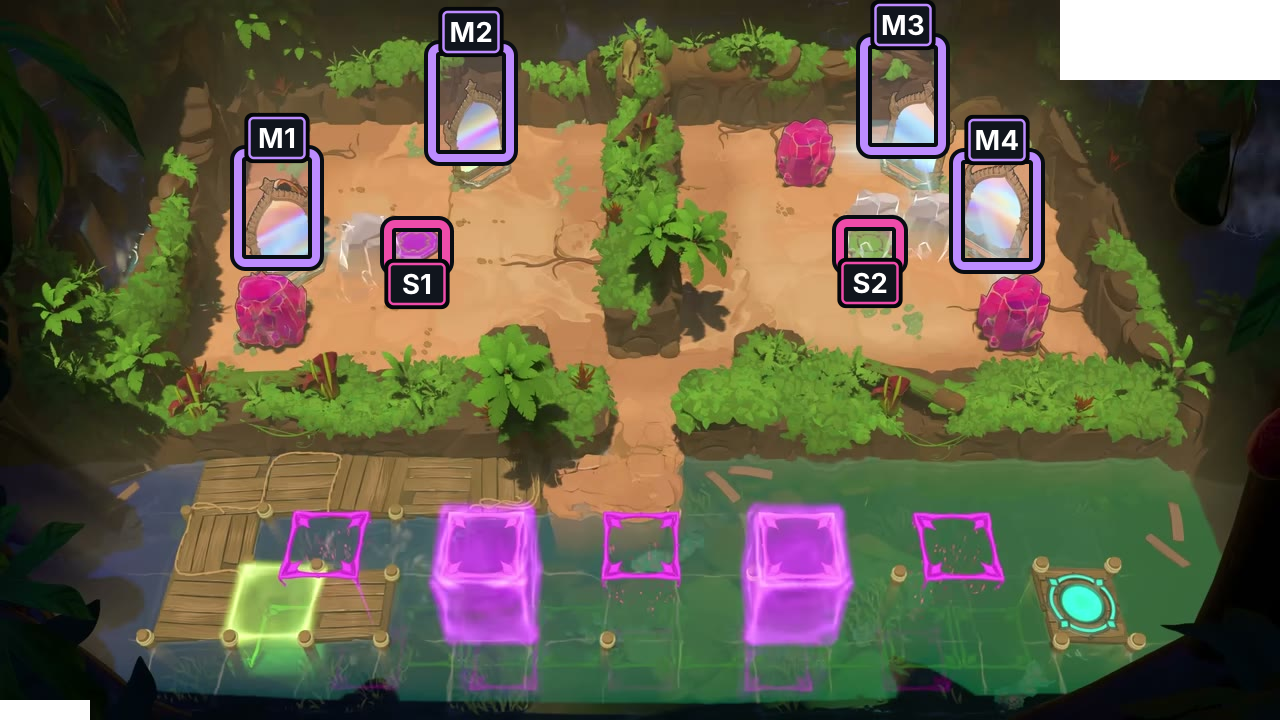
At 47:00, the four mirror views and switch-side objects have shifted. Compare positions only; this is not a step-by-step route.
Check: The room is still active. A new scene begins by 47:30, with no clear emblem recorded.
Open full-size image in a new tabSources and credits
Native rooms and Overworld entries come from the local release-labeled PC r67121 package. The official Steam update notes identify r67121 as the October 14 patch; the public notes do not expose a depot manifest for the local package. Selected P11 frames match the five starting layouts. Clear emblems appear for Two for One at 38:37, Gate Shatter at 41:01 and Iodine Clock at 44:13; Mirror Clocks has later visual checkpoints only, and exact input routes remain unresolved. Video: 塞德莎, Order of the Sinking Star, part 11. Board artwork: Thekla, Inc.
- Full puzzle candidate inventory (PC r67121) — Extracted data
- Heroes and Mirrors source-only room layouts (PC r67121) — Extracted data
- Heroes and Mirrors launch-candidate classification and route limits — Documentation · candidate-classification-review-2026-10-22;remaining-source-candidates-2026-10-24
- Official Order of the Sinking Star Steam update notes — Documentation · official-updates-reviewed-2026-10-21
- [Northeast] Heroes and Magic Mirrors [North 3 East 2 / North 3 East 3 / North 2 East 2] / 【东北】英雄与魔镜[北3东2/北3东3/北2东2] — Observed in-game · selected-state-review-2026-10-22
- Heroes and Mirrors Flip Flop selected P11 states — Observed in-game · screenshots-reviewed-2026-10-22
- Heroes and Mirrors Two for One P11 checkpoints and clear emblem — Observed in-game · screenshots-reviewed-2026-10-22
- Heroes and Mirrors Gate Shatter P11 start and clear emblem — Observed in-game · screenshots-reviewed-2026-10-22
- Heroes and Mirrors Iodine Clock V2 P11 start and clear emblem — Observed in-game · screenshots-reviewed-2026-10-22
- Heroes and Mirrors Mirror Clocks P11 selected later states — Observed in-game · screenshots-reviewed-2026-10-22
Unofficial fan wiki, not affiliated with Thekla, Inc. / Arc Games / Gamirror Games. Game content belongs to its owners.
Comments & feedback
Share a tip or suggest a correction. Comments are public. Guest names are unverified; verified accounts show their account username. All language pages share this discussion. Please keep personal information private.