
 Order of the Sinking Star
Low Beamcasters: selected layouts

The Low Beamcasters solutions page has 103 numbered room stills. Ninety-six match distinct local r67121 candidate layouts; the remaining seven stay unassigned. The article also has 29 separate Overworld stills with no assigned targets. The Steam depot mapping remains unverified. Compare your board with these selected views, then use the hint below each image. Article numbers and internal set positions are recorded separately. Rings identify landmarks, not action steps. Article stills and selected video views identify layouts; neither establishes starting states, routes, or finishes.
Article rooms
Section titled “Article rooms”Puzzle 1
Section titled “Puzzle 1”The ring marks a visible landmark, not an action step.
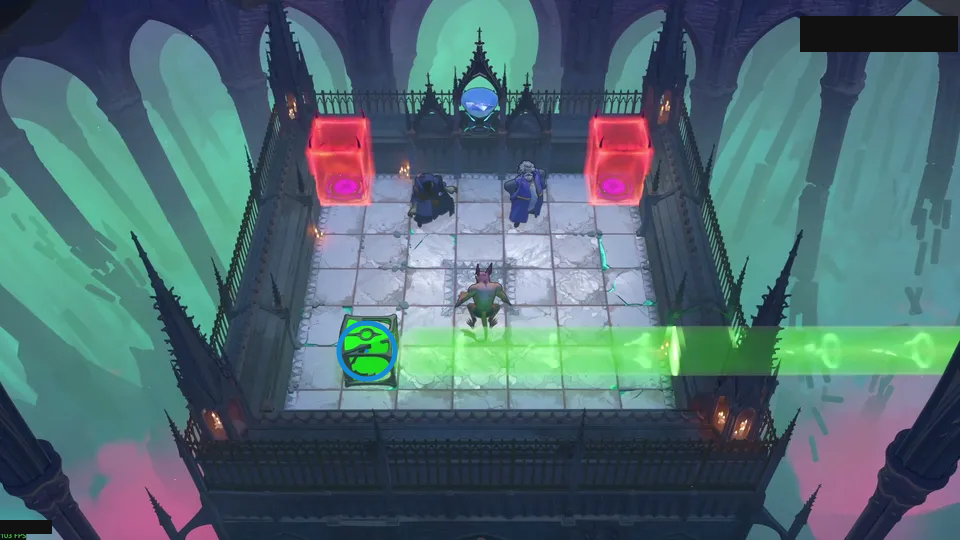
Use green light through the wall.
Check: Ring marks green emitter at the lower-left edge.
Open full-size image in a new tabPuzzle 2
Section titled “Puzzle 2”The ring marks a visible landmark, not an action step.
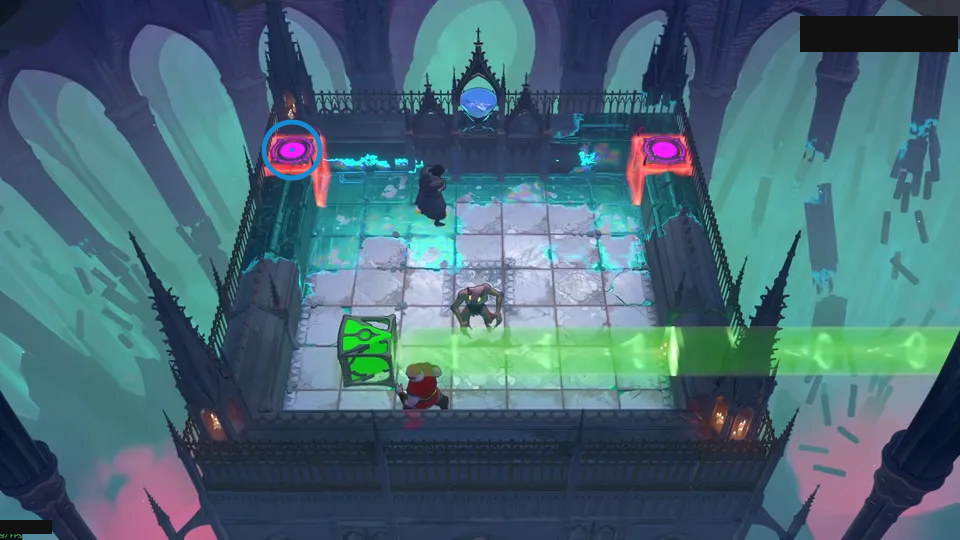
Place Druid inside before pushing.
Check: Ring marks magenta pad on the left red block.
Open full-size image in a new tabPuzzle 3
Section titled “Puzzle 3”The ring marks a visible landmark, not an action step.
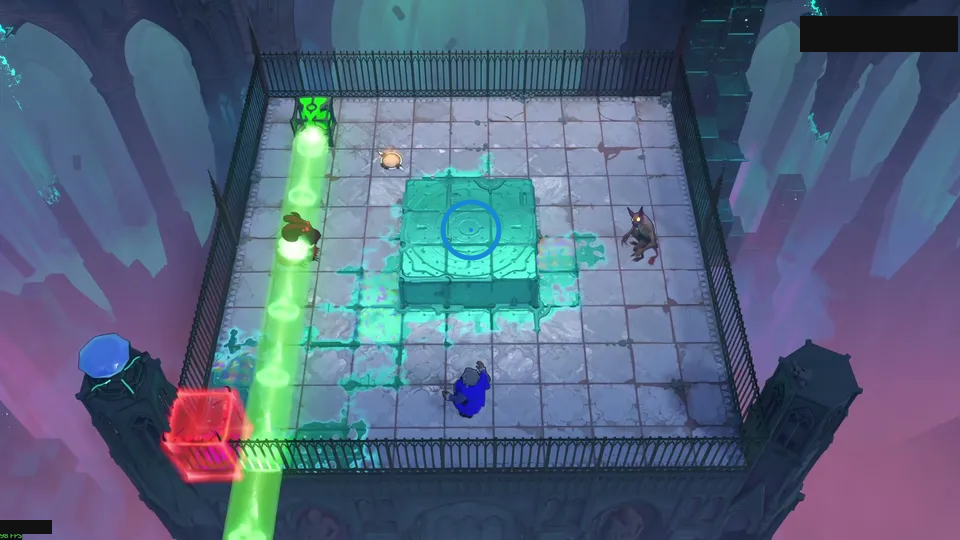
Place dragon where its fire exits.
Check: Ring marks raised teal block.
Open full-size image in a new tabPuzzle 4
Section titled “Puzzle 4”The ring marks a visible landmark, not an action step.
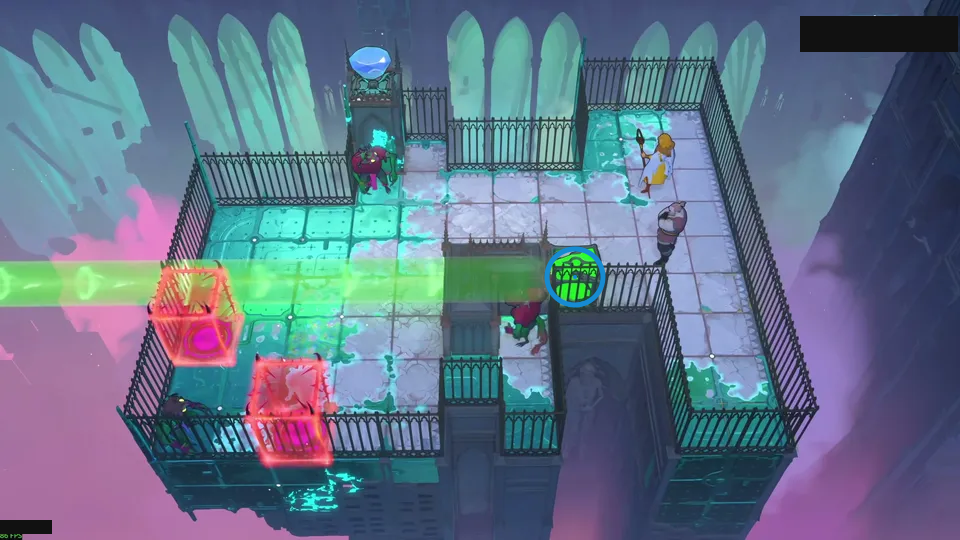
Separate one goblin with green light.
Check: Ring marks green emitter beside the inner fence.
Open full-size image in a new tabPuzzle 5 — en_root_alt
Section titled “Puzzle 5 — en_root_alt”Source-reported hint: Use blue light through plant roots.
Selected room view.
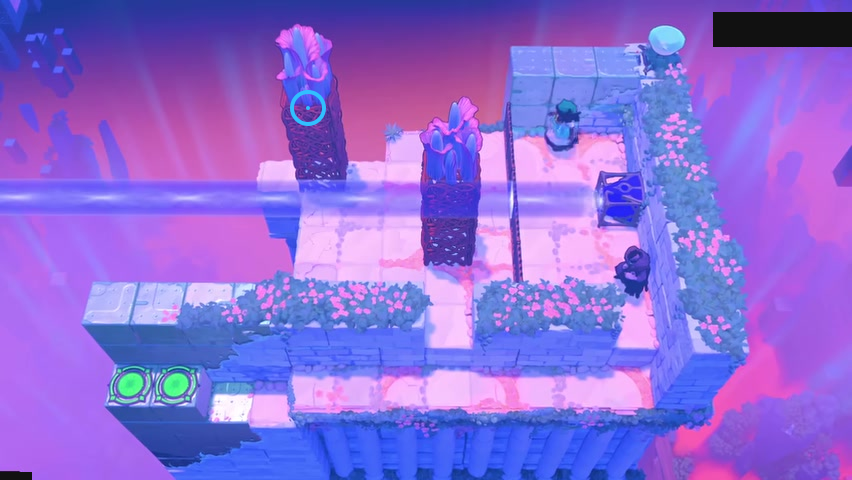
Find the tall plant on the left.
Check: The blue ring marks the tall plant on the left.
Open full-size image in a new tabPuzzle 6
Section titled “Puzzle 6”The ring marks a visible landmark, not an action step.
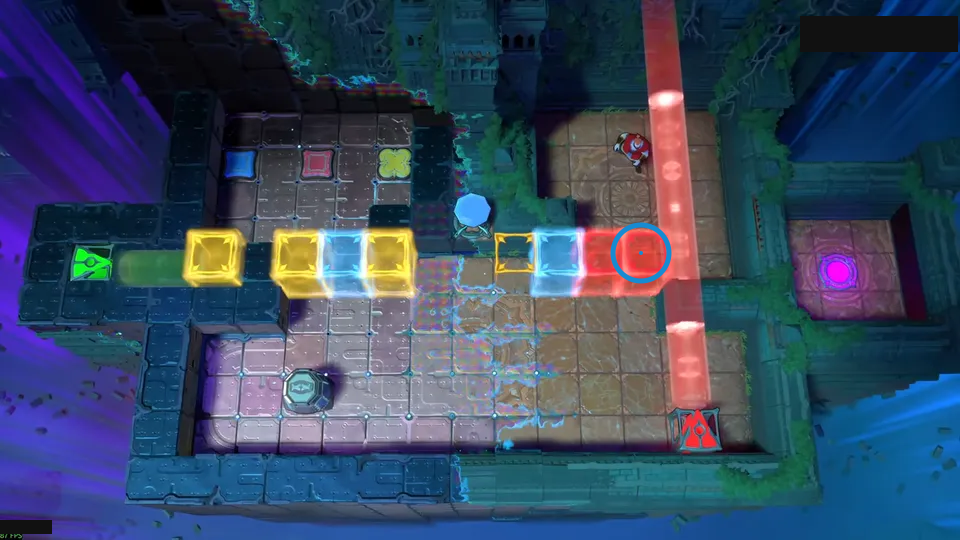
Red light opens every color door.
Check: Ring marks rightmost red cube in the horizontal row.
Open full-size image in a new tabPuzzle 7
Section titled “Puzzle 7”The ring marks a visible landmark, not an action step.
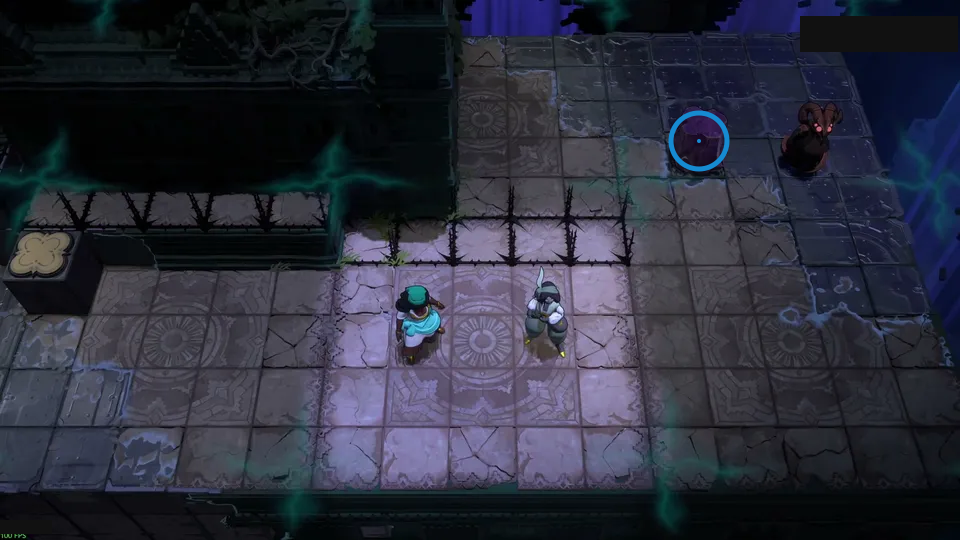
Toggle gates by moving monsters.
Check: Ring marks purple crystal on the upper-right ledge.
Open full-size image in a new tabPuzzle 8
Section titled “Puzzle 8”This article still has no approved candidate assignment.
Puzzle 9
Section titled “Puzzle 9”This article still has no approved candidate assignment.
Puzzle 10
Section titled “Puzzle 10”The ring marks a visible landmark, not an action step.
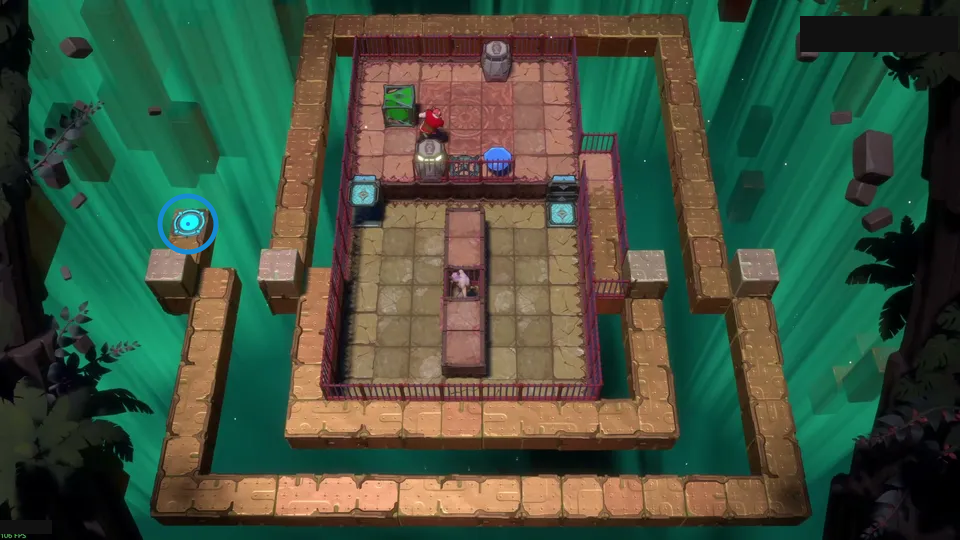
Use carts to turn the goblin.
Check: Ring marks cyan pad on the small left island.
Open full-size image in a new tabPuzzle 11
Section titled “Puzzle 11”This article still has no approved candidate assignment.
Puzzle 12
Section titled “Puzzle 12”The ring marks a visible landmark, not an action step.
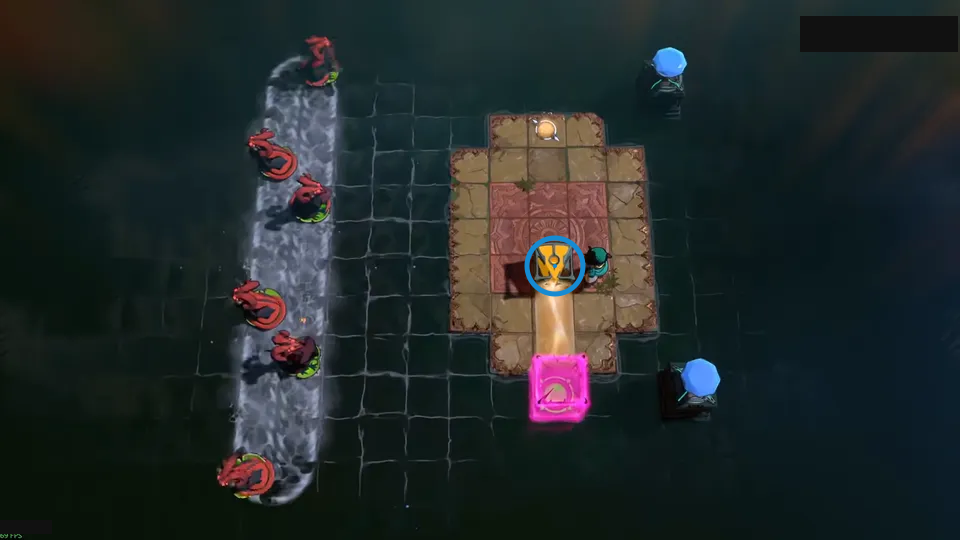
Turn orange light across the dragon loop.
Check: Ring marks yellow emitter on the main island.
Open full-size image in a new tabPuzzle 13
Section titled “Puzzle 13”This article still has no approved candidate assignment.
Puzzle 14
Section titled “Puzzle 14”The ring marks a visible landmark, not an action step.
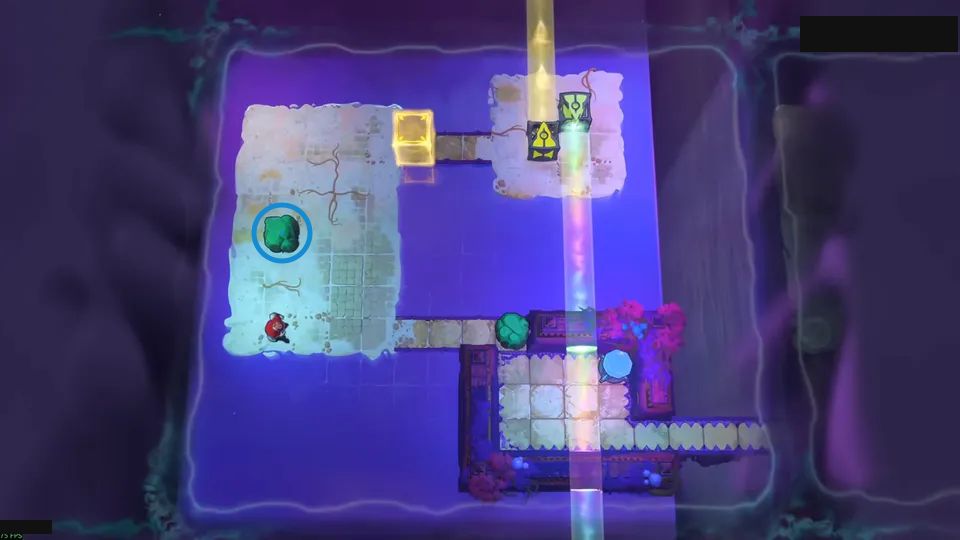
Blast stones, then clear rubble.
Check: Ring marks green stone on the large left platform.
Open full-size image in a new tabPuzzle 15
Section titled “Puzzle 15”The ring marks a visible landmark, not an action step.
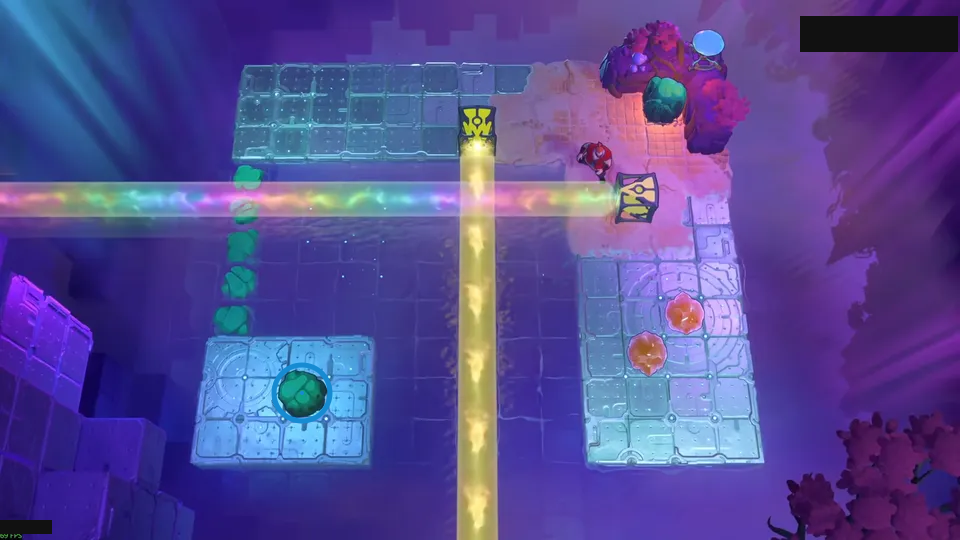
Use crystal stones from a distance.
Check: Ring marks green stone on the lower-left platform.
Open full-size image in a new tabPuzzle 16 — get_through_depths
Section titled “Puzzle 16 — get_through_depths”Source-reported hint: Break the stone in orange light.
Selected room detail.
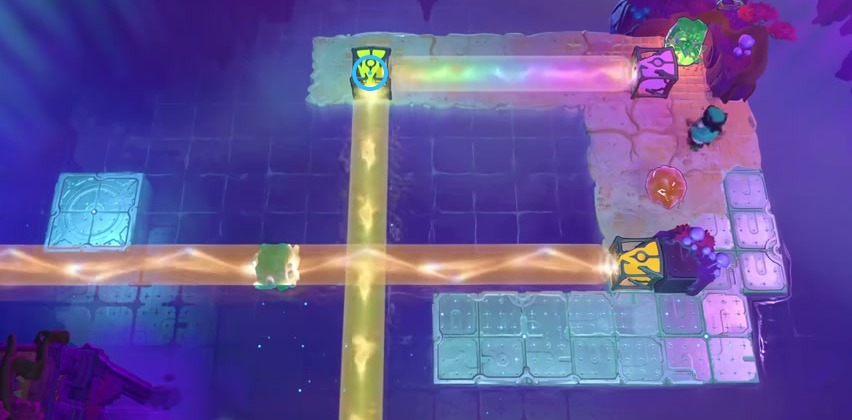
Find the yellow beamcaster at the upper beam crossing.
Check: The blue ring marks the yellow beamcaster at the upper beam crossing.
Open full-size image in a new tabPuzzle 17
Section titled “Puzzle 17”The ring marks a visible landmark, not an action step.
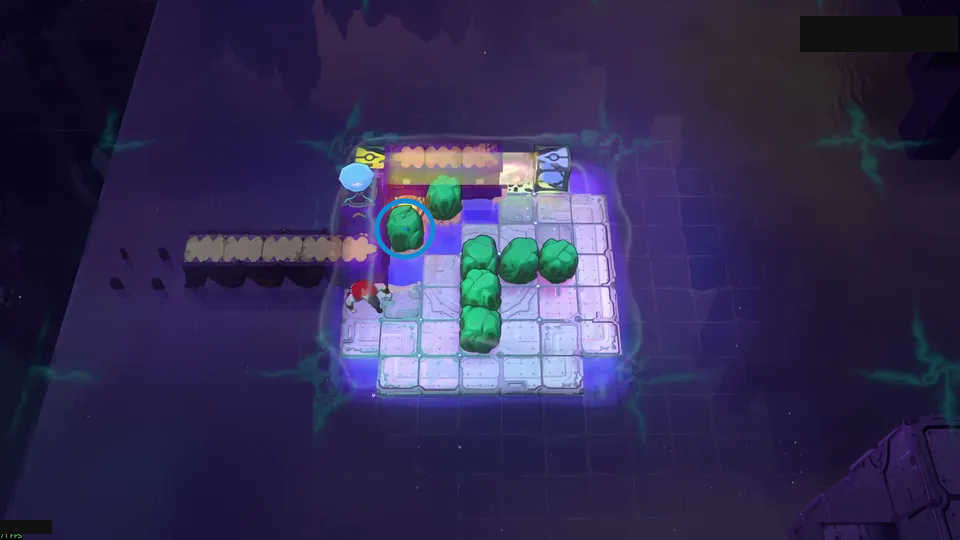
Keep one stone outside the block.
Check: Ring marks green stone at the left edge of the cluster.
Open full-size image in a new tabPuzzle 18
Section titled “Puzzle 18”The ring marks a visible landmark, not an action step.
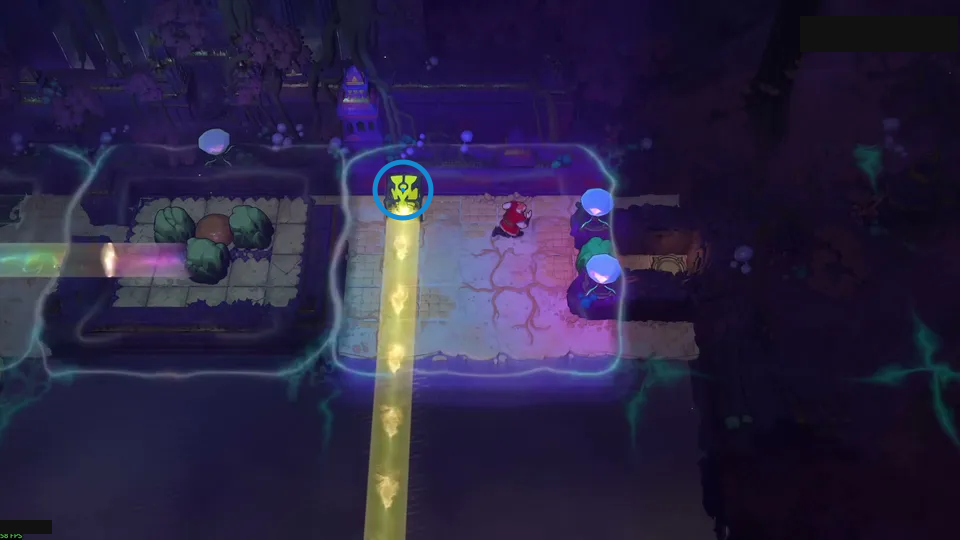
Use lily pad to carry rubble.
Check: Ring marks yellow emitter on the right-hand platform.
Open full-size image in a new tabPuzzle 19
Section titled “Puzzle 19”The ring marks a visible landmark, not an action step.
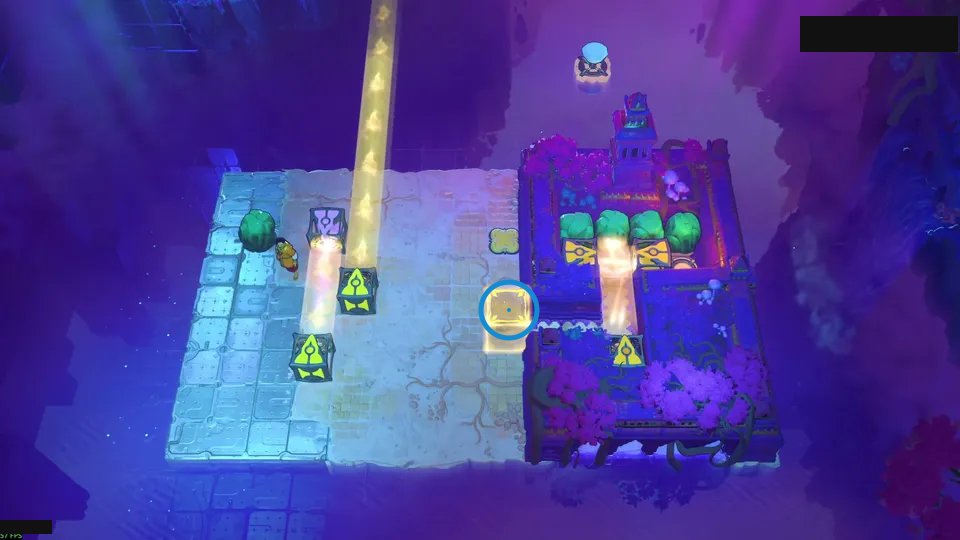
Crush the emitter with an energy block.
Check: Ring marks yellow cube at the right edge of the main floor.
Open full-size image in a new tabPuzzle 20
Section titled “Puzzle 20”The ring marks a visible landmark, not an action step.
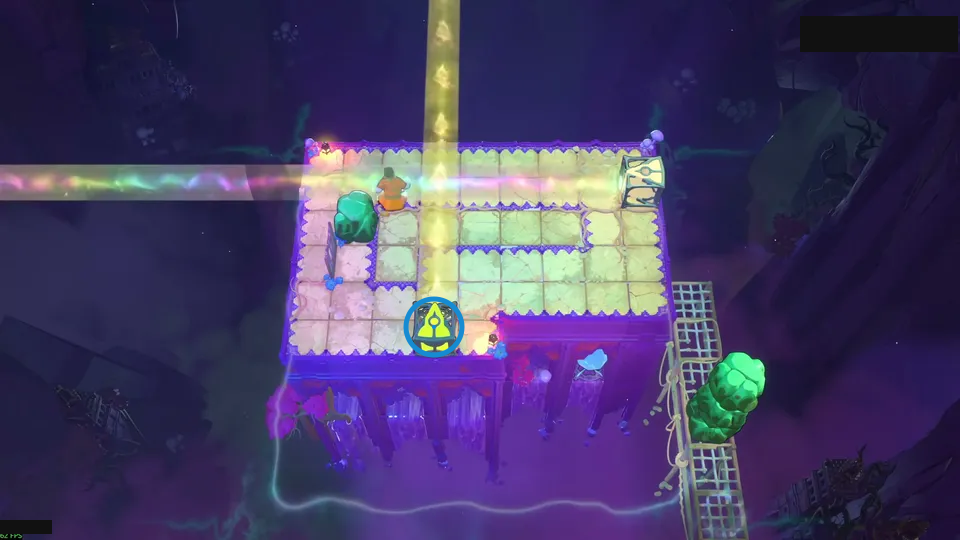
Combine yellow and multicolored blasts.
Check: Ring marks yellow emitter at the lower edge.
Open full-size image in a new tabPuzzle 21
Section titled “Puzzle 21”The ring marks a visible landmark, not an action step.
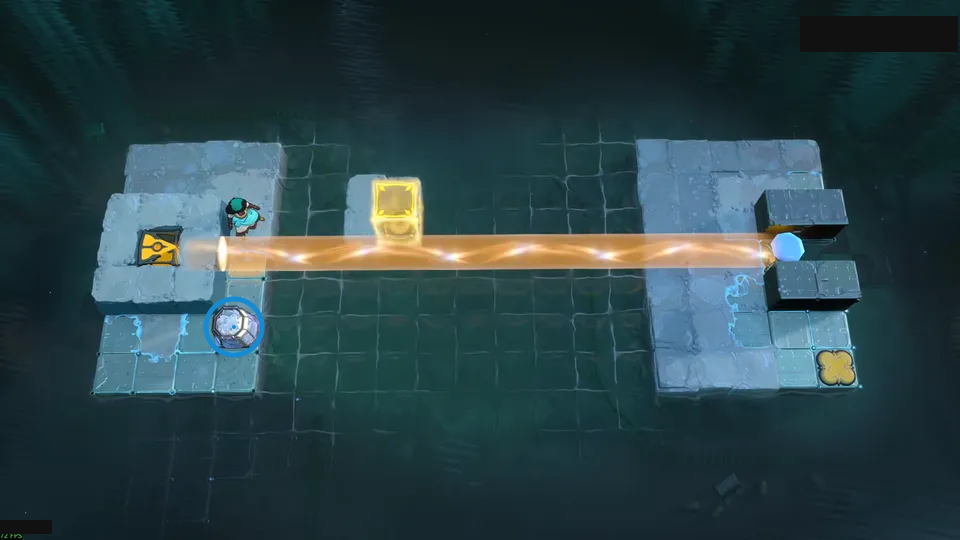
Get ahead of the cart on orange.
Check: Ring marks round cart on the left island.
Open full-size image in a new tabPuzzle 22
Section titled “Puzzle 22”The ring marks a visible landmark, not an action step.
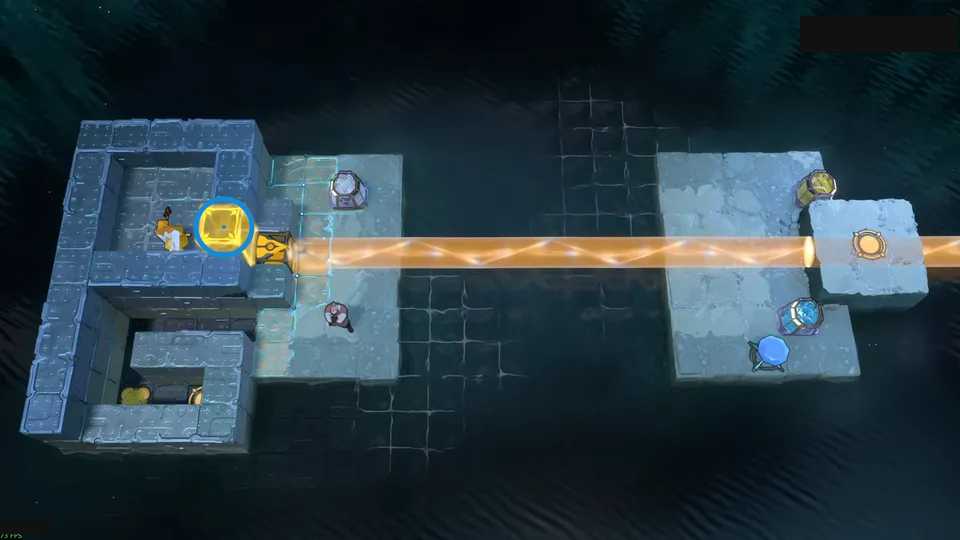
Line up three carts as a bridge.
Check: Ring marks yellow cube in the left-hand maze.
Open full-size image in a new tabPuzzle 23
Section titled “Puzzle 23”The ring marks a visible landmark, not an action step.
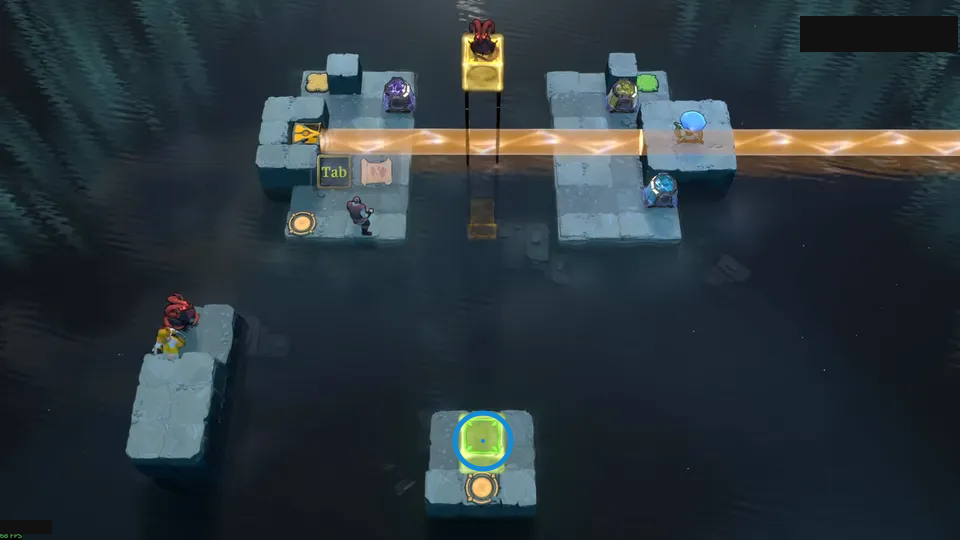
Keep a cart beneath the dragon.
Check: Ring marks green cube on the small lower island.
Open full-size image in a new tabPuzzle 24
Section titled “Puzzle 24”The ring marks a visible landmark, not an action step.
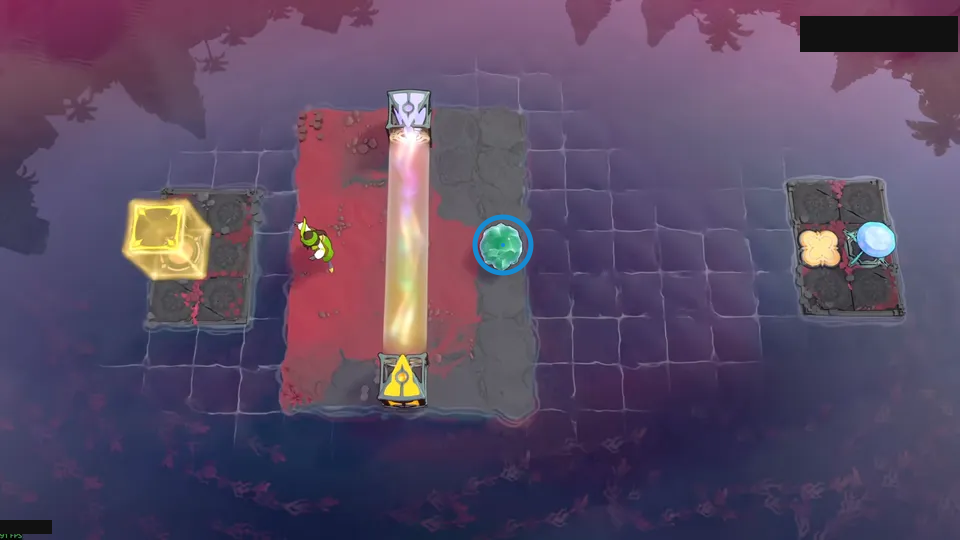
Use multicolored light for longer jumps.
Check: Ring marks green skipping stone on the central platform.
Open full-size image in a new tabPuzzle 25
Section titled “Puzzle 25”The ring marks a visible landmark, not an action step.
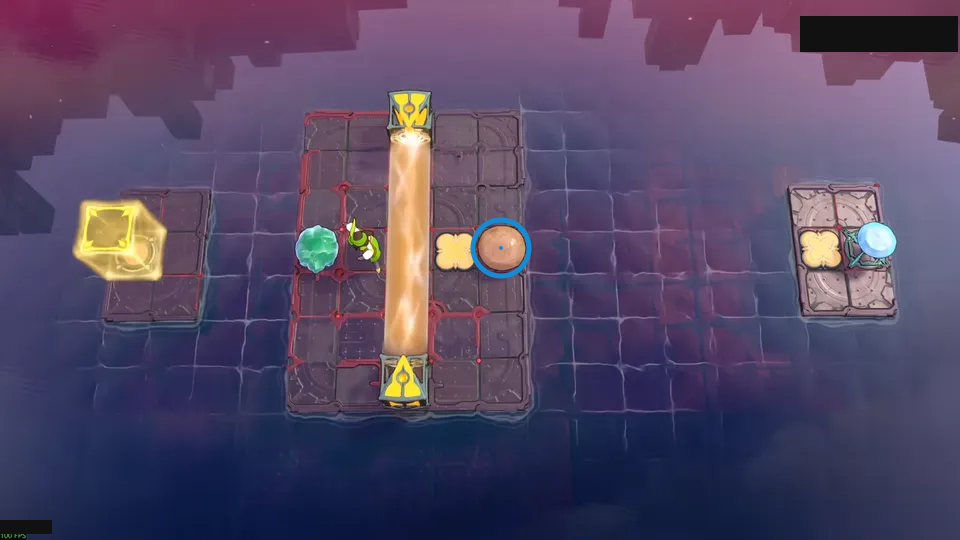
Use both orange beams to extend jumps.
Check: Ring marks brown skipping stone to the right of the beam.
Open full-size image in a new tabPuzzle 26
Section titled “Puzzle 26”This article still has no approved candidate assignment.
Puzzle 27 — 3wcn_stonehenge
Section titled “Puzzle 27 — 3wcn_stonehenge”Source-reported hint: Block dragons before the stone lands.
Selected room detail.
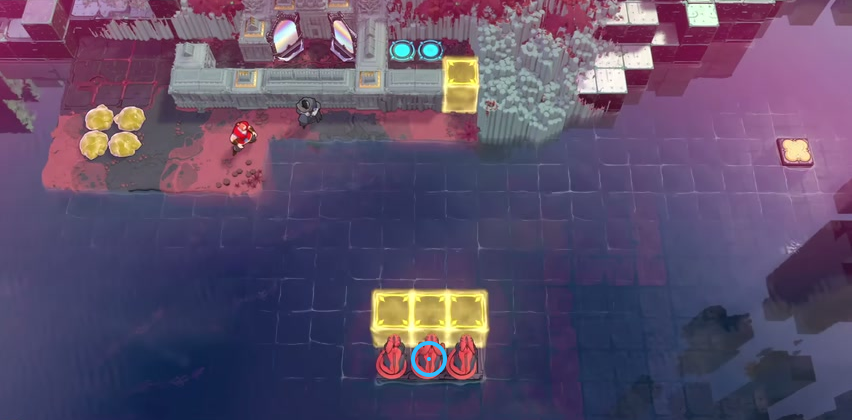
Find the middle Dragon below the three yellow tiles.
Check: The blue ring marks the middle Dragon below the three yellow tiles.
Open full-size image in a new tabPuzzle 28
Section titled “Puzzle 28”The ring marks a visible landmark, not an action step.
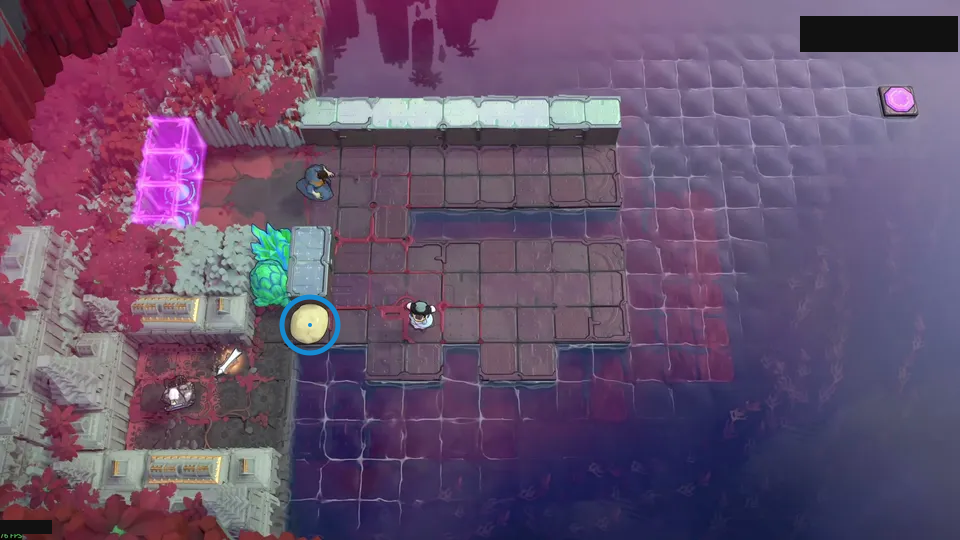
Extend the wall before shoving upward.
Check: Ring marks large pale-yellow stone beside the lower platform.
Open full-size image in a new tabPuzzle 29
Section titled “Puzzle 29”The ring marks a visible landmark, not an action step.
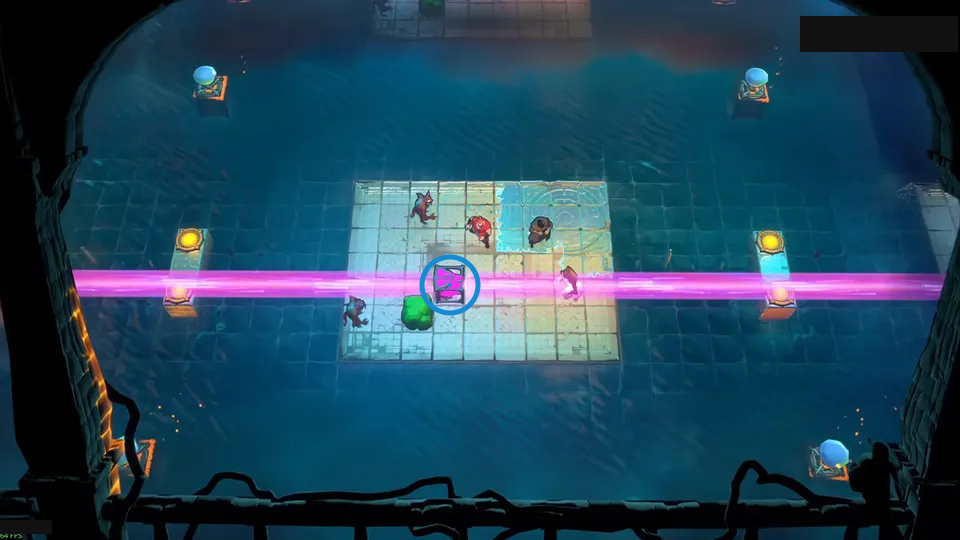
Use crystals to pave the water gap.
Check: Ring marks magenta emitter on the central island.
Open full-size image in a new tabPuzzle 30
Section titled “Puzzle 30”This article still has no approved candidate assignment.
Puzzle 31 — pat_on_the_back_v2
Section titled “Puzzle 31 — pat_on_the_back_v2”Source-reported hint: Shove yourself, leaving the marker behind.
Selected room detail.
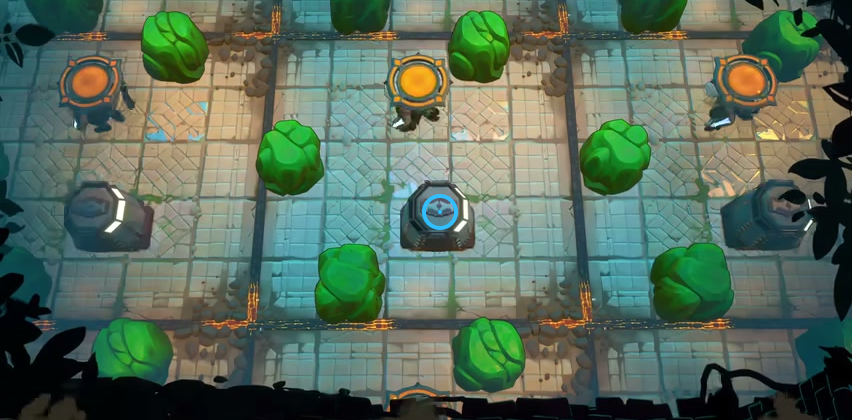
Find the cart below the yellow exit.
Check: The blue ring marks the cart below the yellow exit.
Open full-size image in a new tabPuzzle 32
Section titled “Puzzle 32”The ring marks a visible landmark, not an action step.
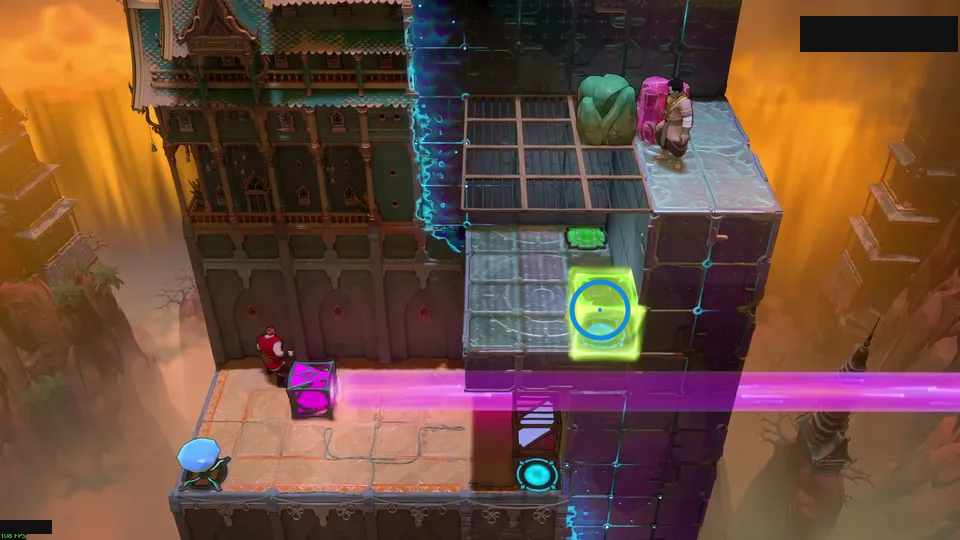
Block the left endpoint before teleporting.
Check: Ring marks lime-green energy block on the raised wall.
Open full-size image in a new tabPuzzle 33
Section titled “Puzzle 33”The ring marks a visible landmark, not an action step.
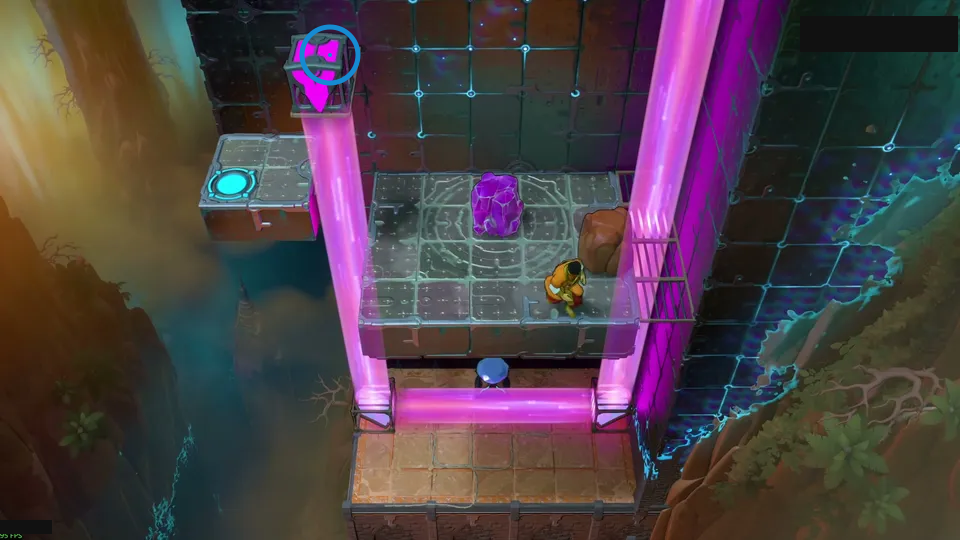
Let a crystal bounce between endpoints.
Check: Ring marks the upper-left magenta emitter.
Open full-size image in a new tabPuzzle 34
Section titled “Puzzle 34”The ring marks a visible landmark, not an action step.
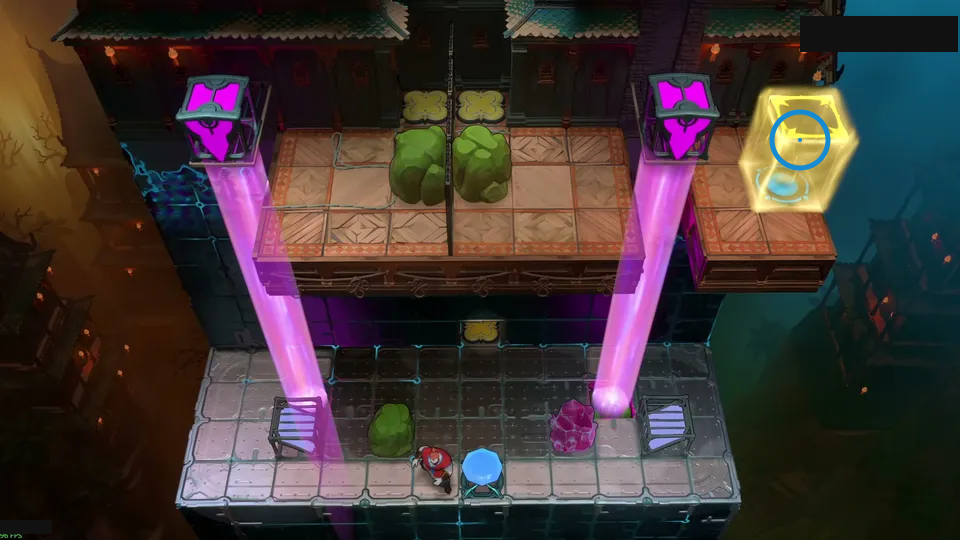
Ride the bouncing crystal to upper platforms.
Check: Ring marks yellow cube on the upper-right platform.
Open full-size image in a new tabPuzzle 35
Section titled “Puzzle 35”The ring marks a visible landmark, not an action step.
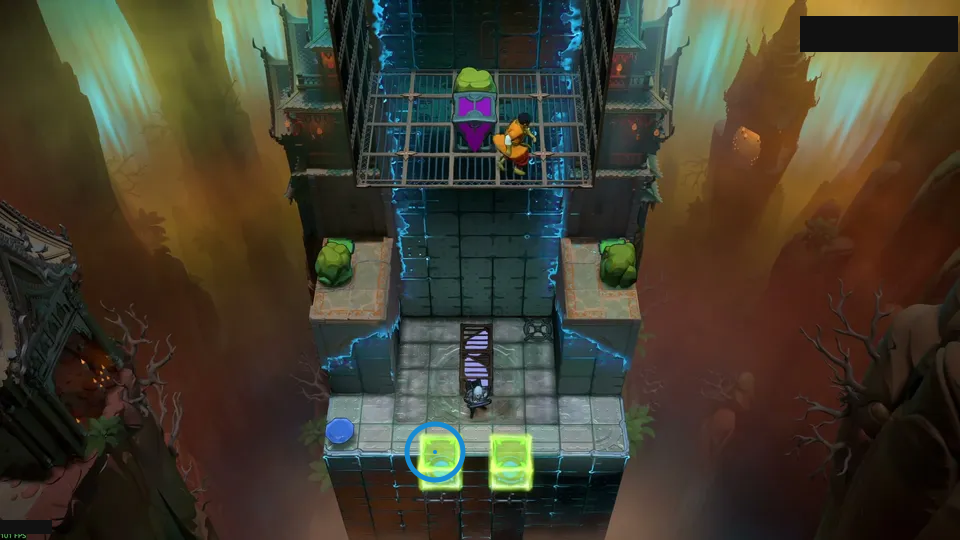
Use the Explorer as a bouncing endpoint.
Check: Ring marks left green energy block at the lower edge.
Open full-size image in a new tabPuzzle 36
Section titled “Puzzle 36”The ring marks a visible landmark, not an action step.
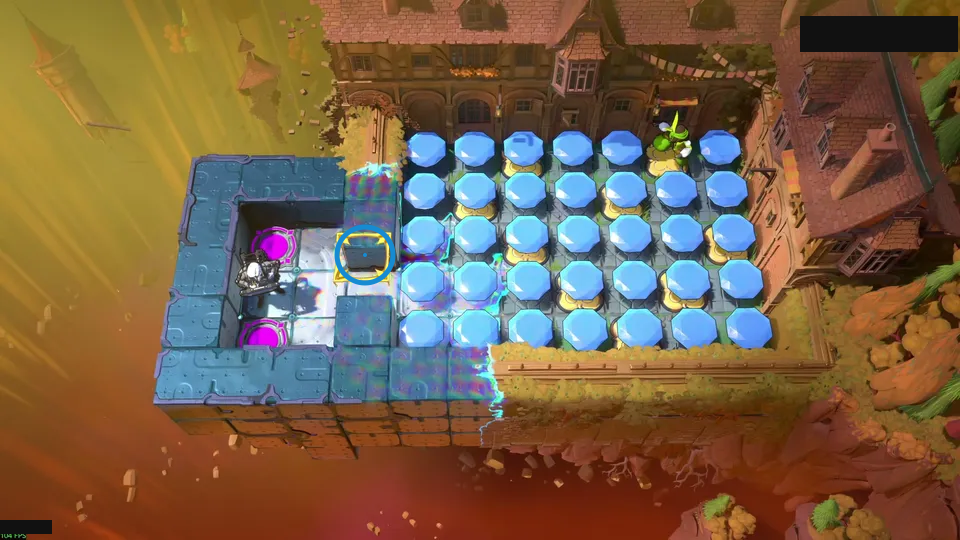
Leave the gems holding required buttons.
Check: Ring marks yellow outlined block beside the gem grid.
Open full-size image in a new tabPuzzle 37
Section titled “Puzzle 37”The ring marks a visible landmark, not an action step.
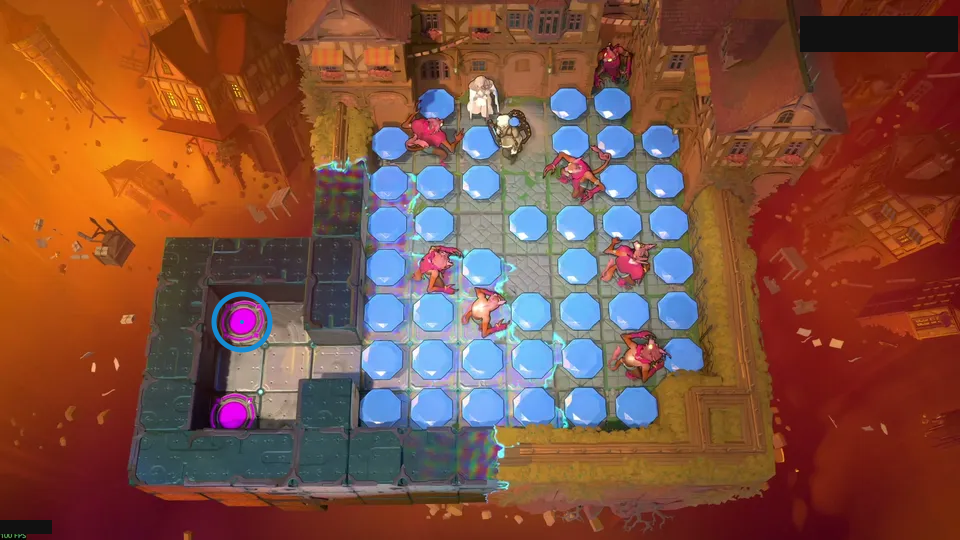
Keep the Priestess near the Explorer.
Check: Ring marks upper magenta pad on the left island.
Open full-size image in a new tabPuzzle 38
Section titled “Puzzle 38”The ring marks a visible landmark, not an action step.
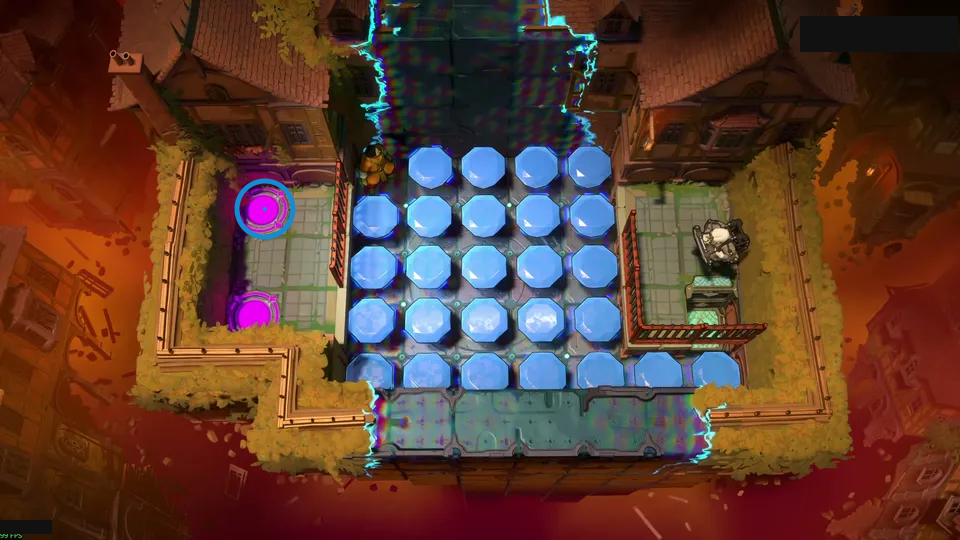
Carry Explorer left, then arrange gems.
Check: Ring marks upper magenta pad on the left island.
Open full-size image in a new tabPuzzle 39
Section titled “Puzzle 39”The ring marks a visible landmark, not an action step.
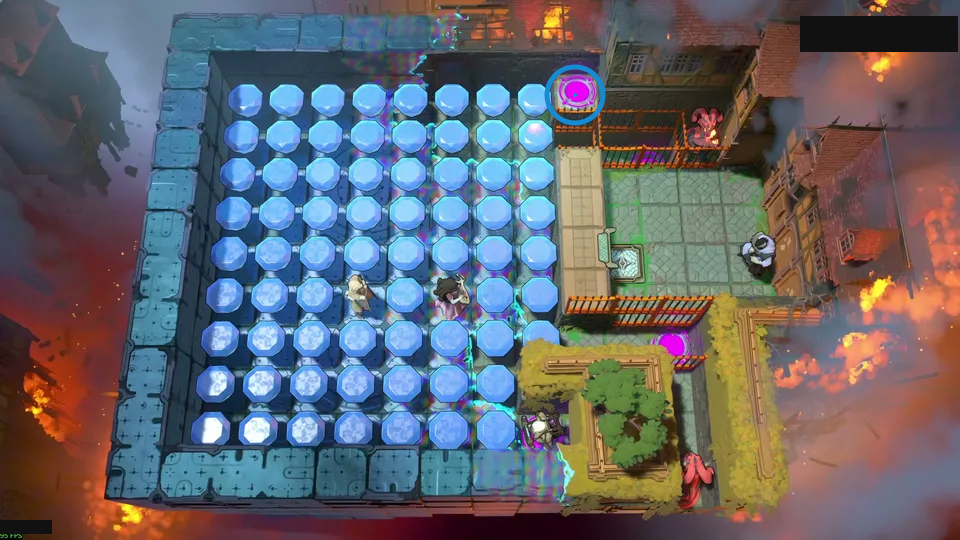
Keep the three paths from crossing.
Check: Ring marks magenta pad above the walkway.
Open full-size image in a new tabPuzzle 40
Section titled “Puzzle 40”The ring marks a visible landmark, not an action step.
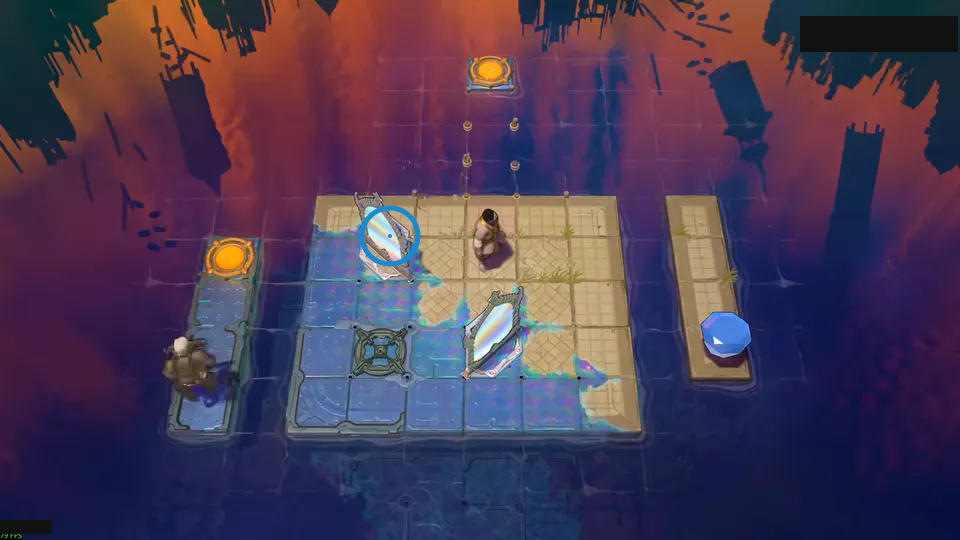
Reflect a gem-carrying Explorer.
Check: Ring marks upper angled mirror on the central platform.
Open full-size image in a new tabPuzzle 41
Section titled “Puzzle 41”The ring marks a visible landmark, not an action step.
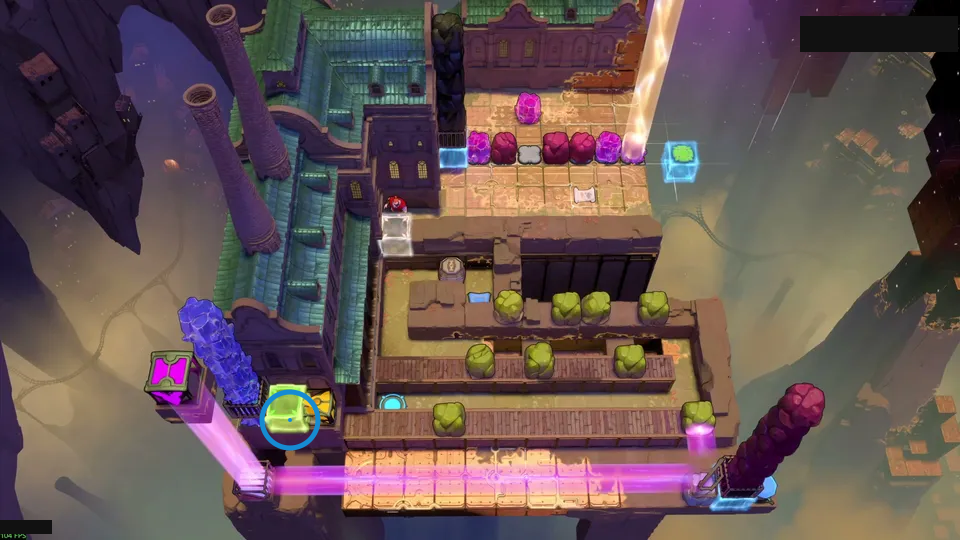
Match the top-row input to the output.
Check: Ring marks green outlined block at the lower-left edge.
Open full-size image in a new tabPuzzle 42
Section titled “Puzzle 42”The ring marks a visible landmark, not an action step.
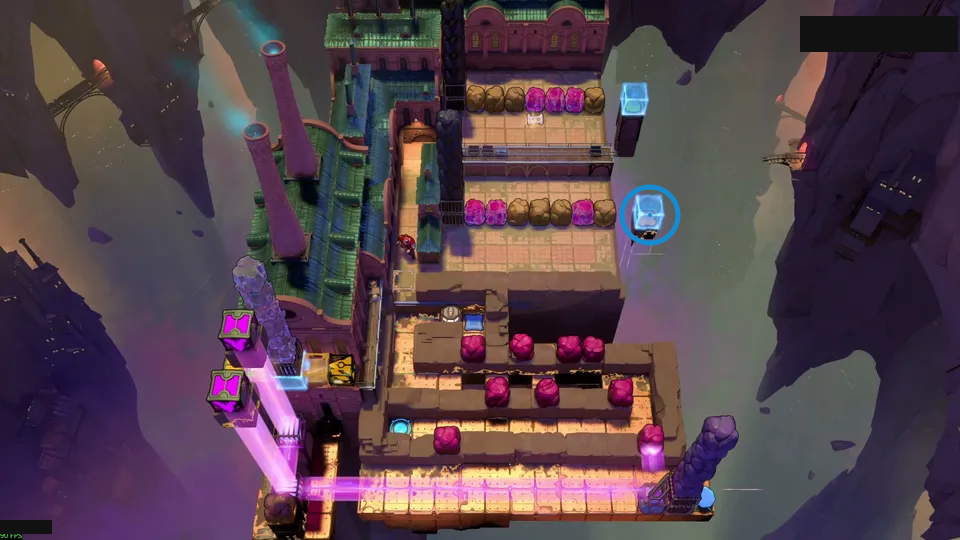
Use any input to light the output.
Check: Ring marks lower cyan result block on the right.
Open full-size image in a new tabPuzzle 43 — zachtronics_xor
Section titled “Puzzle 43 — zachtronics_xor”Source-reported hint: Avoid paired crystals in the same column.
Selected room detail.
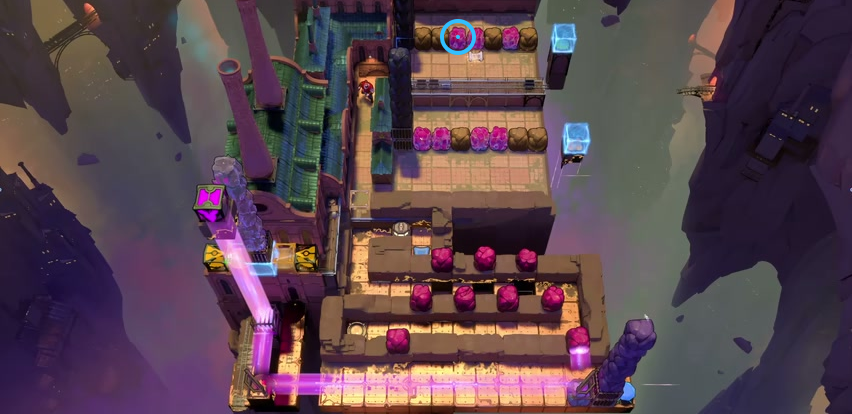
Find the pink crystal in the upper row.
Check: The blue ring marks the pink crystal in the upper row.
Open full-size image in a new tabPuzzle 44
Section titled “Puzzle 44”The ring marks a visible landmark, not an action step.
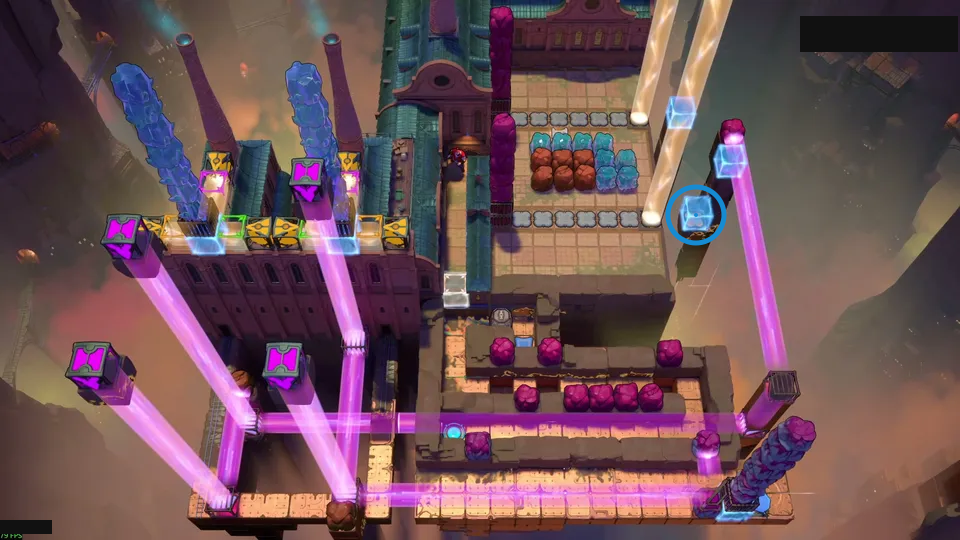
Set the crystal-and-stone binary inputs.
Check: Ring marks cyan block beside the beams.
Open full-size image in a new tabPuzzle 45
Section titled “Puzzle 45”The ring marks a visible landmark, not an action step.
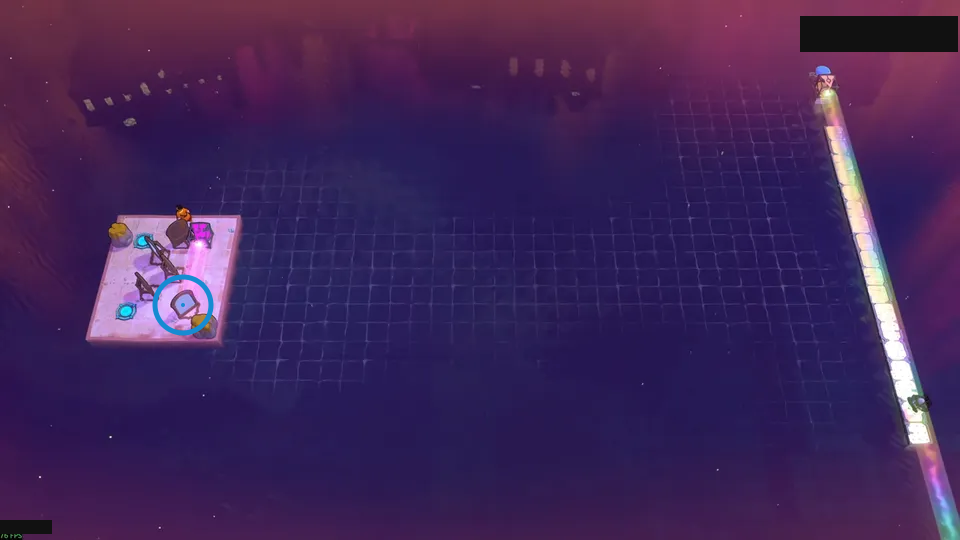
Route a long purple beam across.
Check: Ring marks pale mirror on the small platform.
Open full-size image in a new tabPuzzle 46
Section titled “Puzzle 46”The ring marks a visible landmark, not an action step.
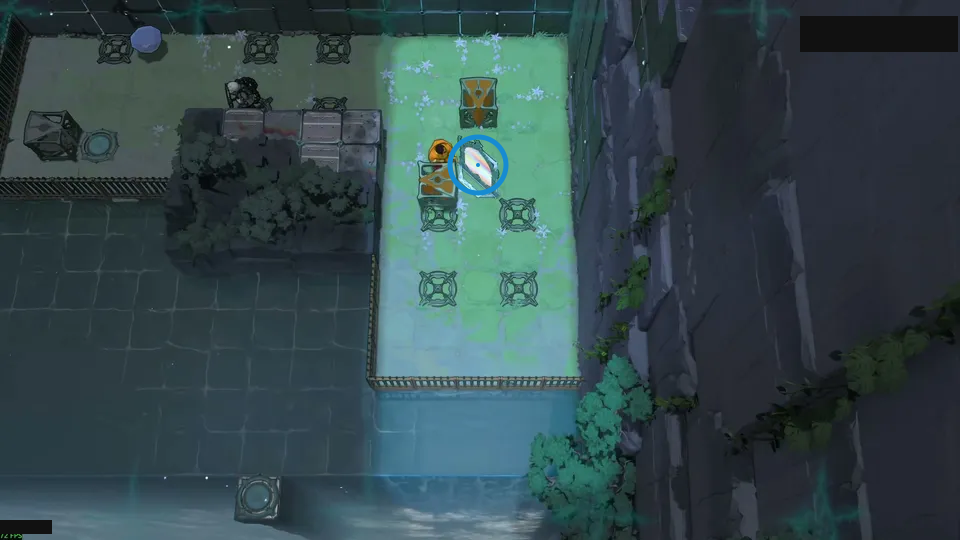
Use reflected white light to activate holders.
Check: Ring marks tilted mirror on the green platform.
Open full-size image in a new tabPuzzle 47 — boot_cycle_warrior
Section titled “Puzzle 47 — boot_cycle_warrior”Source-reported hint: Keep the white beam lit while moving.
Selected room detail.
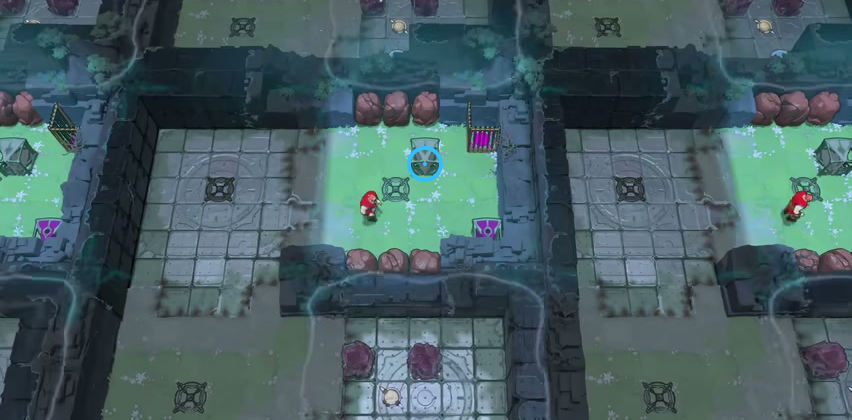
Find the cart above the central four-pronged tile.
Check: The blue ring marks the cart above the central four-pronged tile.
Open full-size image in a new tabPuzzle 48
Section titled “Puzzle 48”The ring marks a visible landmark, not an action step.
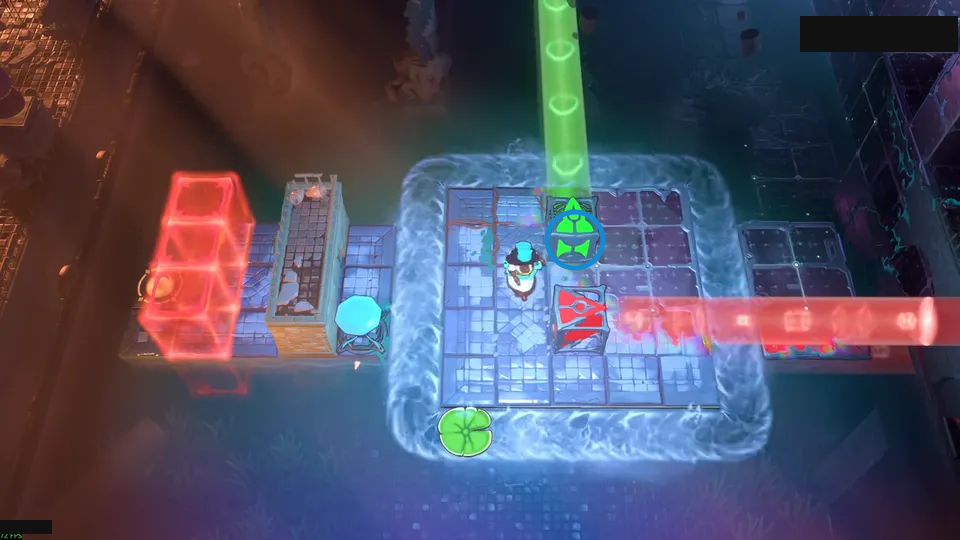
Account for clockwise turns in the current.
Check: Ring marks the green emitter above the current.
Open full-size image in a new tabPuzzle 49
Section titled “Puzzle 49”The ring marks a visible landmark, not an action step.
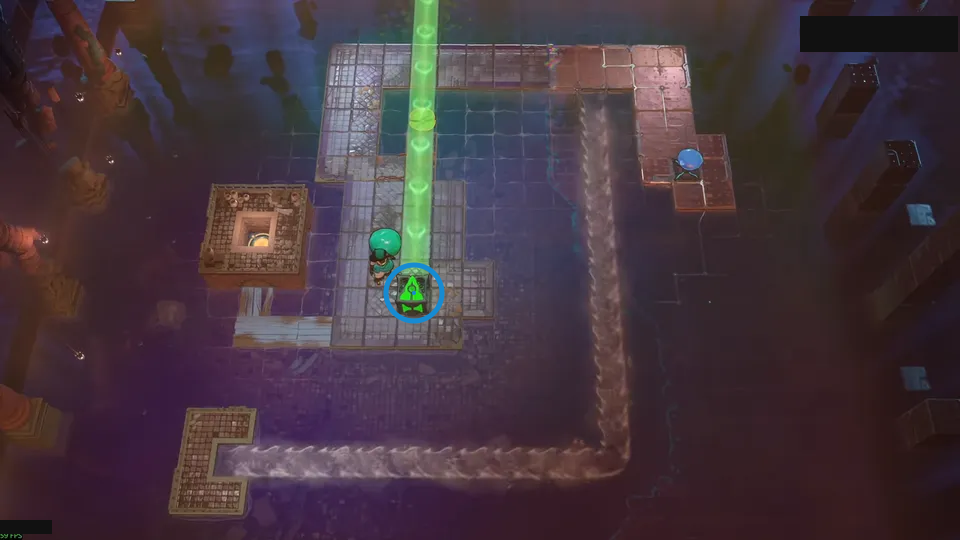
Keep both emitters off the current.
Check: Ring marks green emitter at the bottom of the channel.
Open full-size image in a new tabPuzzle 50
Section titled “Puzzle 50”The ring marks a visible landmark, not an action step.
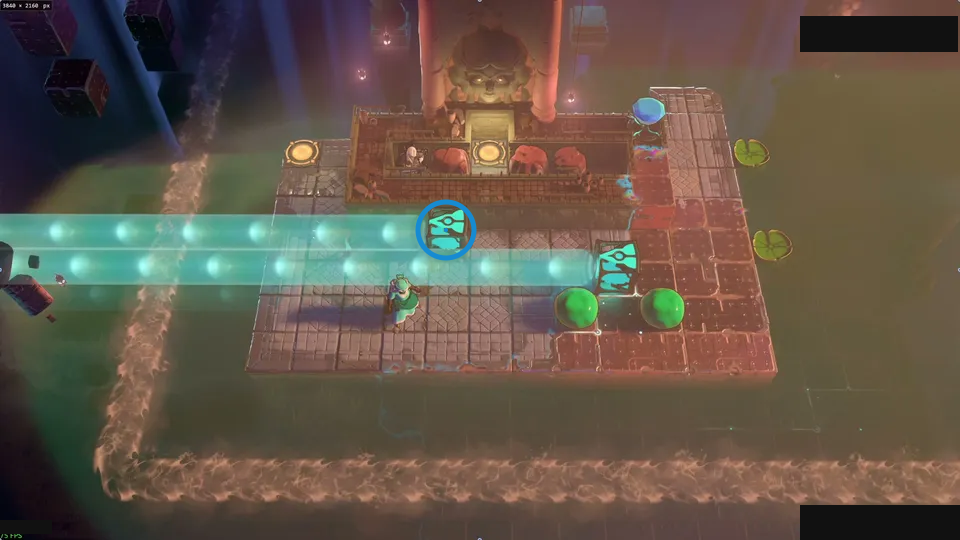
Time both lily pads fifteen tiles apart.
Check: Ring marks cyan emitter on the upper-left side.
Open full-size image in a new tabPuzzle 51
Section titled “Puzzle 51”The ring marks a visible landmark, not an action step.
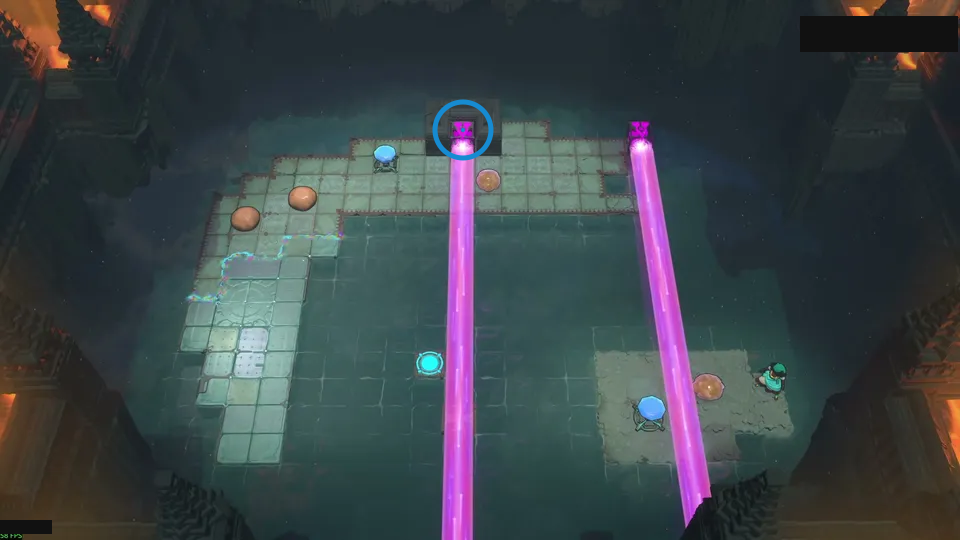
Keep the stone hovering at the endpoint.
Check: Ring marks left magenta emitter at the top.
Open full-size image in a new tabPuzzle 52
Section titled “Puzzle 52”The ring marks a visible landmark, not an action step.
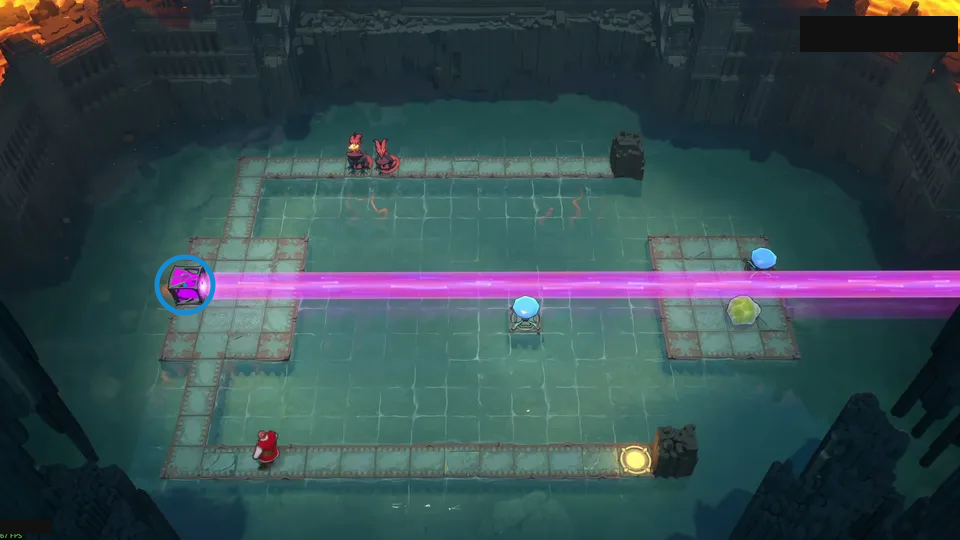
Use the gem and hovering stone as blockers.
Check: Ring marks magenta emitter on the left island.
Open full-size image in a new tabPuzzle 53
Section titled “Puzzle 53”The ring marks a visible landmark, not an action step.
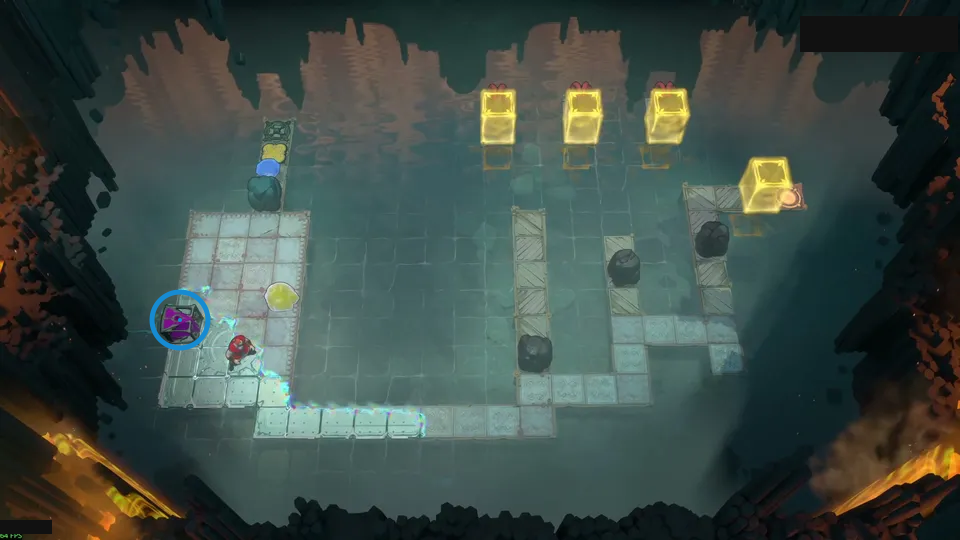
Make the purple activator its own endpoint.
Check: Ring marks the purple endpoint holder.
Open full-size image in a new tabPuzzle 54
Section titled “Puzzle 54”The ring marks a visible landmark, not an action step.
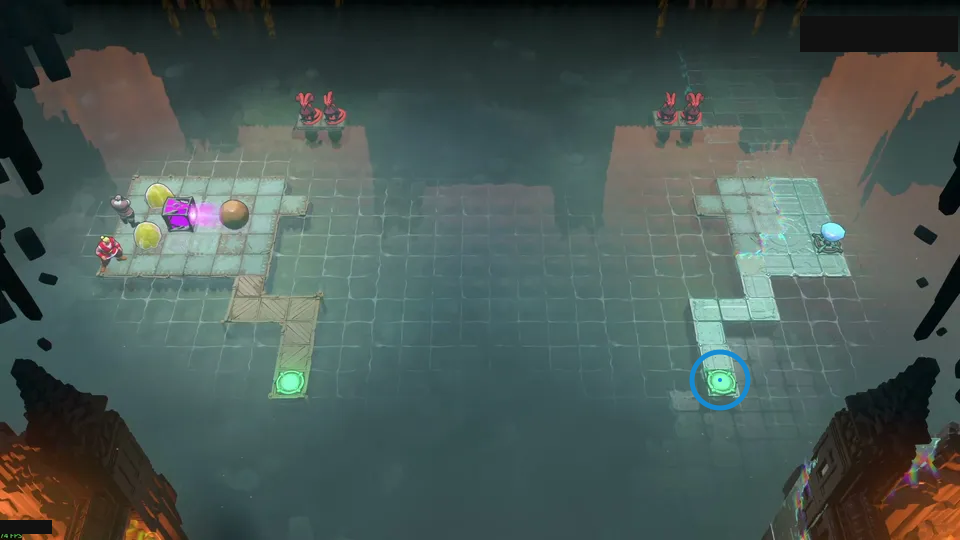
Hover two stones to block four dragons.
Check: Ring marks the green exit pad on the right island.
Open full-size image in a new tabPuzzle 55
Section titled “Puzzle 55”The ring marks a visible landmark, not an action step.
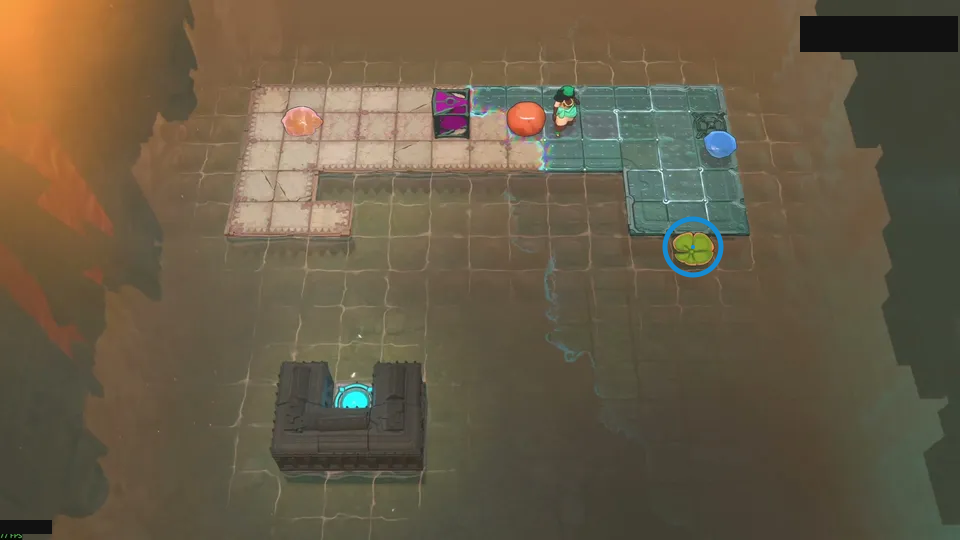
Use hovering stone to turn the pad.
Check: Ring marks green lily pad at the upper-right edge.
Open full-size image in a new tabPuzzle 56
Section titled “Puzzle 56”The ring marks a visible landmark, not an action step.
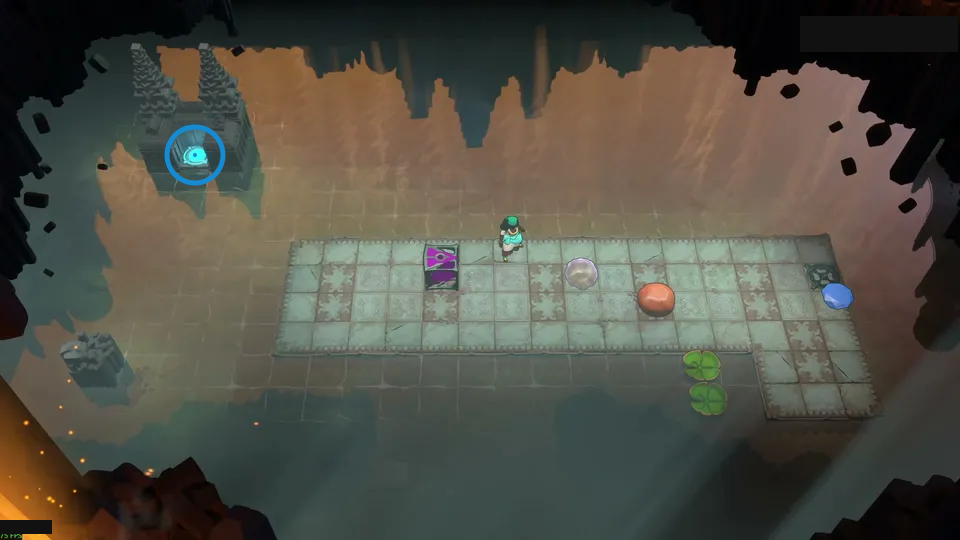
Nudge the lily pad with hovering stone.
Check: Ring marks cyan pad on the small left platform.
Open full-size image in a new tabPuzzle 57
Section titled “Puzzle 57”The ring marks a visible landmark, not an action step.
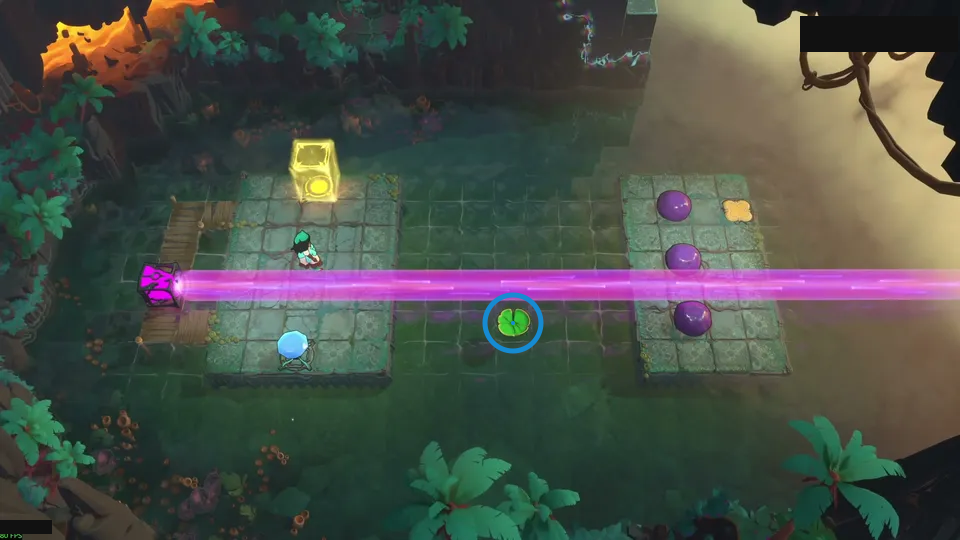
Create a new endpoint on the shore.
Check: Ring marks green lily pad between the islands.
Open full-size image in a new tabPuzzle 58
Section titled “Puzzle 58”The ring marks a visible landmark, not an action step.
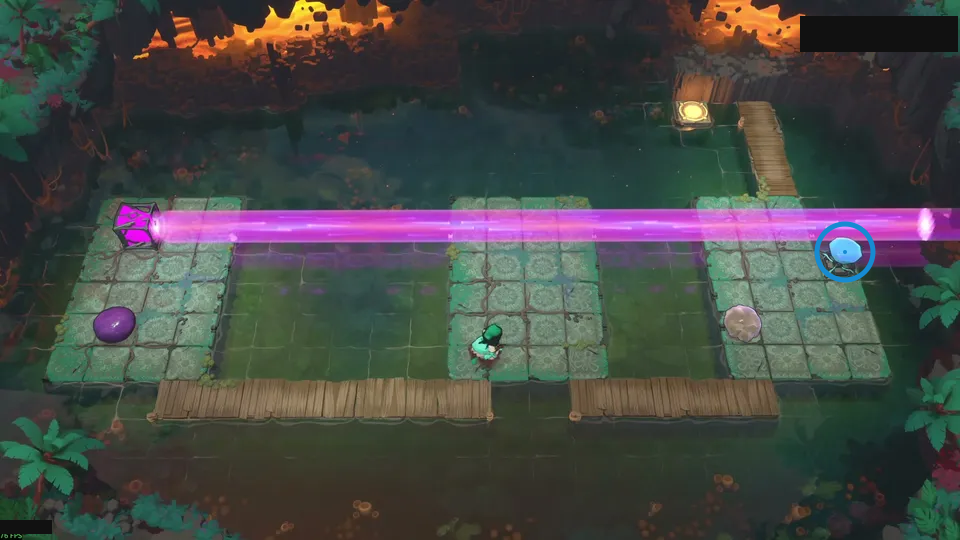
Use the plain stone as endpoint.
Check: Ring marks blue gem on the right platform.
Open full-size image in a new tabPuzzle 59
Section titled “Puzzle 59”The ring marks a visible landmark, not an action step.
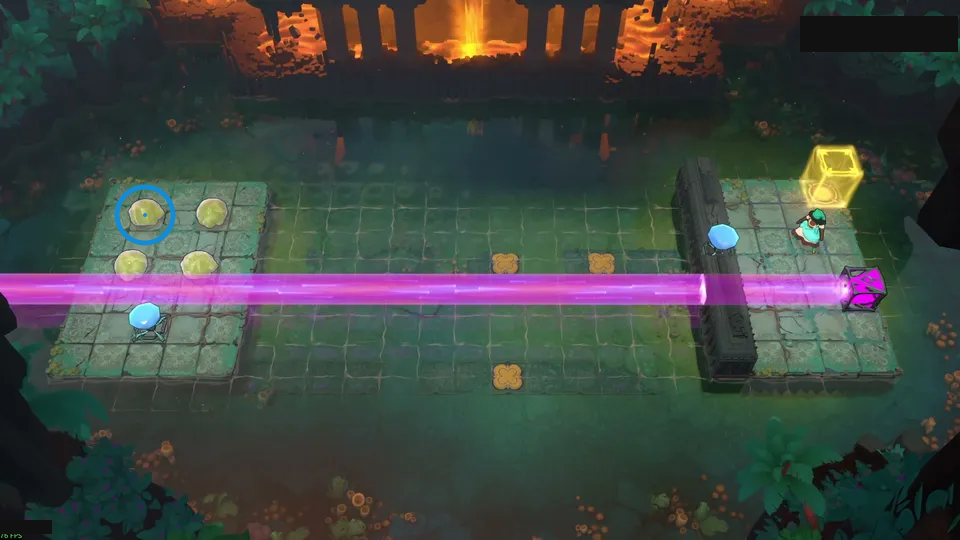
Use one extra stone as blocker.
Check: Ring marks upper-left golden skipping stone.
Open full-size image in a new tabPuzzle 60
Section titled “Puzzle 60”The ring marks a visible landmark, not an action step.
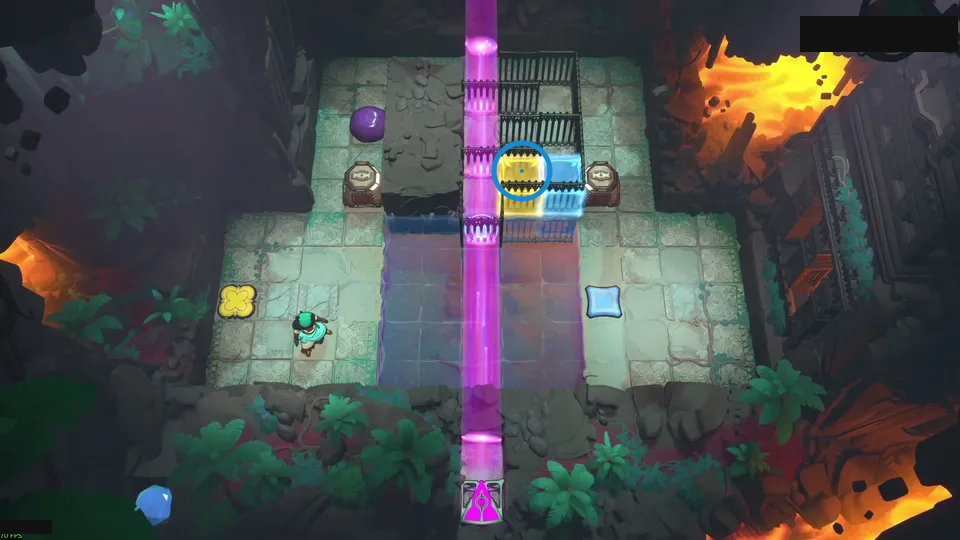
Hold yellow and blue buttons together.
Check: Ring marks yellow block beside the upper blue block.
Open full-size image in a new tabPuzzle 61
Section titled “Puzzle 61”The ring marks a visible landmark, not an action step.
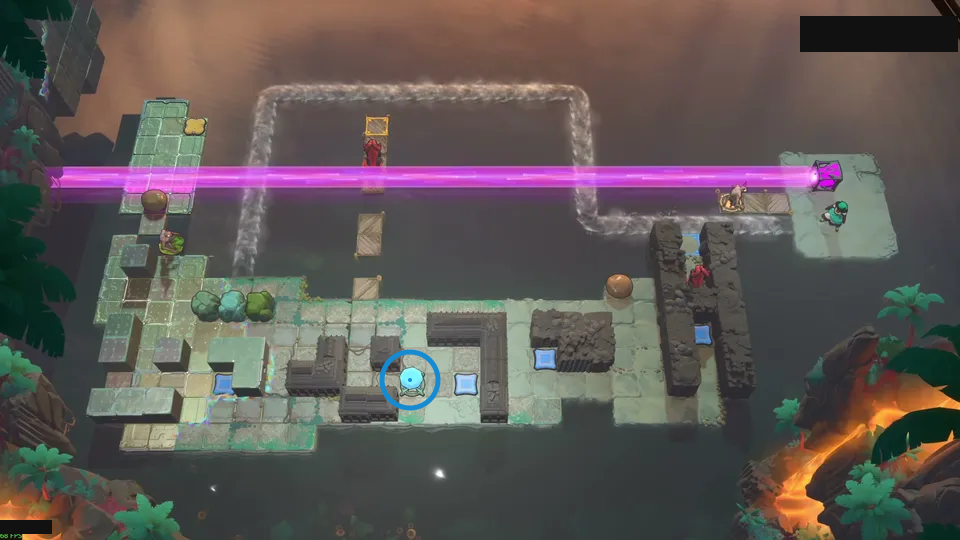
Spend spare stones to buy time.
Check: Ring marks cyan pad beside the lower wall.
Open full-size image in a new tabPuzzle 62
Section titled “Puzzle 62”The ring marks a visible landmark, not an action step.
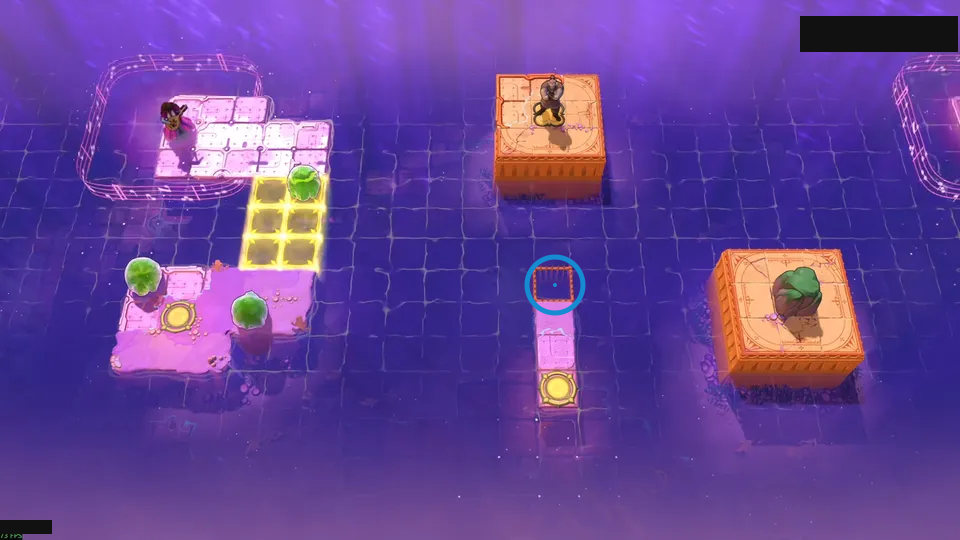
Build a bridge from skimming stones.
Check: Ring marks framed pit on the narrow pier.
Open full-size image in a new tabPuzzle 63
Section titled “Puzzle 63”The ring marks a visible landmark, not an action step.
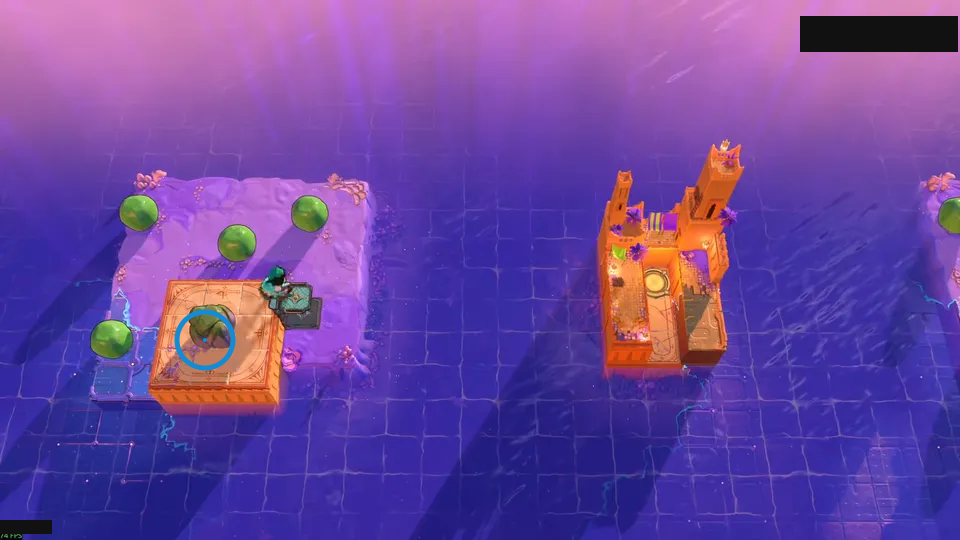
Build a two-by-two skimming platform.
Check: Ring marks large green stone on the left island.
Open full-size image in a new tabPuzzle 64
Section titled “Puzzle 64”The ring marks a visible landmark, not an action step.
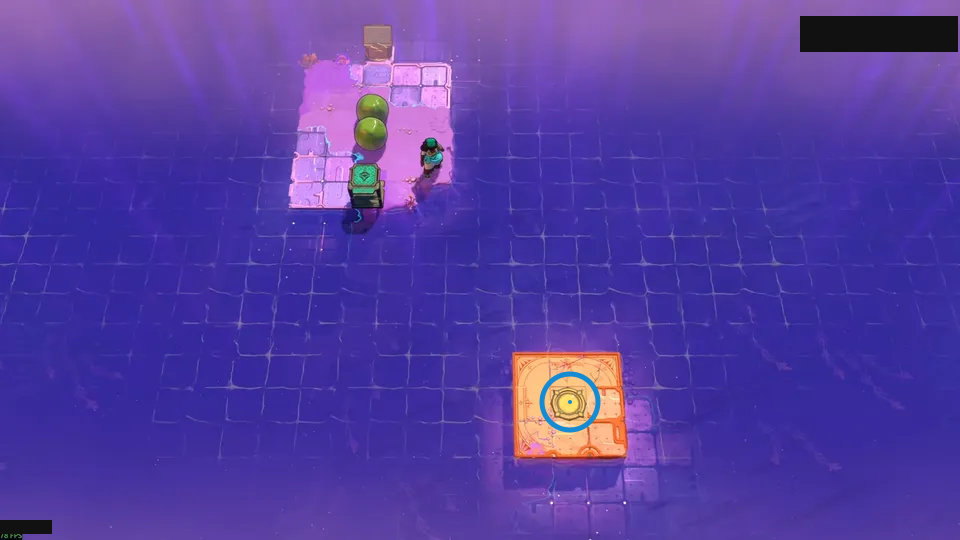
Use the co-prime world dimensions.
Check: Ring marks yellow pad on the orange platform.
Open full-size image in a new tabPuzzle 65
Section titled “Puzzle 65”The ring marks a visible landmark, not an action step.
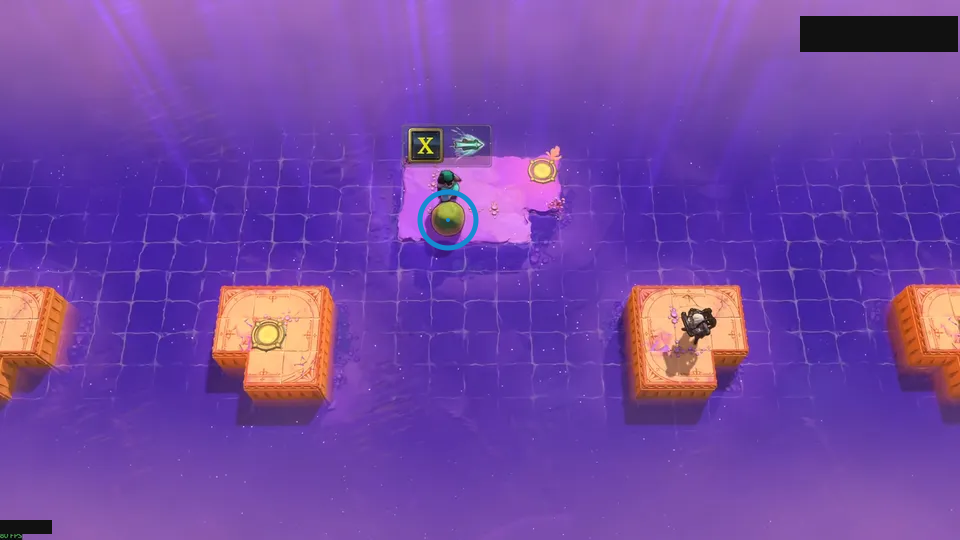
Build a short bridge for Explorer.
Check: Ring marks green skipping stone on the pink island.
Open full-size image in a new tabPuzzle 66
Section titled “Puzzle 66”The ring marks a visible landmark, not an action step.
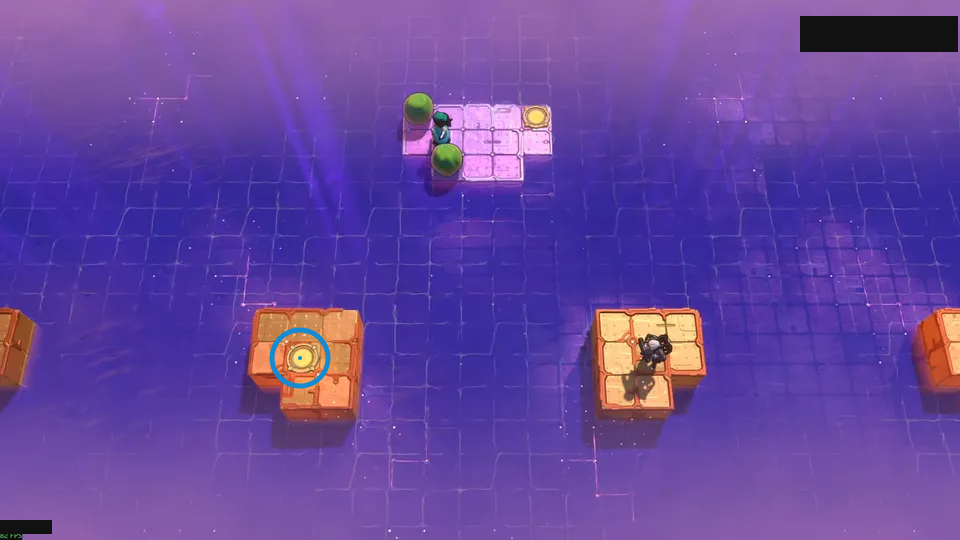
Cross on the Sailor’s head.
Check: Ring marks yellow pad on the lower platform.
Open full-size image in a new tabPuzzle 67
Section titled “Puzzle 67”The ring marks a visible landmark, not an action step.
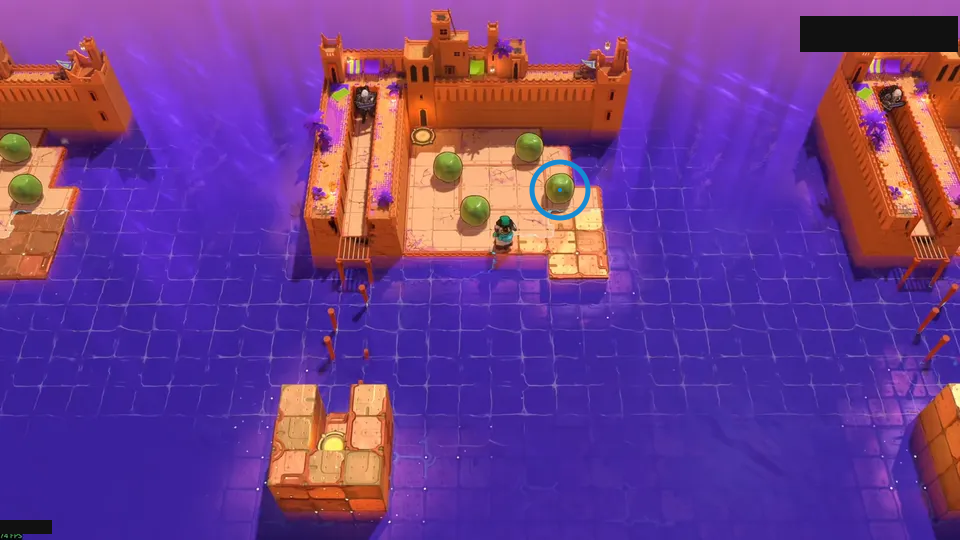
Keep four skimming stones in step.
Check: Ring marks green skipping stone on the fortress island.
Open full-size image in a new tabPuzzle 68 — ortho3
Section titled “Puzzle 68 — ortho3”Source-reported hint: Use the clockwise beam to change levels.
Selected room detail.
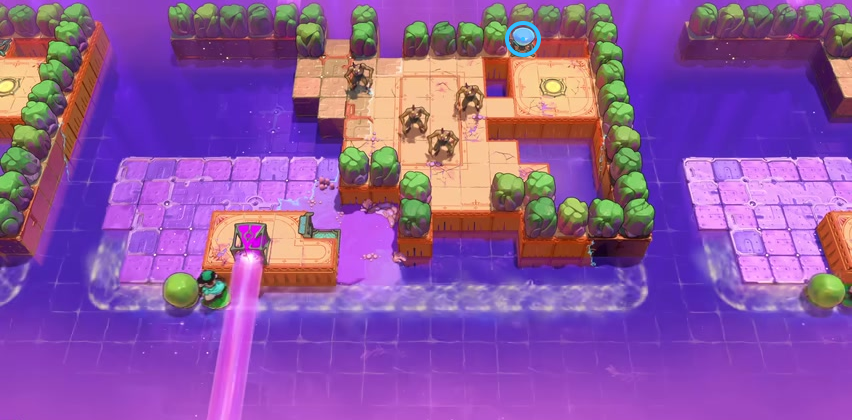
Find the blue gem above the raised exit platform.
Check: The blue ring marks the blue gem above the raised exit platform.
Open full-size image in a new tabPuzzle 69
Section titled “Puzzle 69”The ring marks a visible landmark, not an action step.
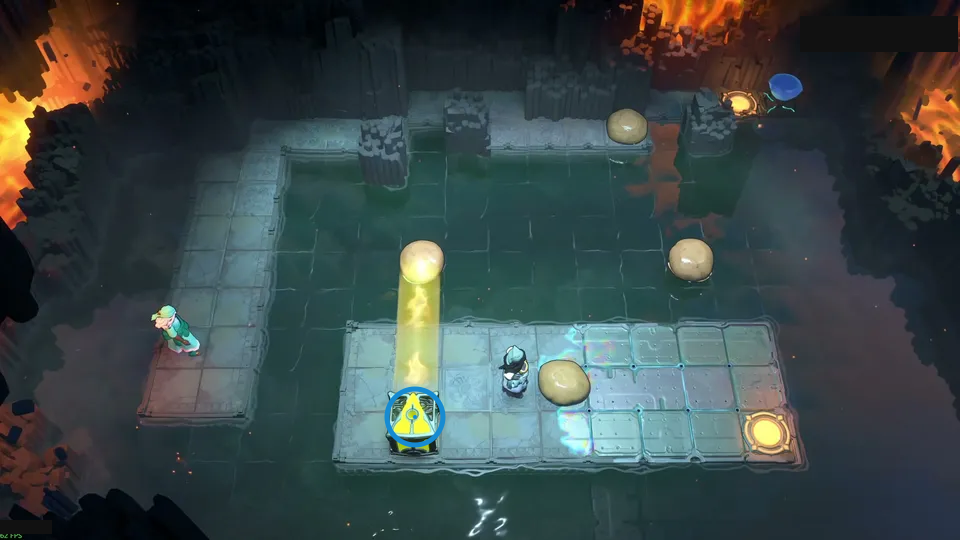
Launch the pad, then break the stone.
Check: Ring marks yellow emitter at the lower edge.
Open full-size image in a new tabPuzzle 70
Section titled “Puzzle 70”The ring marks a visible landmark, not an action step.
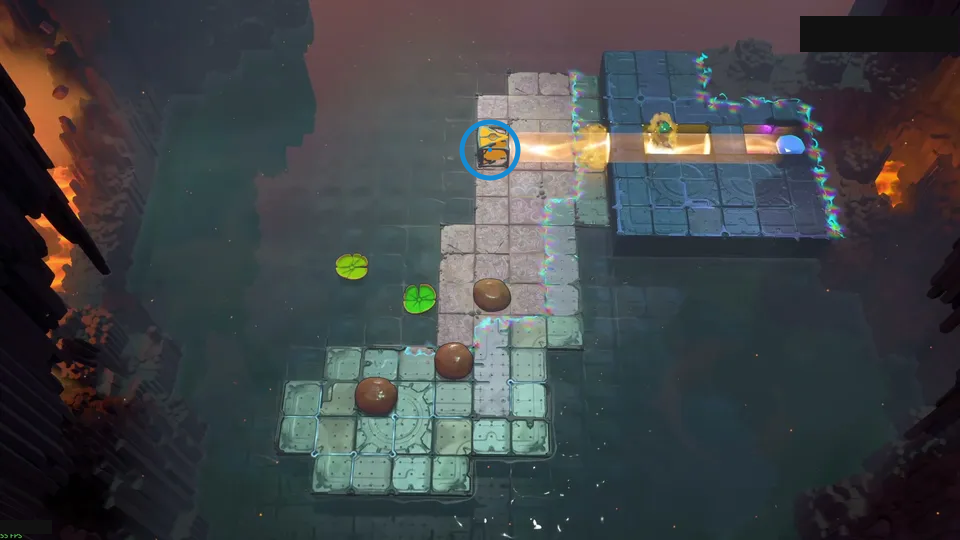
Let the lily pad interrupt the orange beam.
Check: Ring marks yellow emitter at the upper-left turn.
Open full-size image in a new tabPuzzle 71 — chain_reaction
Section titled “Puzzle 71 — chain_reaction”Source-reported hint: Let orange light launch stones from pads.
Selected room detail.
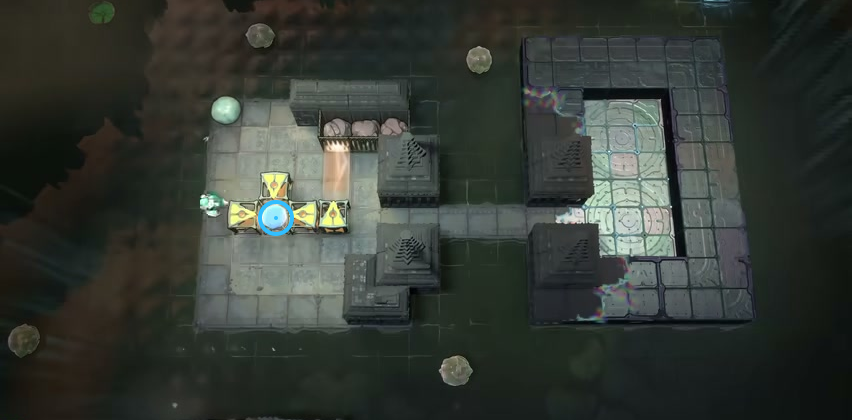
Find the blue gem between the yellow beamcasters.
Check: The blue ring marks the blue gem between the yellow beamcasters.
Open full-size image in a new tabPuzzle 72
Section titled “Puzzle 72”The ring marks a visible landmark, not an action step.
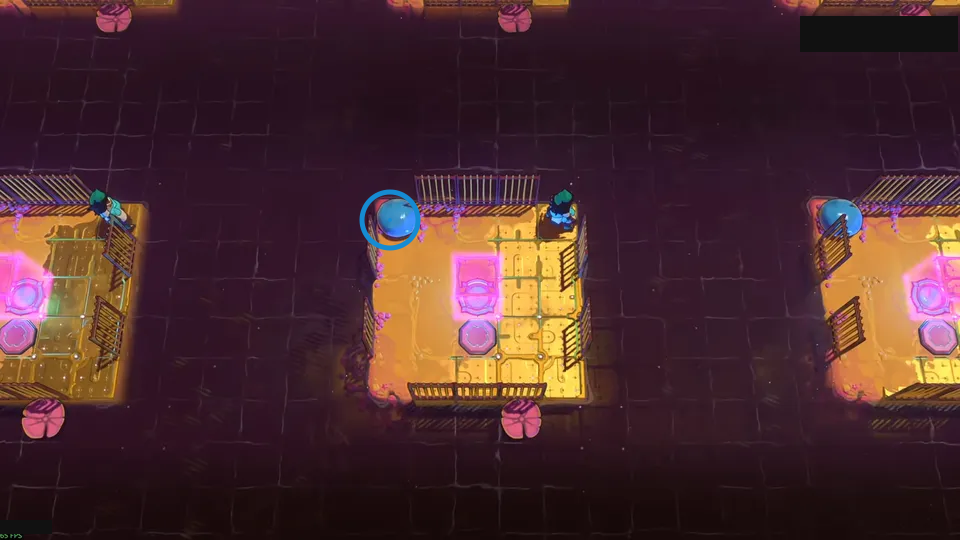
Work with the room’s wraparound.
Check: Ring marks blue stone on the central island.
Open full-size image in a new tabPuzzle 73 — wrap_music
Section titled “Puzzle 73 — wrap_music”Source-reported hint: Surround  Bard with skimming stones.
Selected room detail.
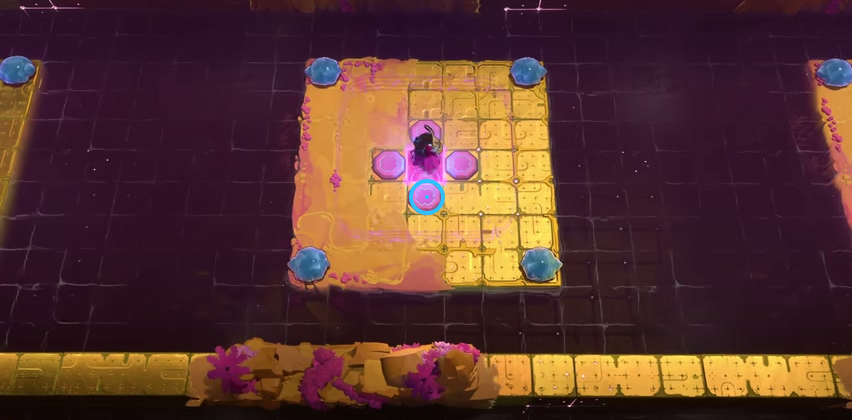
Find the lower purple button in the cross.
Check: The blue ring marks the lower purple button in the cross.
Open full-size image in a new tabPuzzle 74 — wrap_music_2
Section titled “Puzzle 74 — wrap_music_2”Source-reported hint: Let the current carry the row left.
Selected room detail.
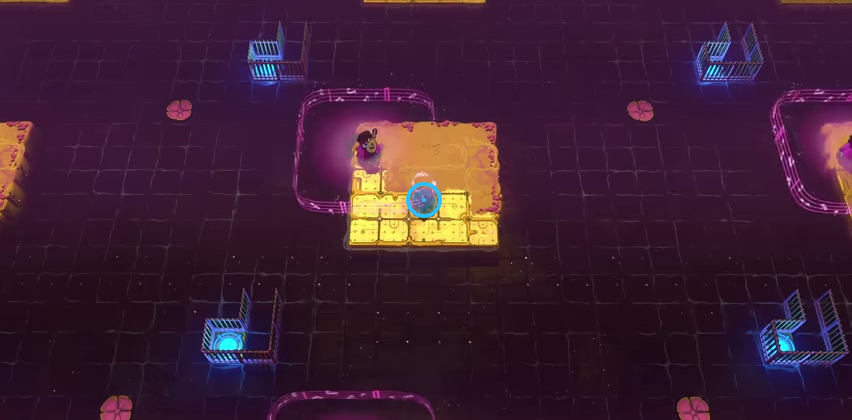
Find the blue stone on the central island.
Check: The blue ring marks the blue stone on the central island.
Open full-size image in a new tabPuzzle 75
Section titled “Puzzle 75”The ring marks a visible landmark, not an action step.
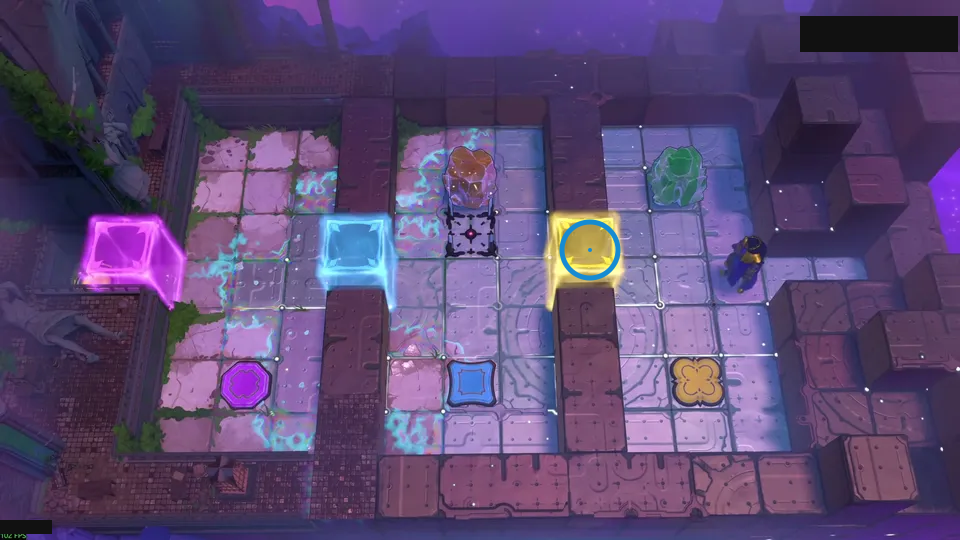
Use the Queen’s local reset point.
Check: Ring marks yellow energy block between the walls.
Open full-size image in a new tabPuzzle 76 — reset_mirror
Section titled “Puzzle 76 — reset_mirror”Source-reported hint: Set mirror to reach the left exit.
Selected room detail.
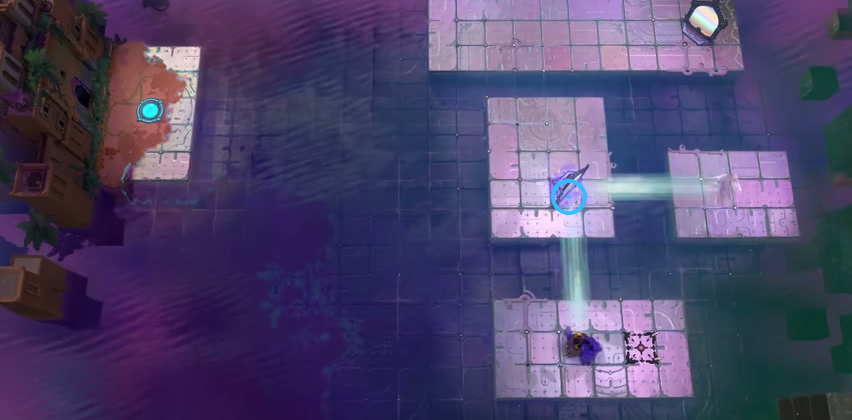
Find the small mirror at the beam crossing.
Check: The blue ring marks the small mirror at the beam crossing.
Open full-size image in a new tabPuzzle 77
Section titled “Puzzle 77”The ring marks a visible landmark, not an action step.
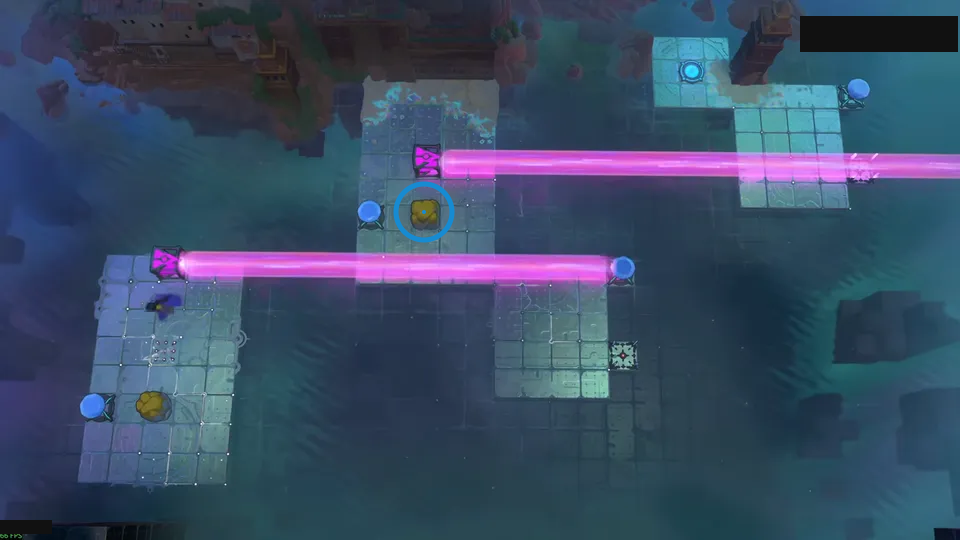
Reset a platform stone, not the beam.
Check: Ring marks yellow stone between the two beams.
Open full-size image in a new tabPuzzle 78
Section titled “Puzzle 78”The ring marks a visible landmark, not an action step.
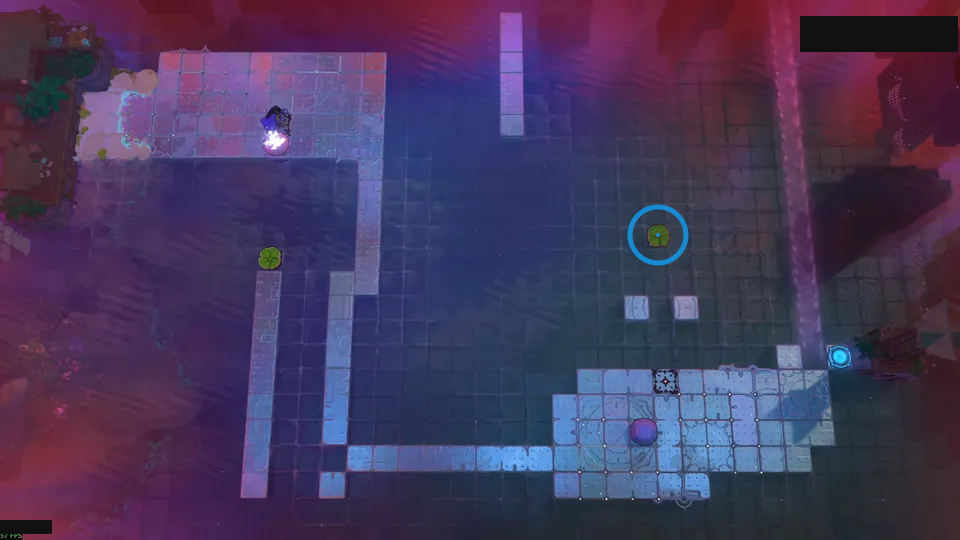
Guide the lily pad into the slot.
Check: Ring marks green lily pad in the outlined loop.
Open full-size image in a new tabPuzzle 79
Section titled “Puzzle 79”The ring marks a visible landmark, not an action step.
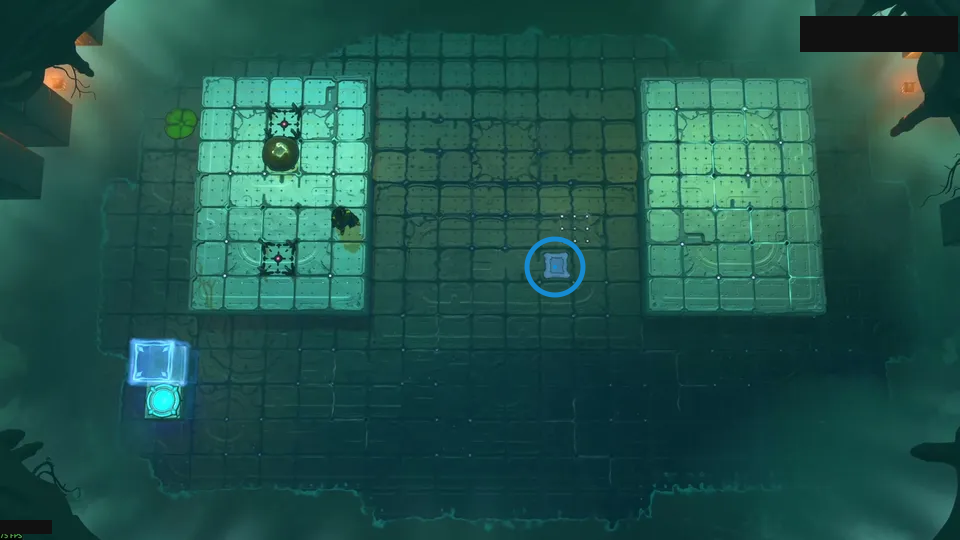
Catch the dropped button on a stone.
Check: Ring marks small blue button on the lower platform.
Open full-size image in a new tabPuzzle 80
Section titled “Puzzle 80”The ring marks a visible landmark, not an action step.
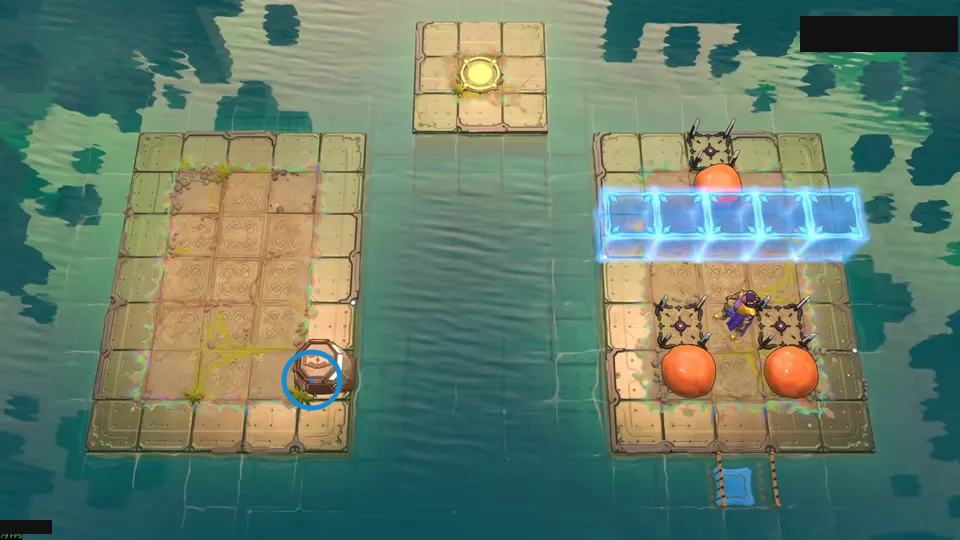
Use cart before stacking stones.
Check: Ring marks cart at the lower edge of the left platform.
Open full-size image in a new tabPuzzle 81
Section titled “Puzzle 81”The ring marks a visible landmark, not an action step.
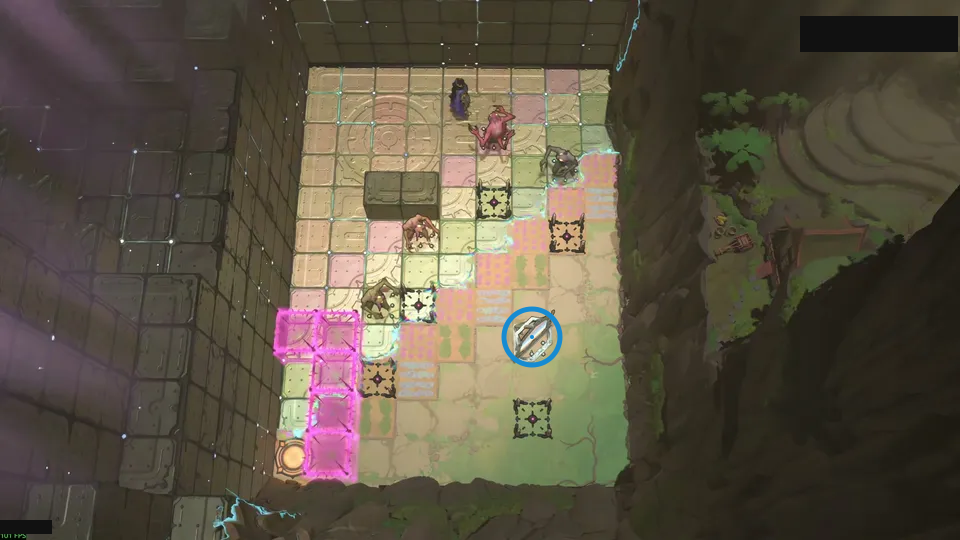
Reset each goblin separately.
Check: Ring marks mirror on the right side of the room.
Open full-size image in a new tabPuzzle 82
Section titled “Puzzle 82”The ring marks a visible landmark, not an action step.
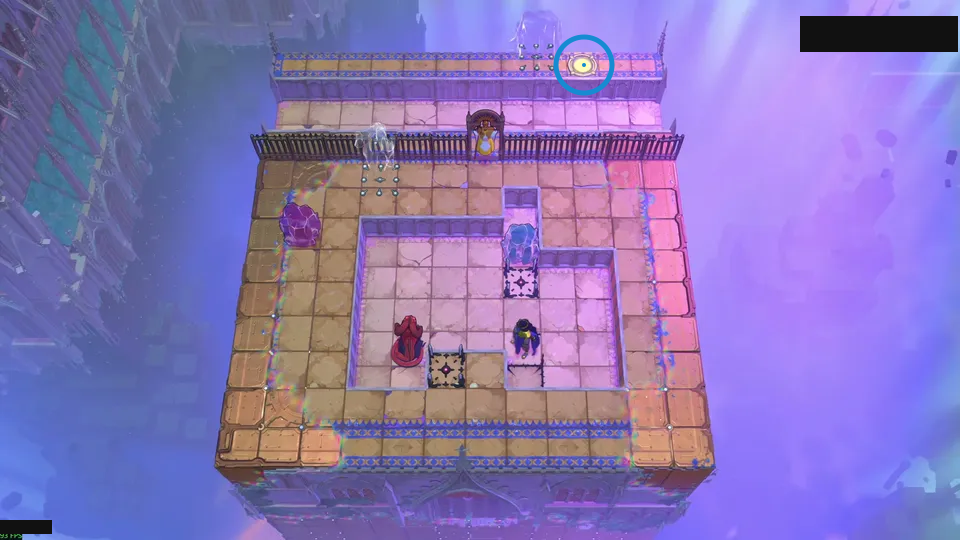
Raise the dragon to cross the pit.
Check: Ring marks yellow pad on the raised walkway.
Open full-size image in a new tabPuzzle 83
Section titled “Puzzle 83”The ring marks a visible landmark, not an action step.
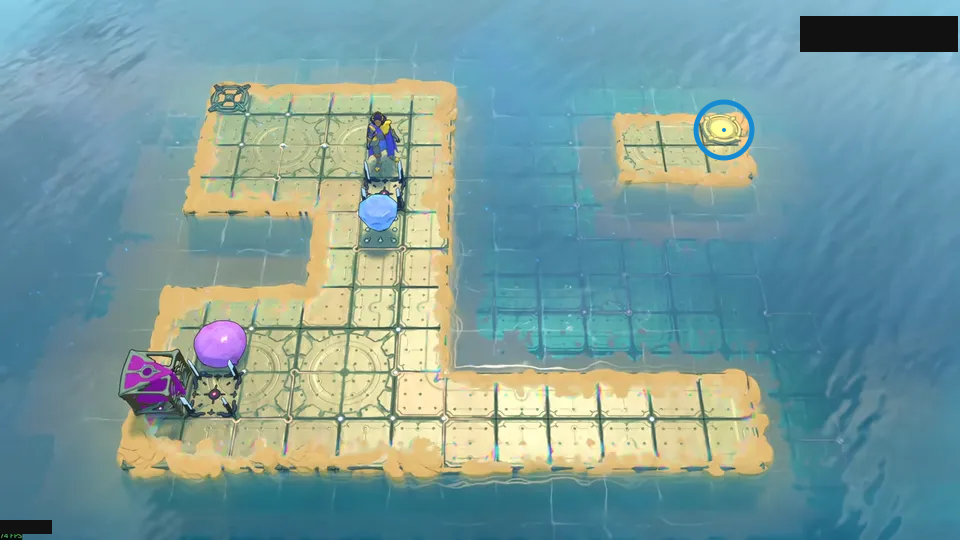
Block the emitter’s reset spot first.
Check: Ring marks yellow pad on the small island.
Open full-size image in a new tabPuzzle 84 — duality_condensed
Section titled “Puzzle 84 — duality_condensed”Source-reported hint: Treat each copy as a different puzzle.
Selected room detail.
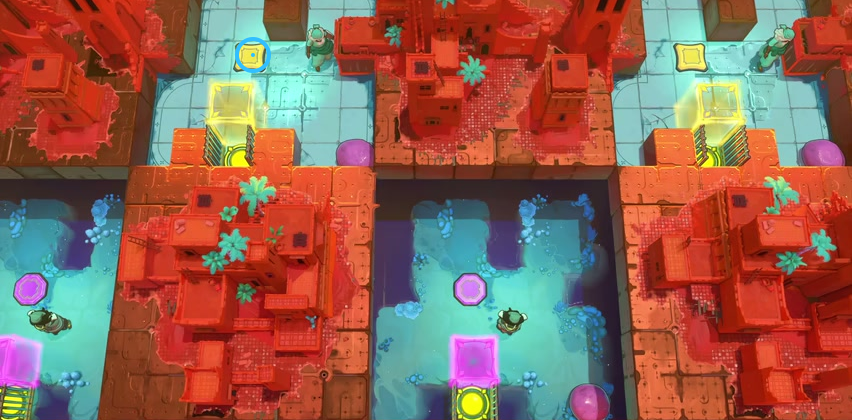
Find the yellow button above the yellow gate.
Check: The blue ring marks the yellow button above the yellow gate.
Open full-size image in a new tabPuzzle 85 — duality_2
Section titled “Puzzle 85 — duality_2”Source-reported hint: Find a separate solution for each copy.
Selected room detail.
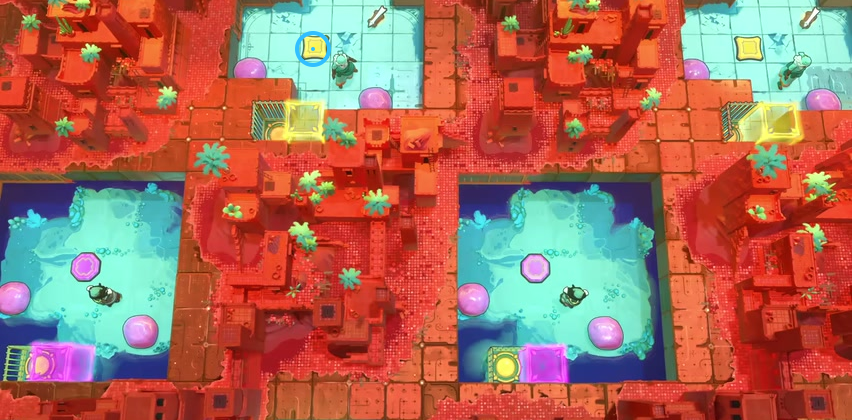
Find the yellow button in the upper room.
Check: The blue ring marks the yellow button in the upper room.
Open full-size image in a new tabPuzzle 86
Section titled “Puzzle 86”The ring marks a visible landmark, not an action step.
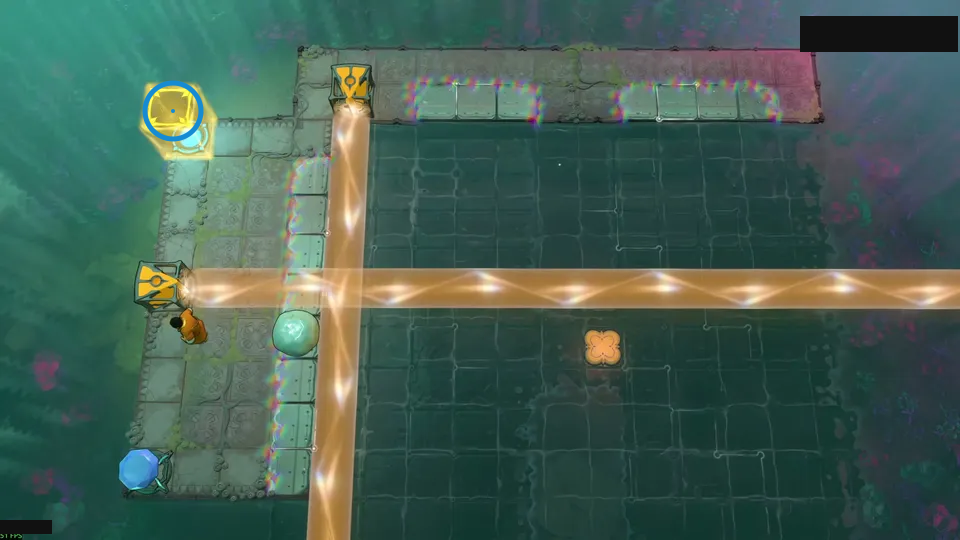
Use a four-tile jump to block the stone.
Check: Ring marks yellow cube at the upper-left bend.
Open full-size image in a new tabPuzzle 87
Section titled “Puzzle 87”The ring marks a visible landmark, not an action step.
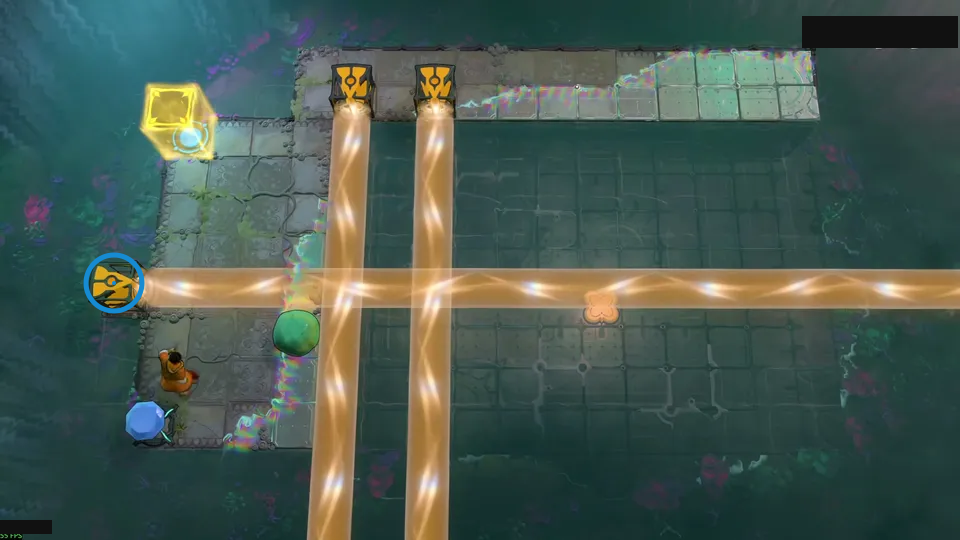
Cross beams for a four-tile shortcut.
Check: Ring marks orange emitter at the left edge.
Open full-size image in a new tabPuzzle 88
Section titled “Puzzle 88”The ring marks a visible landmark, not an action step.
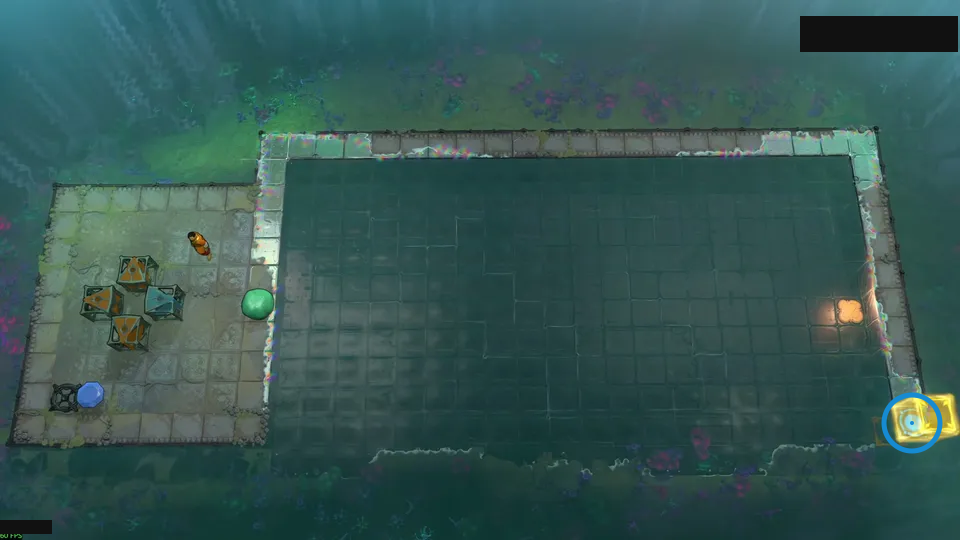
Use multicolored light at the crossing.
Check: Ring marks cyan pad at the lower-right corner.
Open full-size image in a new tabPuzzle 89
Section titled “Puzzle 89”The ring marks a visible landmark, not an action step.
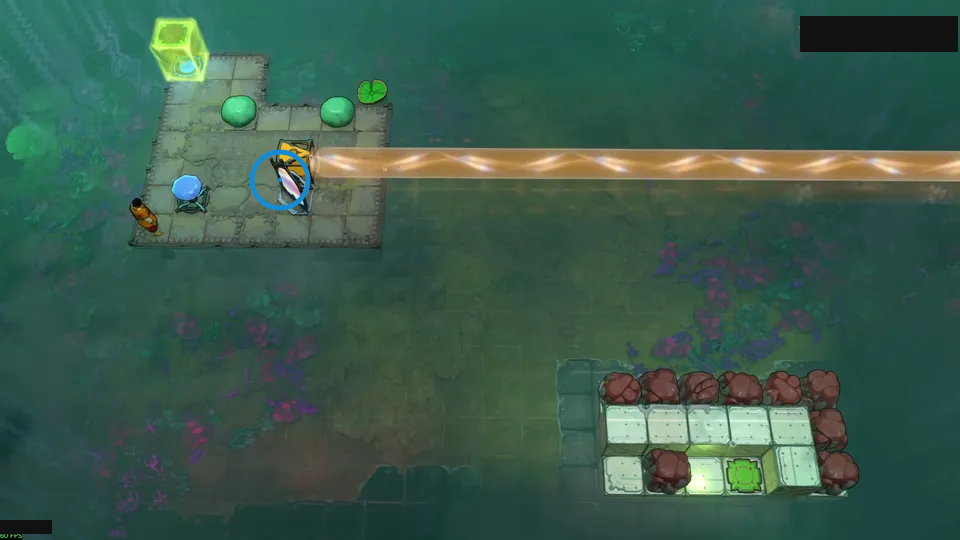
Hold the mirror’s lily pad in place.
Check: Ring marks the mirror near the upper-left terrace.
Open full-size image in a new tabPuzzle 90
Section titled “Puzzle 90”The ring marks a visible landmark, not an action step.
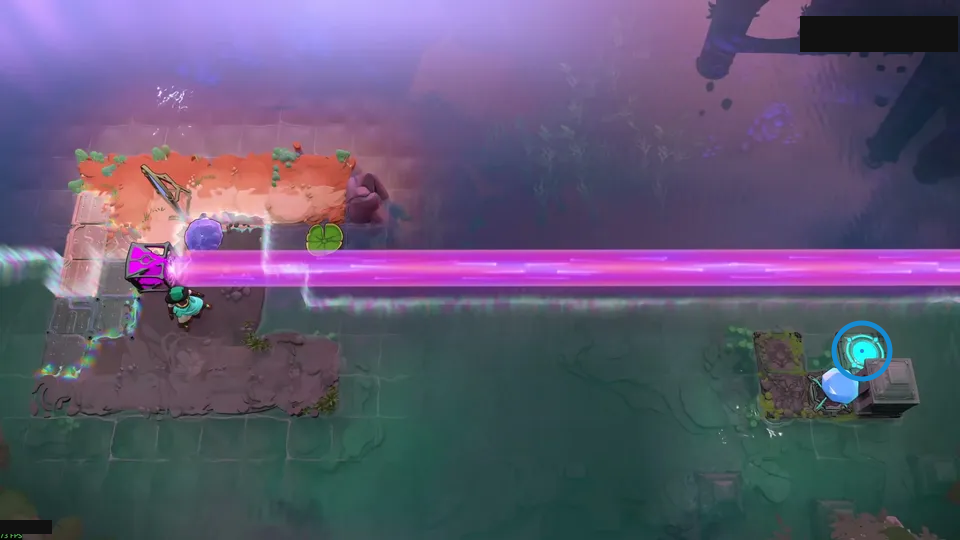
Time the crystal stone’s endpoint teleport.
Check: Ring marks cyan pad on the small right island.
Open full-size image in a new tabPuzzle 91
Section titled “Puzzle 91”The ring marks a visible landmark, not an action step.
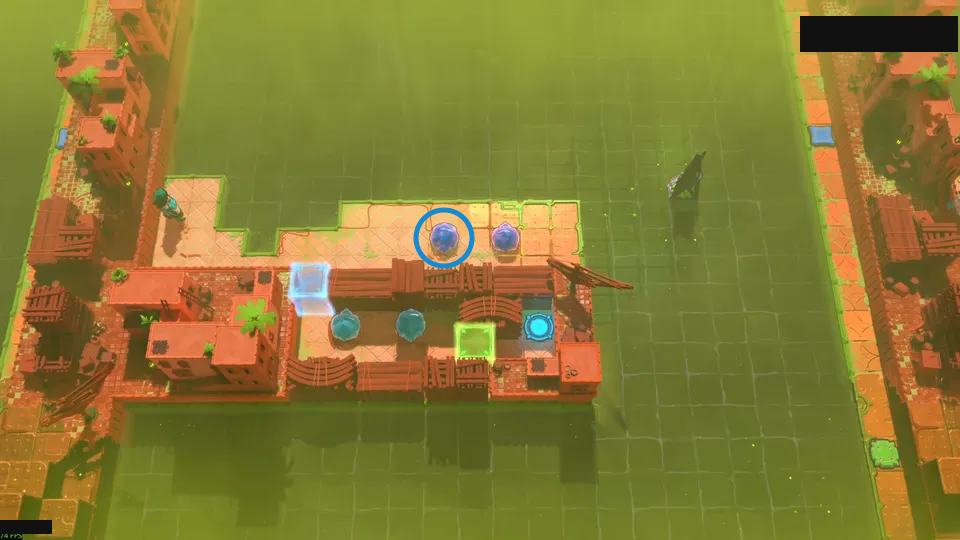
Press blue before green.
Check: Ring marks left blue stone on the upper walkway.
Open full-size image in a new tabPuzzle 92
Section titled “Puzzle 92”The ring marks a visible landmark, not an action step.
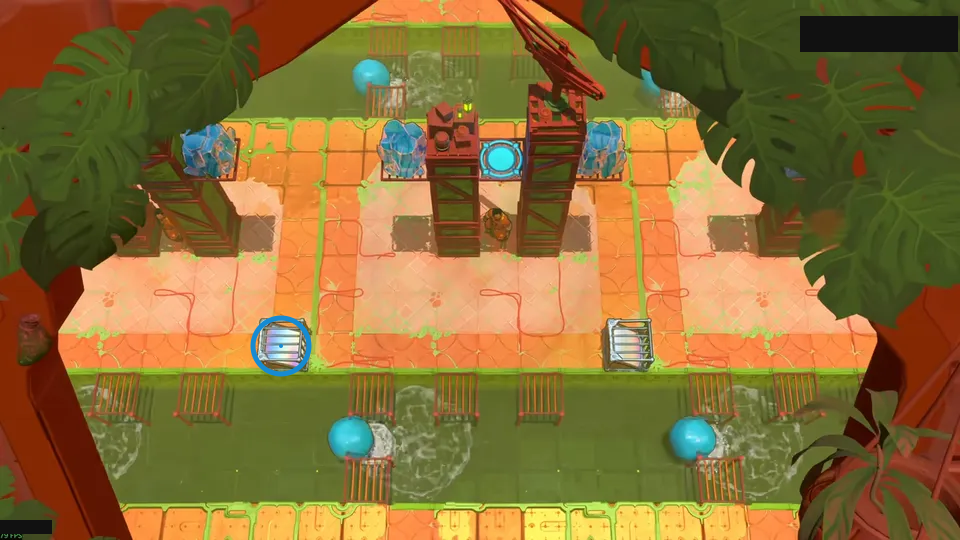
Turn the mirror through a wraparound.
Check: Ring marks left striped panel in the courtyard.
Open full-size image in a new tabPuzzle 93 — yars_revenge_setup_v3
Section titled “Puzzle 93 — yars_revenge_setup_v3”Source-reported hint: Let the current sweep the goblin away.
Selected room detail.
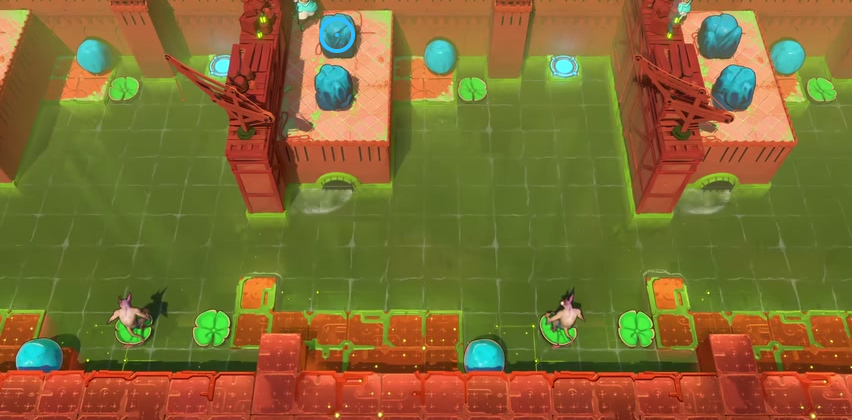
Find the upper blue stone on the raised platform.
Check: The blue ring marks the upper blue stone on the raised platform.
Open full-size image in a new tabPuzzle 94
Section titled “Puzzle 94”The ring marks a visible landmark, not an action step.
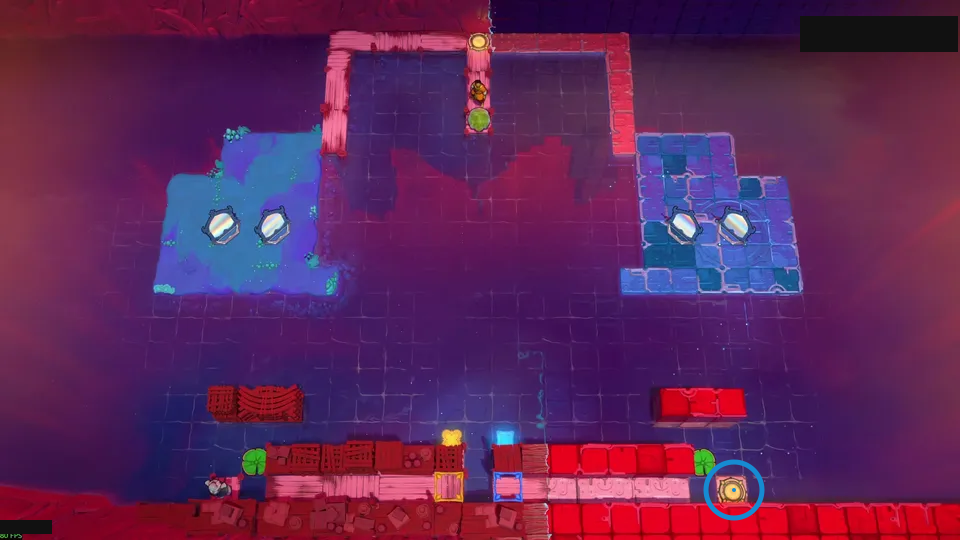
Keep the yellow and blue buttons clear.
Check: Ring marks yellow pad at the lower-right edge.
Open full-size image in a new tabPuzzle 95
Section titled “Puzzle 95”This article still has no approved candidate assignment.
Puzzle 96
Section titled “Puzzle 96”The ring marks a visible landmark, not an action step.
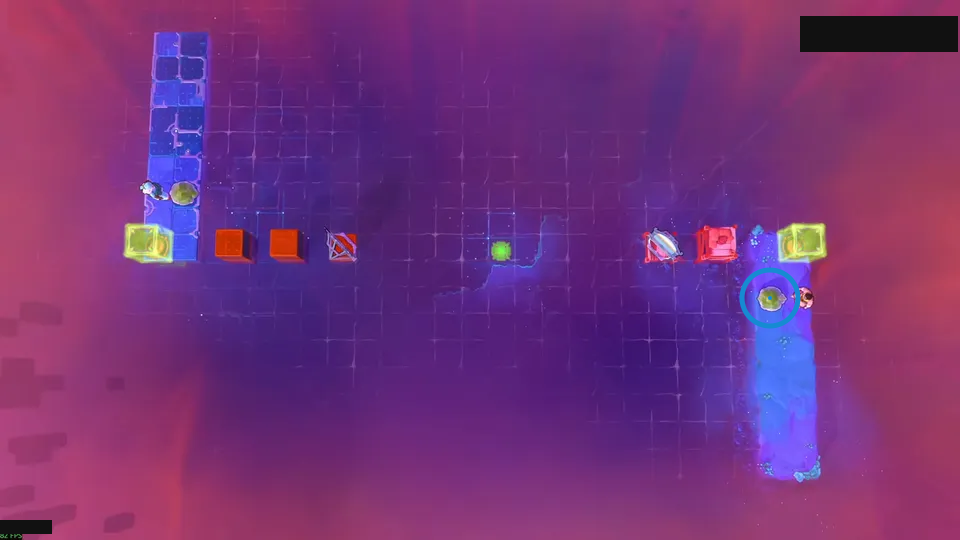
Send two stones toward the middle.
Check: Ring marks green stone on the right vertical platform.
Open full-size image in a new tabPuzzle 97 — infinite_looping_skipper0_alt
Section titled “Puzzle 97 — infinite_looping_skipper0_alt”Source-reported hint: Use a stone to interrupt purple light.
Selected room detail.
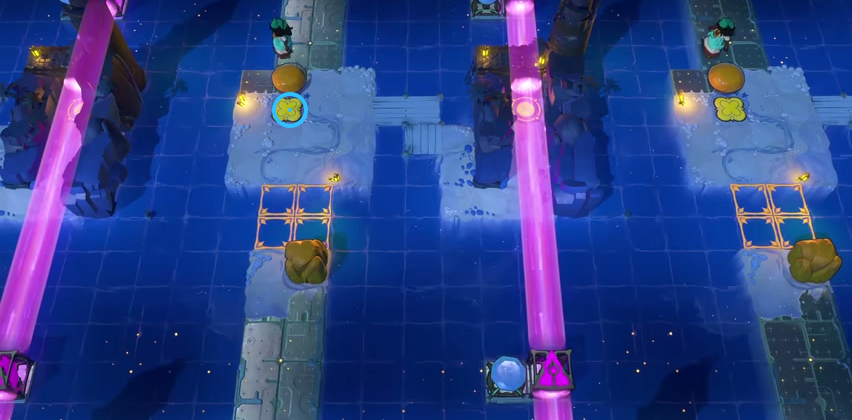
Find the yellow button below the orange ball.
Check: The blue ring marks the yellow button below the orange ball.
Open full-size image in a new tabPuzzle 98 — infinite_looping_skipper_alt
Section titled “Puzzle 98 — infinite_looping_skipper_alt”Source-reported hint: Use lily pads to interrupt purple light.
Selected room detail.
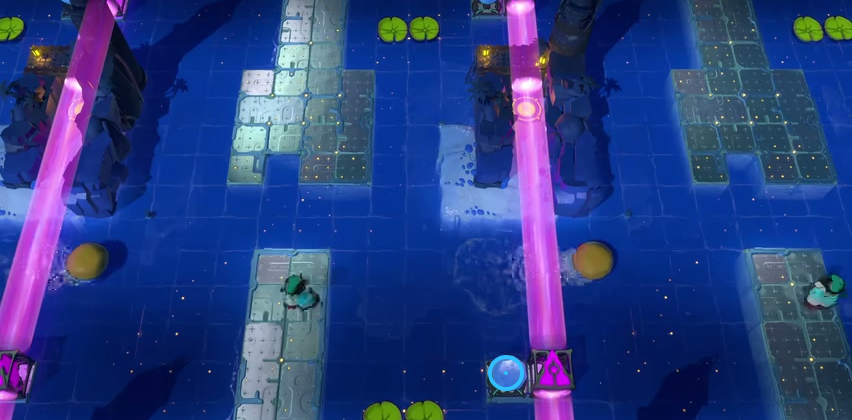
Find the blue gem beside the lower purple beamcaster.
Check: The blue ring marks the blue gem beside the lower purple beamcaster.
Open full-size image in a new tabPuzzle 99
Section titled “Puzzle 99”The ring marks a visible landmark, not an action step.
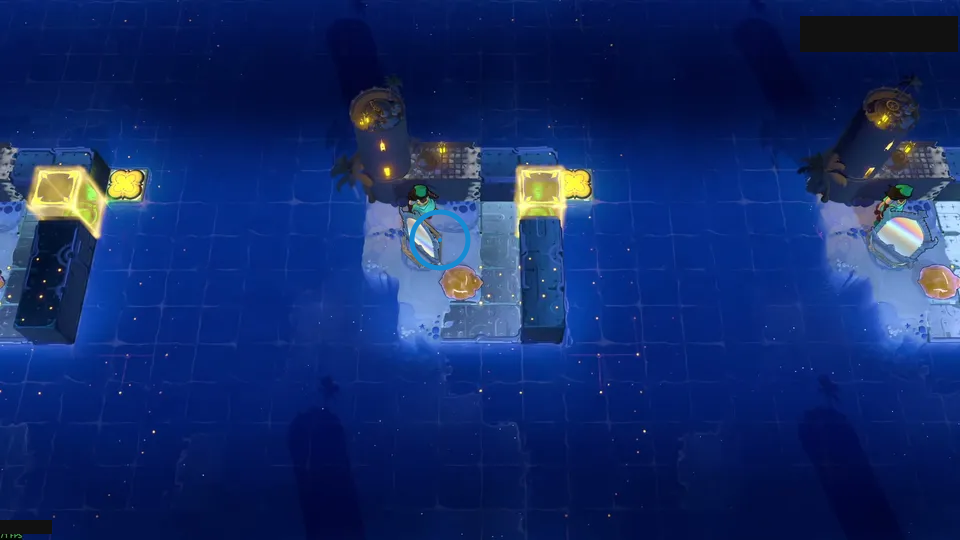
Guide the crystal stone toward the button.
Check: Ring marks the mirror on the pale ledge.
Open full-size image in a new tabPuzzle 100 — infinite_looping_skipper_mirrored_ikaruga_alt
Section titled “Puzzle 100 — infinite_looping_skipper_mirrored_ikaruga_alt”Source-reported hint: Keep two decoy pads off the route.
Selected room detail.
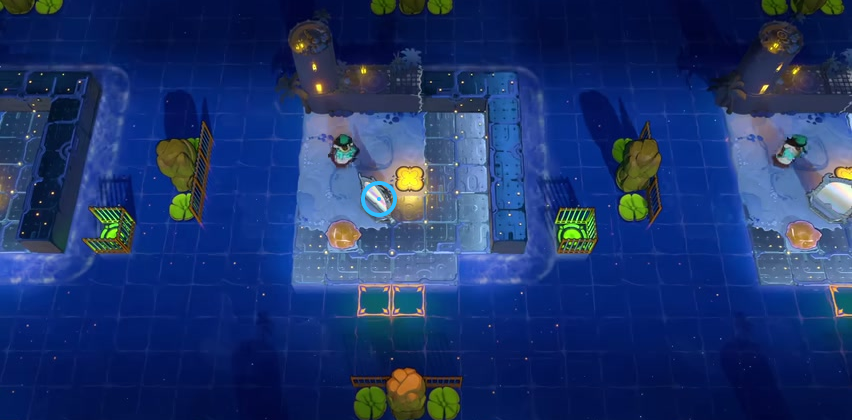
Find the mirror beside the yellow button.
Check: The blue ring marks the mirror beside the yellow button.
Open full-size image in a new tabPuzzle 101
Section titled “Puzzle 101”The ring marks a visible landmark, not an action step.
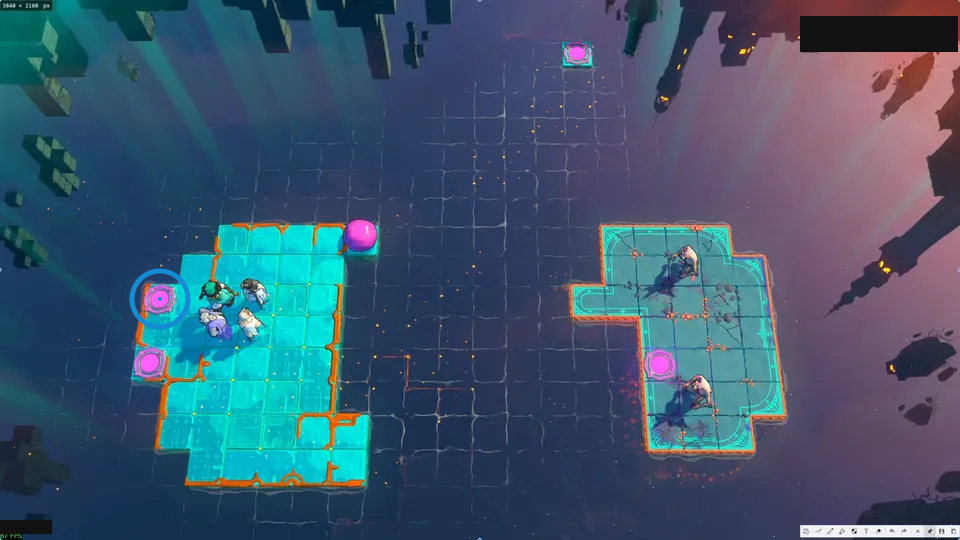
Swap with the stone while it skims.
Check: Ring marks upper pink pad on the left island.
Open full-size image in a new tabPuzzle 102
Section titled “Puzzle 102”The ring marks a visible landmark, not an action step.
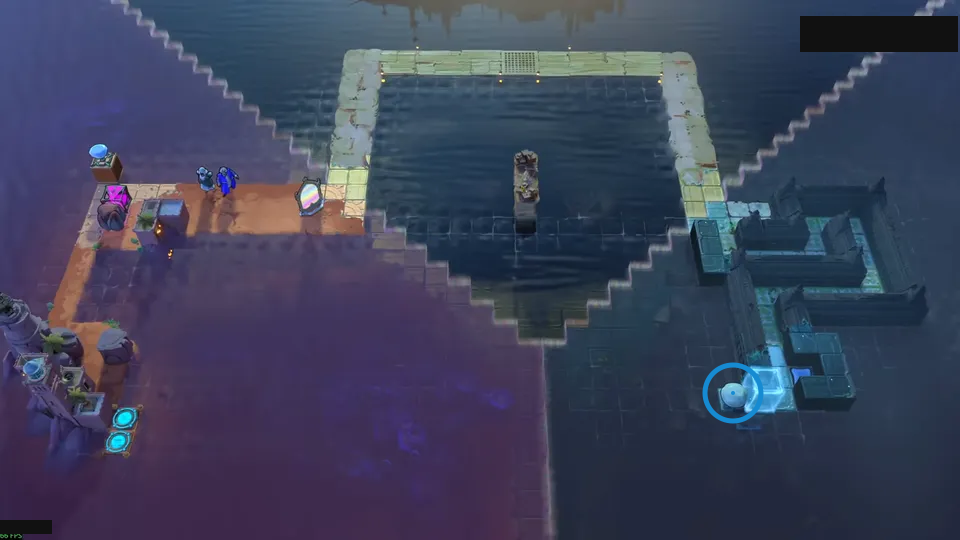
Chain the Wizard’s instant moves.
Check: Ring marks blue orb beside the lower blue cube.
Open full-size image in a new tabPuzzle 103
Section titled “Puzzle 103”The ring marks a visible landmark, not an action step.
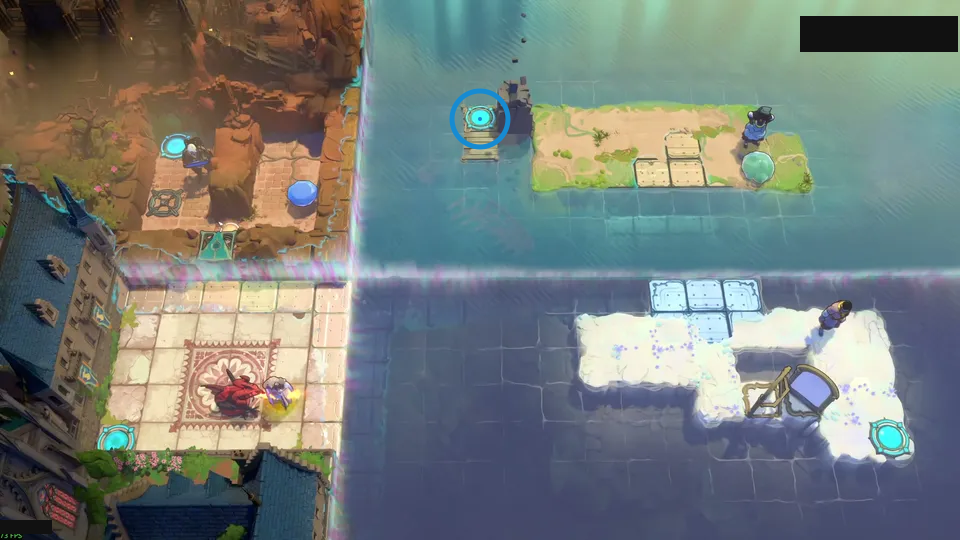
Float the crystal stone upward with cyan light.
Check: Ring marks cyan pad beside the upper-right island.
Open full-size image in a new tabSelected room views
Section titled “Selected room views”Upper blue gem on the far wall
Section titled “Upper blue gem on the far wall”Note the goblins and gems arranged around the dark floor.
The blue ring marks a visible landmark in this selected view.
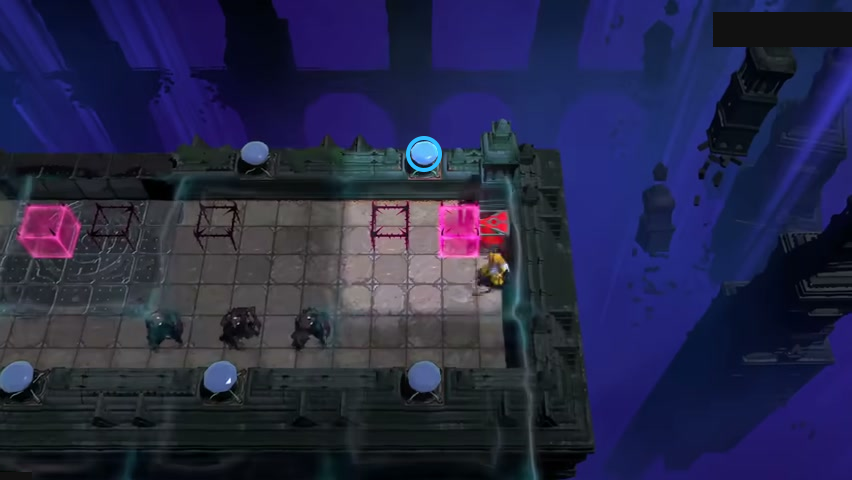
Find upper blue gem on the far wall.
Check: The blue ring marks upper blue gem on the far wall.
Open full-size image in a new tabCyan hourglass beside the central floor
Section titled “Cyan hourglass beside the central floor”Compare the goblin platform with the fenced controls.
The blue ring marks a visible landmark in this selected view.
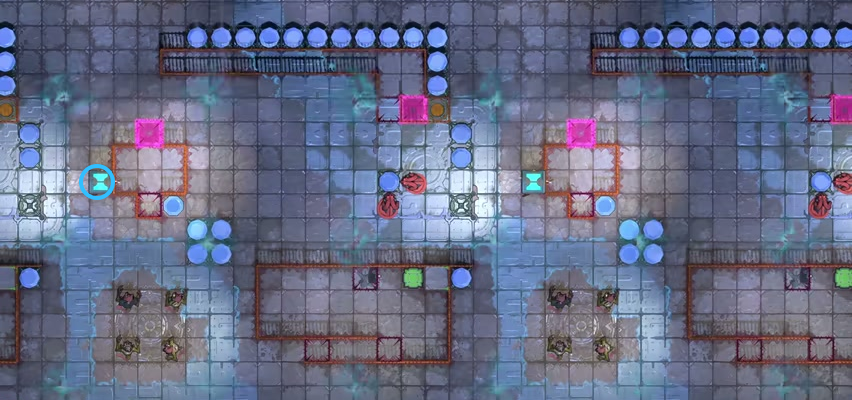
Find Cyan hourglass beside the central floor.
Check: The blue ring marks Cyan hourglass beside the central floor.
Open full-size image in a new tabBlue gem beside the purple wall
Section titled “Blue gem beside the purple wall”Use the rod to push the gem onto its socket.
The blue ring marks a visible landmark in this selected view.
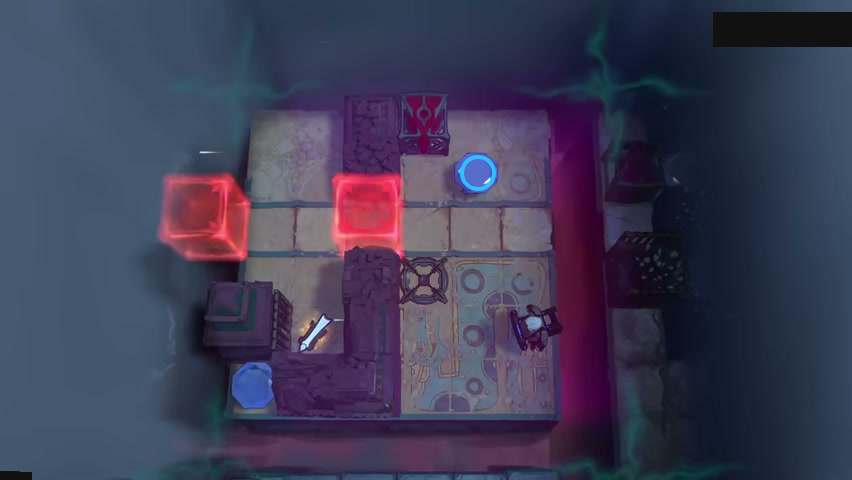
Find blue gem beside the purple wall.
Check: The blue ring marks blue gem beside the purple wall.
Open full-size image in a new tabMirror on the upper island
Section titled “Mirror on the upper island”Notice the mirror and cart beside the stepped island.
The blue ring marks a visible landmark in this selected view.
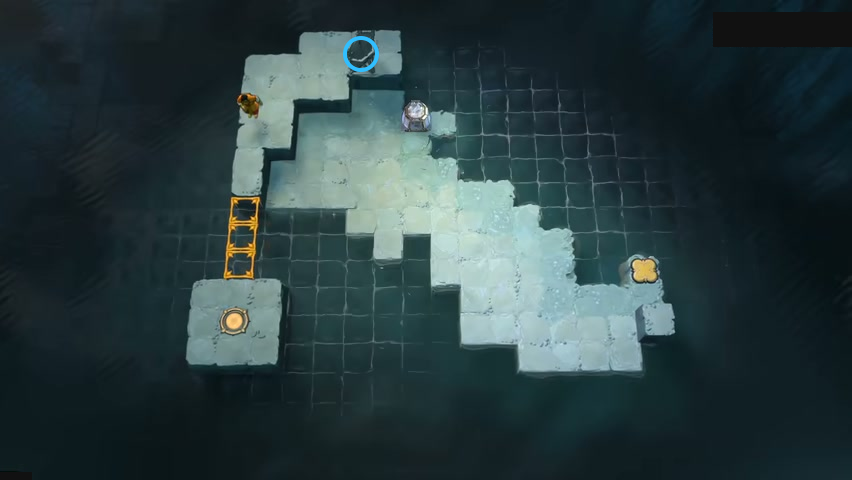
Find mirror on the upper island.
Check: The blue ring marks mirror on the upper island.
Open full-size image in a new tabLeft blue gem in the central chamber
Section titled “Left blue gem in the central chamber”Trace where the crossing beams end.
The blue ring marks a visible landmark in this selected view.
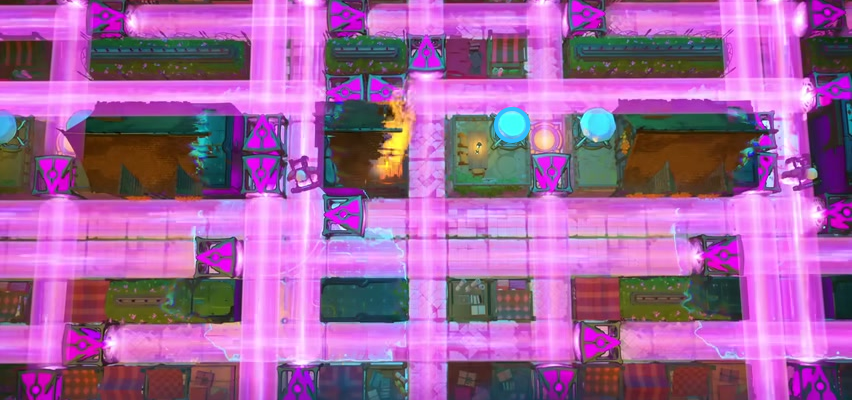
Find left blue gem in the central chamber.
Check: The blue ring marks left blue gem in the central chamber.
Open full-size image in a new tabVideo source
- Full puzzle candidate inventory (PC r67121) — Extracted data
- Low Beamcasters solutions article — Documentation · walkthrough-low-beamcasters-solutions
- Low Beamcasters walkthrough video — Observed in-game · low-beamcasters-series-p53
- Low Beamcasters candidate source crosswalk — Extracted data · low-beamcasters-candidate-review-2026-10-23-remaining29-video-displays-2026-10-25
- Low Beamcasters bilingual selected-layout guide cards — Extracted data · low-beamcasters-selected-layouts-2026-10-23-remaining29-display-upgrades-2026-10-25
- Twenty-nine selected video frames for previously confirmed room identities — Observed in-game · remaining29-selected-video-frame-observations-2026-10-25
- Display-only coverage delta for29 existing confirmed identities — Extracted data · remaining29-display-coverage-delta-2026-10-25
- Root-approved selected video frame and native layout observations — Observed in-game · verified-backlog-video-frame-observations-2026-10-25
- Verified backlog bilingual selected-layout cards — Extracted data · verified-backlog-selected-layouts-2026-10-25
- Verified backlog current display coverage delta — Extracted data · verified-backlog-display-coverage-delta-2026-10-25
- Endpoint Maze raw BC1 texture recovery observation — Observed in-game · endpoint-maze-raw-bc1-native-observation-2026-10-25
Unofficial fan wiki, not affiliated with Thekla, Inc. / Arc Games / Gamirror Games. Game content belongs to its owners.
Comments & feedback
Share a tip or suggest a correction. Comments are public. Guest names are unverified; verified accounts show their account username. All language pages share this discussion. Please keep personal information private.